Showing posts with label DIY. Show all posts

Wednesday, November 2, 2022

Jewelry Making: Copper and Silver Chain Earrings


I have a bunch of jewelry supplies left over from a stint on a design team. Of course, that doesn't mean I haven't or won't continue buying more but I wanted a pair of earrings that were "Fall" now that it's actually feeling like it here in the desert. I primarily wear silver but decided to branch out and use some copper. I was in Michaels (see...impossible not to add new supplies!) and saw some copper earring pieces ON SALE and remembered some chain I had in my stash. 

Supplies: 
  • Copper Earring Components (Michaels)
  • Copper and Silver Chain (Stash)
  • Clip Earring Backs (Michaels)
  • Silver Floral Charms (Shipwreck Beads)
  • Jewelry Glue or Super Glue (Aleene's Jewelry Glue, Walmart)


NOTE: I don't have pierced ears, hence the clip on backs. To get the same look for pierced ears, use post style findings to glue to the floral charms. 

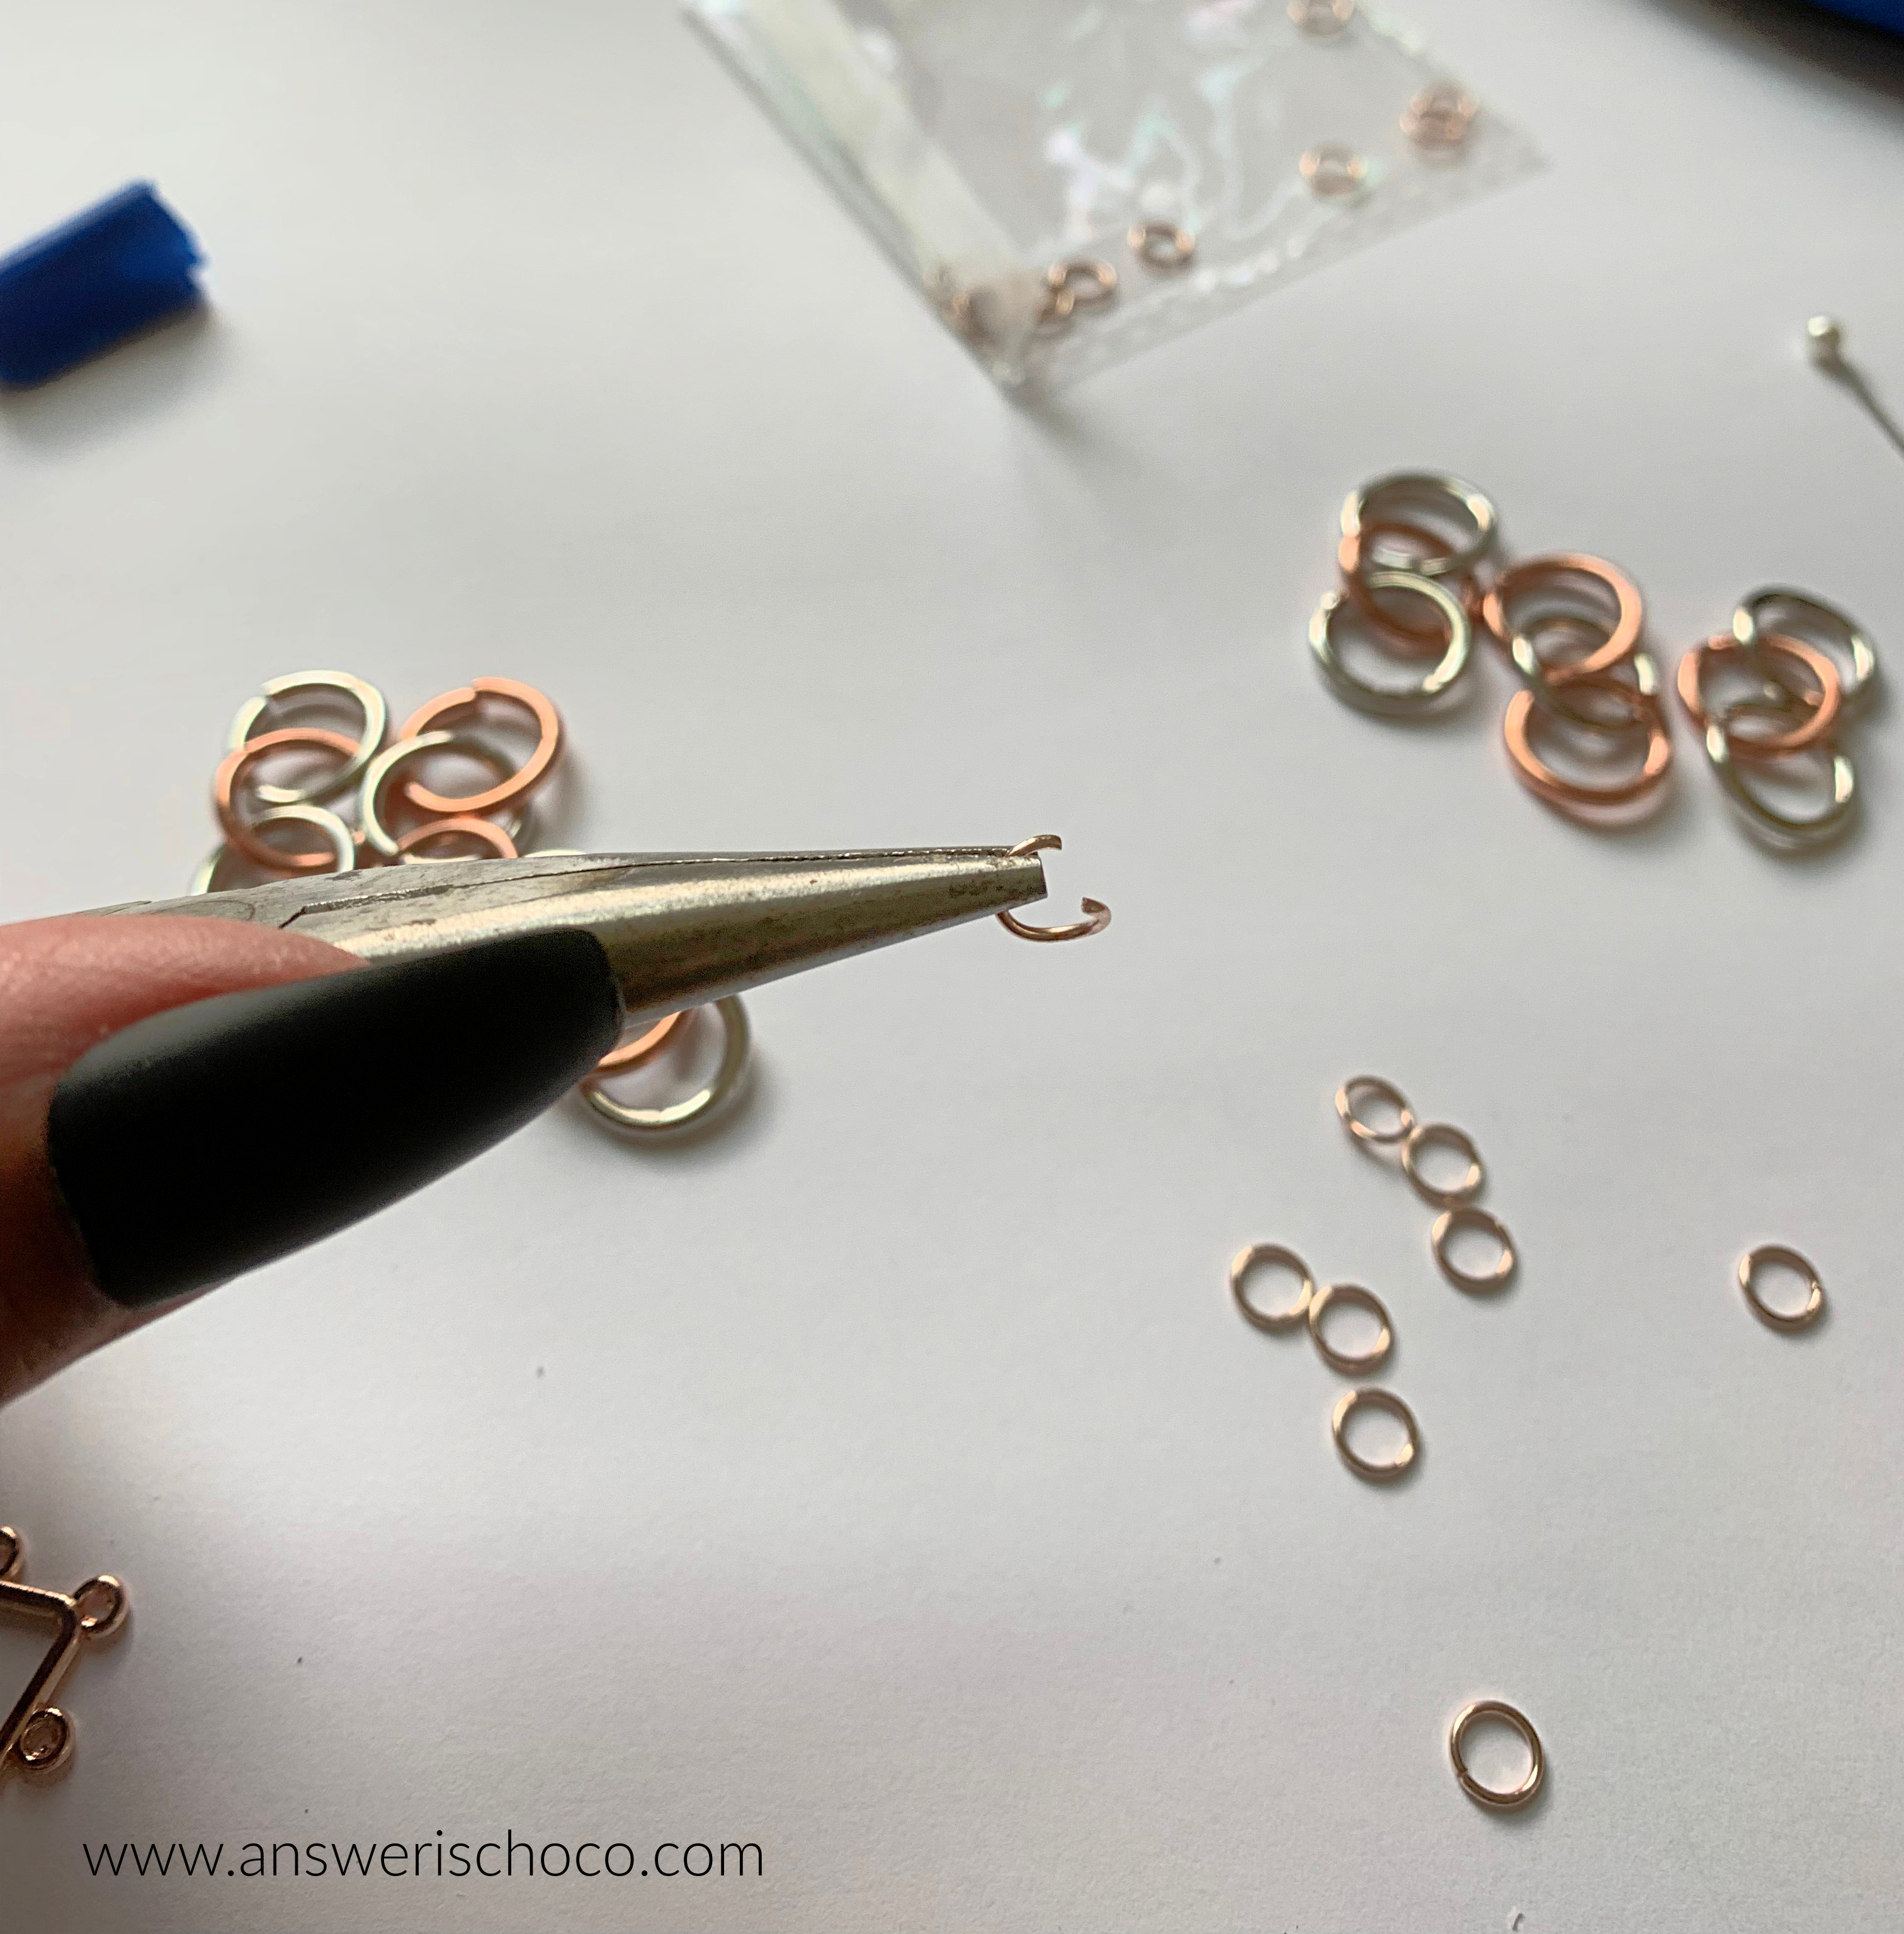
The chain I used also had gold links. Since I don't really wear much gold, I removed these and set them aside for other projects. 


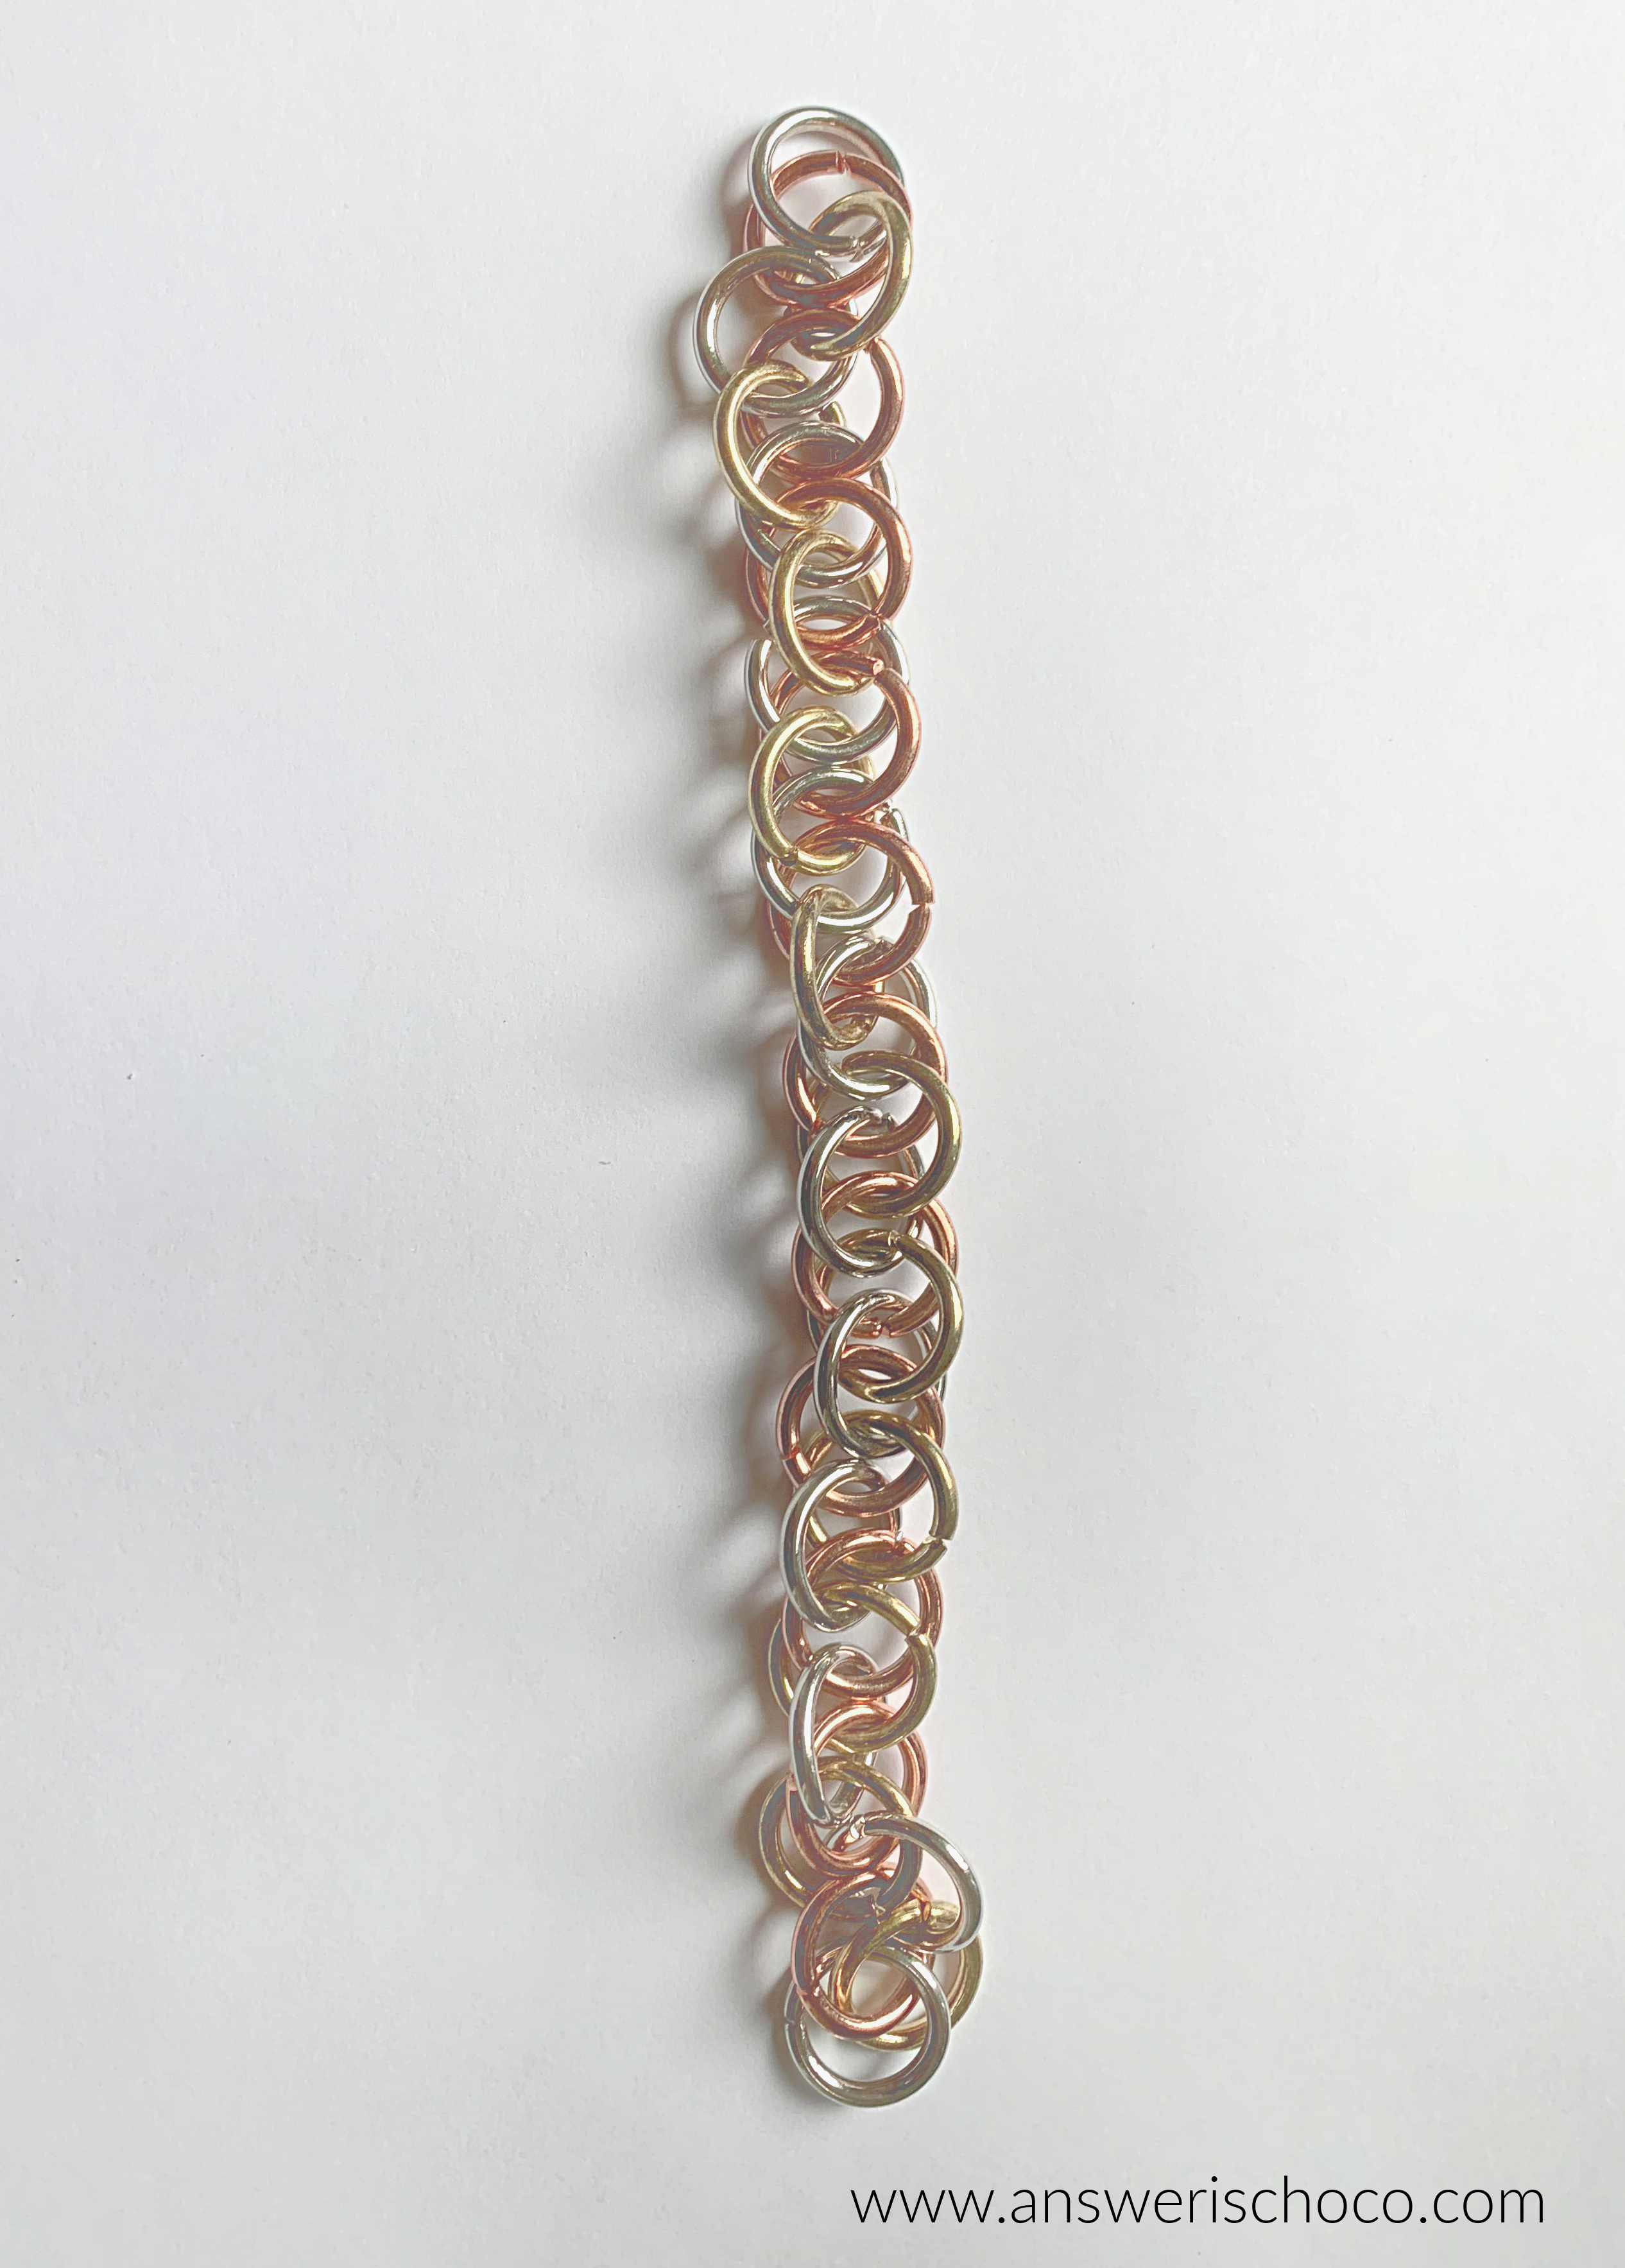
After taking off the gold links, I separated six sets of three links using just the copper and silver. 


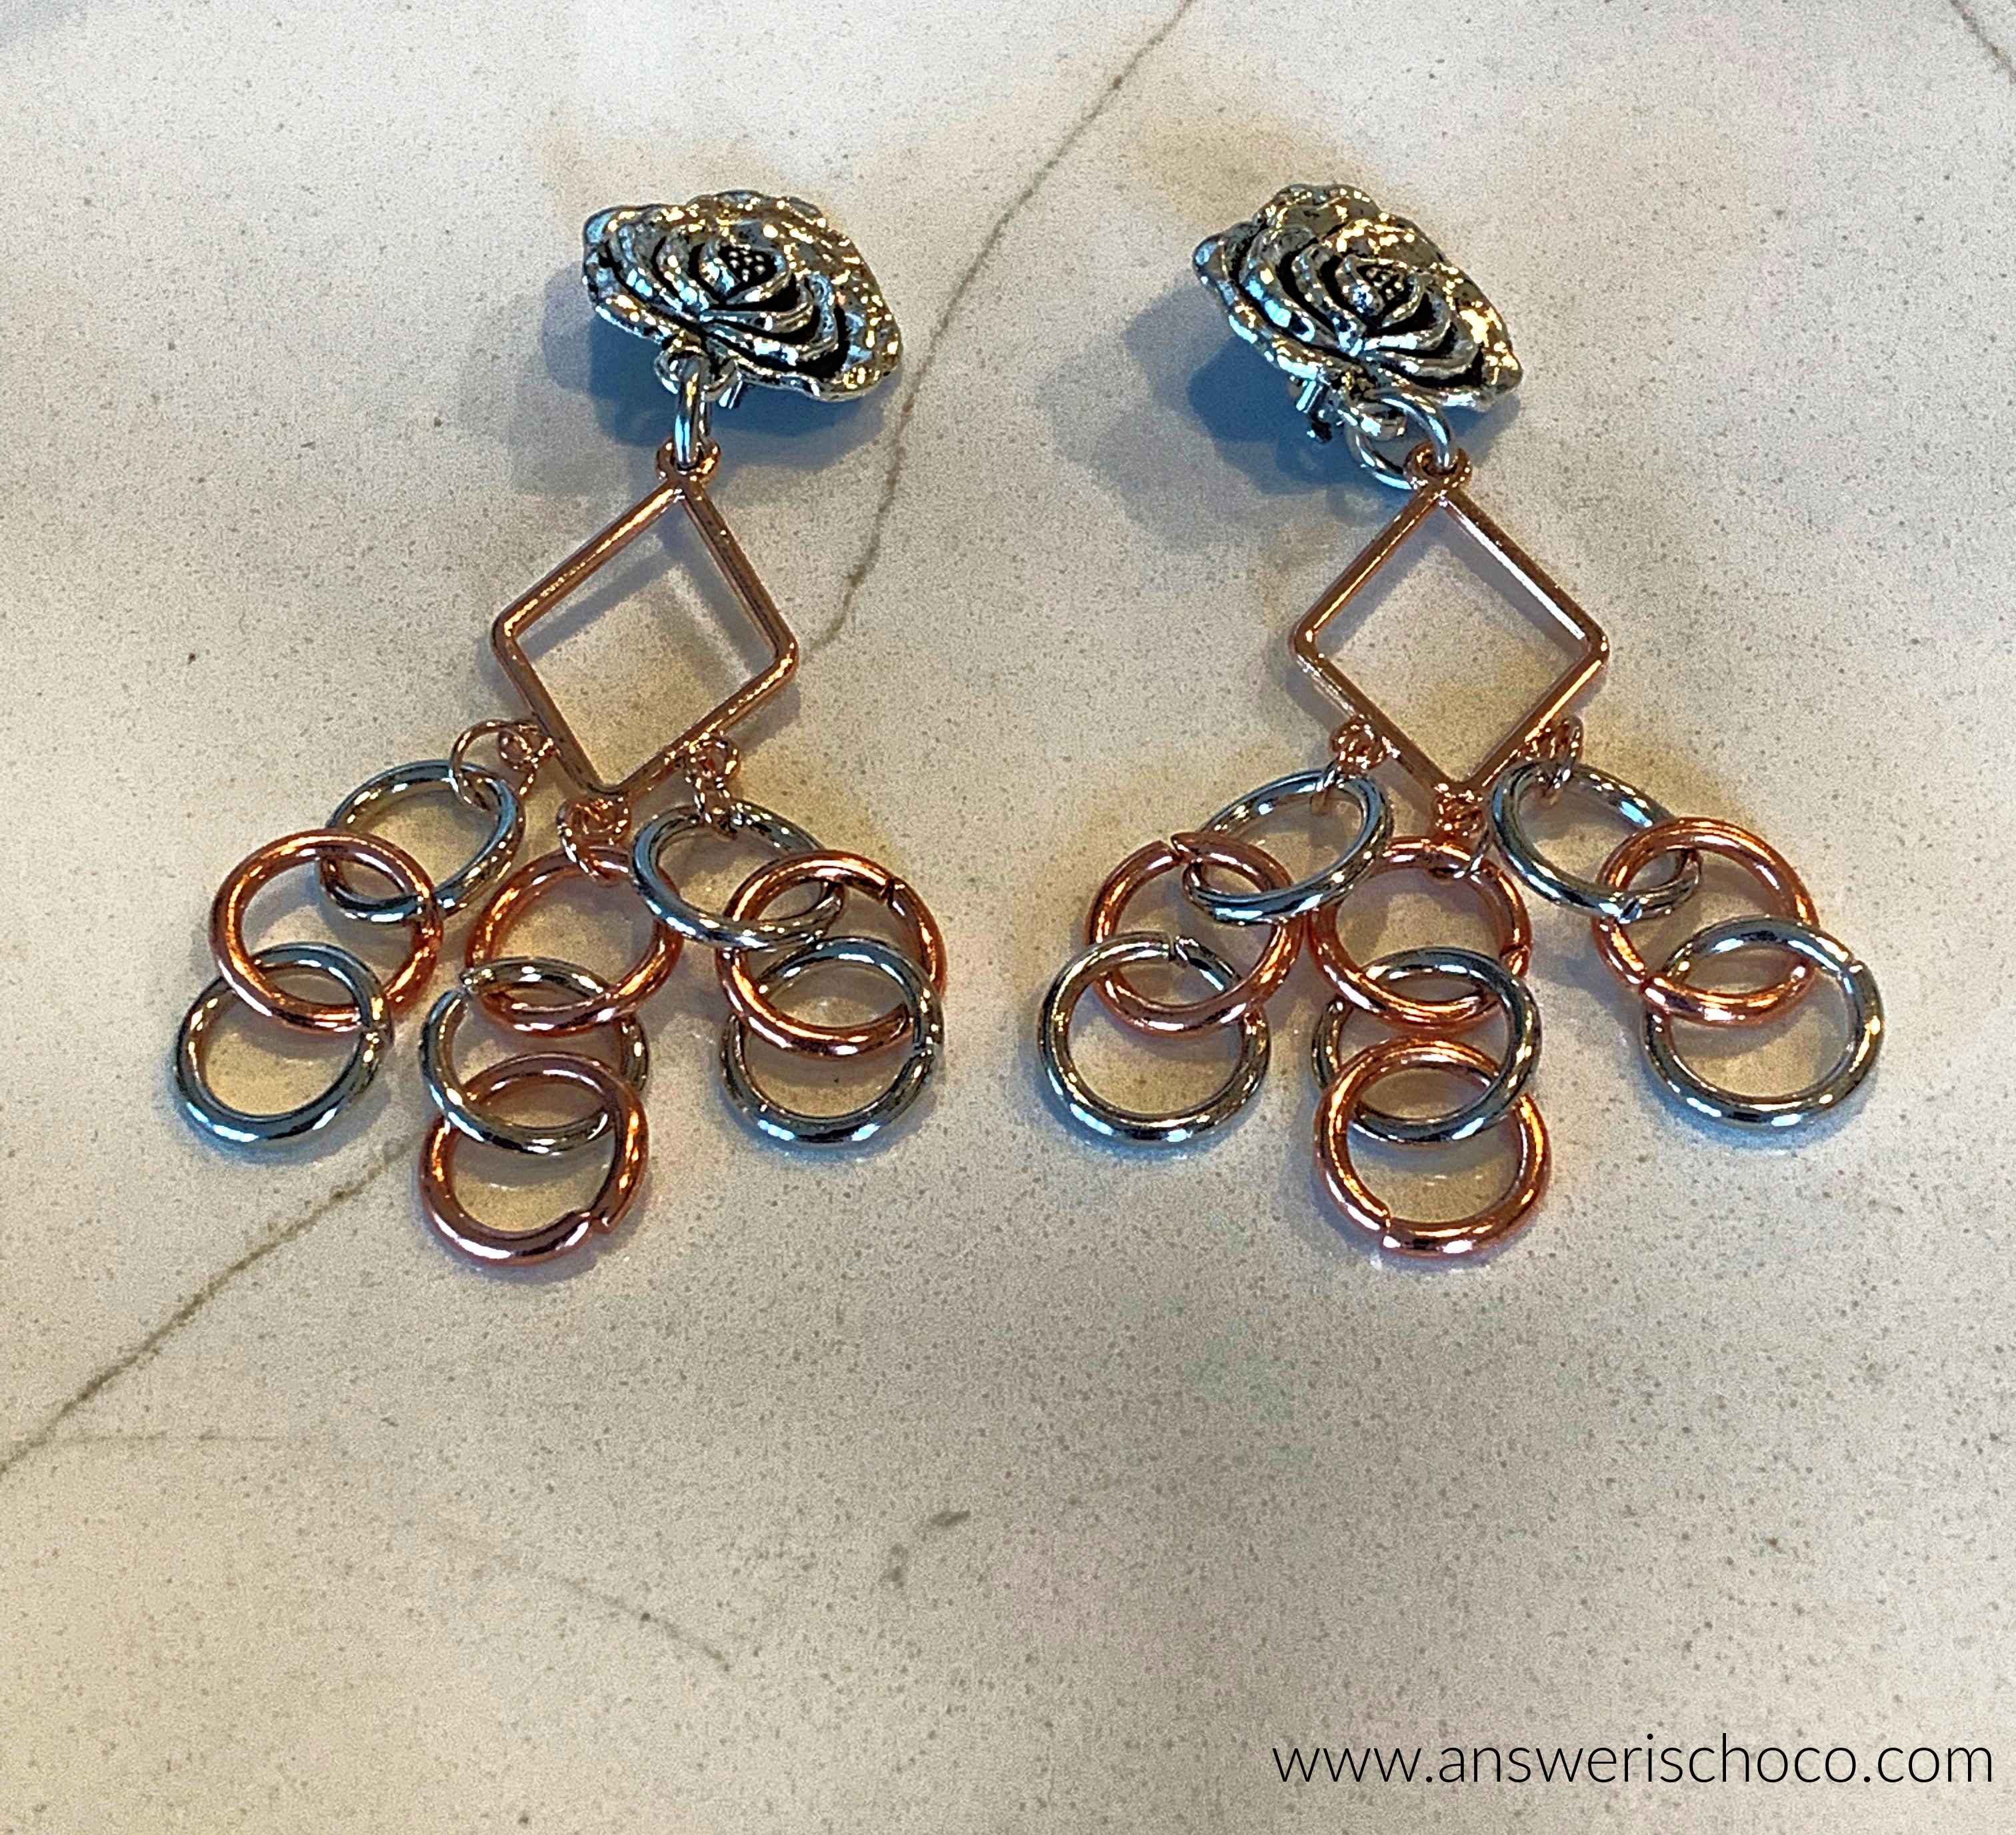
Each earring component can hold three sets so I did silver, copper, silver for the ends and copper, silver, copper, for the center. 


The earring components came with their own jump rings which I used to attach the trio of links. 


At this point you could attach fish hook ear wires. 


With the earring backs glued to the charms, I attached these to the earrings using a silver jump ring from my stash, et voila!

I love the copper for "Fallvember" especially since I always associate Fall with copper. 


Sharing At: 


Tuesday, May 24, 2022

Easy Project: Faux Stained Knife Block


Ever look at something debate about changing it, debate some more, then one day you just say "What the heck" and go for it? I've had my Knife Block since we got married. It's 30 years old. And it was fine in its original form. Aging well. Bothering no one. Sitting there, minding its business, holding my knives. 

But, it might be going to a new home. Still with me, however. So I decided "What the heck" and made it over with a faux-stain effect. Mr. Chocolate always freaks out and looks at me funny when I decide to mess with "perfectly good" things but turns out...HE LOVES IT! 

Supplies
  • Knife Block
  • Acrylic Paints
  • Water


It's faded over the years but still in great condition. I washed it to make sure there were no residual oils or anything. 


You can see it wasn't quite dry but since the stain is water-based, no big deal. I mixed some white acrylic paint into some black paint diluted with water until I got a shade of grey I liked. Then I just lightly brushed onto the knife block which drank it up. I wanted a stain vs paint effect, hence diluting with the water. 


You can still see the wood grain which is what I wanted. It was still wet in this pic so dried even grainier. 


I used a small brush to blend the edges of the slots but only just so the wood didn't show. I did this project in the morning and let it dry all day to make sure the "stain" was good and set. 

Mr. Chocolate has appropriated one of my knives for his nightly apple and I keep pretending like I don't need to replace it because we don't share well! There's also the knife that accidentally got thrown away with a birthday cake box several years ago 😠😠😠

I'm quite happy with how it turned out, and it will look great "wherever it might end up". 


Sharing At: 


Wednesday, September 16, 2020

Mackenzie Childs Inspired DIY Pumpkins


If you've spent any time in Home Decor world, you are probably familiar with Mackenzie Childs signature style. I love it, not only because she uses tons of black and white but because it's whimsical, pretty, and not rigidly perfect. It's also expensive and while I'd love to have a bunch of pieces, I don't. But hey, we're Makers so what do we do? We use our faves for inspiration and DIY that stuff! 

Here's an example of the real ones: 


Supplies: 
  • Plain Ceramic Pumpkins ( $1 each from Target)
  • Paint Pens ( I used Craftsmart from Michaels)
  • Acrylic Paint 
Step 1: 
Gather your supplies. I found these ceramic pumpkins for $1 each at Target in the section that none of us can get past. They know us! I also grabbed two paint pens: gold and black. 


Step 2: 
For the signature Mackenzie Childs check, I went down the lines of the pumpkin with the black pen. 

Since the style here is to look handpainted, you don't have to be perfect. 

Step 3: 
I went horizontally around the pumpkin with the paint pen to create the squares.


Step 4:
Tip: When I've done checkerboard before, I've gotten the order messed up so I've taken to putting a pencil dot in the squares to be filled in before I start filling! 


Step 5 
When all of the squares were filled in, I went back down the pumpkin spines with a gold paint pen and colored the stem. (I went back over that gold spot w/ black)


Et voila! 


The process for the Striped Pumpkin was similar but I used acrylic paints instead of paint pens.


I did a couple of coats for opacity. 


To finish, I also used paint and just went down each side w/ antique gold. 

Et voila!


I am pretty happy with my $2 project! 


Monday, February 1, 2016

DIY Wall Art


Art is subjective and therefore it's subject to what you like. I don't want Art majors and MFAs after me so that's my humble but subjective opinion but as a result, I'm not one to spend a lot of money on it (mostly because of reality!)  and my walls tend to be decorated with things I make. This project is no different. 

I wanted something for a bare wall in our master bath so when canvases were recently 50% off at Michaels I decided to play around with some paints and some gold leafing. I'd seen a couple of ideas on Pinterest that inspired me. 

Supplies Needed: 
  • Pre-stretched canvas  (I used 18x24 from Michaels)
  • Paints ( I used Acrylics)
  • Glue (ideally, specific to leafing)
  • Gold Leaf  (Art supply section of craft stores or where art supplies are sold) 


I went into my paint drawer and just pulled out a bunch of stuff. I gravitate towards neutrals and our bathroom is very neutral but I decided to stretch a bit and pulled out some blues as well. 


Next I applied the gold leaf to my canvas. There is a specific type of glue you're supposed to use with the leafing but I forgot I was out and wasn't going to the store. I used Mod Podge and let it get tacky but not dry and applied the leaf. Not perfect but it worked. 


Then I just kind of went to town with the paints. I brushed some and stippled some. And then brushed some more and stippled some more until I was satisfied. In some cases the gold leaf got a little muted by the paints ; in some cases not. After the paint was dry I added a little more leaf here and there. 


And since my canvas came in a two pack, I have another one to play with!

Sharing At: 


Monday, January 11, 2016

Game Board: Necessity Is The Mother of Invention


It was great having our son home over the holidays and we spent a lot of time just hanging out, watching movies, playing games, even doing some crafty things.

We played Yahtzee one night and spent the first part of the game chasing the dice as they skidded off of our marble table. Then we tried using a Tupperware lid which worked but the whole time I kept thinking "I can make something better than this" so I did.


 Supplies:

  • Wood surface with lip ( you can always count on me for the technical terms).  I found this at Michaels...it's technically called a Wood Plaque. OK. 
  • Paint ( I used Burnt Umber)
  • Glazing medium
  • Paint brush
  • Template 
  • Felt 


Pretty straightforward. Paint the wood with as many coats as you are happy with. I wanted a stained look more than a painted one so I thinned with glazing medium.  When dry, I sealed it with a coat of Mod Podge glossy. 

Measure the inside of your wood surface and cut a paper template to fit. I rounded the edges with a pair of edge rounding scissors. Use template to cut out felt. Glue felt to painted wood. I just used a spray adhesive. Pay closer attention to rounding the edges. My fancy scissors didn't cut through felt so I had to do this manually and oops'd.   


This is still better than the Tupperware lid! I had everything on hand except the wood piece so my total cost for this was $2.99 less 40% coupon! 


Tuesday, October 14, 2014

Halloween: Beaded Spider Web

Beaded Spider Web

Oh what a tangled web we weave as the saying goes. Only with this project, the deceiving part is how easy this project is to make. Now I know not everyone loves spiderwebs or spiders (including College Boy who is very happy he’s safely away at school nowhere near my “pretty but evil” creation…his words).

For this project you will need:
  • Wire Snowflake Form
  • Seed Beads and Bugle Beads
  • Misc beads for center
  • 26 Gauge Wire
  • Needlenose pliers
I had the snowflake forms in my stash but you will find them with the Christmas supplies at your local craft store:

Beaded Spider Supplies

Starting with one of your “misc beads” ( I scrounged around in my leftover beads and found enough that matched)  string onto one spoke of the wire form. String seed beads until almost full, leaving enough exposed wire to make a loop for the end. Use the pliers to bend a loop. Repeat until your wire form is covered.

I started with about a two feet of the 26 gauge wire and wrapped the starting end around one of the beaded wire spokes enough to secure it. Work from the middle out and string enough bugle beads to get to the next spoke. Wrap that spoke with wire, string more bugle beads. Rinse. Later. Repeat until you’ve gone around the whole thing.  Eyeball where you want the next row of your web to be and repeat the process two more times as shown.

Beaded Spider Web 1

I finished my web with a bow of scrap grosgrain ribbon I saved from a package of curtains. Left it all wrinkly because of the creepy factor.

But what’s a web without a spider? The basic construction is two beads and some wire. There are tutorials on Pinterest and You Tube you can follow to get the basic construction. I decided not to bead my legs because I liked the wire legs plain.

Bead Spider 
I also used the same size beads (10mm) vs two different sizes that a lot of the tutorials show. And I added some beadcaps. Attach your spider to its web using a jump ring.

I hung mine from our dining room light fixture ( "Hi welcome to dinner don’t mind the spider hanging above you”) using some jute twine.

Beaded Spider Web 2

They’re creepy and they’re kooky
Mysterious and spooky
They're altogether ooky
My beaded spider webs

You're welcome for the Addams Family theme song ear worm.

Sharing At: