Showing posts with label Home Decor. Show all posts

Wednesday, March 13, 2024

Home Decor: Layered Bunny and Egg


Mr. Chocolate now gets why I stop at different Dollar Tree locations. (And yes, I saw where they're closing stores!). We were out and about the other day and there was one next to a place we were going so of course I had to stop and I found some things I hadn't seen at other stores like these thicker "wood" eggs and Buffalo check bunnies! This idea instantly popped into my head. 

Supplies 
  • Dollar Tree Wood Egg
  • Dollar Tree Buffalo Check Bunny Garland
  • Dollar Tree Mini Wood Blocks
  • Hot Glue Gun and Glue
  • Ribbon
  • Acrylic Craft Paint
  • Coordinating Ribbon


The bunny garland would be cute as a garland but I already had this idea in my head. I painted the top of the eggs and left the sides bare. 


It only took one coat but I let it dry overnight. I took two of the bunnies off of the twine and replaced it with coordinated ribbon. 


I pulled the ribbon through the holes from the back, tied a square knot, then trimmed the ends as shown. I had some mini-wood blocks in my stash that I used to create depth to glue the bunnies to the eggs.


After I glued the block to the back of the bunny, I used more hot glue to attach the bunnies to the eggs.


Easy Peasy Dollar Treesy! But what to do with the remaining bunny garland? I decided that the remaining four would make two cute 3-D bunnies. 


I had these mini pom poms in my stash and went with the light turquoise ones to cover the holes from the twine. Then I glued two more of the wood blocks to the back and attached another bunny to the blocks. 


Be careful to make sure the bottoms are even so they'll stand up. 


They go with some eggs I did years ago!


And of course, now, I wish I'd bought another garland! 

Monday, January 30, 2023

Home Decor: Beaded Wood Wreath and Tag


I love how you never know what you're going to find a Dollar Tree. When I turned the corner of an aisle and found not only a Wood Bead Wreath form but in black? Squeal! And then when I saw a tag to match? Double squeal!

Supplies
  • Wood Bead Wreath Form (Dollar Tree)
  • Wood Bead Strung Tag (Dollar Tree)
  • Faux Leather (On Hand)
  • Silk Flowers (On Hand)
  • Hot Glue and Glue Gun
  • Twine


I remembered I had some faux leather in my stash from JoAnn. Decided this project needed a center bow and that this was perfect for it. I chose a bow image from those I have saved, sized in Cricut Design Space, and cut. 

When you cut faux leather, you need to use a strong grip cutting mat (I use Cricut's purple one) and you also want to lay your leather right side down. 


All of the faux leather I've seen has this woven backing so you want to cut through the back side to minimize fraying.


Here are the bow pieces cut out. I opted out of using the tail. Back in the stash for something else!


To assemble the bow, use hot or other strong glue (eg E6000) and fold in each side. Since this is a layered bow, repeat for the other layer. 


Layer one bow atop the other, then using the rectangle strip from the bow pattern, wrap around and glue to secure. 


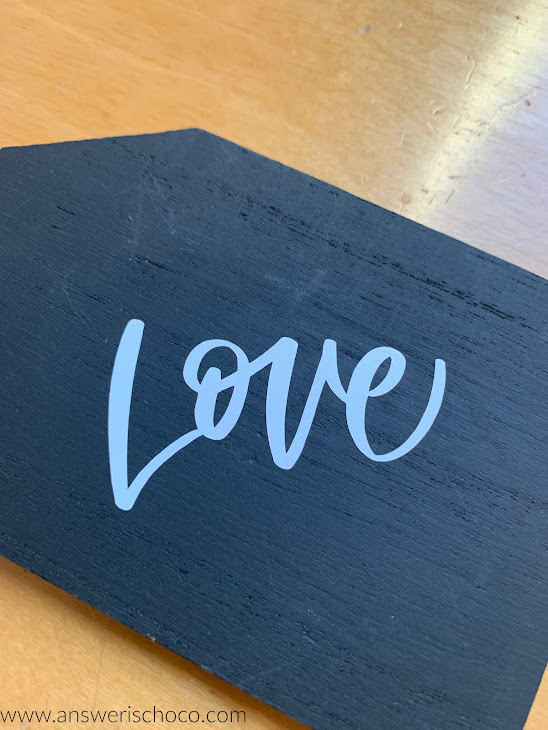
The flowers I had on hand from a post-holiday 80% off sale so they were like, $2? I stripped the leaves, cut the stems to where I wanted them, bound them together with floral tape and hot glued to the wreath, then glued the bow on. I left the tag pretty much as-is, just adding the word "Love" cut from white vinyl. 


I decided to angle it just because that's what my brain decided to do. Once I had it positioned the way I wanted, I burnished with my scraping tool and ...


In hindsight, I probably should have attached the tag before gluing the bow on but, I didn't! So I grabbed some twine and used the existing twine loop on the tag to secure it to the wreath. 


Simple. Inexpensive. Love! 

Sharing At: 


Tuesday, January 17, 2023

Home Decor: Family Chinese Zodiac Wall Art


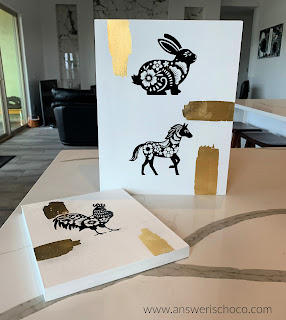
Lunar New Year, most popularly known as "Chinese New Year" (but celebrated in other Asian countries) is this coming Sunday. This year is the Year of the Rabbit which is my Chinese Zodiac sign and also happens to also be a milestone year for me. For as long as I can remember, I've always loved rabbits. Even before I knew I was one! In thinking about doing a project I decided to do one that incorporated my sign, as well as my husband's and son. Since this is the first project I'm sharing in the New Year, it makes sense that it's a New Year project, right? 

Supplies:
  • Wood Art Boards (I used 11x14 and 8x10)
  • Acrylic Paint
  • Chinese Zodiac Images (Designbundles)
  • Vinyl (Cricut Glossy Black)
  • Cutting Machine (I used my Cricut Explore Air 2)
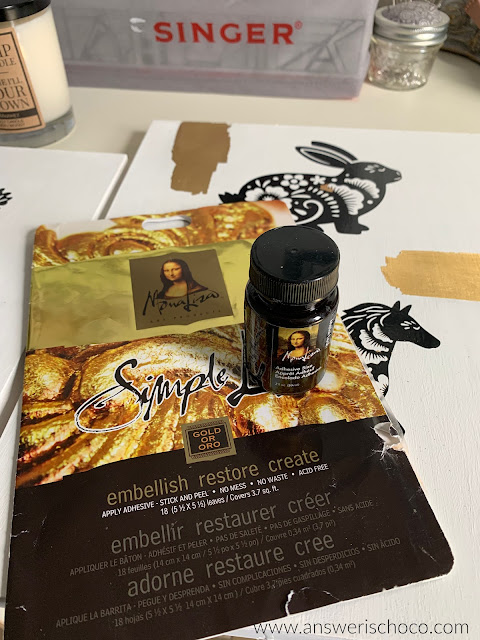
  • Gold Leaf Adhesive and Gold Leaf (I used Mona Lisa)


You can find wood art boards in the fine arts sections of craft stores and at art supply stores. I have a few leftover from when I found them on clearance in the arts and crafts section at Target. I wanted a clean graphic look so while red is customary, I chose to match my neutral home decor and painted the boards white and used black vinyl with gold leaf accents. 


A couple of coats of paint (Apple Barrel, White) and you're all good. Allow to dry thoroughly or else your vinyl won't stick properly and the transfer tape will pull up the paint. 


Confession time! I initially planned to put all three Zodiac signs on one board and thought I'd given myself enough space between when I sized the images. I didn't. So after cutting and weeding and not wanting to do that over, I just painted the smaller board and put mine and my husband's on one, and our son on it's own. The two of us made him so this worked in my brain! 


This was a great project that let me test some new skills I learned in a workshop by Abbi Kirsten which was how to use a PNG file to create an SVG file in Inkscape! I bought the graphics from designbundles.net.  


Since gold is another color you see in Chinese art, I decided to add some splashes of gold leaf. I love the Mona Lisa products (Michaels) which are easy to use. I just did some freehand brushstrokes where I wanted to gold leafing, let dry per the instructions on the bottle (actually a little less since the air is so dry where I am) and then applied the leafing using a strong bristled stencil brush. 


Wishing everyone health, peace, and prosperity in the Year of the Rabbit / 2023!

Sharing At: 


Monday, August 15, 2022

Home Decor: From Brass to Hammered Pewter


I previously shared the Lamp and Mirror Makeover I did for our entryway but hadn't yet done the table. I finished it and am so happy with how it turned out! With just a little paint, it changed the whole feel of the table and entry. 

Supplies:
  • Rustoleum Hammered Pewter Spray Paint


We bought this table years ago. It's heavier than it looks, has stayed in great condition and there was no reason to get rid of it, except the color didn't go with our new home. I was also not looking to spend any more money when I knew I could re-purpose it! Rustoleum All Surface Paint to the rescue! 


The paint comes in several different colors and is paint and primer all in one. It sprays evenly and coats well. You definitely still want to use it outside or someplace with good ventilation so Mr. Chocolate brought it out to the backyard and I went to work spraying! Not a lot of before and after to show so at the top of the post is the before, here's the after: 


I had to take advantage of a break in the monsoon weather so my picture-taking was utility vs perfection based. 

Our entryway is now complete with a beautiful hammered pewter table. Honestly, I spent more on the orchid stems and branches (Michaels) and quartz vase fillers (also Michaels)!


To finish the entryway, I recovered an ottoman with a crushed velvet cover I bought on Amazon and the mirror we bought a Pottery Barn years ago which is also still going strong. 


Since we're a shoes-off house, it will make it easier for guests to have a place to sit to remove / put on their shoes. 

What's hilarious is, Mr. Chocolate has always been reluctant when I say I want to paint something. Guess who brought our coffee table outside for a makeover? I used the same Rustoleum paint but this time in brushed nickel. 


Tuesday, July 12, 2022

Home Decor: Blending Traditional and Modern


 As I've mentioned, our new home is very modern. And while it would be fun to buy all new things, I live on a planet called Reality. Plus DIYing and making things over is what we do. Our prior homes have been more traditional and I wanted a way to make some pieces I still love fit in with this more modern aesthetic. Plus, it's better for the environment as well as the wallet to re-purpose right? These pieces were already thrifted finds I'd painted once so painting them again was no big deal. 


These were some candleholders I found several years ago at Goodwill. They didn't match so I painted them to match and painted them again! 


We have a lot of black accents in this house so I started by painting them with a couple of coats of black acrylic paint. I still love a vintage look so I didn't leave them solid, and dry brushed them with a little bit of white. 


To finish, I used Silver Leaf Rub N Buff to accent some of the raised areas to make them pop. Originally, I thought I'd re-do the candles too. They're decoupaged onto the candles but the powder room also has a wood cabinet and I decided I really liked how they went with it. 


I also knew I wanted to place a small table I'd also previously thrifted and painted. Again, I wanted to emphasize the black but again, I still like my vintage / distressed look. 


I originally painted it a light tan with white drybrush. I painted the legs solid black and  for the bottom did a crackle effect with white using my tried and true white glue crackle technique. 


I applied the same Rub N Buff around the edges of the top and shelf of the table. We had a Longaberger basket we bought years ago that matched the cabinet as well as a beautiful wood bowl from my husband's family that I thought would be perfectly displayed on this table, and the black captures the essence of the sink. 


I feel like the silver accents on the candleholders and table work well with our floors, the black and white with the sink, and the browns with the cabinet! We added a couple of black storage baskets from Target to hold extra supplies like toilet paper. I'm really happy with how it all came together mixing traditional and modern. 


Sharing At: