Thursday, November 30, 2017

BFF Open House Link Party


Yikes! It's the last day of November and the Christmas countdown begins in earnest starting tomorrow. Here are some ideas from last week's party that might come in handy! 


From Hazel and Gold Designs , this gorgeous inlaid wood Christmas tree tray! I have a friend w/ mad woodworking skills and I have to show him this! 


Repurpose and Upcycle shared her beautiful rustic farmhouse decor with links to some of the DIYs. Love this vignette!


How much fun are these Edible Candles from All That's Jas? Would make a great centerpiece that you get to eat as dessert! 


Printables make seasonal decor so simple. This one from My Busy Beehives is ready to print and frame! 

OK let's see what everyone's been up to this week! 


Tuesday, November 28, 2017

DIY Vintage Christmas Sign


I will start decking my halls this coming weekend and wanted to add some new items to my Christmas decor. This sign was easy to make starting with a ready to decorate sign I found at Michaels 70% off! 

Supplies: 
  • 11x24 Sign or Board. Mine is Art Minds which I got for $5 
  • Vinyl of choice. I used Cricut Glitter Red
  • Images / Phrase to cut. The ornaments and "BELIEVE" phrase were in my library, previously purchased from the Silhouette online store. 
  • Electronic Cutter. I used my Cameo 3


Size and cut your images and text. I used the "BELIEVE" and ornament images I got from the Silhouette online store. For the rest of the sentiment, I just chose fonts from my library. 

The ornament image is designed with the snowflakes to be cut separately and layered. I wanted to change that up so I un-grouped everything and then put the snowflakes inside the ornament. 

This is the original: 


This is how I reconfigured it: 

Once you have your  images cut out, then take a deep breath, have a Harry Potter marathon on in the background, and "proceed to weed" your vinyl. Once that's done then apply the transfer tape and prepare to apply to your sign. 


I applied the "BELIEVE" vinyl first, then the rest of my phrase and finally the ornaments. It has a vintage / farmhouse feel to it! 


Thursday, November 23, 2017

BFF Open House Link Party


Hi all, hope you've had a wonderful Thanksgiving! No features this week ( will resume next week), but having my party for those who may not be out braving Black Friday shopping ( not me!). 


Happy Thanksgiving !


From our home to yours, wishing you a very Happy Thanksgiving filled with family, friends, food, and lots of love and laughs. 

Thursday, November 16, 2017

BFF Open House Link Party


Hi all and welcome to another week's fun of sharing creativity. Can you believe this time next week all the hours of cooking and prepping and depending on where you are maybe eating will be over? One week to Thanksgiving! If you're still getting ready to host, here are some ideas to inspire you. 


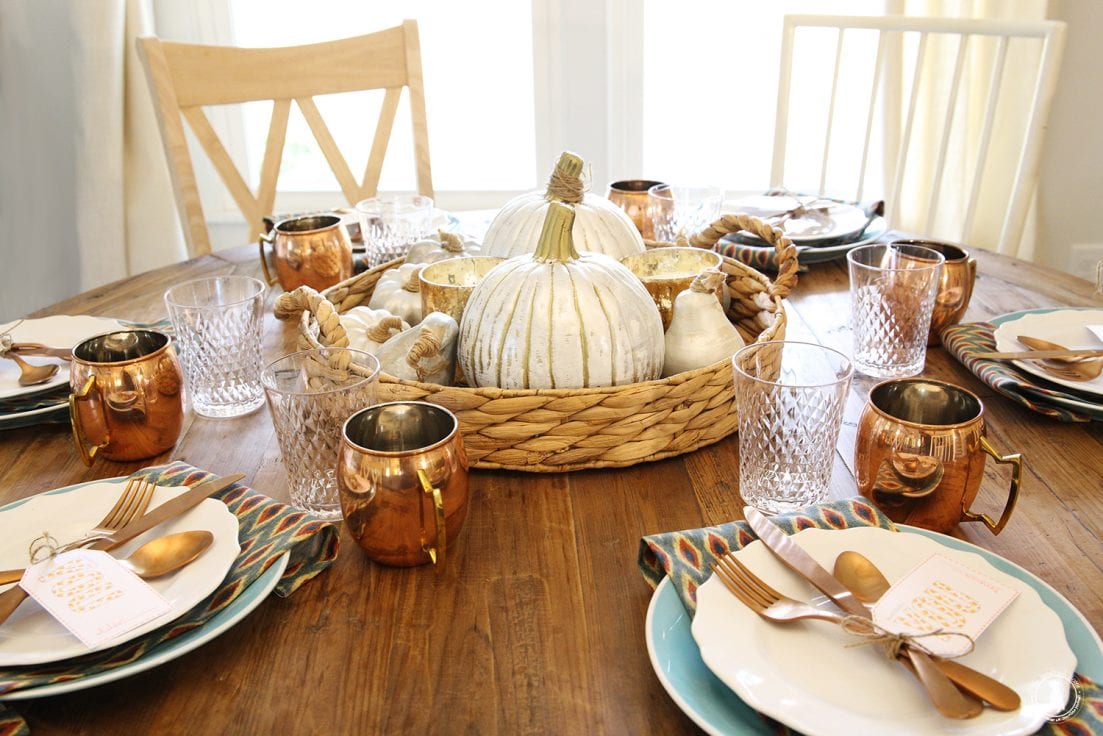
Here's a lovely tablescape from The Handmade Home. Love the Moscow Mule mugs and the centerpiece basket filled with white gourds and candles! Head on over because she's also got some free downloadable place cards! 


You still have time to add a Fall themed pillow. I especially love the non-traditional color of this one from Kathleen at Our Hopeful Home


If you're in a place where weather permits hosting an outdoor dinner, check out this gorgeously rustic Boho Chic idea from Birds Party


Finally, from Carol at The Red Painted Cottage comes this gorgeous thick wood tray complete with a tutorial ( bottom of post) so you can make your own or maybe one to give as a holiday gift! 

OK let's see what you've all been up to this week! 


Tuesday, November 14, 2017

My First Heat Transfer Project: Fall Pillow


The first thing I'll say is, if you've wanted to try heat transfer vinyl and been intimidated so keep putting it off because you think it's too complicated ....DON'T. Because that was me, I used it for the first time and was kicking myself saying "Why didn't I do this sooner?"

There's no logic behind why I thought that, just did. But I finally decided to go for it and it's a game changer. I decided to start with something simple: a pillow. I also decided to go w/ a design that didn't matter if I messed up the mirroring because I kept reading how key that is to using HTV. 

Supplies: 
  • Fabric ( I used flannel which was very receptive to the vinyl)
  • HTV ( I used Siser Easy Weed which really was easy)
  • Fiberfill to stuff pillow
  • Thread
  • Image to transfer ( mine is from the Silhouette Online Store)
  • Cutting machine ( I used my Cameo 3)
  • Iron
  • Pressing cloth


I'm not going to describe pillow construction. My sewing skills extend to four straight lines. 

Lessons learned on HTV Vinyl: 
  • The front side goes down. When you put your vinyl on your cutting mat, you're cutting from the underside of the vinyl. It took me one attempt to figure this out. HTV comes with a clear plastic liner, its own transfer tape in a way which is the side you want to touch your cutting mat. 


See how the matte side is "up"? That's what you want. The shiny side is what will go on your project and this is a shot during the weeding process. About that. I HATE WEEDING. If you're not a vinyl user, weeding is removing the parts of the vinyl you don't need to reveal the image. This stuff just pulled away so easily! 


This is a (bad) picture of the front / shiny side that will go on your project. Once your project is weeded, it's already on the equivalent of the transfer tape so it's super easy to lay down on your material. 


The heat process is more press than iron.
  • When applying your iron, it's  more of a press and pick up than slide your iron around. Press, hold, pick up, move to next session. Now, I did do some slight gliding but the main process is press and lift. This is why you'll see serious HTV people use a heat press which is like a vinyl panini maker.  

Don't Make This Mistake! 

  • You will use a pressing cloth on top of the plastic carrier sheet when applying heat. This is good. What's not good is deciding to use said cloth directly on top of the vinyl when you're just trying to make extra sure that you've applied enough heat. This will result in the weave of your pressing cloth ( mine was a scrap of a flour sack towel) transferring to your vinyl. Now as it turned out this was OK w/ my project because the texture looked kinda cool but in general, if you don't want this, keep the plastic from the vinyl between the surface of your project and your pressing cloth! 


Once my image was applied, I went about construction my pillow. And voila!


Some other tips: 
  • If you're using words or letters, you will need to "mirror" (flip) your project before you cut it or your letters will be backwards when you apply. I chose this image because it didn't matter if I messed that up since it was the same either way. As it turned out, the Cameo 3 asks you if you want to do this because you will have selected the HTV material in your cut settings. 
  • If you're not using a full sheet of vinyl, you need to pay attention to which side of the mat you put your vinyl on, again because of the mirroring. So if you place a smaller than 12x12 piece on your mat on the left side, choose mirror, the Cameo at any rate will actually cut from the right side of your mat so put your vinyl on the right side of the mat! 

I'm happy with my first attempt and have a new addition to my Thanksgiving decor. 

Fall Mantel


Side Table. Found these pumpkin signs last year 90% off after Halloween. Painted and applied glitter vinyl. Turkeys were 75% off at JoAnn one year. Painted w/ glitter paint.
Marc Roberts Harvest Fairy. I have a collection of Christmas fairies but found this Fall themed one on sale one year.


Sunday, November 12, 2017

Easy and Elegant Pumpkin Transformations


As much as I dislike eating anything pumpkin, I love making pumpkin projects. Go figure! I thought I'd round up some of my favorite pumpkin transformations. 


Two $1 pumpkins , two $1 candleholders, some paint and embellishments and...


 I did these for Halloween but can work for Thanksgiving / Fall. Faux pumpkin, silk leaves, rolled paper roses and a drawer pull. 


Paper mache pumpkin, tissue paper, Mod Podge


More tissue paper and Mod Podge. 


$1 pumpkin, glitter paint, paper roses and misc. embellishments


Drop cloth, fabric and leather scraps.


Saturday, November 11, 2017

"Remember Why You Wonder" Printable


I hope you're all enjoying this Saturday, doing whatever fills your soul. This week's party continues here.

I saw this quote somewhere online as I was hopping around and don't remember where but it resonated with me so I decided to make a printable. 

"Remember Why You Wonder" 
I did three versions. The first one is clean and simple:

For the second one, I added a vintage paper background: 


For the third, I added a texture over top of the vintage paper: 


It's sized 8x10 so click on whichever image to bring to full resolution. Graphics are from a Rustic Wreath collection I downloaded from Creative Market.  

Thursday, November 9, 2017

BFF Open House Link Party

Happy Friday Eve all and welcome to another party. Hope you've all had a great week. 

I'm pleased to announce the winner of my recent Paperless Post giveaway ( winner was randomly selected via Rafflecopter) is Kim who has been notified via email. Thanks to everyone who participated.

OK who else has never heard of an "Ears and Beers" party (as the name implies, it involves corn and beer)? I love hosting this party because I learn new things all the time. Jenny from Jenny Louise Marie shared how she hosted one of these and you really need to check it out to see all the amazing things she did and incporated popcorn, candy corn, corn tortilla chips, Mexican street corn, candy corn jello shots and of course, beer! 

She sent her guests home with these corn themed favors that could easily work for Thanksgiving.

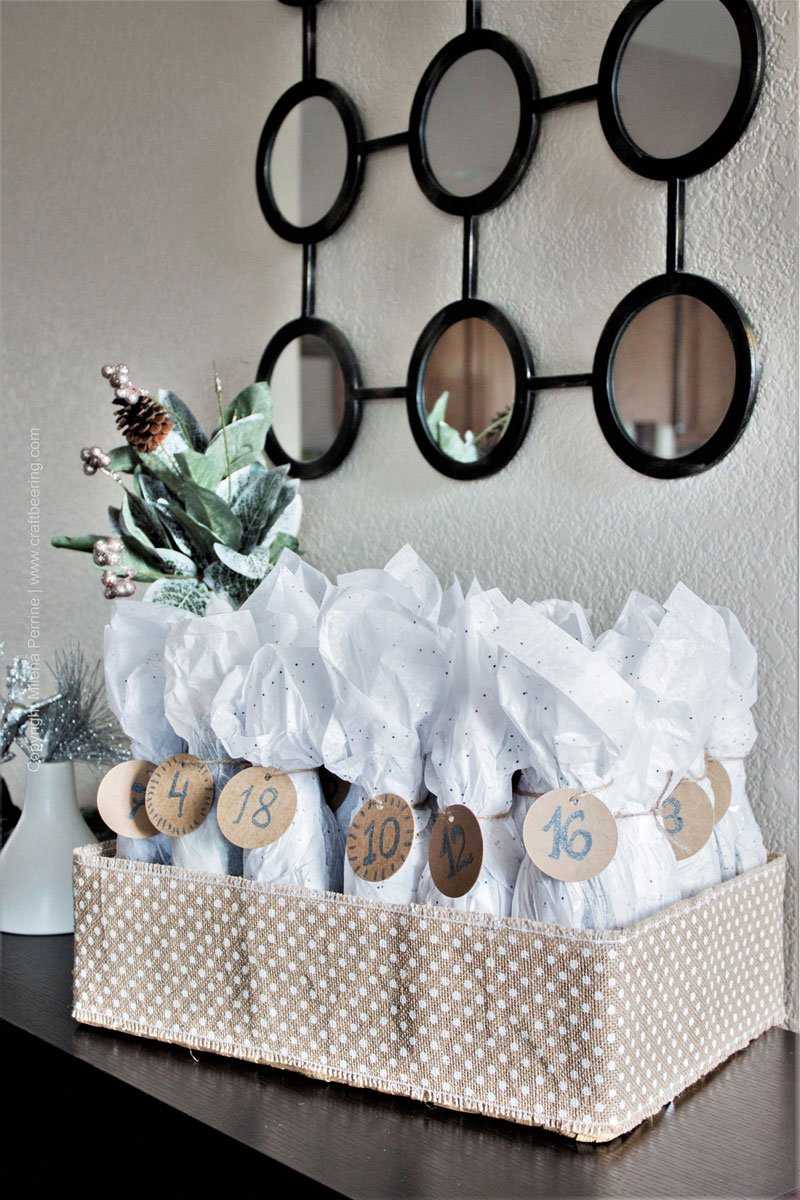
My son is coming home for Thanksgiving so I must have beer on my mind since he is a craft beer aficionado. I know not everyone drinks beer so you could easily do this w/ your beverage of choice , but Milena and Chris from Craftbeering came up with a fun way to count down until Christmas especially since there are many seasonal brews that are only out a certain times of the year. 


You could even have a different flavor for each day! 

Tis the season to be wreathy and Cathy from Vintage Paint and More has got you covered. 


Finally, if you are looking for pie alternatives for Thanksgiving or for any time, check out this gorgeous Apple Galette from Mrs. Kringles Kitchen


OK now on to this week's party!