Tuesday, October 31, 2017

Happy November! Need to Send a Last Minute Card? Use Paperless Post! And a Giveaway!


This is a sponsored post in conjunction with Anagram Interactive. I was provided access and funding but opinions are 100% mine. 


My readers know that my first love is card making. But sometimes there are times when I need to get a card to someone faster than snail mail and I have been unsatisfied with the electronic options I've found...until now! Enter Paperless Post.

Paperless Post is a website that allows you to send invitations, cards or personalized stationery in a way that other "ecard" sites that I've seen don't.  In their own words: 

"Paperless Post is a digital events platform that helps you create online and paper invitations and stationery that reflect your individual aesthetic. Our distinctive, customizable designs and powerful online tools make it easy to communicate and connect expressively on any occasion—from everyday correspondence to milestone life events. Paperless Post collaborates with leading fashion and lifestyle designers, including kate spade new york, Oscar de la Renta, Rifle Paper Co., and John Derian. To date, Paperless Post users have sent over 85 million cards. To browse designs and send invitations, please visit www.paperlesspost.com." 

The team from Paperless Post contacted me about their site and offered me coins to use so I could try it out. Each card has a coin cost. You can load a set amount of coins that you draw down from as you make your creations. 

The experience for the creator and the recipient is interactive and you get to customize as much or as little as you want. Being a frequent snail mail user, one feature I love is that your recipients get the whole experience of receiving a piece of mail including a customizable envelope, complete with liner.  For invitations or holiday cards, you can also upload your own pictures so keeping friends and family up to date is a cinch. For me, it's so much warmer than the typical e-card you can send. 

There are selections for kids parties to adult parties and events and they have a wide range of seasonal options. 

Here's the official overview on how it works: 


Here's an example of a  Halloween card I sent . You can customize each of the options as much or as little as you like (each customization increases the amount of coins you use) , and you can preview what your recipient will see before you send. 


The basic card for this option starts at "4 coins" and customization and the number of recipients you choose to send to increases the coin cost. You can even add a customized stamp to your envelope! 

Here's the best part! The team at Paperless Post has offered one of my readers the opportunity to win 1100 coins of your own to use! This is perfect for the busy holiday season with lots of parties and events to host, family and friends to keep updated etc. 

Giveaway will run through 11/8 and winner will be announced on 11/9. 


Saturday, October 28, 2017

Anatomy of a Halloween Card


This week's party continues here.

For my Halloween cards this year, I went with a color palette of black, purple, silver and gold and for my focal, used an image from The Hungry JPEG. 


I printed the image on photo paper and then trimmed to the size I wanted. I used a stamping technique called masking, where you closely trim a copy of your image, lay it over top of an image you want to color, and then apply ink so you color everything but your focal image. 


The image on the left is the one I want to color ; the one on the right is my trimmed mask. 


I used a purple ink and then randomly applied a black ink to my image. Once I was happy with my inking, I randomly sprinkled some gold embossing powder and used my heat gun to set the embossing powder. 


Once I had all my focal images done, I mounted them to purple glitter paper and then silver glitter paper. 


To make the cards, I used black metallic card stock cut to 5x7, and papers from a Recollections paper stack I'd picked up a couple of years ago at Michaels. Ironically, I didn't use it at the time but knew I would sometime!


I accented with a Halloween washi tape and a spider punched from scraps of the silver glitter paper. 

For the interior of the card, I digitally colored one of my hand drawn doodles to match my color palette,, bordered and layered the image onto a black and white background paper in PicMonkey and then added some text: 


As always, I have scraps of paper I can't bear to part with so I used those to make some tags I sent to friends to use for their treats etc. 


Thursday, October 26, 2017

BFF Open House Link Party


Not going to lie. Will be glad to say goodbye to October. Between being sick, having to start physical therapy and my mom having taken a fall, October can be gone! But on the upside,October has been filled with great Halloweeen and Fall projects shared by the awesome attendees who come to my little party and this has been THE bright spot in an otherwise icky month! 

Let's see some great ideas from last week! 


Pumpkins in decor carry us through November. I adore these Glitter Glass pumpkins shared by Mary Jo from  Masterpieces of My Life. She got a PB look w/ out a PB price! 


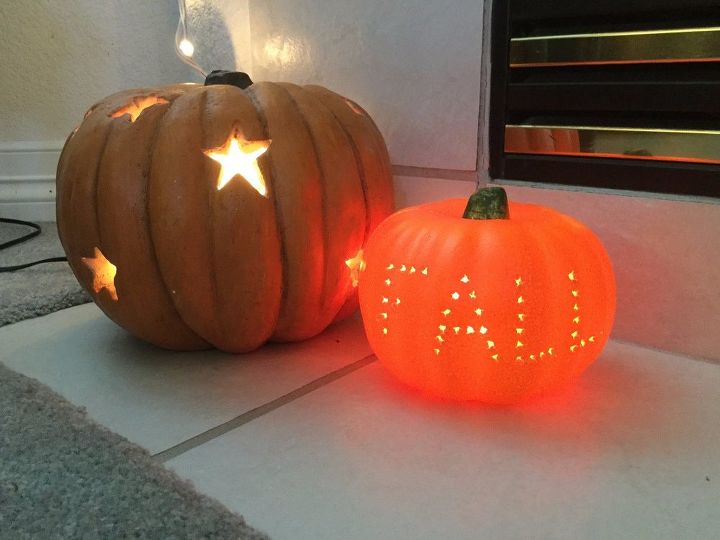
Another fun and inexpensive pumpkin idea is from Chas's Crazy Creations . She used a Dollar Tree pumpkin and lights and I can see all kinds of possibilities that would be perfect for November projects! 


I have a love-hate relationship with pies. I love making them. I hate cutting them. I can rarely get a piece of pie out of the dish without destroying it. So these Mini Pumpkin Pies from From Play Dates to Parties are a perfect solution. Plus they make for easy transportation of leftovers!

Before we leave Halloween though, here are a couple of  chocolatey treats you still have time to make!


Love these adorable Witches Brew Bites from Manic Mama of 3

And if you're the kind of person who manages to have leftover Halloween candy ( much respect!) or you pick up a few bags on sale after Halloween, Pin these :


from Sugar Spice and Family Life. I'm always looking for ways to bring chocolate to Thanksgiving. The colors of these are perfect! 

Now, let's see what you've been up to this week! 


Thursday, October 19, 2017

BFF Open House Link Party


Happy Friday Eve all. I seriously hope you all have had a better week than I have. F is for Fall and also for Flu Season even though I did get my flu shot.

Let's take a look at a few wonderful ideas from last week's party!


With Halloween just over a week away, if you're looking for last minute decor ideas you can never go wrong with a printable and I love the simplicity of this one from My Busy Beehives

Next weekend will be a big Halloween party weekend since the day itself is during the week. If you're hosting an adult party, you have got to check out Bird's Party and her Creepy and Chic Cocktail Party


I have a thing for ravens ( and their cousins, crows). They figure prominently in some of my favorite TV shows and the characteristics described by the coastal tribes of the PNW are a match w/ my personality. Needless to say I fell in love with this Raven Wreath from The Red Painted Cottage. 


And even though Halloween will be "frought" with lots of chocolate, can you ever have too much? These Brownie Chocolate Chip cookies from Everyday Parties for example. YUM: 


Now, let's see what everyone's been up to this week! 


Monday, October 16, 2017

Navy and Silver Candles with Metal Flowers


There's something about candles as a housewarming present  Maybe it's because I live in the PNW and we're approaching power outage season? I think of it more as new homeowners always having light in their home. 

For these, I tried something new which was making the flowers that are the focal out of metal. This was easily done using pewter that's used in metal embossing. 

Let's get started. 

Supplies: 
  • Plain altar candles ( Dollar Tree)
  • Decorative  / Scrapbook paper
  • Mod Podge
  • Glitter Washi Tape
  • Acrylic Paint
  • Embossable Metal ( I used Art Emboss by AMACO...you can find at craft / art stores, Amazon etc. ) 
  • Die Cutter ( I used my Cuttlebug)
  • Dies ( I used the Tattered Florals die by Tim Holtz)

I started with a base layer of white paper that I'd trimmed with the glitter washi tape. Measure and apply to your candle using Mod Podge. My go to formula is the Matte. 

I realized I didn't have any paper that worked with the color scheme I was using which is the new homeowner's palette of navy, white and grey.  So I did what creative people do. I made some. Well I painted some. 


I have a roll of paper painter's masking tape like this that I use for projects like this because it's very think but holds the paint well. I covered a couple of pieces in navy acrylic paint and then stenciled the leaves with metallic silver. Originally, I thought I was going to silver leaf the leaves (no pun intended) and then decided to paint. 


Once the papers were stenciled and dry, I tore the edges and then used the Mod Podge to apply to the candles. 

While waiting for the papers to dry, I cut the flowers. I used a crinkled white paper along with the pewter. Layered these and let the glue dry ( I live for Loctite gel control super glue) and then glued them to the candles. I curled the edges of the flowers using the handle of a paintbrush. 


I'm terrible at photographing metal and glitter but this is a closeup. I didn't emboss the metal flowers but I did freehand cut and emboss the leaves: 


To finish, I wrapped the tops with some metallic crochet thread beads and charms. 

I used a scrap of the stenciled paper for the card and used a quote from Maya Angelou as the focal: 


I re-purposed a paper bag by adding some scrapbook papers and more leaves I cut with my die.


Thursday, October 12, 2017

BFF Open House Link Party


TGIAF (Almost Friday). I took last week off for a little creative staycation and this week back at work has been busy busy busy so I'm already ready for the weekend. How about you all?  Let's take a look at some ideas from last week's party and as always, thanks to my regular guests and WELCOME to those of you who are new to this party! 


I shared my Halloween decor here and absolutely in love with this vignette from Masterpieces of My Life. I can see we have a love of Edgar Allan Poe in common! 


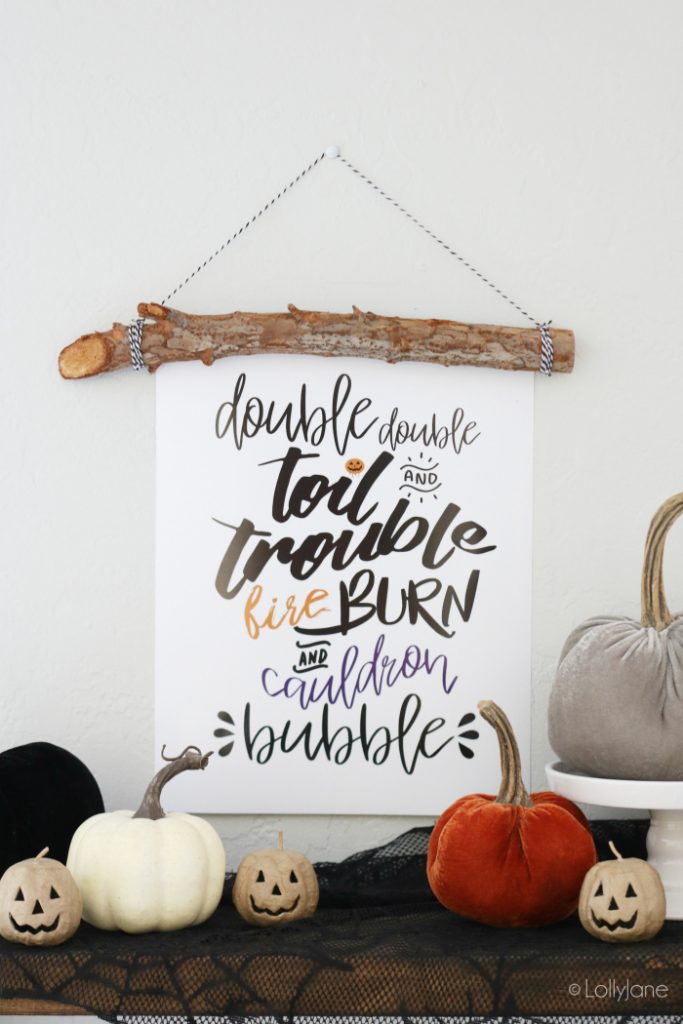
You can never go wrong with Shakespeare, especially this time of  year with this timeless quote from Macbeth. Fantastic printable from Lolly Jane

How cute is this Bride of Frankenstein hat from Sew Crafty Crochet

And for this week's chocolate feature: 

Are these not the most perfect cupcakes? My signature drink is a Mocha so these look like a must make for me! From Sugar Spice and Family Life

Now let's see what everyone's been up to this week! 


Wednesday, October 11, 2017

Using My Doodles as Decor: Georgie and Georgina Sugarskull


My doodling addiction continues. Introducing Georgie and Georgina Sugarskull, the newest additions to my doodle collection and Halloween decor. I've been wanting to incorporate some Dia de los Muertos ( Day of the Dead) touches and these were an easy addition. I printed them out and framed them in black and gold painted frames to match my color scheme of black and white and  gold.  

I started my drawing by tracing a simple skull outline. I knew I wanted to give her a floral crown so I drew the flowers on top of her skull first and then kind of went wherever my pen took me. This is what I find relaxing about this. I just kind of go wherever in an image, usually without a plan and just feel my way through. 


Georgina was done first, but Georgie was named first. I'd texted him to my son, he asked if he had a name, I said "you name him" and he named him Georgie. Georgina was kind of a no-brainer after that. 

I followed the same process for Georgie, took me a while to get the hat right. If I'm adding an element like that I'll do it in pencil first, then go over it in pen but the Zentangling itself I just go for with the pen. 


The frames were inexpensive plain unfinished wood I had in my stash. I painted with a couple coats of black paint, then dry brushed with gold. 


Now, lest you think I'm allergic to color, I did color each of these in my Recolor app.