Thursday, November 29, 2012

BFF Open House Link Party #81

Can you  believe that tomorrow is the last day of November? I can't believe Thanksgiving was just / already  a week ago. It's full steam ahead for December holidays.

Hanukkah starts December 8th  and then Christmas is just three short weeks or so after that. Fuel up on your favorite energizing beverage, protein bars, and of course chocolate because it's turbo holiday time! I hope you'll bear with me as I'm counting down the days until College Boy comes home for a month. 24 days from today!

So let's see what everyone's been up to this week.

Please remember to link to your specific post and not your main blog page and spread the holiday cheer by visiting a few other links.  You can also meet some other bloggers here: 


DIY Holly-day Shirt With Tulip Shimmer Sheets and Glitter Paints

Tulip Shimmer Sheet Holiday Shirt

If you read my blog on any kind of a regular basis, you know I love bling and glitter. So I was thrilled when Tulip and I Love To Create sent me some fabulous goodies to play with including iron on Shimmer Sheets,  washable glitter and glitter paints. Yep washable!

Tulip Haul

We host Christmas day and I like to be festive. Problem is, I’m always hot from running around, cooking etc. and most of the holiday attire is sweaters. I knew exactly what I wanted to do with these goodies. I started with a lightweight longsleeved cotton shirt. You want to wash your item before embellishing.

Tulip Spray Glitter

I was giddy that the Glitter spray paints included  silver and gold. I covered up part of the shirt and then just started spraying! They’re pump spray bottles and you can apply as much or as little as you want.

Tulip Washable Glitter

Once I was satisfied with the Spray Glitter, I used the Fashion Glitter Bond glue to outline the neck and went over that with silver glitter.  While that was drying I played with the Shimmer Sheets.

Tulip Haul

I cut a piece of one of the silver sheets to size , ran it through my die cutter using a Holly shaped die.

Shimmer Sheets Iron On

The great thing about these Shimmer Sheets is that they can be cut freehand, using a stencil, punched, or using a manual or electronic die cutting machine. I placed the leaves where I wanted them and ironed them on. SO easy!.
Holly Shimmer Shirt Tulip

Once that was done, sectioned off the bottom, got the silver and gold Spray Glitter back out and did the bottom of my shirt, and added some rhinestones to the cuff.

Tulip Shimmer Sheet Closeup

I had so much fun with this and love that the Spray Glitter is no odor ( good for breathing challenged peeps like me).


I’m definitely dreaming of a glittery Christmas so be on the lookout for some more shimmery projects!

You can check out the Shimmer Sheets, Glitters, and other Tulip products here and they are also avail at most major craft stores.

Web: http://www.ilovetocreate.com/
Facebook: https://www.facebook.com/lovetocreate
Twitter: https://twitter.com/ilovetocreate
Pinterest: http://pinterest.com/ilovetocreate/


Here are some ideas from other creative bloggers.


Disclosure: I was provided with the materials for this project by Tulip / I Love to Create. Ideas and opinion are my own.

Sharing At: 


Tuesday, November 27, 2012

Mod Podge, Foil, and Glitter Hanukkah Votives


Featured On:


Mod Podge, Foil and Glitter Votives


Hanukkah is just around the corner. Since it’s the Festival of Lights, what better thing to make than some fun votives? I made these for a friend.

For this project you’ll need:
  • Clear glass votives
  • Mod Podge
  • Tint of your choice, paint, ink etc. I used JudiKins Mica Gloss
  • Foil Transfer Sheets  ( I had some in my stash but I know Michaels carries the ones by Martha Stewart w/ her paints)
Tinted Votives

In a small container, mix your Mod Podge and tint to a desired color. I went with a metallic blue for Hanukkah.  Apply your tinted mixture to your votive, let dry, repeat twice more or to desired color.

Tinted Mod Podge

Top pic is the first coat. Bottom pic is after three coats and dry.

Blue Mod Podge Votives

Now it’s time to apply the foil. While your votives are still a little tacky, randomly press your foil onto your votive. I use what I call the leg waxing technique. Lay your foil down, smooth over with your hand and rip off. No pain!

Apply Gold Foil

I tend towards an imperfect look so I crinkled my foil up first and then didn’t try to match up lines or get full coverage.

Mod Podged Hanukkah Votives

After you’re done applying your foil, brush some more Mod Podge around the bottom, sprinkle with glitter, Edge the top rim with more MP and dip in glitter .

You could whip up eight of these for an impromptu menorah or you could make them in different colors for your Christmas mantle, or  for everyday decor, or...

Sharing At: 


Monday, November 26, 2012

Wreath Makeover With Paper and Ribbon Scraps

Scrappy Wreath

I had a productive weekend getting some Christmas crafts and gifts done, including this wreath makeover  that’s going to hang next to one of my trees. Yes, I said “one of”. No, the Hoarders people are not parked outside my house. Yet.

Scraps Wreath

I started off with a pressed wood wreath frame that you can find at most craft stores. I had a wreath from last Thanksgiving that I decided I no longer loved so I pulled all the stuff off of it which is what the white spots are. If people open gifts at my house, guess who hoards the scrap ribbon to re-use? I pulled out a couple of pieces and wrapped my wreath form.

Wrapped Wreath
The rough ends where the ribbon joined won’t matter since they’ll be covered up. The next part I thought I tool pictures of and oops. But to decorate my wreath, I used a Tim Holtz die to cut holly leaves, and branches from chipboard. Ran those through an embossing folder to give them some texture and then dabbed on some inks in metallic brown, green, and gold.  Went to my paper scraps and pulled out some black and white polka dot papers and made rolled flowers. And then to my embellishments stash and grabbed some off white paper roses.
Embossed Holly Leaves

Hot glued the leaves and flowers on over my ugly ribbon spots.

Frosty Scrappy Flowers


Woodland Wreath

I finished the whole thing with a bright red ribbon ( another scrap) and it will hang next to my Whimsical tree that’s filled with lots of red, lime green, black and white.

Sharing At: 


BFF Open House Link Party#80 Wrap Up and Features

Thanks to everyone who linked up to Friday’s party. Hope you all had a great Thanksgiving and long weekend. The pressure’s on! Here are some ideas to jump start the week.

Paper Tree Ornaments Collage thumb Paper Tree Ornaments

Sarah from Alderberry Hill shared a quick way to make some whimsical ornaments using scrapbooking paper. You could whip up a batch for yourself and to give.


Speaking of trees, Janet, from Janet of All Trades whipped up these contemporary fabric trees to dress up her craft room. Love the colors and the patterns.

These would go great with this cute burlap and pom pom  wreath from Re-Made Simple:


Or how about a different twist on burlap like this candy cane wreath from Kathy at Life on Lakeshore Drive?


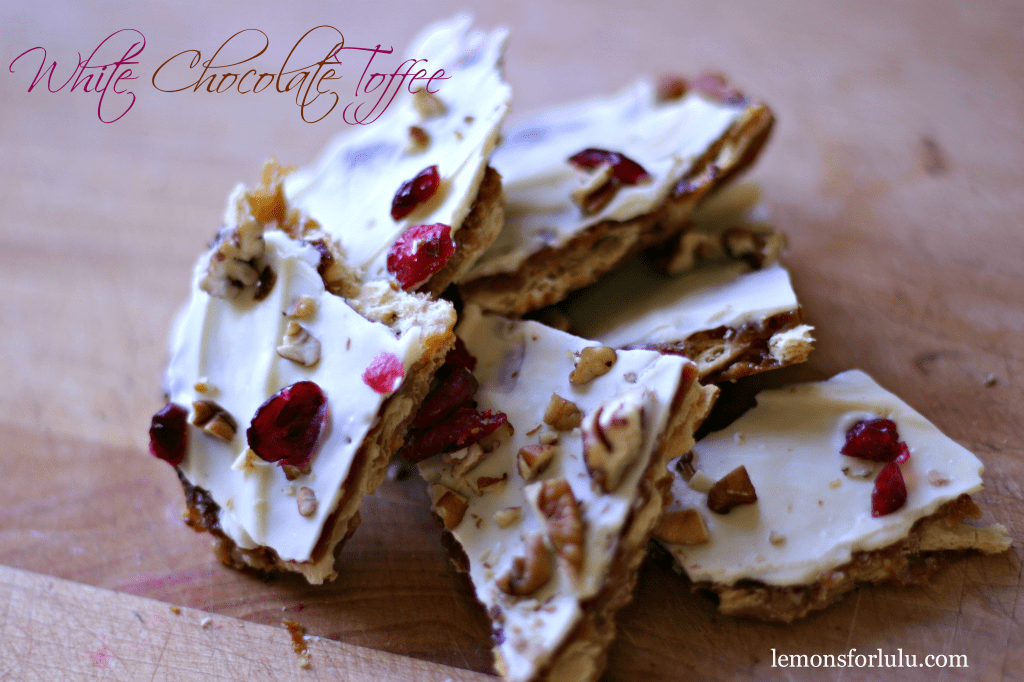
Finally, this week’s chocolate feature is perfect if you’re dreaming of a white Christmas…a white chocolate Christmas.
White Chocolate Toffe

White Chocolate Toffee from Lemons For Lulu. How festive does this look?

Thanks again to everyone who linked up. Hope to see you all again this Friday. Make it a creative week!

Saturday, November 24, 2012

Easy Christmas Countdown Banner

Coundown Banner

I haven’t hung this up yet since I haven’t decided where it’s going but thought I’d share this quick Christmas Countdown banner.

Once again, I fell in love with a paper stack. It’s an illness. I accept  I have it.

Joyful Christmas

This time it was “Joyful Christmas” by Recollections at Michaels. Lots of vintagey goodness with some sheets full of glitter accents. Yum.

Countdown Page

You can see how easy they made it to make this banner since there are a couple of countdown sheets in the stack. I just cut each one out and mounted onto a black panel.

Countdown Numbers

I had these brads in my stash from after Christmas shopping last year:

Recollections Brads

Connected the corners using the brads but decided that 1-25 all together would be way too long so I did 1-12, 12-24 and then 25 as a standalone.

Coundown Banner

Framed "25" with a silver glitter scrap and snowflake brads. Used black and white bakers twine to finish things off.

Sharing At: