Thursday, July 28, 2022

BFF Open House


Happy Friday Eve and end of July! The month's flown by and been a whirlwind getting moved in to our new home, unpacking etc. It's been a serious monsoon season this year with lots of rain, which is needed, and some amazing lightning light shows. It's also felt good to get back to being able to make some things. This week I shared another piece of DIY Modern Wall Art and have been playing with more. 

As always, the projects shared at last week's party were inspiring and beautiful. Let's take a look at a few. 


I've mentioned that I love combining modern and vintage. The Soiree Blog has an incredible roundup of re-purposed vintage sewing machine tables that do just this. I absolutely love this one with a natural wood top! They're all amazing. 


Artsy VaVa shared this AMAZING Corner Cabinet transformation. The color is fabulously named Cactus! 


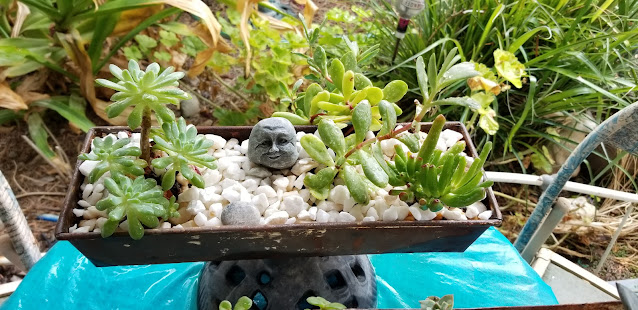
Dragonfly Treasure shared this lovely Succulent Garden made using old cement trays (molds). Aren't they fabulous?!


Finally, I love pickles almost as much as I love chocolate. When I was little and we went to the deli, I loved the pickle barrel and the crunch of a good garlicky pickle. My husband laughs at me and pickles because I will just sit and eat them standalone. These, from The House on Silverado inspire me to actually make some! 


Thank you to everyone who linked up and can't wait to see what you've all been up to this week! 


You are invited to the Inlinkz link party!

Click here to enter

Monday, July 25, 2022

Home Decor: DIY Black White and Silver Wall Art


I've been having more fun with DIY Wall Art and exploring modern looks. The first piece I showed was for our second bathroom and this one is as well. The bathroom is a "Jack and Jill" with two entrances, but it's also split into two sides. The first side that I showed here has the vanity, sink, and cabinets. The other side has the toilet, shower, tub with black and white subway tiles which is what influenced this piece. 

Supplies: 
  • Wood Art Board 11x14
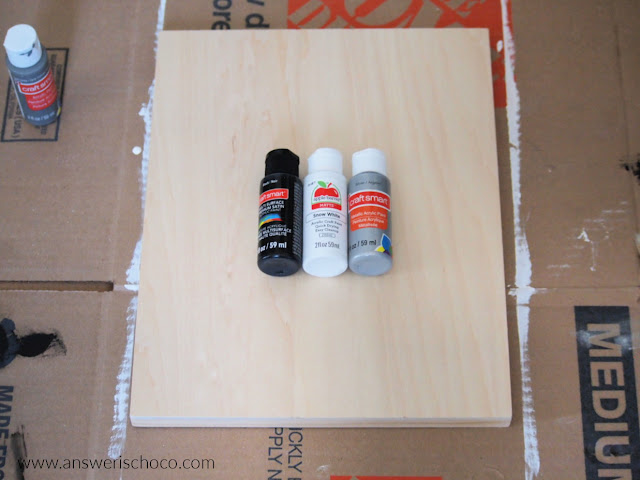
  • Acrylic Paints
  • Paint Scraper and Brushes

I bought a bunch of these wood art boards at Target when they were on clearance so I had them in my stash. You can get similar at Blick Art and I've also seen them at Michaels and JoAnn.  To start, I covered the board with a couple of coats of white paint (Apple Barrel Snow White).


For this, I didn't want any of the wood bleeding through so I made sure to get a good opaque coverage. After that, I placed black paint (Craftsmart) dotted in a grid pattern, then used a paint scraper to rough out a rectangle. 


It doesn't matter if the grid is straight because you can even it out with the paint scraper and brush and it doesn't have to be perfect. Once dry, repeat the same process for however many other sections you want to do. 


To finish, I once again used a black paint pen to outline and draw some squiggles. There's no right or wrong. Just what you like. 


I think it picks up the tiles perfectly and also works with the shower curtain we put up! 


The black and white ties together with the black and white from the other piece on the other side of the bathroom. 


Sharing At: 


Thursday, July 21, 2022

BFF Open House


Greetings all! Hope anyone dealing with higher temps than normal is keeping cool. It's monsoon season in the desert which means storms and humidity. The amazing lightning storms the past few nights have been light shows and almost (ALMOST) make the humidity worth it. 

I've been exploring some modern art and have had fun with a few projects. I shared one here: DIY Modern Wall Art. Working on a couple of others I'll share soon. 

Starting to see Halloween creeping into the stores so the full-press holiday season will be upon us before we know it. Let's take a look at some of the fun ideas from last week's party! 


This thrifted table transformation from Junk Is My Life is the perfect addition to any room. Love the color! 


This portable DIY TicTac Toe game from Creatively Beth is all kinds of perfect. Fun to make, especially as a boredom buster wtih kids, fun to take on the go  with the storage pouch used as the board. 


If you're looking for some jumpstart inspiration for Christmas, and it's never to soon to start getting ready, check out these ideas from Two Chicks and a Mom


Finally, these Chocolate Snaps are pefect to bake and eat or freeze for use later. I love these kins of cookies for cheesecake crusts or crushed at the bottom or chocolate pudding or mousse. From Cindy's Online Recipe Box

Thank you to everyone who linked up and as always, can't wait to see what you've been up to this week!


You are invited to the Inlinkz link party!

Click here to enter

Saturday, July 16, 2022

Home Decor: DIY Modern Wall Art


This week's party continues here. Today I wanted to share an easy DIY Modern Wall Art piece. This was done for our second bathroom. Mr. Chocolate is more a fan of copper than I am despite the fact that we live in The Copper State and I wanted to honor that. This was a different style for me but I had a LOT of fun doing it and it was super easy. 

Supplies: 
  • 16x20 Black Canvas
  • White, Grey, Copper Acrylic Paints
  • Paint Scraper Tool
  • Brushes
  • Paint Pen


I stock up on canvases when Michaels has them on sale so I picked up this 5 pack some time ago. The only think I bought for this project was the Folk Art Metallic Copper Paint (Walmart $1.97)

Since the canvas was black which went with my color scheme, I didn't do a base coat. 


After checking out a few videos, I just went for it! To start, I made a grid of dots with the white paint, then used the paint scraper to rough out a rectangle. 


Since this was an abstract / modern look, I didn't go for perfection. I let the paint dry so it wouldn't bleed then did the same process with the grey paint. 


As with most things I make, I just started playing around with the space. Once the grey was dry, I added the copper using the paint scraper. Then I switched to brushes to add some lines and fill in some spots. I also dry brushed white over some of the grey parts as shown.


Finally, I got out a black paint pen and drew some freehand lines. When I showed it to Mr. Chocolate, HE LOVED IT! 


See? We don't even have a hand towel in this bathroom yet but I had this idea in my head and...priorities! 


I think it works well with this print we've had forever!


Sharing At: 


Thursday, July 14, 2022

BFF Open House


Happy Friday Eve Creative Peeps. Hope you've all been having a great week. We continue to get settled in our new home and found some time to update a few thrifted pieces that work with this new aesthetic. Shared how I combined Traditional and Modern Decor with just a little acrylic paint and Rub N Buff! 

Let's take a look at some of the great ideas shared at last week's party! 


All the way from The Netherlands, we have these fun earrings from Mooisvanme using mirrored crystals and fiber. Pretty! 


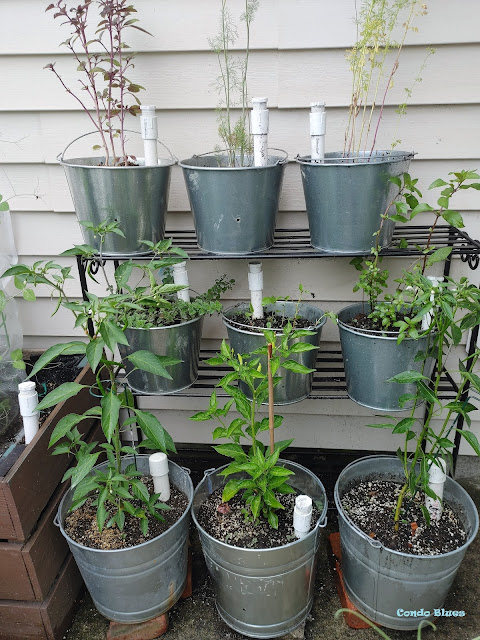
Condo Blues shared a wonderful idea for something I really would like to do, even here in the desert:  a Self Watering Herb Garden! 


July will always be "Harry Potter" month for me and I love how all these years after the series concluded people continue to find ways to come up with new creations inspired by it. For example, these DIY Flying Keys from Creatively Beth

Finally, "When Harry Met Chocolate" to play with a couple of movies. A second HP inspired creation comes from Artsy Fartsy Mama with these Resin Chocolate Frog Earrings. So cute! 


These won't leap away. 

Thanks to all who linked up and now let's see what everyone's been up to this week! 


You are invited to the Inlinkz link party!

Click here to enter

Tuesday, July 12, 2022

Home Decor: Blending Traditional and Modern


 As I've mentioned, our new home is very modern. And while it would be fun to buy all new things, I live on a planet called Reality. Plus DIYing and making things over is what we do. Our prior homes have been more traditional and I wanted a way to make some pieces I still love fit in with this more modern aesthetic. Plus, it's better for the environment as well as the wallet to re-purpose right? These pieces were already thrifted finds I'd painted once so painting them again was no big deal. 


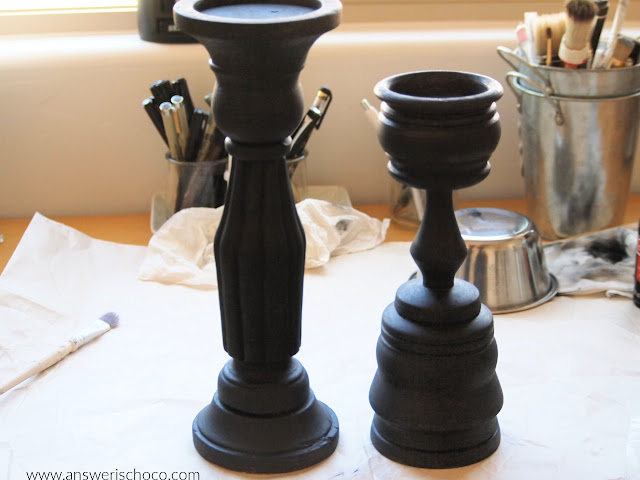
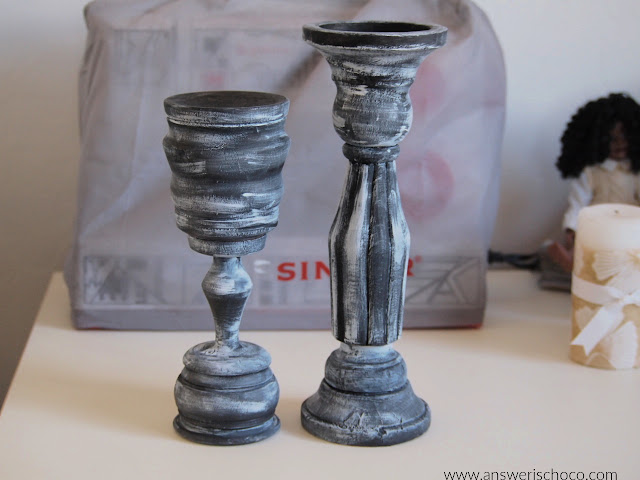
These were some candleholders I found several years ago at Goodwill. They didn't match so I painted them to match and painted them again! 


We have a lot of black accents in this house so I started by painting them with a couple of coats of black acrylic paint. I still love a vintage look so I didn't leave them solid, and dry brushed them with a little bit of white. 


To finish, I used Silver Leaf Rub N Buff to accent some of the raised areas to make them pop. Originally, I thought I'd re-do the candles too. They're decoupaged onto the candles but the powder room also has a wood cabinet and I decided I really liked how they went with it. 


I also knew I wanted to place a small table I'd also previously thrifted and painted. Again, I wanted to emphasize the black but again, I still like my vintage / distressed look. 


I originally painted it a light tan with white drybrush. I painted the legs solid black and  for the bottom did a crackle effect with white using my tried and true white glue crackle technique. 


I applied the same Rub N Buff around the edges of the top and shelf of the table. We had a Longaberger basket we bought years ago that matched the cabinet as well as a beautiful wood bowl from my husband's family that I thought would be perfectly displayed on this table, and the black captures the essence of the sink. 


I feel like the silver accents on the candleholders and table work well with our floors, the black and white with the sink, and the browns with the cabinet! We added a couple of black storage baskets from Target to hold extra supplies like toilet paper. I'm really happy with how it all came together mixing traditional and modern. 


Sharing At: