Saturday, May 27, 2017

Saturday Wine Humor


This week's party continues here.

My BFF sent a hilarious quote to me this week and it was serendipitous that Designbundles.net had the perfect set of graphics to go with it as their freebie of the week . You might say they were the perfect pairing, so I made this printable with her in mind. 

It's a great collection of wine themed graphics but it's only free to download for 5 more days! 


To save, click on image to bring to full resolution, right click to Save As, download. It's sized 8x10


Thursday, May 25, 2017

BFF Open House Link Party


Happy Friday Eve and especially long weekend Friday Eve! To give you a hint of the kind of week it's been, we're going to skip features this week and jump right to the party. Wishing everyone a long, restful and happy weekend! 


Thursday, May 18, 2017

BFF Open House Link Party


Happy Friday eve and here's to the end of another busy week. Hope all the moms had a wonderful Mother's Day !

Some features from last week party. 


Farmhouse style is so popular right now. I've been wanting to start an indoor herb garden and love this idea from Paisley and Pugs ( in fact, I think I have these exact galvanized pots!)


Who can't use more storage but buying enough can get pricey. These coordinated pretty bins are made from cardboard boxes! Shared by Just Measuring Up.


Hair clips, especially decorative ones, are another thing that can get expensive. You can make your own ( and get the exact colors you want) like Sew Historically did with the one shown here. 


Finally, I'm drooling over these Cinnamon Rolls. Don't they look delicious? From Crazy About Expresso!

Now on to this week's party! 


Tuesday, May 16, 2017

Ermagerd! Special Gift for a Special Friend


A few years ago, fate introduced me to someone who has become a great friend. A change in work assignments brought us together though in our company, "together" is virtual since she is on one side of the country and I'm on the other.  

Our paths had never crossed before and we quickly discovered we had many things in common. Our passionate love of our kids, our "wicked smaht" sense of humor, our shared love of the same TV series and movies and more. I don't remember exactly how the expression "ERMAGERD" (for OMG) became part of our daily discussions but it was probably from something that had happened on "Game of Thrones" or "Bates Motel". 

We'd always have the same take on something and that morphed into us saying we were like Forrest and Jenny from "Forrest Gump" ...."peas and carrots" which became "peas in a pod". She became Erma and I became Gerd and that's been our thing!  I wanted to commemorate our relationship which is what this gift represents. Still with me? 


I knew I wanted to letter something, and I knew I wanted to frame it so I started with these supplies: 
  • Unpainted Frame
  • Acrylic Paints 
  • Lettering Pens
  • Embellishments for frame
  • Heavy Paper ( I used watercolor paper)
  • Lightbox
  • Fun Font


I painted the frame black , then crackled it using my tried and true white glue crackle technique with metallic gold as the top coat.  Once dry I added the rolled paper flowers I picked up on one of my Michaels trips. 


For the lettering and pea pods, I chose a fun font, found a piece of clipart I liked, created the sentiment on my computer, printed off and then using my lightbox, layered watercolor paper on top. Traced with a pencil, then outlined with a high quality non-bleed pen ( I bought a pack of pens by Recollections @ Michaels, comparable to Micron Pens). 

Some might ask why I didn't just use the computer generated print but I wanted this to have a hand lettered feel (and the watercolor paper wouldn't fit my printer anyway). Since I wanted it to coordinate w/ the frame, I used a metallic gold gel pen to accent the peas in the pod. 


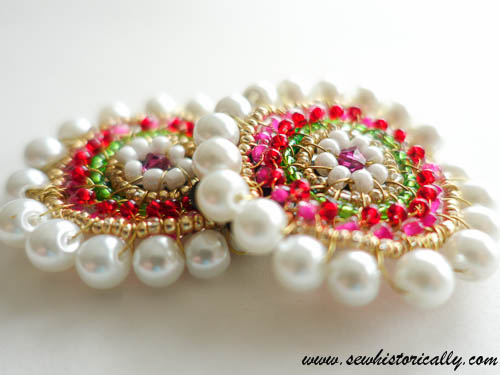
We also share a love of black and white clothing. Since I love making jewelry and had recently picked up some new supplies to play with, I made her a pair of earrings, and made a complementary pair for me! I wear big earrings, so I made hers a little less bold but using the same beads. 


I  can't have pierced ears so mine are clips and hers are pierced. I'd picked up a package of  connector links ( the silver ovals) and layered different sizes together for each pair, and then strung the beads on headpins as shown, connecting them to the links with jump rings. 

I've waited to post this until I knew she received ( and liked!) her gift which she did and does. As I told her, the BEST feeling in the world for us makers is the excitement we feel when someone loves something we made for them. My gift in return ( not that one was expected) was her excitement over receiving this. Best feeling in the world! 


Love ya Erma!


Saturday, May 13, 2017

Metallic Mother's Day Cards


This week's party continues here.

Not happy w/ the photography here but these cards have been mailed already so...

I always make a few Mother's Day cards for special friends. This year I went with a palette of grey, white, black and gold.  The grey floral paper is actually from a Valentine's collection but works so well here I think. 


The focals for each card are from the DCWV Eclectic Chic stack I picked up at JoAnn's. Each is a panel from a 12x12 page of sentiments. 


There was a sentiment perfect for each of the women I was sending cards to. 


I layered each with gold glitter and white papers and then attached them to a gold and white polka dot panel on top of the grey floral panel. Gotta figure out how to get better at photographing metallics. 


Thursday, May 11, 2017

BFF Open House Link Party


TGIF ( almost) everyone. Wishing all the Moms a very Happy Mother's Day weekend. Hope you all get treated like the Queens that you are.  If you're scrambling for some last minute ideas, here are some from last week's party. 


You can't beat printables for coming in handy at the last minute. Play Dates and Parties shared these just in case you need some last minute gift tags. 


Whether you want to tuck a gift into these or use as a gift topper, you can't go wrong with these Basket Weave Hearts shared by Eclectic Red Barn


If you're like a lot of makers, you may have something already in your stash that would make the perfect holder for some Spring plants or a little herb garden? Love this shabby toolbox Our Hopeful Home turned into a planter. 


Finally, fess up. What Mom among us hasn't had that moment when we've longed for a treat just for us? Sure the recipe says 2-3 people but let's be honest...SINGLE SERVING lol. Edible cookie dough without eggs ( even though I've eaten the raw cookie dough and lived to tell about it). From A Sprinkle of Joy. 

Now, on to this week's party! 


Monday, May 8, 2017

Lettering Practice: Monday Motivation from Hermione Granger

Happy Monday all. (Trying to have a better attitude about Mondays!)

I lettered this quote from "Harry Potter" specifically from one of my favorite characters, Hermione Granger. 


I was Hermione as a child. My nose always in a book and in love with libraries and and bookstores, and my parents sent me to the dictionary and encyclopedia when I had questions. 

I've been practicing "bounce" lettering which basically brings the lower parts of the letter down lower so when you start the next letter it looks higher and "bounces" ( this is completely MY very simple explanation!). 

Here are some explanations of bounce lettering from more expert sources. 

From Dawn Nicole Designs: How to Do Bounce Lettering
From One Artsy Mama: Basic Bounce Lettering
From Pinterest: Bounce Lettering

Another of  my favorite HP characters, Mad Eye Moody, sums it up when it comes to lettering: "Constant Vigilance" which translates for me to Practice Practice Practice.

Happy Monday ( working on that). 


Thursday, May 4, 2017

BFF Open House Link Party


Happy May and happy Friday Eve all ! I think (THOUGHT)  we may finally be getting a taste of Spring ( we're only 1.5 mos behind the official calendar right?) here in the PNW but now it's thundering and storming out. Hope everyone's had a good week and let's see some of the ideas shared at last week's party! 


I am seeing a lot of fun made-over globes everywhere.  JoAnn's even has some you can buy new to decorate. Check out this beautiful shabby chic vintagey globe that Penny's Treasures shared. I love those "DREAM" blocks too!


Fun decor isn't only for the inside. How lucky are the birds who get to visit this lovely bird feeder shared by Lolly Jane? SO lucky!


You've got to check out the "before" pics of these gorgeous bedside tables that were made over by Grandma's House DIY


This week's chocolate feature is a Chocolate Cake literally made out of Chocolate Bars! I love this idea from A Crafty Homemaker.

Now, on to this week's party!


Tuesday, May 2, 2017

Marker Pen and Alcohol Tiles


I had some creative time this weekend, and filled it with what may be my new obsession: making "Alcohol Ink" coasters. They aren't a new idea but I came across them on Pinterest last year and they were on my list to try so they were new to me. It's art and chemistry in one and I love that no two will be the same. 

Supplies Needed: 
  • Hardware Store Ceramic Tiles ( mine were like $.16 each )
  • Sharpie or Alcohol Ink Pens ( I used Sharpie, Prismacolor, and Spectrum Noir)
  • Rubbing Alcohol
  • Eye Dropper
  • Sealant ( I used Rustoleum Clear Laquer Spray)
  • Aluminum Tape (optional) 
  • Paper Towel or something to protect your work surface. I liked paper towel because of the absorbency. 


Clean the tiles with a little of the alcohol just to get any residual dust etc. off of them. That's it on the prep! You'll want to use the "shiny" tiles...ones that are not porous. 

The tiles are so cheap ( not inexpensive, these are downright CHEAP...16 cents each) and if you mess up guess what? Before you seal you can clean off the ink with more alcohol and start over!

Decide which colors you want to use and then scribble all over your tiles. You can cover as much or as little as you want depending on the effect you're going for. If you have alcohol inks in your stash you can use them too and just drip them directly onto the tiles. 


For this one went all over just randomly covering with bright colors. This one is all Sharpie.  Once you're happy , then grab your eye dropper and start dripping your alcohol randomly and watch the magic happen! (This is where I wish I had video'd the process because it's fascinating to watch the alcohol and inks interact)


Don't overdo it on the alcohol. It's a judgement call and in some cases you might want to add more where it doesn't spread. I also observed that as the alcohol dries, it continues to interact with the marker and continues to change until it's completely dry. 


As I was doing these and lamenting that I didn't have some colors in my Sharpie collection, I wondered if other pens would work since all the ones I'd seen on Pinterest used Sharpies . 

Guess what? They do! I grabbed some of my Prismacolor and Spectrum Noir pens since they're basically alcohol based and found that they interact equally as well with the alcohol and are a little more fluid than the Sharpies. I did some with just Sharpie, some with just the other pens, and some combining them all. This was truly just playing around to see what happened. 


Once dry, you'll want to seal them. I used Rustoleum Clear Laquer and lightly sprayed about three coats. To finish, I had some aluminum tape ( I think this is from the electrics section at the HW store...I bought mine at an art fair but I think that's where the booth owner said it came from) and then put self adhesive felt dots on the bottoms. 


This one's for me to keep and use for my iced mochas! It reminds me of the milk and foam from a coffee drink. 


Mr. Chocolate called dibs on this one because it reminds him of the outdoors. 

The rest are actually a birthday gift for my son's BFF who loves to host cocktail parties. I figured he could always use some additional coasters! 

Never to early to start thinking about handmade holiday gifts! I am going to get some larger tiles and make some trivets as Hannukah and Christmas gifts! 


Monday, May 1, 2017

Happy May


Happy May everyone! I cannot believe it's May already. Five months into the year already? How can that be? 

Hope you all had a great weekend. Did some lettering and worked on a few things I'll be posting soon.