Monday, August 31, 2020

Halloween: Gothic Batty Wreath. Dollar Tree Finds


I popped into Dollar Tree recently since I've been seeing some fun finds on different blogs. Just my luck, I didn't find what I went for but can you ever leave Dollar Tree empty handed? Not me! The end result is this Gothic Batty Wreath using a wire frame and ornaments I picked up on my visit. 


Supplies

  • Wire Wreath Form (Dollar Tree)
  • Black Mini Ornaments (Dollar Tree)
  • Black Ultra Suede Fabric (Stash)
  • Cream Paper Flowers (Stash)
  • Self Adhesive Rhinestones (Stash)


I also picked up these cool straw brooms that I thought I was going to use in this project but ended up saving for something else. 


The fabric scrap I had was about 36 inches long and 9 inches wide so I cut it in half to make two 4.5 x 36 strips and wrapped the wreath form adhering with hot glue. 


I cut out 8 pairs of bats (16 total) on my Cricut Explore 2 using black cardstock.


I scored each bat down the middle and then layered using foam tape to give each pair some depth and dimension. Then, hot glued as shown towards the inside of the wreath. Never one to leave well enough alone, because I debated...I kind of liked the simplicity of it but...I had those cool black ornaments to use! 


I removed the ornament caps and then glued groups of three ornaments around the wreath. They come in matte, shiny, and glitter. I ended up using about 1.5 packages and still have the same amount left over which means I guess I'll have to make something else!  I also remembered I had these paper flowers in my stash. Last September we were at Disneyland which was all decorated for Halloween. My favorite was The Haunted Mansion which each normal year ( so not 2020!) they turn into "The Nightmare Before Christmas" and this was shaping up to remind me of that. Creepy yet pretty. 


I added the flowers to the ornament clusters and then because "it don't mean a thing, if it ain't got that bling" finished with some self adhesive rhinestones.


Yep. I got that stray glue string. 

Et voila! 


Thursday, August 27, 2020

BFF Open House

 
Yikes! How is it the end of August already? I go from "this year is one long month" to "where did this year go" in the same breath. Spent the week organizing my craft room and even went through all of my paper scraps and "whimper" got rid of some. I am attached to every little piece and remember which card or project they're from. As Shakespeare said: "Parting is such sweet sorrow". 
Took a break from Quilling ( although I did order some new quilling strips from Quilling.com and they ship FAST!) and re-purposed / stash busted a couple of things here.  OK! Let's see what everyone's been up to this week!


Mary Jo from Masterpieces of My Life shared this simple, elegant, and high impact Reindeer Moss Wreath. What a stunning piece! 


Penny, from Penny's Treasures shared her GORGEOUS second gallery wall! I love how everything is tied together by color. 

Living in the SW, and particularly in horse country, I see a lot of horse themed decor that can get pricey! Anita from Unique Creations by Anita has a great piece that fits right in!


Be still my chocoholic heart! Cecelia from My Thrift Store Addiction shared these Cake Mix and Candy Bar Donuts. It's not like I wanted to jump through the screen to get them or anything. Maybe. OK definitely. 
Now, let's see what everyone's been up to this week! 

You are invited to the Inlinkz link party!

Monday, August 24, 2020

It's A Sign! Actually Two And The Story of Craft Fail to Fab


Yes, I took a break from Quilling! Well sort of as you'll see in this post. I did some stash busting this weekend but you know us makers...rarely throw stuff out and re-purpose things!

I made two fun signs this weekend. The one above, using a picture frame that previously held a collage that had seen better days, and this one using up a plain wood sign I picked up after Halloween last year at Michaels for 70-80% off and had been sitting in my craft closet. 


Supplies: 
  • SVG "Strong" File ( I think this was from a Creative Fabrica freebie)
  • Cricut Black Glossy Vinyl
  • Old Frame w/Glass
  • Wood Sign
  • Acrylic Paint
  • Adhesive Rhinestones
For the "Strong" Sign, I imported the SVG file into my Silhouettte Design Studio software, traced and cut it on my Cameo 3. Here's the fail I mentioned in the title. I thought I'd traced the inside of the letters so they'd cut ( eg Os, Gs, etc.) and I was not in the mood to cut it again. I got the idea to use rhinestones to simulate what I'd flubbed, turning frustration and a craft fail into what I'm now thrilled with as FABULOUS! 


I had some rhinestones in my stash that were circles so I used those for the "Os" and then regular ones everywhere else. This fit my style of adding a little bling to things and I really love it against the back drop of my industrial "cement"  accent wall. 

 
What do you think? 

The other sign is now above the entrance to my office since Quilling is forever going to be part of my life. I chose the name because I'm not a traditional Quiller but more of a Whimsical one. 


For this one, I used the plain wood sign I found at Michaels last year for around $5. 


I painted it white and then painted the edges black.  Then I selected a mix of fonts and cut out again using Cricut glossy vinyl. To finish I added painted polka dots to the edge and some of the letters. 


And yes, I intentionally offset some of the letters!


Thursday, August 20, 2020

BFF Open House


Welp. August is both flying by and standing still like the rest of 2020. Hope you've all had a wonderful and creative week. I've been working on some Halloween stuff, trying to get ahead of things this year since I have some more time on my hands. 

Let's take a look at some of the wonderful ideas shared at last week's party! 


Card making remains my first love and like Antonella from White House Crafts, I love finding and using 12x12 pads which usually contain a few pages of panels you can use as the focals of your cards. Mr. Chocolate won't believe him if I say I don't have this cute collection in my collection and need to remedy that! 


Eccentricities by JVG shared how to make a pretty and practical Diffuser Bracelet. These work w/ body heat to release scent and can be used w/ essential oils. 

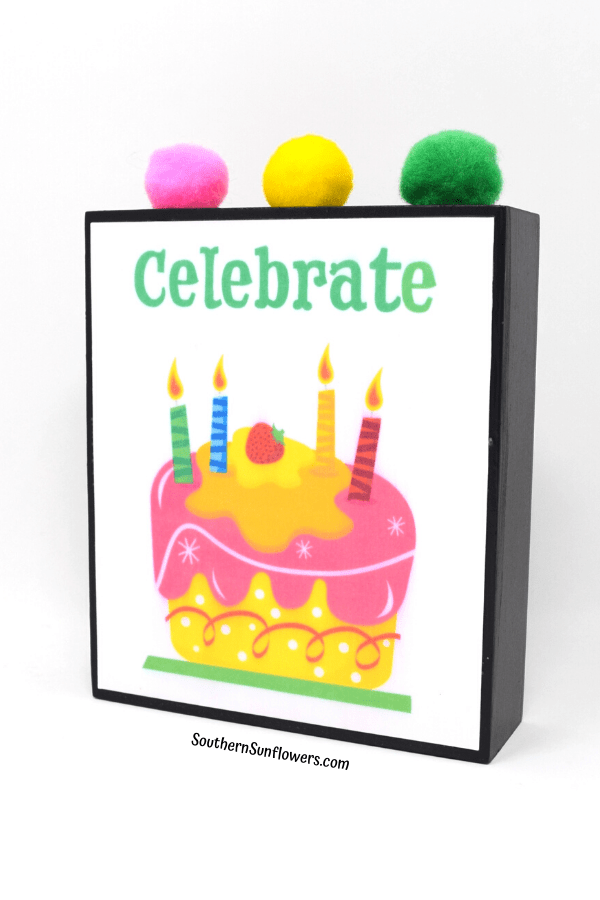
Southern Sunflowers shared a wonderful makeover of a box sign thrifty find and is also sharing the printable she made and used!

Picture

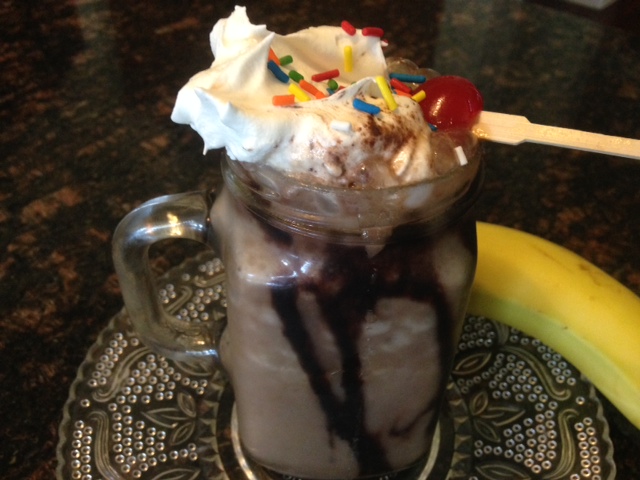
Finally, Cindy's Online Recipe Box shared this adult version of a banana split via this Frozen Banana Split Cocktail. Oh my! 

Now let's see what everyone's been up to this week! 


You are invited to the Inlinkz link party!

Monday, August 17, 2020

Quillermania Continues: Monogrammed Letters


I recently made three different gifts for three different friends. As my quilling mania continues, this time I made coordinating gifts and cards. 


Left to right: A monogram for a friend's daughter who recently moved into her first post-college home. Her initial done in colors to match her bedroom.  Middle: A gift for a friend in her furbaby's colors. Right: A monogram for one of my BFFs daughter in her brand new son's initial. 


For this one I used this fun bow themed background paper, cut the letter using my Cricut, and then quilled in colors to match her bedroom.  For the card I made to go with, I stuck w/ the same color theme but did a dog paw for her furbaby. 


I used the same background paper for the paw card and then coordinating quilling strips for the paw. 


For the paw hoop, I used a bone print background paper and then used different shades of brown to make the paw. Did the reverse as the hoop above and did the paw print here and the monogram of the furbaby's initial on the card. 


For the last one, I used the nursery colors and made the monogram, again cutting the letter using my Cricut Explore Air 2 and then made quilled "baby feet" and a rattle for the card. using a chipboard letter sticker to finish. 


For this one I used a navy paper layered with a vellum paper with silver dots. 

My husband is almost ready to stage a "quillervention" because I keep popping out of my craft room with new projects. Almost. Because he keeps claiming a few of them! 

Vintage Charm weekly party button
2