Showing posts with label Quilling. Show all posts

Monday, December 18, 2023

Paper Crafting: 2023 Christmas Cards


Now that I know my Christmas cards have been received and the Post Office hasn't sent me a cease and desist order, I can share the cards I made for friends and family this Christmas season. I previously shared the Hanukkah cards I made and said in that post that Mr.Chocolate thought I was nuts when I said I'd be quilling our cards this year. Here are the Christmas cards! I'm still old school and since cardmaking is my first crafting love, I love making them for those I love! 


Supplies:

  • 110lb Cardstock for Card Base (Recollections from Michaels)
  • Holiday Themed Papers (Michaels)
  • Coordinating glitter and Foil Papers (Recollections)
  • Coordinating Quilling Strips
  • Coordinating Sequins

I was on the lookout early for the Recollections holiday papers this year. Frosted Juniper and Glistening Snow are from this year. Black and White Winter is from last year. 

I'm consistent in my card construction:
  • Cut 110lb paper 7x10
  • Score
  • Cut chosen decorative papers in panels and layer
  • Attach focal 

I didn't take pictures of the quilling process ( I need to grow more arms and hands), I used a random approach and cut out the base tree shapes using my Cricut Explore and then just started making coils and swirls! 


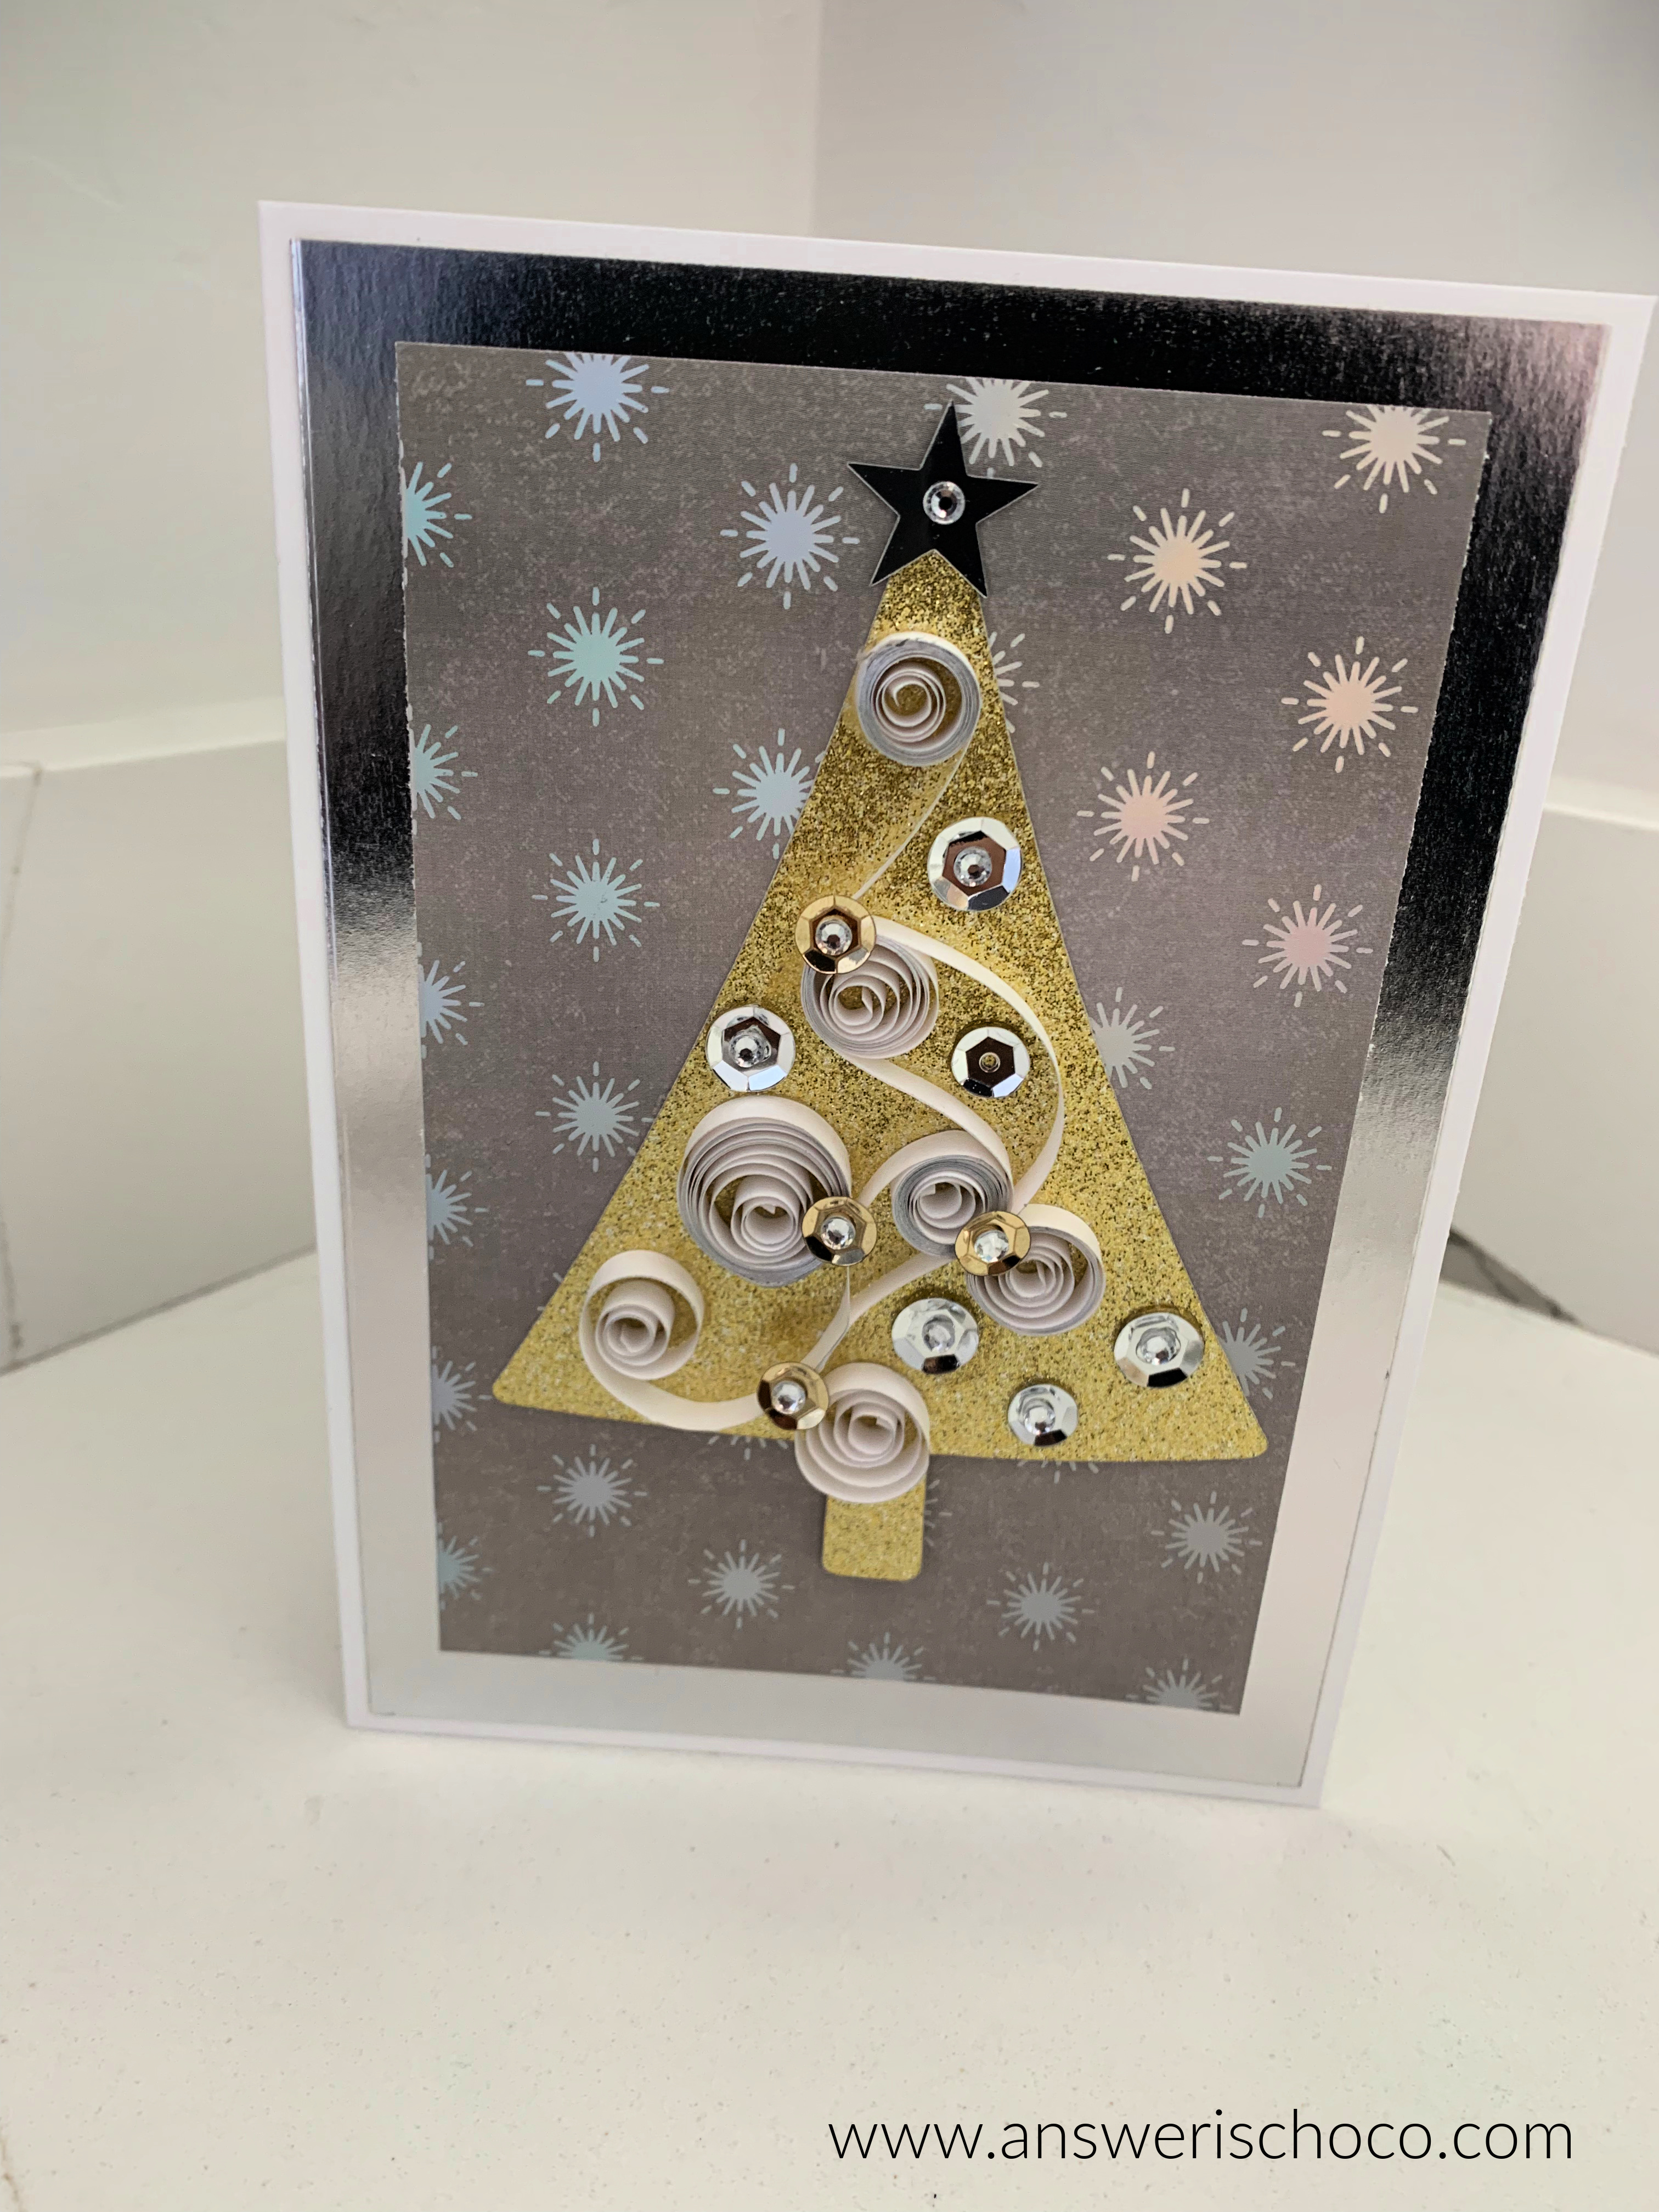
I like to make a few different versions of cards versus making the same card for everyone. Part of that is because I can never limit myself to one set of papers and another part is because I try to match cards to their recipients. For this set, I cut modern looking trees from gold glitter paper and used silver and gold edged quilling strips from Quilling.com and finished with mirror sequins and rhinestones.


I used the Frosted Juniper papers for others, matching the colors with green glitter trees and coils in blues, greens and whites, and then embellished with rhinestones and sequins.


I loved the Black and White Winter stack I got last year (so much so I bought another after Christmas!) and have a few friends who are black and white fans like me. 


For these I cut trees from glitter silver and white papers, and then used coordinating quilling papers. 


I get these ideas before thinking about mailing them and then wait with bated breath! 


Sharing At:


Wednesday, December 6, 2023

Papercrafting: Layered Letter Hanukkah Banner and Dreidel Card


Hanukkah begins tomorrow and I am honored to have a friend who appreciates my craftiness. I try to come up with something new each year and I realized I'd never made her a banner. So I did! It was easy to do using these amazing layered letters I was able to download for FREE (sign-up required) from Gjoa at Special Heart Studio.


Supplies:


I downloaded the file, imported into Cricut Design Space, and sized, then chose gold glitter, white, black, and blue glitter cardstock for the layers. Working from the bottom up, I attached the white layer to the gold base layer with foam squares, used a tape runner for the black, and second gold layers, then attached the blue (top) layer using spray adhesive. 


Here are the first three letters done! Once all of the letters are complete, assemble the banner using ribbon. I used Offray "Galena" Ribbon (Walmart) and strung the letters as shown, tying knots on the ends of the ribbon to prevent fraying. 


Of course, I had to make a card too! Hubs gave me the "she's off her nut" look when I told him I was quilling our holiday cards this year. Challenge accepted! I finished Hanukkah cards first, choosing a dreidel outline as the base. 


Then I selected coordinating colors from my quilling strips and just coiled away! I got so busy I neglected to take pictures but Pinterest and You Tube have TONS of how tos! You can check out my Quilling Board on Pinterest as well. 


I made one to go with this gift, and another for another friend whose family celebrates both Hanukkah and Christmas. I had this handmade star paper in my stash...the stash I save for special cards and it worked perfectly with the colors! To finish, I added gold sequins as shown using Glossy Accents dimensional glue. 

Wishing all those celebrating, Love, Lights, Latkes! 


Sharing At:

Saturday, October 24, 2020

Fall Decor: Striped and Quilled Dollar Tree Pumpkin Sign


Happy Saturday friends! This weeks BFF Open House link party continues here I'm continuing to work on some additions to my Fall decor for when I take Halloween down and excited to share this fun and I hope, elegant, sign with you today!

Supplies: 
  • Wood Pumpkin Sign ( Dollar Tree)
  • Acrylic Paints (White Craftsmart and Light Gold Metallic Martha Stewart)
  • Cream Cardstock
  • Quilling Papers (White and White With Gold Edge)
  • Aleene's Turbo Tacky Glue and White Glue (Elmer's)
  • White Satin Ribbon
  • Hot Glue Gun and Glue

When I was at Dollar Tree last month getting some goodies for Halloween, I picked up this plain wood sign. They have different ones seasonally ( I may or may not have picked up some Christmas ones since). As I talked about in a previous post, I started Quilling this year and decided to incorporate that into this project. 


I covered the sign with a couple coats of the white paint. Then, using the crackle technique I showed in my Witch Switch Girlfriend Gifts, covered with a layer of Elmer's glue and the light gold paint. 

Apply glue, then contrast color, crackles as it dries


After my crackle layer was dry, I taped off the stripes with painter's tape then used more of the white paint to make the stripes. 


While the stripes were drying, I made my leaves by first cutting them using my Cricut Explore Air 2 with cream lightweight cardstock and chose my Quilling papers: plain white and white with a gold edge. 


I went around the outline of the leaves with the white paper (you can see this process in my Quilled Sugar Skulls post  using the Aleene's Turbo Tacky glue and then used the gold edged Quilling strips (Quilling.com) to create swirls and coils. When complete, used hot glue to adhere them to the sign. 


To finish, I made a  bow from white satin ribbon. Et, voila!


Monday, August 17, 2020

Quillermania Continues: Monogrammed Letters


I recently made three different gifts for three different friends. As my quilling mania continues, this time I made coordinating gifts and cards. 


Left to right: A monogram for a friend's daughter who recently moved into her first post-college home. Her initial done in colors to match her bedroom.  Middle: A gift for a friend in her furbaby's colors. Right: A monogram for one of my BFFs daughter in her brand new son's initial. 


For this one I used this fun bow themed background paper, cut the letter using my Cricut, and then quilled in colors to match her bedroom.  For the card I made to go with, I stuck w/ the same color theme but did a dog paw for her furbaby. 


I used the same background paper for the paw card and then coordinating quilling strips for the paw. 


For the paw hoop, I used a bone print background paper and then used different shades of brown to make the paw. Did the reverse as the hoop above and did the paw print here and the monogram of the furbaby's initial on the card. 


For the last one, I used the nursery colors and made the monogram, again cutting the letter using my Cricut Explore Air 2 and then made quilled "baby feet" and a rattle for the card. using a chipboard letter sticker to finish. 


For this one I used a navy paper layered with a vellum paper with silver dots. 

My husband is almost ready to stage a "quillervention" because I keep popping out of my craft room with new projects. Almost. Because he keeps claiming a few of them! 

Vintage Charm weekly party button
2

Monday, August 10, 2020

Quilled Cupcake Birthday Card Tutorial


One thing I was excited about when I started my Quilling journey was the ability to incorporate it into my cardmaking. I'm so happy with how this card came out, inspired by some fabulous papers I found at JoAnn. 

Supplies: 
  • Pebbles Double Sided Scrapbooking Paper (JoAnn)
  • Cardstock ( 110 lb)
  • Coredinations Glitter Scrapbook Paper (JoAnn)
  • Juya Quilling Paper Strips
  • Quilling Tool
  • Glue (Aleene's Turbo Tacky, Elmer's)
  • Paper Trimmer
  • Tape Gun

JoAnn recently had a mega sale on scrapbook paper. I couldn't resist these at $.19 each!! Hello my name is Carol and I have a paper problem. 


They're double sided so it's like two, two, two papers in one. My older followers will get that joke. 


TIP: 
In learning Quilling, I've watched different videos on how to outline an image but the thing that works the easiest and best for me is to cut the image I want to outline using my Cricut Explore Air 2. My trick that I think I invented but who knows, is to cut two of the image, layer on top of each other with a thin foam tape, which gives some depth to make it easier to go around it with the Quilling paper. 


I went around the image with the light acqua strip, then made a cupcake liner design with pink. Another TIP: I do these atop wax paper since the glue doesn't stick. Wax paper is inexpensive ( OK cheap!) and a little will go a long way. 


Once my image was outlined, I did a bunch ( technical term) of brown open coils and some darker pink tight coils for the "frosting", and then yellow, acqua, and cream to fill in the wrapper. 


As the focal image was drying, I made the actual card. Simple 5x7 card, and alternating layered panels of the acqua glitter paper and the cupcake paper. 


I use the Aleene's Turbo Tacky Glue for the outline and to fill large spaces and the Elmer's in the fine tipped bottle for detail, small spaces. 

To finish, I made a small coil of red for the cherry on top !


Since the friend this is for lives in another state and we can't enjoy a real cupcake, this will have to do!