Thursday, October 29, 2015

Boo FF Open House Link Party #230

The Answer Is Chocolate

Happy Hallo-weekend! Hopefully you're all stocked up on candy ( and have some left to give out lol) and costumes are close to done. There were some great ideas shared at last week's party. Here are a few.


Let's start with this Cameo Votive from Much More Creative. LOVE the purple and black combo !


I think these clay candleholders ( because Halloween just screams candles doesn't it) would look great mixed in. Visit My Very Educated Mother to see the tutorial. 


You don't normally think champagne for Halloween but Yankee Smart Ass has a devilishly delicious cocktail. 


And all treat, no tricks here with this week's chocolate feature. Boston Creme Pie Cupcakes from In Our Castle. YUM! 

Now on to this week's party !


Monday, October 26, 2015

Happy Hallow-Week! Bone Yard and Franken Family Oreos

Pic Monkey Fun! 

I don't think I will ever out grow Halloween much to Mr. Chocolate's chagrin. Even with Grad School Boy out of the house, and exactly 0 trick or treaters last year, I can't help myself! 

I'm also not sure when GSB will stop getting holiday care packages. I thought "oh once he's out of college" but Noooooo.  

I've done all kinds of dipped Oreos over the years and this year's no exception. This time...acid green candy melts and Frankestein themed sugar decorations.  I didn't take pictures of the process because you can find the how to's all over Pinterest but here are my goodies! 


For these I covered completely in acid green candy melts and then put a candy  Papa Frankenstein, Mama Frankenstein, Baby Frank and Franken Pooch on top! The package also came with Cats and Bats. I love these things because they are so detailed and so easy ( but you don't tell people that of course!)


The rest of the cookies are a boneyard theme , just 1/2  dipped in the candy melts and sprinkled with black sugar and white sugar bones. All products are Wilton. I got mine at Michaels and Target. 

I packaged them up in cello bags along  with some Dove eyeball candies, and the rest of the goodie box contains a scarf for the cold weather he will not be used to this winter, two pounds of coffee, and of course more candy as filler! 


For some extra fun I decorated the inner flaps of the box with some Halloween scrapbook paper.  I had to include a card....cut out the "BOO" bat with my Silhouette, glittered it and mounted as shown. 


 Your kids may grow up but you will always be a mom right? 


Thursday, October 22, 2015

BFF Open House #229

The Answer Is Chocolate

Crunch time people! One week until Halloween! Did I scare you :) 

Here are some features from last week's party...still time! 


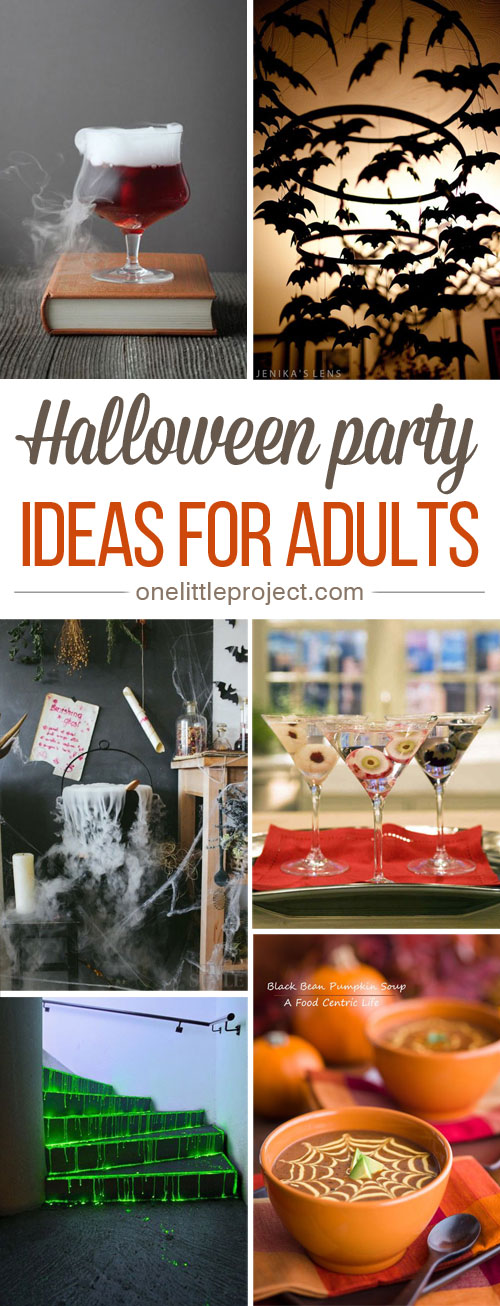
Adults love Halloween too. Sometimes I think more than the kids do. One Little Project has an AMAZING collection of party ideas for grownups! 


Want a more sophisticated pumpkin look for a thrifty price ( I'm NOT looking at you Pottery Barn)? How about combining metallic paint and chalkboard like Engineer Mommy did to transform a Dollar Store pumpkin? 


Transform plain muslin bags into fun ( or personalized) treat bags. Loving these from Much More Creative. She made her own but you can pick up plain muslin or canvas bags from lots of places. These have so many possibilities!


This week's chocolate feature is actually not from the party but one I want to try that I found at Kraft. How about a sludgy chocolate martini? The glasses are rimmed with crushed Oreos! Yum.

Now on to this week's party! 


Monday, October 19, 2015

Creepy Bride and Groom Silhouettes: Easy Vinyl Project


I get teased by my family for picking things up without a plan in mind...I can't imagine any crafter who doesn't experience this!  Maybe not the teasing but the picking up items without a plan. Or, the teasing. 

During the Summer I picked up a pack of metallic painted canvases at Michaels for 70% off. Two gold and two silver 8x8 originally 9.99 that I got for 2.99!  When I saw these creepy silhouettes in the ( no pun intended) Silhouette Online Store I knew what I wanted to do with my steal deal  canvases. 

This is such an easy project I didn't take pictures of the process because it's as easy as : 

  • Download images ($.99 each)
  • Size, cut with your Silhouette ( I have a Cameo) 
  • Apply to already painted canvas
  • Embellish
To embellish them I used metallic self adhesive rhinestones and washi tape. Easy Peasy


Thursday, October 15, 2015

BFF Open House #228

The Answer Is Chocolate

Hi all! The countdown to Halloween is upon us....two weeks from Saturday! Here are some ideas from last week's party that are not too late to whip up! 


Love these spooky display pedestals from Much More Creative.  You need to see how Brenda pulled a bunch of thrifted pieces together to create these. 


Pick up some pumpkins from the Dollar store, add some paint and some googly eyes and you have a Spooky Topiary. Engineer Mommy shows you how. 


Linda from Paper Seedlings showed how to make a fun Halloween card using something you'd never guess. Have to visit to find out! 


Finally this week's chocolate feature which comes from Anne at Upstate Ramblings. The secret ingredient? Pecan Pie M&Ms! Who knew they even existed? 

Now on to this week's party !


Monday, October 12, 2015

Creepy Crackled and Foiled Skulls


I had a lot of fun making these creepy crackly skulls for my mantle. They are so easy to do and look like they took a lot more work than they actually did. 

Supplies Needed: 
  • Ceramic Skull ( Mine was from Oriental Trading Company)
  • Black Acrylic Paint ( I used Craft Smart from Michaels)
  • Gold Acrylic Paint ( I used Martha Stewart Yellow Gold Metallic) 
  • White Glue ( I love back to school supply shopping for this craft staple)
  • Gold Leaf ( I used Simple Leaf by Mona Lisa available where fine art supplies are sold)  

Paint your skull gold ( or whatever base color you've chosen. 

When your skulls are dry, paint a coat of white glue over them. . 

When glue is still tacky but not dry ( temp and humidity make this hard to time so just keep an eye on things) paint over with the gold paint. Watch the crackle magic happen. You can hasten the effect with a blow dryer but the longer the paints cure, the more crackling you'll see. 

Optional: Improvise words to Rolling Stones "Paint it Black" and sing while you paint ie "I see a gold skull and I want it painted black" .  Or not :)


Metal leafing intimidates a lot of people but it shouldn't. It's easy ( messy at times!) but the effect is so worth it.  Follow the instructions on the leafing package. I usually use the leaf sizing glue but I was out. Mod Podge to the rescue. Just dabbed it on randomly where I want the leafing , applied the leafing by laying it over the glue and using pressing down w/ my fingers. I used a dry paint brush to brush away the excess and went on to the next spot. 

And Voila


After I was done I used some of the scrap leafing to highlight raised portions of the skull like the teeth, eye sockets etc. 


Sharing At 


Thursday, October 8, 2015

Tuesday, October 6, 2015

Haunted Halloween Mantle and Halloween Spooktacular Giveaway from Oriental Trading Company


Surprise! It’s been a while since I’ve posted any projects but I’m excited to share my Haunted Mantle with you. (Disclosure, products for this post were provided to me by Oriental Trading Company) .

I’m sharing the overall mantle and in the coming days will share some tutorials of projects in this post.

I’ve been moving to a more gothic spooky look and when I saw these DIY ceramic skulls from OTC. I painted, crackled and gold leafed these for an elegant but spooky look.


To enhance the spookiness, I turned a large vase upside down and placed one of the skulls under it like a specimen in a lab.

I fell in love with this silver glitter fabric the minute I saw it and it was the perfect thing to simulate a magical spider web. I covered the mirror on my mantle with it and I wove more  of it on a side table.


I covered plain DIY wood photo blocks with paint, gold duct tape and scrapbook paper from a Poison Paper Pack  to make holders for signs to go with my spooky vignette.


Now here’s the best part of this post. Oriental Trading Company is having a weekly giveaway through October 17 with a chance to win $250 in Halloween products! They're also giving away a $25 gift card DAILY! Between craft and party supplies and Halloween decorations, think what kind of a party you could throw! Here's how to enter:

Spooktacular Giveaway from Oriental Trading
Visit www.spooktaculargiveaway.com today and enter to win their weekly prize -- $250 in Halloween products of your choice from Oriental Trading. Plus, they’re giving away a $25 Oriental Trading gift card every day! Contest ends October 17, 2015.


Thursday, October 1, 2015

BFF Open House #226 Happy October!

The Answer Is Chocolate

Friends,

I debated about going ahead and posting this week's party in light of today's awful events in Oregon. My thoughts are with the families going through the unspeakable.

Since I'd already let those being featured know they were, I'm going to go ahead and post the party but I understand if this week's traffic is light.

Peace. Love. Chocolate.

Here are some features from last week's party! 


Let's start with this layered frame chalkboard Scarecrow project from Much More Creative. Brenda shows how she layered and vintaged up the concentric frames. This would make a fun menu board too wouldn't it? 


While Fall is full of rich vibrant colors, and I love them, I also love the muted colors found in nature this time of year. Penny from Penny's Vintage Home has some absolutely gorgeous ideas! 


Mason Jars are still so popular and Engineer Mommy has a great idea to incorporate them into Fall and Halloween decorating with this Mason Jar Jack O'Lantern. 


To finish things off how about some Snickers Cannoli from Woods of Bell Trees? Yes please! 

Now on to this week's party.