Showing posts with label Black and White. Show all posts

Monday, July 25, 2022

Home Decor: DIY Black White and Silver Wall Art


I've been having more fun with DIY Wall Art and exploring modern looks. The first piece I showed was for our second bathroom and this one is as well. The bathroom is a "Jack and Jill" with two entrances, but it's also split into two sides. The first side that I showed here has the vanity, sink, and cabinets. The other side has the toilet, shower, tub with black and white subway tiles which is what influenced this piece. 

Supplies: 
  • Wood Art Board 11x14
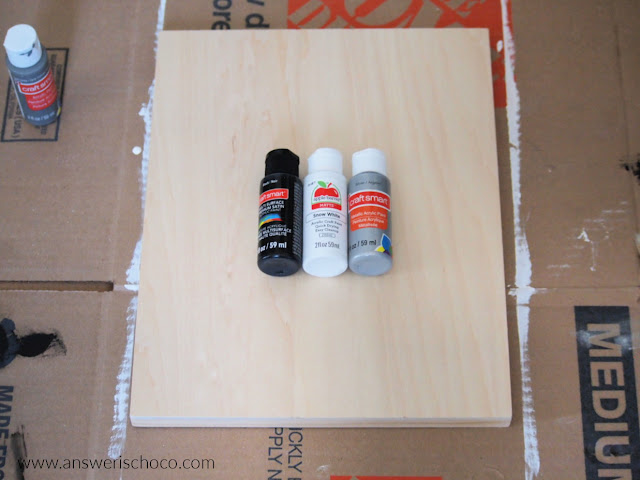
  • Acrylic Paints
  • Paint Scraper and Brushes

I bought a bunch of these wood art boards at Target when they were on clearance so I had them in my stash. You can get similar at Blick Art and I've also seen them at Michaels and JoAnn.  To start, I covered the board with a couple of coats of white paint (Apple Barrel Snow White).


For this, I didn't want any of the wood bleeding through so I made sure to get a good opaque coverage. After that, I placed black paint (Craftsmart) dotted in a grid pattern, then used a paint scraper to rough out a rectangle. 


It doesn't matter if the grid is straight because you can even it out with the paint scraper and brush and it doesn't have to be perfect. Once dry, repeat the same process for however many other sections you want to do. 


To finish, I once again used a black paint pen to outline and draw some squiggles. There's no right or wrong. Just what you like. 


I think it picks up the tiles perfectly and also works with the shower curtain we put up! 


The black and white ties together with the black and white from the other piece on the other side of the bathroom. 


Sharing At: 


Tuesday, October 1, 2019

Black and White Wickedy Witch Wreath


Happy October! Yikes. But here we are. I actually had time to make something this weekend and had so much fun with it. Super easy and inexpensive and I'm really happy with it!

Supplies: 
  • Wire Wreath Form ( Dollar Tree)
  • Recycled Packaging ( See below for description)
  • Tulle (on hand)
  • Ribbon ( Michaels 40% off, 2 rolls)
  • Halloween Picks (Michaels 40-60% off)
  • Hot Glue / Glue Gun

Don't ask me how my brain works. My family has tried and failed. It just does what it does, which is how I came up with the idea to use this "packaging stuff" that's used to protect things in shipping to pad my wreath which my brain decided needed to be done. That's it. I had a wire wreath form on hand from Dollar Tree and thought just wrapping it in ribbon the frame might show through so wanted to pad it before wrapping it in ribbon. 


I cut it in strips and then wrapped and glued it to the frame w/ hot glue. WARNING: I used to have a fancy glue gun then it broke and I've been using a really cheap little "one temp" one. You might want to use "low temp" if you use this material because it can melt. I recovered and kept at it but you've been warned!


Wrap and glue, wrap and glue, wrap and glue watch "SVU". 


I ended up not wrapping the whole thing because a couple of burned fingertips makes you lazy and I also figured that where I was going to put "stuff" didn't need to be padded.  You can see the difference it made though and I do like the padded part which is the exposed part of the wreath. Wrap with ribbon et voila. 


Once my wreath was ribbon wrapped ( say that three times fast) I made a six-loop bow from black tulle, tied the ends around the wreath, and secured with a couple of dots of hot glue. Using the second roll of ribbon, I made an eight-loop bow and glued down to the wreath. 

Then, assuming your puppy hasn't run off with your witch leg pick, remove the stems from the hat and legs and glue down and you're done. 


Sharing At:


Monday, September 19, 2016

2016 Halloween: Gothic Pumpkin


I am working on some Halloween decorating and projects and whipped up a couple of fun faux pumpkins this weekend. Not showing the whole table on which these are displayed yet since that will be part of an upcoming sponsored post! 

This is an easy peasy project so I didn't take a lot of step by step pics. 

Supplies and Steps: 
  • Faux pumpkin (small) ($9.99 ea less 60% sale)
  • Glittered leaf bush ($4.99 lesss 50%)
  • Glass Knob (Clearance $.50...yes fifty cents)
  • Scrapbook Paper in gold metallic ($.10 on one of their 10 for $1 sales)
  • Paper Roses (stash)
  • Hot glue / glue gun
With the exception of the paper roses which I had on hand, all other supplies are from Michaels, and of course all supplies were on sale! Total cost to make two pumpkins was $10, or the regular price of one pumpkin.


Faux white pumpkin, glitter leaf bush, glass knob, messy desk


Make 6 rolled paper roses from the gold scrapbook paper, set aside. I used 3 per pumpkin. Pinterest has tons of tutorials on how to make these.  

Cut 6 leaves per pumpkin from the bush, hot glue to the pumpkin making a kind of crown. I did 4 (North, South, East, West) and then layered the remaining 2. 


I thought these glass knobs were awesome at $1.50 when they first came in but wasn't sure what I'd use them for. When I saw them for $.50 I bought several. I'd come up with something! 

Start a hole in the pumpkin stem and then screw in the glass knob. Hot glue three of the rolled roses to the stem and fill in any spaces with the paper roses and voila. 


Sharing At:

Sunday, December 13, 2015

Christmas Mantle : Black and White Tree Makeover


I made over my mantle decorations this year, going with a black , white and gold theme w/ accents of red. 


Waste not want not so I try to repurpose pieces I already have which is what I did with these black and white felt trees. They used to be these from a few years ago: 

Tinsel Tree With Topper

which were fun and I still liked them but was tired of them. 


I'd pinned the tinsel to the tree ( see thinking ahead to when I might want to rip them apart!) so removing it was easy. I created a pattern for my felt freehand on a piece of scrap paper and then cut out a bunch of shapes in black and white felt. I started off counting them. That ended quickly. 


These trees are a little more permanent since I hot glued the felt pieces to the styrofoam cone.  Working from the bottom up, glue one color around the cone then offset your pieces and glue the next color around the cone. Continue until your cone is covered. 


Slightly more work than the tinsel trees but only slightly. 


They fit right in on my mantle with a black and white Father Christmas I painted years ago, and my mantle focal of a chalkboard sign I also  made this year. 


The chalkboard sign was made from a pre-cut piece of plywood from Home Depot, painted with chalkboard paint  and bordered with gold glitter paint ( Martha Stewart). 


The right side of the mantle contains a large vase filled with pinecones I've picked up on walks, birch and glittered branches left over from my Thanksgiving mantle and filled in with silver and gold balls. 

Vintage bottle brush and live  mini cedar trees in antique cordial glasses finish out the mantle along with collectible ornaments. 

Wednesday, January 7, 2015

Birthday Cards in Black and White and Gold


DCWV Decor Noir Stack Cards

It’s no secret to anyone who’s read my blog that I LOVE black and white. Clothes, decor, photography…pretty much everything. So when I stumbled across this paper stack from DCWV while at Michaels recently, there was no doubt about whether to get it. It’s appropriately entitled “Decor Noir”. I couldn’t wait to get started with it and luckily I had three birthday cards to make for whom this color palette was perfect.

DCWV Decor Noir Stack

The black and white alone was enough for me but they added gold foil to many of the pages ! GOLD FOIL and black and white. Could I get any happier? Only if the pages were chocolate. I chose two papers to start. One with white mums that’s featured on the stack cover and has flecks of gold foil ramdomly placed and the other a distressed black background with gold foil dots.

For the first card I cut out a sentiment from a page of well, sentiments, trimmed and matted with black and gold papers. The papers in this stack are so elegant that I resisted my natural urge to embellish and went with less is more letting the papers speak for themselves.

DCWV Decor Noir Beautiful Card

The only embellishment I added was the piece of ribbon at the corner to which I added some gold glitter glue.

DCWV Decor Noir Black and Gold

The black and gold dotted paper has the sentiment “Count your blessings each and every day” on the page in the lower right corner. I cut that out and matted with gold and black papers. I used a scrap from another stack to make the striped ribbon and layered it with a piece of the polka dot paper.

DCWV Decor Noir Mums and Dots

For the last card, I combined both sheets of paper from the stack and stamped the sentiment on black paper and heat embossed with gold powder.

DCWV Decor Noir Cards

I love them in color or in black and white photos!

DCWV Decor Noir Stack Cards

Sharing At:

Tuesday, February 4, 2014

21: Vegas Style Birthday Card

Red White and Black Birthday

My BFF and I have done everything together including getting married and then a few years later, having kids within days of each other. We even went to the same Ob/Gyn and delivered in the same hospital. So 10 days after celebrating my baby’s 21st, it was time to celebrate her baby’s 21st.

Since she’ll be celebrating in Vegas, I wanted the card to match so when I saw dice brads at Impress I had to get them and based the card around them.
Black and White 21

I went with a red / white / black scheme to play off of the roulette wheel. Used Canvas Corp diamond patterned paper , layered with an embossed panel using a Cuttlebug embossing folder with a crown at the top.
Black and White Checker

I used my Cricut Expression to cut the numbers 21 out of the diamond patterned paper and layered them with foam dots ( cut 2 sets for each number) and added some glittered gold paper and ribbon to give the card some glitz.  Layered the dice brads onto black and gold papers and embellished the crown with gold rhinestones.

I hope the birthday girl has a great time!

Tuesday, October 9, 2012

Vampire Coffin Boxes

Vampire Coffin Boxes

I know a couple of people who love all things Vampire. Even though I’m not that into them, Vampires do give me an excuse to play with my signature colors: black and white. And what’s a Vampire without a little red?
P9256489

Started with one of these from Michaels. Painted the sides with Martha Stewart red craft paint, over which I painted Martha's  red glitter paint.

Vampire Coffin

Mod Podged a black and white patterned paper to the top and bottom and then went around the edges with some black and white washi tape.

Do your family members send you random things when they clean out their junk drawers? Mine do. The Mumster sent me a bag of keys. I don’t know that Vampires use keys but they seemed to fit. I also used some keyholes from a pack by Tim Holtz . 

Vampire Coffin Closeup

Embellished the top with red rhinestones and black pearls. Vampires have to be glam right?

Vampire Boxes

Since they sleep during the day, do they say “day day” instead of “night night”?

Sharing At: