- Wood Art Boards (I used 11x14 and 8x10)
- Acrylic Paint
- Chinese Zodiac Images (Designbundles)
- Vinyl (Cricut Glossy Black)
- Cutting Machine (I used my Cricut Explore Air 2)
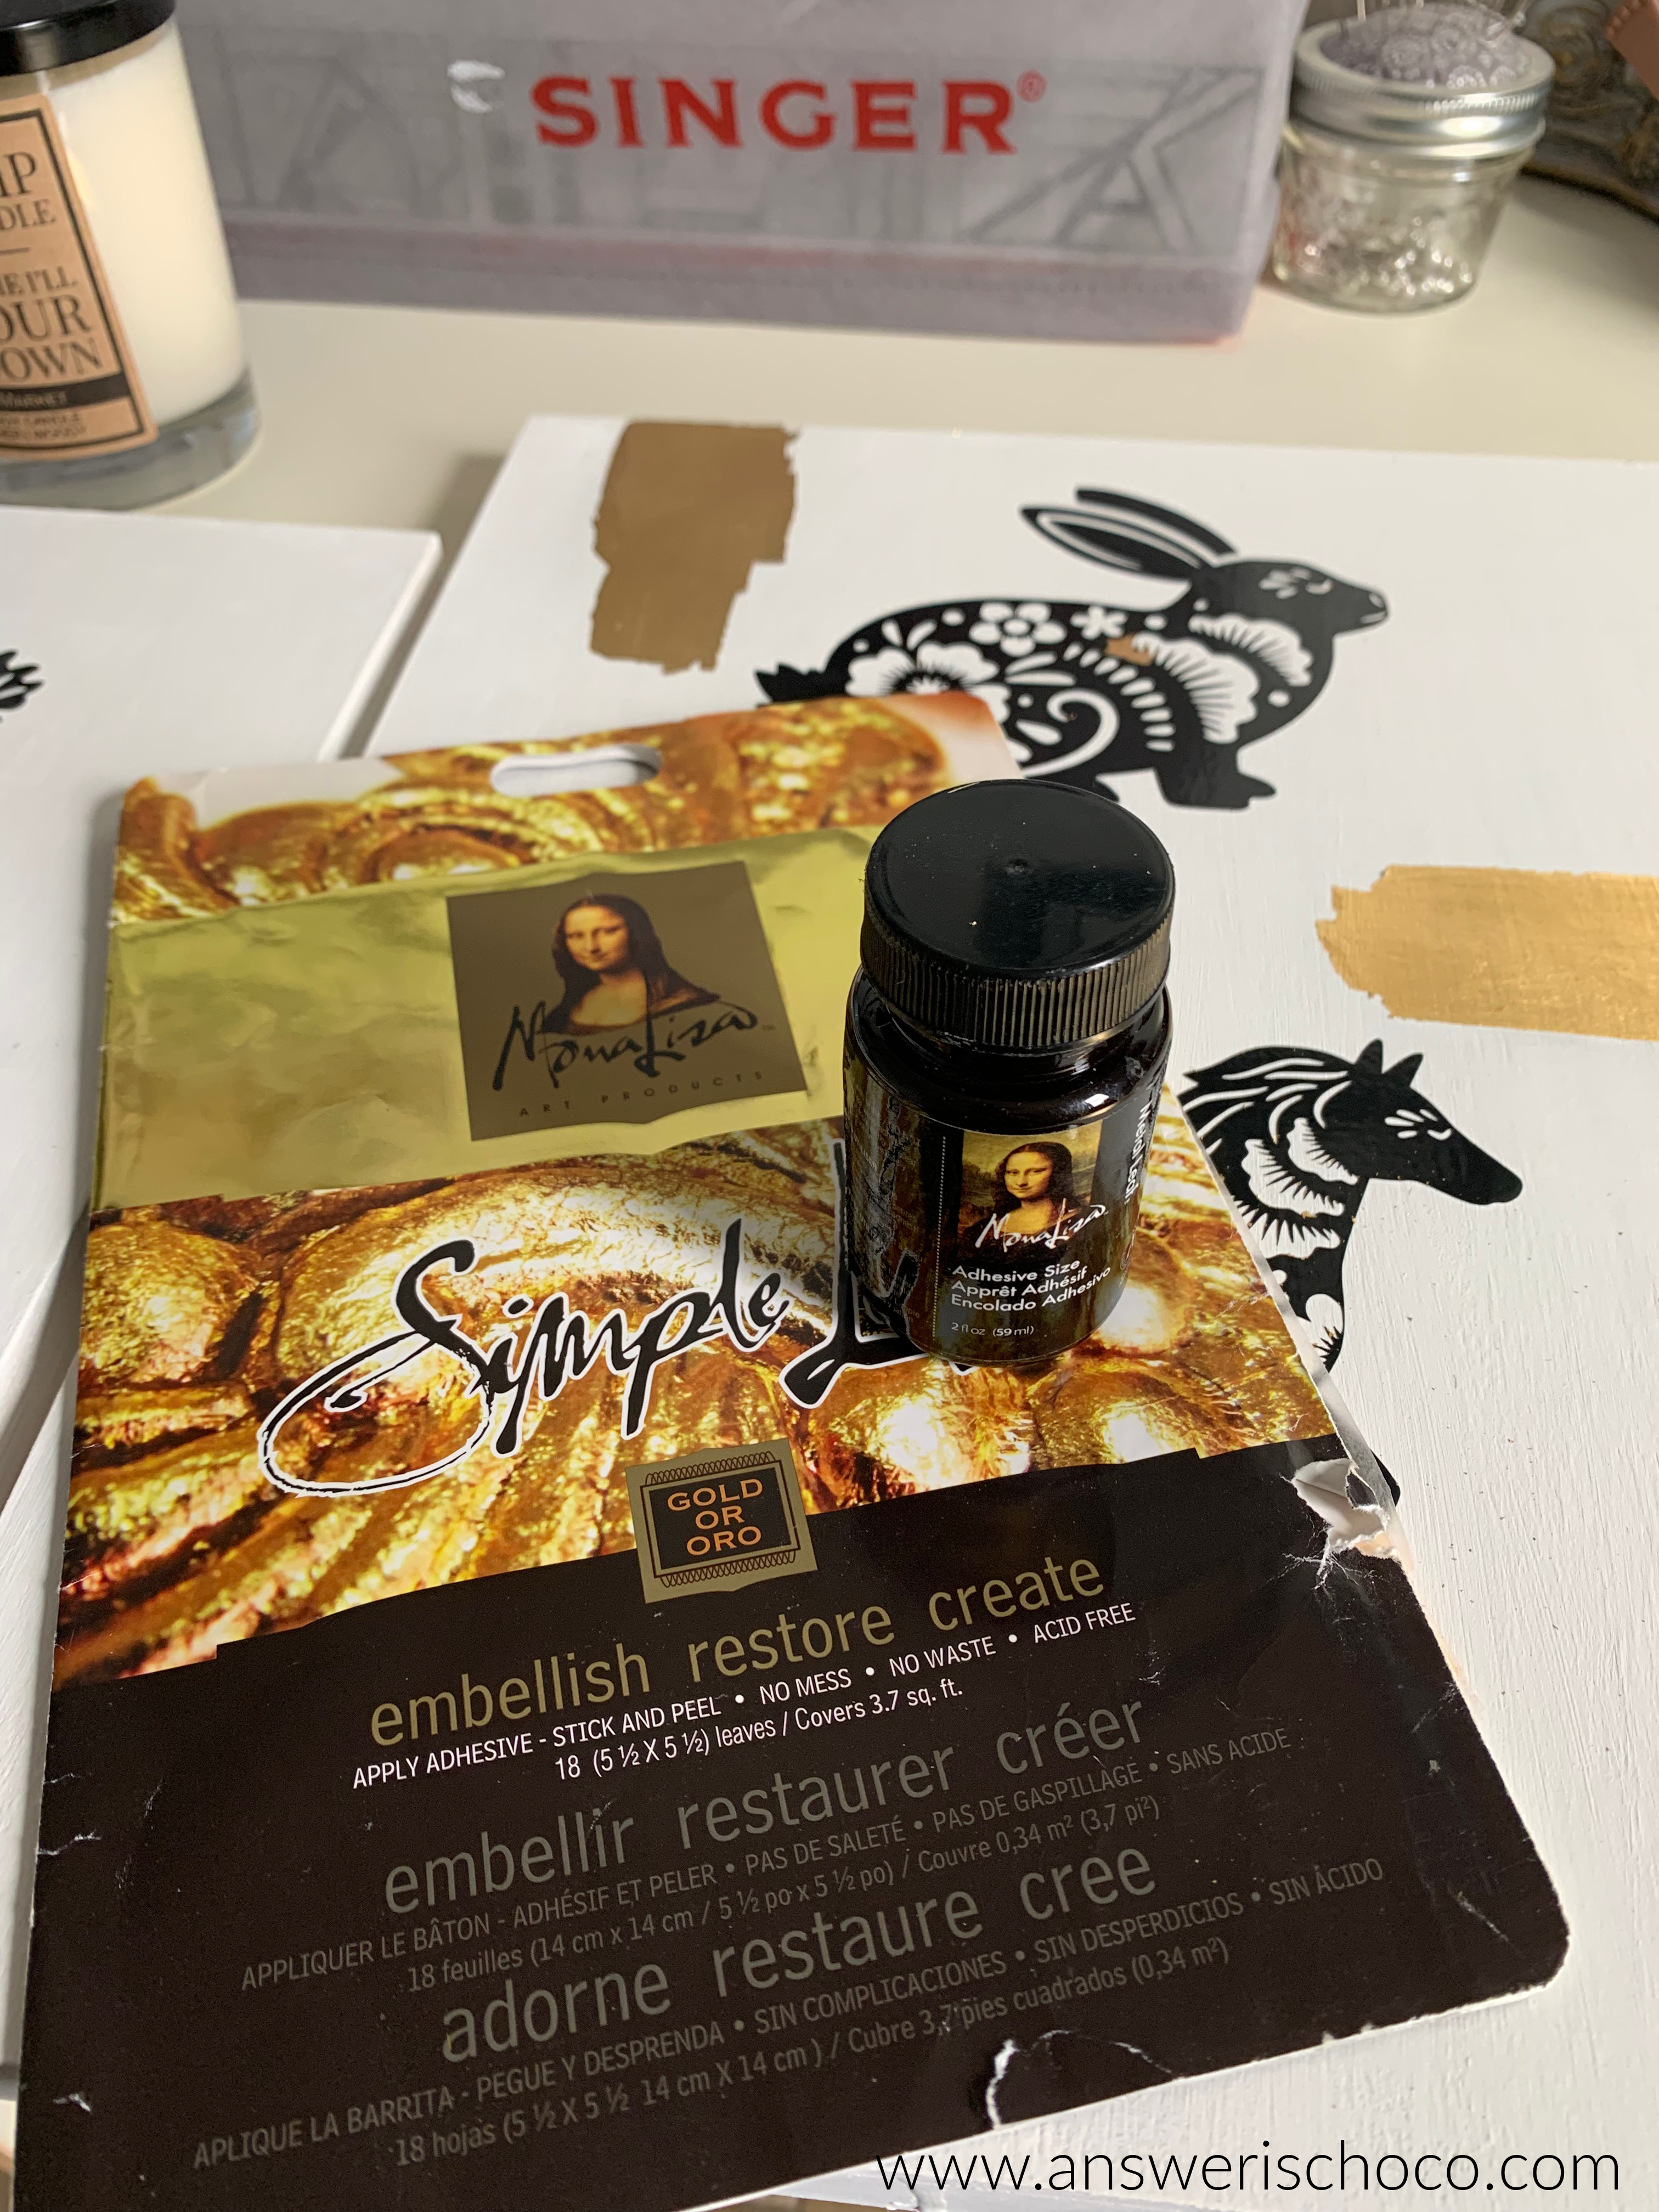
- Gold Leaf Adhesive and Gold Leaf (I used Mona Lisa)
Finally found a few minutes to make something, my first real project of 2022. I saw a sign with this sentiment in an office and knew immediately I needed to make something with the sentiment. It doesn't always feel like this is true, but if not "everything" I think almost everything is "figureoutable".
Supplies:
I bought a bunch of these art boards sometime last year when they were on clearance at Target. Art Stores and Craft Stores sell similar. This is a simple project that requires only a little paint and some vinyl. I used Oracal silver, Black CraftSmart acrylic paint, and Cricut Transfer Tape.
The first thing I did was paint my board, sides and front.
I used a Design Space font called "Annie Leu" and sized to fit my board.
Weed the vinyl and then cut a piece of transfer tape to match the size.
When I first started working with vinyl ( and I am still FAR from a pro at it ) I was afraid to play with placement fearing it was going to stick and when I placed it it had to be perfect the first time. If your surface is truly dry ( eg paint ) you can lightly lay it on top and still be able to re-position it. I got it to where I was satisfied and then used my scraper tool to apply the needed pressure for the vinyl to stick.
And done! On dark surfaces, I wipe with a dry cloth when done just to remove any smudges from applying the transfer tape. The wall I have it on doesn't allow for room to take a head on pic but I'm very happy with it!
Easy Peasy!
NOTE: This project assumes a digital cutting machine and familiarity with applying vinyl but you could use a die cutter to cut the images or cut images using an X-Acto knife.
The ornaments come 18 pieces to a package. Regular price is $9.99 w/out sale or coupon. I used Cricut Glitter Vinyl and a metallic turquoise vinyl I had in my stash. The images I used were various ones I had in my collection.
First step is to size your images to fit the ornaments. These are 3 inches in diameter so you want to size your image slightly smaller. Then cut and weed your vinyl. Set aside and prepare your surface.
I used glass cleaner and paper towels but you could also use alcohol to clean them. You want to make sure you remove any residue plus you want a clean surface! Then apply the transfer tape and apply your image to the ornament.
Once you've positioned your vinyl then use your scraping tool to apply. Remove transfer tape. Now it's time to embellish!
I added some iridescent rhinestones to the trees on these, and some black ones on the gnome.
I picked up these cute snowmen beads at JoAnn's when they were having a great sale. They were perfect for the turquoise. I also found these snowflake ornament hangers at Walmart. I wish I'd bought more! I strung the bead onto a head pin, closed, then used a large jump ring to attach the ornament hanger to the ornament and a smaller jump ring to attach the bead. Same process for the others shown using coordinating beads.
And there you are!
I have been running so sweaty my whole life
Urgent for a finish line
And I have been missing the rapture this whole time of being forever
incomplete
Happy Crunch Time Makers! I hope you all had a wonderful Thanksgiving and now we are full speed ahead towards the December holidays! I've been having such fun Elfing in my workshop and once I get a few things off in the mail can share some more projects but I can share a few things I've made to show our appreciation to some of our local favorites. This year with the pandemic especially, I am passionate about being grateful and showing appreciation to people who've been there and kept us going.
I'm also going to share my latest obsession...making Quatrefoil Tile Ornaments. I know these have been popular this season and I too am hooked!
Like so many, we've limited our eating out because of COVID but we have a local place that offers to go or outside dining. It's been important to us since we live in a small town to support local businesses so this set is for our fave little place called The Grotto Cafe which is part of an art enclave called The Red Truck Trading Company so you can see the obvious theme here!
We also have a local coffee roastery called ROC2 or Roastery of Cave Creek where my husband gets his coffee beans. They do all of their roasting on site and small town living being what it is, they even use an honor system for their coffee locker. You pick up your beans and slide your money through the slot!
Being a Seattle girl, Starbucks is in my blood. Literally. If you cut me, I will bleed a non-fat iced mocha, no whip. So while not a local company, my local go to location has the nicest baristas who always have my mobile order ready and are always so cheerful!
Apply transfer tape and position on the tile before you use your scraper to apply pressure to ensure the vinyl transfers.
There are many ideas of how to apply hangers to these tiles. I remembered too late that I had some flat bails in my jewelry making supplies which would work or you can use wire or as I did, ribbon. I've read some tutorials of people who drilled holes through them but you need special drill bits etc. and I didn't want to deal w/ that! I also didn't finish the backs of my tiles. I thought I was going to but when the netting came off easily and the back wasn't messy looking, I skipped it. Others have painted, applied vinyl or felt to the back.
I cut a length of 1/8" ribbon and hot glued to the center of the tile as shown. Then using another piece of ribbon (the black ribbon shown below), placed a dab of glue on the front of the tile, wrapped it around to the back and glued down. To finish, I made a ribbon bow and hot glued to the front.