Showing posts with label Ornaments. Show all posts

Monday, December 6, 2021

Christmas: DIY Acrylic Ornaments


I had so much fun with these easy to make ornaments! I found these plain acrylic disc ornaments at Michaels and they were a must get! They can be painted, papered, or as shown here, are the perfect surface for vinyl. 

Supplies:
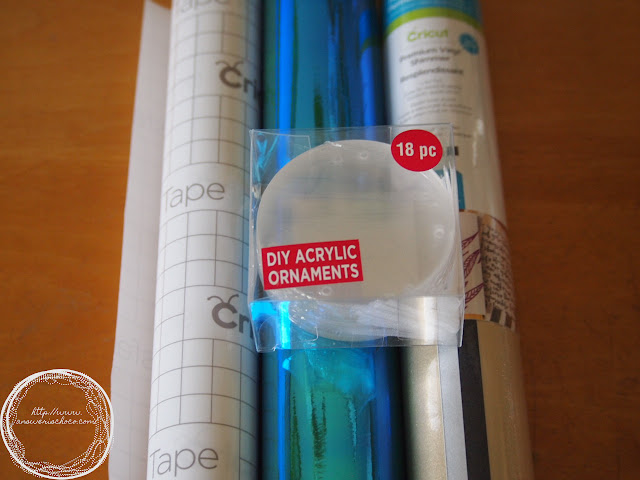
  • Acrylic Disc Ornaments (Michaels)
  • Assorted Vinyl and Transfer Tape
  • Assorted Beads
  • Snowflake Ornament Hooks (Walmart)
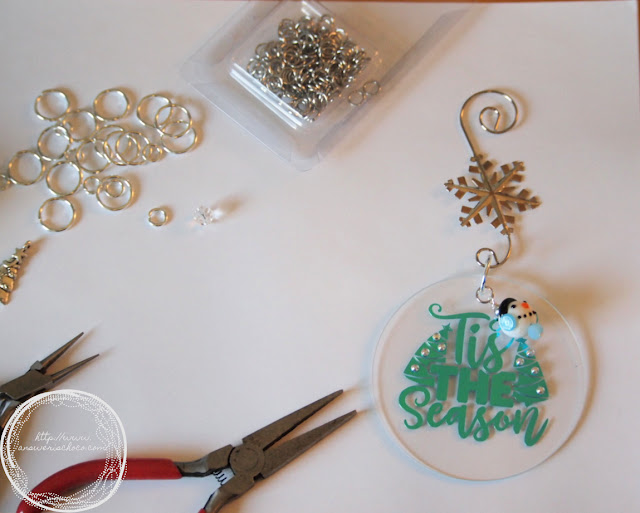
  • Misc Jewelry Supplies (Jump Rings, Head Pins, Pliers)
  • Design
  • Digital Cutter (Cricut, Silhouette, etc. )


NOTE: This project assumes a digital cutting machine and familiarity with applying vinyl but you could use a die cutter to cut the images or cut images using an X-Acto knife. 


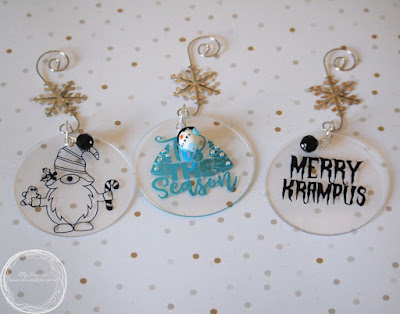
The ornaments come 18 pieces to a package. Regular price is $9.99 w/out sale or coupon. I used Cricut Glitter Vinyl and a metallic turquoise vinyl I had in my stash. The images I used were various ones I had in my collection. 

First step is to size your images to fit the ornaments. These are 3 inches in diameter so you want to size your image slightly smaller. Then cut and weed your vinyl. Set aside and prepare your surface. 


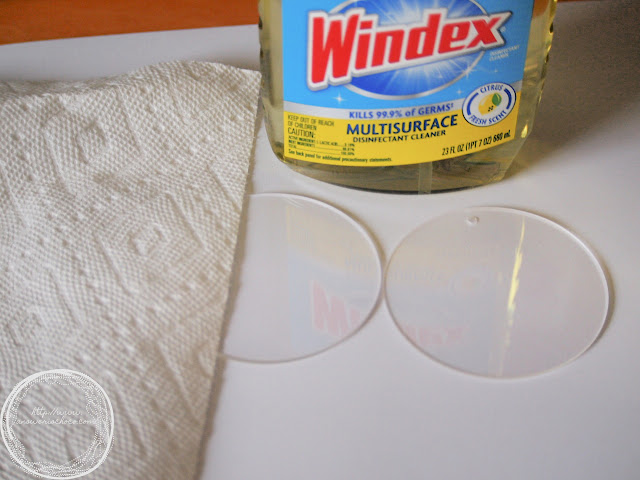
I used glass cleaner and paper towels but you could also use alcohol to clean them. You want to make sure you remove any residue plus you want a clean surface! Then apply the transfer tape and apply your image to the ornament. 


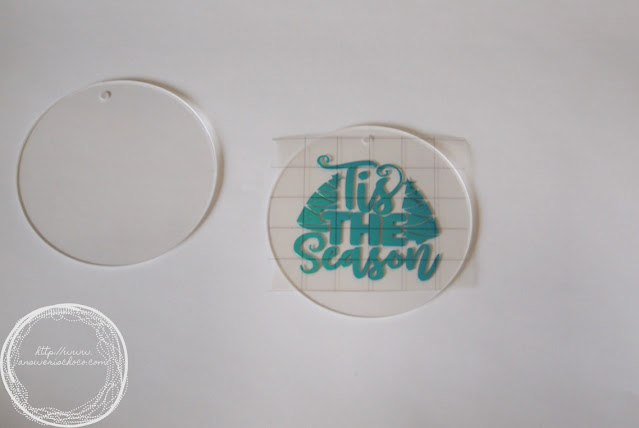
Once you've positioned your vinyl then use your scraping tool to apply. Remove transfer tape. Now it's time to embellish! 


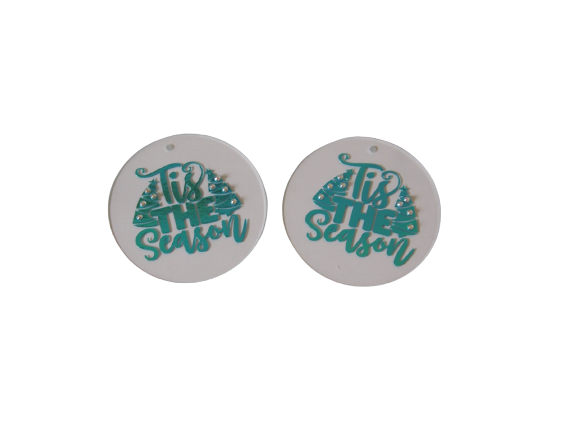
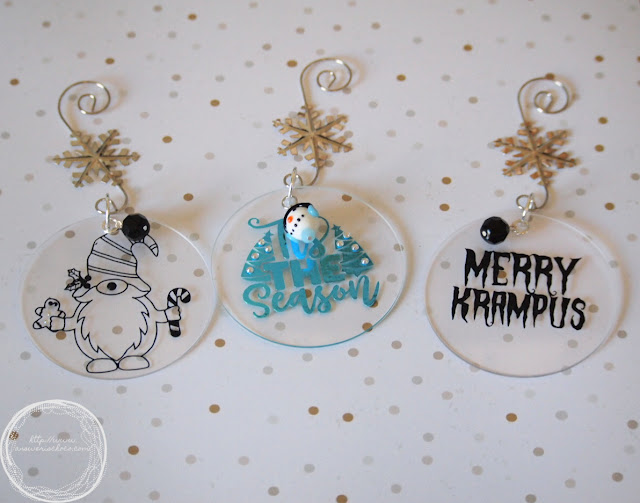
I added some iridescent rhinestones to the trees on these, and some black ones on the gnome. 


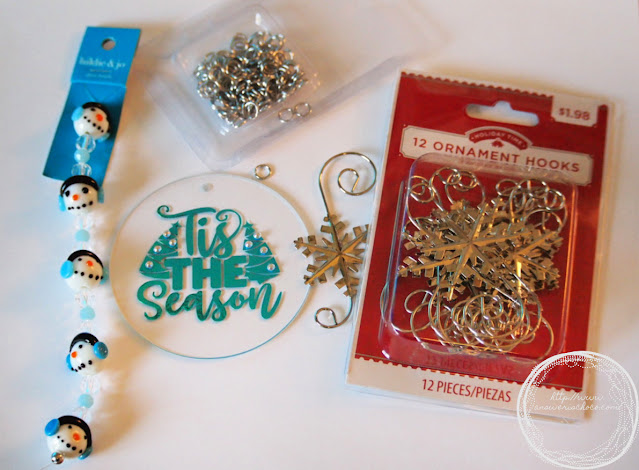
I picked up these cute snowmen beads at JoAnn's when they were having a great sale. They were perfect for the turquoise. I also found these snowflake ornament hangers at Walmart. I wish I'd bought more! I strung the bead onto a head pin, closed, then  used a large jump ring to attach the ornament hanger to the ornament and a smaller jump ring to attach the bead. Same process for the others shown using coordinating beads. 


And there you are! 


One of my friends did a Krampus tree this year so I had to make her an ornament for it! 


Sharing At: 


Wednesday, December 4, 2013

Ghosts of Christmas Ornaments Past: Paper Mache Ornaments

You could say I love ornaments. Did you say it? I have all kinds but some of the ones I love the most were the simplest to make.

 One of the easiest types of ornaments to decorate are the plain paper mache ones that every craft store carries. They come in all kinds of shapes...the basic ones like circles, squares, etc can usually be found year round, and during the holidays there are lots of choices.

I thought I'd share some past projects using them . The original posts / tutorials are all linked. They are an easy and inexpensive way to add to your decor or to make as package toppers, gifts etc.


For these, I stamped directly onto the ornament and embellished with rhinestones and glitter. 


These were done the same way as the first but I added some beads to the end of the ornament. 


These use a combination of vintage sheet music, graphics from The Graphics Fairy, and Mod Podge. The only limit is your imagination!


These are a combination of the two. Mod Podged with sheet music and edged in glitter. The focals are metallic snowflake stickers. Again, you could use any combination of papers / stickers, buttons, jewels. 


These I actually used in a banner for Valentine's Day but the idea could easily be adapted for Christmas. PEACE, JOY, NOEL are all words that could be used. 


Each year when we get out the Christmas stuff I get to re-live memories of the years I made these. I hope you find some inspiration !


Sharing At: