Showing posts with label Target. Show all posts

Tuesday, March 8, 2022

Seasonal Decor: St. Patrick's Day Easy Vignette


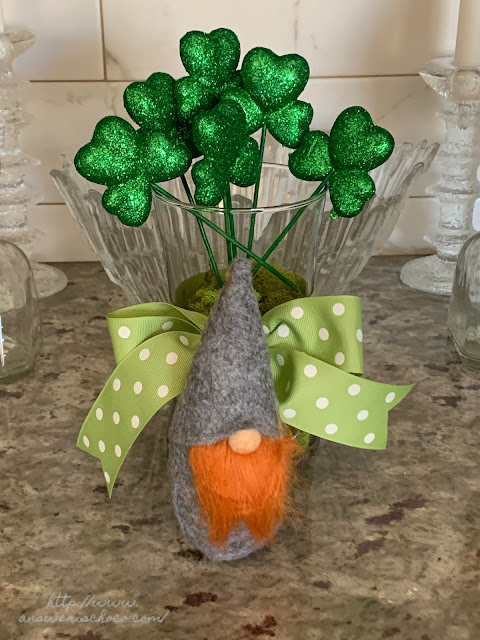
Our big furbaby girl is on the mend from her surgery last week so I grabbed a few minutes, which is literally all this takes, to add a little St. Patrick's decor. This was so easy I'm embarrassed to even make a post about it but...

Supplies: 
  • Felt Gnomes, Target 
  • Glass Vase (On Hand)
  • Mini Clay Pot 
  • Shamrock Picks (Dollar Tree)
  • Moss (On Hand)
  • Ribbon (On Hand)
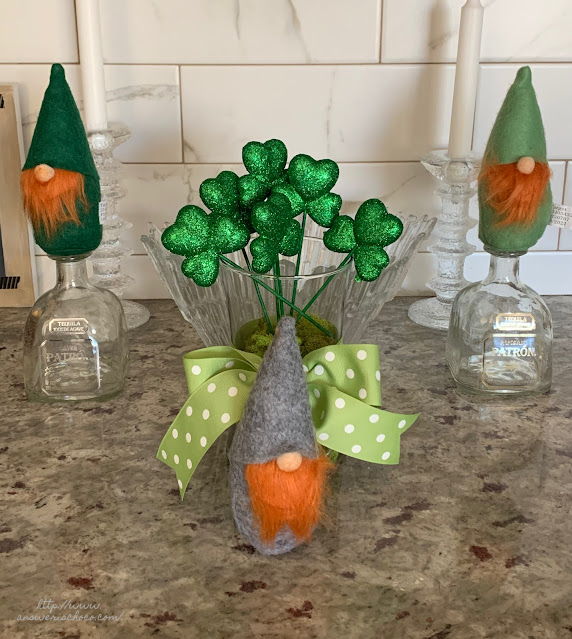
I found the gnomes at Target in their "used to be a dollar" section and couldn't resist. They were 3 for $3! How could I not? Mr. Chocolate has named them "Ginger Gnomes" because of their beards. The Shamrock picks I found at Dollar Tree and the rest of the supplies I had on hand. 


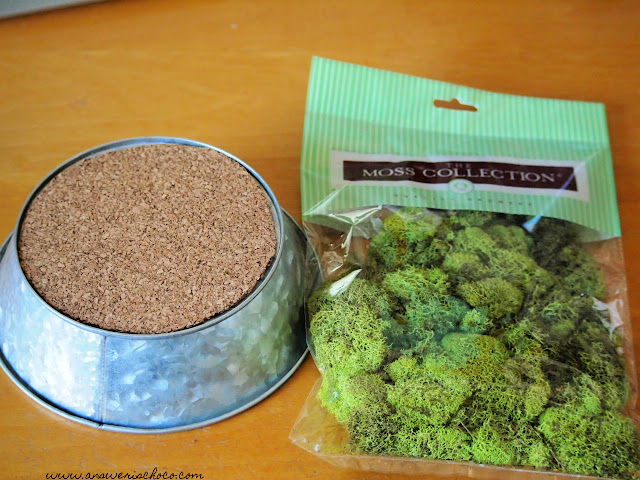
I placed some of the moss on the bottom of the vase, then placed the  mini clay pot upside down in the center. The hole in the pot made the perfect holder for the Shamrock picks so I fit as many as I could, built up the moss around the pot, pushing it down using the handle of a paintbrush, and then used the remaining picks from one pkg. I have a second package leftover!


I had the polka dot ribbon in my stash and it was just the right amount to use to tie a bow around the vase. I used the two empty tequila bottles from a Valentine's project last month to stand up two of the gnomes with the third as shown. I told you this was too easy! 


Never hurts to add a little luck right? 


Monday, January 31, 2022

Easy Decor : Gnome Garden


I have a quirky fun and easy project for you today that started with leftover corks from Tequila bottles and an inspiration from Sum of Their Stories, whose project I featured at last week's party! 

I know Faerie Gardens are super popular, but me being me, I wanted to do something a little different and when I found the gnome...


Supplies: 
  • Mushroom shaped corks ( eg champagne)
  • Acrylic Paints 
  • Gnome Figurine (Target)
  • Reindeer Moss (JoAnn)
  • Glass Cloche
  • Cork
  • Floral Pick


I had a couple of corks from the bottles I used for my Clay Pot Bottle Toppers. I thought they'd make perfect mushrooms...the kind that are cute to decorate with but not eat because they're poisonous! I also have a metal and glass cloche I found a couple of years ago after Christmas at Pottery Barn for 60% off and I use it seasonally for small vignettes. When I saw plain white gnome figurines at Target for $1, I hollered and it all came together in my head. 


First thing was to make my "mushrooms"


Grabbed my corks, some red and white paint and went to work first painting them all white then painting the caps red. I took a ball end tool (an embossing tool or the end of a paintbrush would also work) and dotted the caps with the white. 


I only did one coat of the read leaving a little of the white to shine through because it looked more natural. 


Since I wanted to be able to continue to re-use the cloche I grabbed a scrap piece of cork and cut to fit the bottom. I knew I was probably going to have to use a little hot glue so I wanted a removable base. 


I picked up a package of Reindeer Moss at JoAnn (50% coupon so $2.99 / $5.99 regular price). I made a ring atop the cork (not glued, just laid it down) to figure out positioning. I did glue the mushrooms and the floral pick to the cork then placed the gnome and put the top back on. 


Total cost? $4 since I had most stuff already! There's no place like a home with a gnome right? 


Tuesday, September 28, 2021

Halloween: Crackled and Jeweled Floral Sugar Skull Wall Art


I FINALLY got back to my craft room to make something last week! After the Summer from H*LL, the near septic abscess that tried to kill me followed by weeks of recovery, a move, and then surgery to remove the abscess host ovary and more weeks of recovery, it hasn't exactly been a productive Summer. But doctors know things and it was almost like clockwork when my energy level finally started coming back around week 5 post-op. 

Supplies: 
  • Wood Art Board (Target Clearance but available at Art Supply Stores)
  • Acrylic Paints (Folk Art and Craftsmart)
  • White School Glue (Elmers but store brand will work too) 
  • White Vinyl, Transfer Tape (Cricut)
  • Jewels (Art Minds, Michaels)
  • Dimensional Glue ( Glossy Accents, Ranger)

Before all of this started, I'd stumbled on these fabulous Art Boards at Target which screamed "buy me" especially since they were on clearance for something like $3 so of course I bought all the ones they had! Seven of them for what two cost at regular price. 


I had this mega pack of purple jewels from a previous project so it became the inspiration for my color choice of Purple, Black and White which will fit right into my primarily Black and White Halloween decor.


I painted the board with a coat of Folk Art Violet Pansy. I didn't care about a perfect finish because that's not my thing and besides, I knew I was going to add black with the purple showing through the crackle. 

My go to process for achieving a crackle finish is good old white school glue. I stock up on it during school supply season! Apply it straight from the bottle and then spread it trying to use complete strokes in one direction. 


You want a medium coverage of the glue. Too thin and it won't crackle. Too thick and you won't have a smooth surface. Let this coat dry to tacky. I use my handy craft tool...an old blow dryer set on cool, to speed up the process. You don't want the glue completely dry. Go over the glue layer with the black paint, using the same one direction brush strokes as the glue layer. If you're patient, you can let this air dry. If you're me, grab the blow dryer again, this time set on warm to help the crackling process. 

Q: "Can I use my heat gun?"
A: NO! It's too hot and everything will bubble and peel which might give you a cool effect but it won't be THIS effect. 


Don't worry if the glue shows through. Once dry, it dries clear. Even though I help the drying process with the blow dryer, set it aside to dry completely which gives you time to work on the vinyl piece. I found this image on Creative Fabrica ( Disclosure: I am an Affiliate so if you use this link to purchse, I do receive credit to their store).


Download your image  then bring it into the Cricut Design Space Software ( these files work with all of the different cutting machines but I used my Cricut) and size accordingly. I cut this from white Cricut Vinyl, using my Explore Air 2. 


Weed your vinyl (if you're new to vinyl, weeding is the process of removing the vinyl from the negtive spaces to reveal your image) and then apply the Transfer Tape (this is clear tape, I used the Cricut brand, that allows you to position and apply the vinyl to your surface). 


Position your transfer tape lightly on your surface until satisfied then use a scraping tool ( I use the one that came w/ my first ever Cricut or they sell them at craft stores and you can also use an old credit card etc. ) to apply your vinyl to your surface. Peel off the transfer tape.  I do this slowly vs ripping off like a bandaid in case there are spots the vinyl isn't sticking. It allows you to maintain the positioning and fix any issues. 

Then it was time for the jewels! I used a strong glue (Glossy Accents by Ranger) to adhere these and just randomly placed using the different sizes and shades. 


Et, voila! 


I haven't hung it up yet because I haven't started my Halloween decorating yet but I absolutely LOVE how it turned out and I have some other projects planned using this color scheme! Happy Haunting Season! 


Sharing At: 


Wednesday, September 16, 2020

Mackenzie Childs Inspired DIY Pumpkins


If you've spent any time in Home Decor world, you are probably familiar with Mackenzie Childs signature style. I love it, not only because she uses tons of black and white but because it's whimsical, pretty, and not rigidly perfect. It's also expensive and while I'd love to have a bunch of pieces, I don't. But hey, we're Makers so what do we do? We use our faves for inspiration and DIY that stuff! 

Here's an example of the real ones: 


Supplies: 
  • Plain Ceramic Pumpkins ( $1 each from Target)
  • Paint Pens ( I used Craftsmart from Michaels)
  • Acrylic Paint 
Step 1: 
Gather your supplies. I found these ceramic pumpkins for $1 each at Target in the section that none of us can get past. They know us! I also grabbed two paint pens: gold and black. 


Step 2: 
For the signature Mackenzie Childs check, I went down the lines of the pumpkin with the black pen. 

Since the style here is to look handpainted, you don't have to be perfect. 

Step 3: 
I went horizontally around the pumpkin with the paint pen to create the squares.


Step 4:
Tip: When I've done checkerboard before, I've gotten the order messed up so I've taken to putting a pencil dot in the squares to be filled in before I start filling! 


Step 5 
When all of the squares were filled in, I went back down the pumpkin spines with a gold paint pen and colored the stem. (I went back over that gold spot w/ black)


Et voila! 


The process for the Striped Pumpkin was similar but I used acrylic paints instead of paint pens.


I did a couple of coats for opacity. 


To finish, I also used paint and just went down each side w/ antique gold. 

Et voila!


I am pretty happy with my $2 project! 


Thursday, March 17, 2011

Buckets O Luck

I didn’t post these earlier because I didn’t want Mr. You Know Who to see them ( and I never know when he reads my blog but I think I’m pretty safe now). I found these plain buckets in Target’s $1 Section and thought they’d be fun for St. Patrick’s Day. I cut the letters on my Cricut using white vinyl, and since waste not want not…punched the shamrocks from the scraps.
IMG_5133
I lined the buckets with white polka dot cellophane I had leftover, and filled with Mr. Chocolate and Chocolate Chip’s favorite candies…at least those that were wrapped in gold foil!  Wrapped one big treat in coordinating green wrapping paper:
IMG_5136
Then topped the bigger candy with one of my printables, scaled down, trimmed with decorative edge scissors and mounted to black card stock.
IMG_5145

Linking Up At:

Photobucket