Showing posts with label Cricut Explore Air 2. Show all posts

Tuesday, February 7, 2023

Papercrafting: Black White Gold and Pink Valentine's Cards


I will always LOVE making Valentine's cards for family and special friends. Over the years, like other holidays, these have become part of people's Valentine's decor which makes my own HEART soar. This year, I grabbed some graphic metallic papers from my supply shelves and kept them fairly simple by using this image from Cricut Design Space and going with a color palette of black, white, gold, silver and metallic pink!

Supplies:
  • Patterned Scrapbook Papers 
  • Glitter Scrapbook Paper
  • Metallic Cardstock 65 lb
  • White 110lb Cardstock 
  • Digital Cutting Machine and Images
  • Foam Tape
  • Self Adhesive Rhinestones 


I neglected to take in process pictures but the process is pretty straightforward. 


I browsed Cricut Design Space for an image I liked and found this one. I subscribe so I was just able to add to my canvas. One thing I like to do in Design Space is change the image as close to the colors I want to cut which helps me remember what to cut! This image cuts in three pieces. 

I sized the grouped image to fit my card, then cut out each section. The main heart from gold glitter paper; the other two hearts from silver and metallic pink papers. 


For the card base, I cut white 110lb cardstock (Recollections) 10x7 to make a 5x7 card. I use my Martha Steward scoring board and bone folder to get a crisp fold. Then I cut the metallic papers 6.75x4.75 and the patterned metallic papers 6.5x4.5. Layered these as shown on the card and then attached the heart pieces using foam tape. The smaller hearts nestle in the cutout spaces of the larger heart. 


To finish, I added black and iridescent self-adhesive rhinestones to the smaller hearts. 

Not to leave out those who will be celebrating LOVE day with their furbabies, I made a couple of pet-themed cards too! 


Similar to the other cards, I found an image in Design Space and cut out using the same papers and finished the paw with self-adhesive rhinestones!


Sharing At:


Tuesday, December 13, 2022

Easy DIY Ice Skating Sign


Something you may not know about me is that I was a figure skater for about 10 years. The Olympics were never going to be a thing (although I did skate at the same rink as someone who DID go on to medal and one of my coaches was also an Olympic medalist) but as a result, I love everything to do with ice skating except being at the point now where I'm likely to break a hip! 

I've had a pair of skates as part of my decor for years and this year, decided to put them outside on the bench by our front door. 

Supplies:
  • Wood Art Panel 11x14. These are available at art supply stores as well as Michaels, JoAnn etc.
  • White and Black Acrylic Paints
  • Black Vinyl (I used Cricut Glossy Black) and Transfer Tape
  • Ice Skating Themed Cut File (I found this one at Creative Fabrica)
  • Digital Cutting Machines (I used my Cricut Explore Air 2)


The intent of these boards is to use the flat side but I wanted a framed look so I used the underside. Painted it with a couple of coats of white and let dry while I sized and cut the vinyl.


I downloaded this file from Creative Fabrica where I'm a subscriber, and uploaded into Cricut Design Space and sized to fit within my sign. Cut and weeded, then applied the transfer tape. 


I set that aside and painted the edges of the board with black acrylic paint. I wanted to match the "old fashioned" look of the sign so a few worn spots here and there where the white shows through. 


Then I laid the vinyl where it looked about right, burnished it with my Cricut burnishing tool, and done! 

The outside bench is covered so even if we do get some rain it's safe enough so I didn't seal it. 


We found this cool wreath last year at an art fair. It's made from the wire bristles used to clean chimneys! I also made this giant Santa Mailbox a few years ago that shares the bench. 


Sharing At: 


Monday, November 7, 2022

Fall Decor: Textured Copper Wrapped Candles


Thanks all for understanding about my party oops on Thursday. I think Fall allergies are the culprit. There's no better medicine than creating though, right? Had fun making these Copper Wrapped Candles which were easy and make a statement! 

Supplies: 
  • Dollar Tree Plain White Glass Candles
  • Cricut Textured Copper Vinyl (JoAnn)
  • Cricut Design Space Image #M9BB7EA
  • Digital Cutting Machine (I used my Cricut Explore 2)


I got my candles at Dollar Tree but they can be found wherever Saint candles are sold. You can remove the sticker or leave it. I left it and just made sure the vinyl seam was in the back. The Cricut vinyl is available wherever Cricut products are sold. I got mine at JoAnn when they had a 40% off sale. I have a Cricut Design Space subscription so I found an image I liked and then sized to fit the candle. 7.5 height x 8 inch width. Doing this again, I would cut 1/2 inch shorter in height I think. 

This is the image I used which, if you're not a Design Space subscriber is $.99 to purchase. 


Once the vinyl was cut, I weeded (peeling the top layer from the backing). Normally, this would bethe piece you discard, using what remained on the backing paper. I chose to use it to make a candle wrap! 


Clean your candle with glass cleaner or alcohol (especially if you used a product to remove the label) and then with the vinyl sticky side up, lay the candle on its side and carefully roll it until covered. 


That's it! 


Want to know what I did with the vinyl that remained on the backing paper? Come back tomorrow and I'll show you! 

Sharing At:


Tuesday, September 28, 2021

Halloween: Crackled and Jeweled Floral Sugar Skull Wall Art


I FINALLY got back to my craft room to make something last week! After the Summer from H*LL, the near septic abscess that tried to kill me followed by weeks of recovery, a move, and then surgery to remove the abscess host ovary and more weeks of recovery, it hasn't exactly been a productive Summer. But doctors know things and it was almost like clockwork when my energy level finally started coming back around week 5 post-op. 

Supplies: 
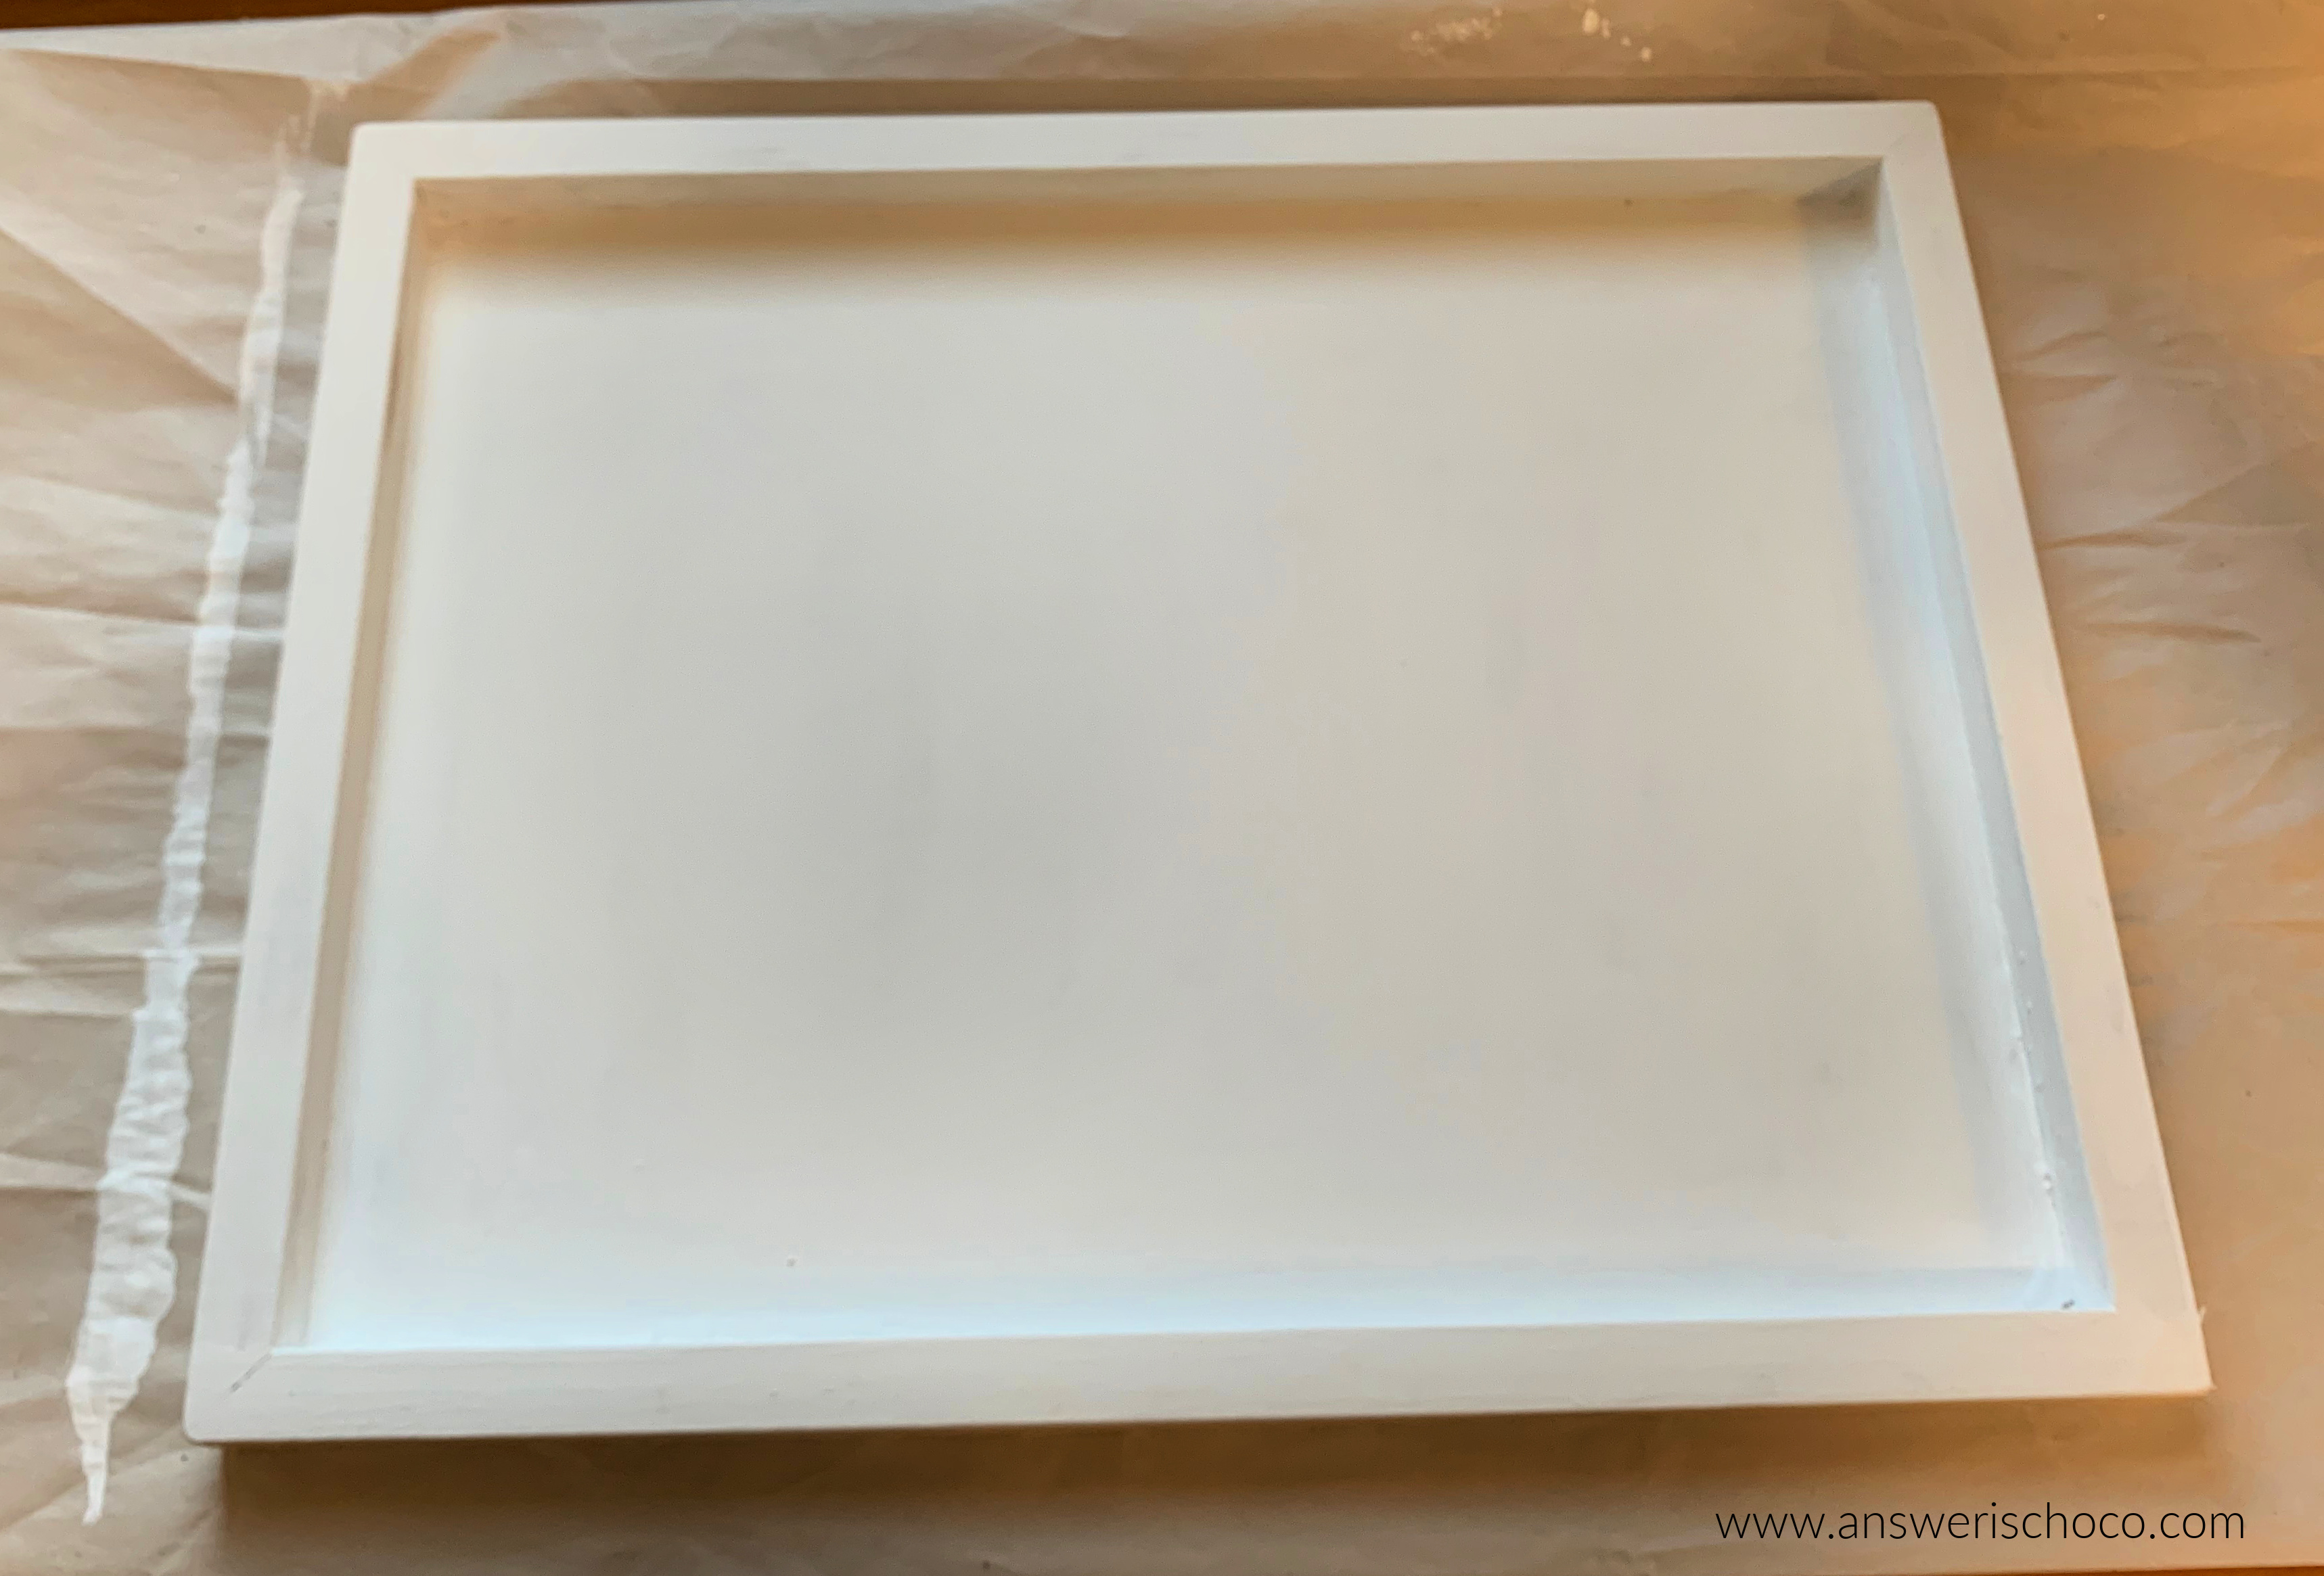
  • Wood Art Board (Target Clearance but available at Art Supply Stores)
  • Acrylic Paints (Folk Art and Craftsmart)
  • White School Glue (Elmers but store brand will work too) 
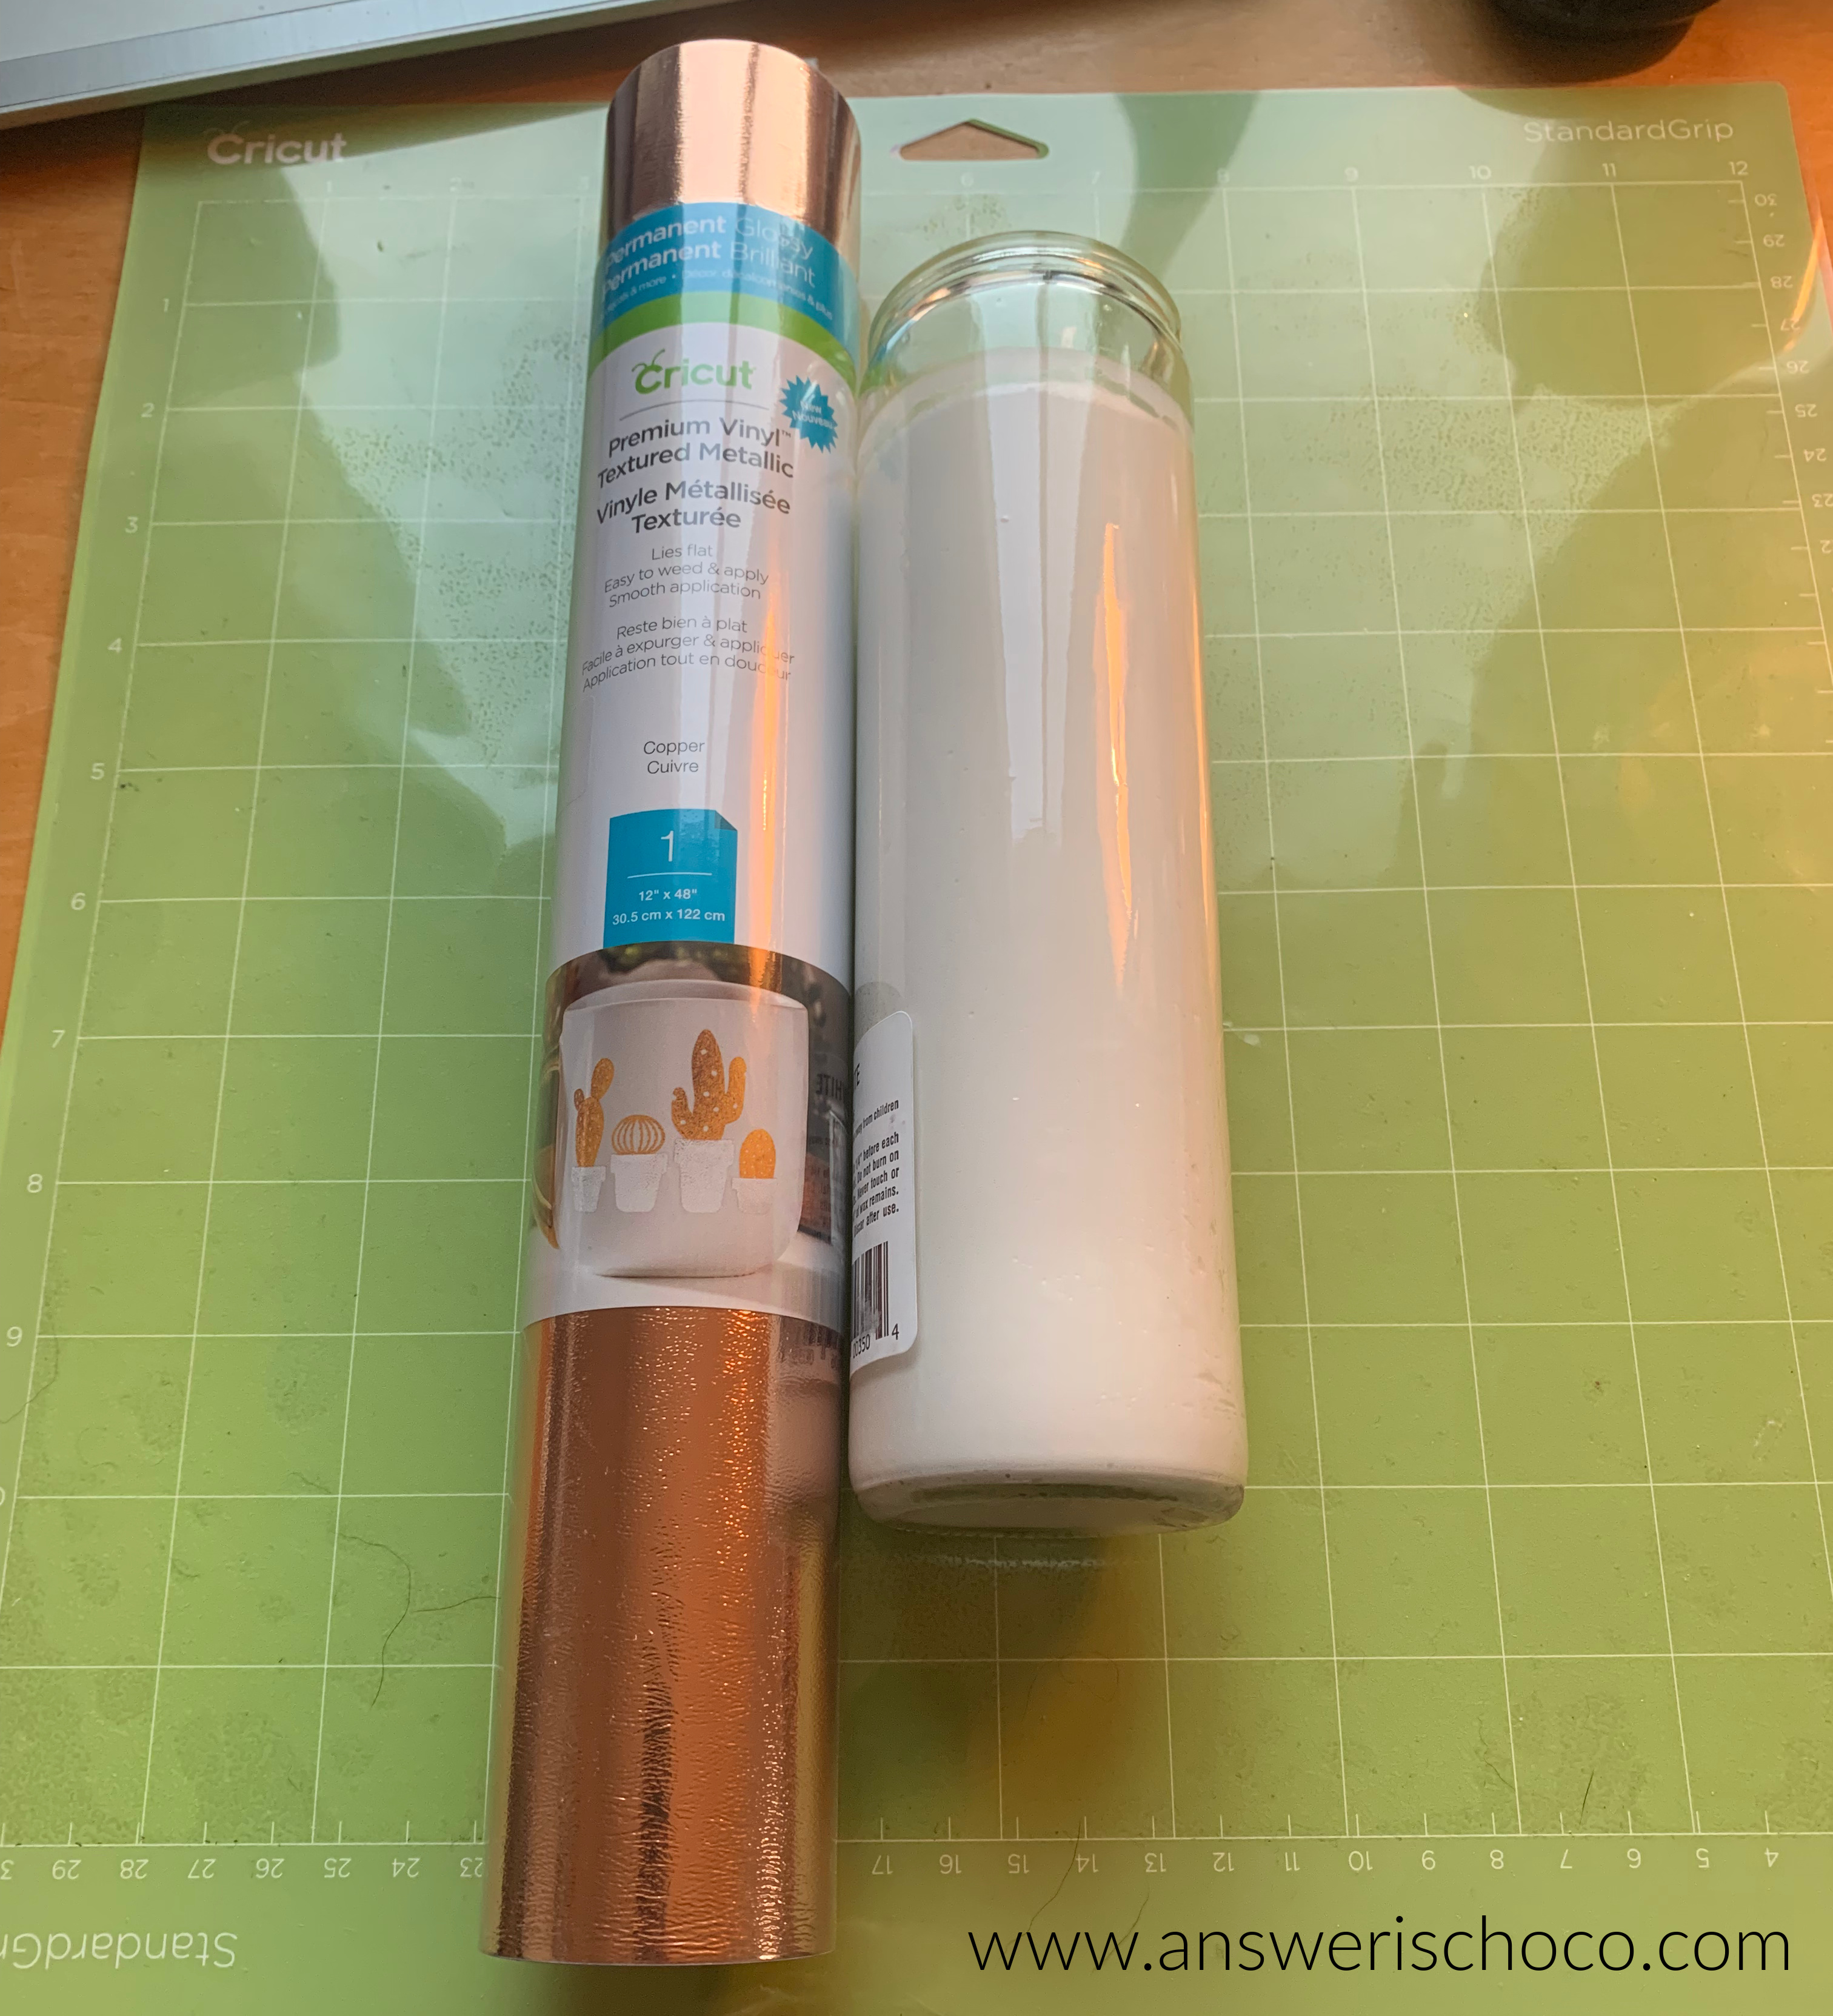
  • White Vinyl, Transfer Tape (Cricut)
  • Jewels (Art Minds, Michaels)
  • Dimensional Glue ( Glossy Accents, Ranger)

Before all of this started, I'd stumbled on these fabulous Art Boards at Target which screamed "buy me" especially since they were on clearance for something like $3 so of course I bought all the ones they had! Seven of them for what two cost at regular price. 


I had this mega pack of purple jewels from a previous project so it became the inspiration for my color choice of Purple, Black and White which will fit right into my primarily Black and White Halloween decor.


I painted the board with a coat of Folk Art Violet Pansy. I didn't care about a perfect finish because that's not my thing and besides, I knew I was going to add black with the purple showing through the crackle. 

My go to process for achieving a crackle finish is good old white school glue. I stock up on it during school supply season! Apply it straight from the bottle and then spread it trying to use complete strokes in one direction. 


You want a medium coverage of the glue. Too thin and it won't crackle. Too thick and you won't have a smooth surface. Let this coat dry to tacky. I use my handy craft tool...an old blow dryer set on cool, to speed up the process. You don't want the glue completely dry. Go over the glue layer with the black paint, using the same one direction brush strokes as the glue layer. If you're patient, you can let this air dry. If you're me, grab the blow dryer again, this time set on warm to help the crackling process. 

Q: "Can I use my heat gun?"
A: NO! It's too hot and everything will bubble and peel which might give you a cool effect but it won't be THIS effect. 


Don't worry if the glue shows through. Once dry, it dries clear. Even though I help the drying process with the blow dryer, set it aside to dry completely which gives you time to work on the vinyl piece. I found this image on Creative Fabrica ( Disclosure: I am an Affiliate so if you use this link to purchse, I do receive credit to their store).


Download your image  then bring it into the Cricut Design Space Software ( these files work with all of the different cutting machines but I used my Cricut) and size accordingly. I cut this from white Cricut Vinyl, using my Explore Air 2. 


Weed your vinyl (if you're new to vinyl, weeding is the process of removing the vinyl from the negtive spaces to reveal your image) and then apply the Transfer Tape (this is clear tape, I used the Cricut brand, that allows you to position and apply the vinyl to your surface). 


Position your transfer tape lightly on your surface until satisfied then use a scraping tool ( I use the one that came w/ my first ever Cricut or they sell them at craft stores and you can also use an old credit card etc. ) to apply your vinyl to your surface. Peel off the transfer tape.  I do this slowly vs ripping off like a bandaid in case there are spots the vinyl isn't sticking. It allows you to maintain the positioning and fix any issues. 

Then it was time for the jewels! I used a strong glue (Glossy Accents by Ranger) to adhere these and just randomly placed using the different sizes and shades. 


Et, voila! 


I haven't hung it up yet because I haven't started my Halloween decorating yet but I absolutely LOVE how it turned out and I have some other projects planned using this color scheme! Happy Haunting Season! 


Sharing At: 


Tuesday, March 30, 2021

Papercrafting: Layered Egg Easter Cards


I will singlehandedly keep the Post Office in business because as much as I love and use technology, I will always make and send handmade cards. And since no matter how hard I try, I can't make cards that only require basic stamps, I'm their best customer!  

I had fun with my newfound knowledge of creating layered files in Cricut Design Space and did a series of layered Easter Eggs in a pastel palette. 


Supplies: 

I will also singlehandedly acquire every Michaels Hot Buy Paper Stack which, did I mention...are buy one get two free this week? 

Since all of the papers complemented each other, it was easy to play with different combinations. I ended up doing some in blues/turquoise, pinks and lavenders, and yellows/oranges/green. 


I cut the top layers of each using the glitter paper, layering using foam tape on either one or two layers of coordinating plain paper. 


For this one I used two layers of glitter paper. 


I had some paper butterflies in my embellishments stash but I didn't have enough so I made some more by cutting them on my Explore Air 2 and adding self adhesive pearls to match the original!


The Post Office employees hide when they see me coming! WHAT is she mailing now?! 


Sharing At: