Showing posts sorted by date for query cabinet. Sort by relevance Show all posts

Wednesday, August 23, 2017

What Good Are (Altered) Wings Wall Art


I teased these when I shared my last project: Another Altered Cabinet Door. I might need to change my blog name to something w/ "altered" in it . 


I saw these wood wings earlier in the year at Michaels when they first came in and went back and forth on them mostly because they had a whole selection of different wings and I couldn't decide. That became easier when after procrastinating, there were fewer to choose from but the ones that remained were 70% off. Score! I mean they were originally only $19.99 but I got them for $5.99. Deal. 

Supplies: 
  • Wooden Wings
  • Acrylic Paint
  • White Glue
  • Leafing Glue
  • Silver Leaf
  • Vinyl Quote
  • Misc. Embellishments 
I had all of the other supplies in my stash which Mr. Chocolate calls "The Michaels Annex".


Paint with your basecoat color of choice. I used Craftsmart gray. Since I'm partial to a chippy / shabby / crackled look, I didn't care about complete coverage. 


If you prefer a more opaque look, go over w/ another coat. 

Did a combination of my fave white glue crackle and dry brushing over the grey using white acrylic paint. While the paint was drying, I laid out my quote in my Silhouette software and cut w/ my Cameo. The quote is by the poet Atticus: 

This is the same font I used for my vinyl ( it's called Ambrosia) and of course now I don't remember where I downloaded it from!  

I cut out my quote using black matte vinyl and since I'm easily frustrated w/ vinyl projects and inevitably muck something up that results in swear words , I trimmed the words into individual pieces to minimize the muck up opportunity. 


This also made it easier to lay out the words. Once I was happy with where I wanted them, I applied them to the wings. 


Never content to leave anything alone ( what fun is that?!) I decided to add some silver leaf to the tips of the wings and pulled out this pair of plaster wings I had in my stash, along w/ some adhesive rhinestone swirls. 

Metallic leafing is such a rich accent. I love adding bits and pieces of it to things. You need a good leafing glue ( called size) and I like the Mona Lisa brand. Basically paint where you want your leafing to go using the glue, wait 20-30 min (weather conditions matter so if hot, shorter time) until tacky and then apply your leafing. You can find many tutorials on how to use metal leafing on Pinterest and You Tube so won't go into that here. 


It hangs in our entryway which I pass everyday on my way to my office and it's a great reminder to me to be fearless, try new things, challenge myself. 

Monday, August 14, 2017

Another Altered Cabinet Door: NEST Sign


I mentioned in an earlier post how I love using cabinet doors for projects. I usually find mine at a local architectural salvage place and got this one along with a previous one for a donation of $5 ( for both) to Habitat for Humanity. 

We have a lot of blank wall space which I don't actually mind, but it's also great for when an idea does hit because  I haven't had to take something else down. This will hang in our TV watching area where we end up spending a fair amount of our time .  This is where I find out all of the latest intrigue on "Game of Thrones", say goodbye to my Sestras on "Orphan Black", see who's up to what on "Scandal" and "How to Get Away With Murder" and Netflix and chill.

We also read here when the TV's not on. We're homebodies so the them of "Nest" seemed appropriate.

Supplies: 
  • Salvaged Cabinet Door
  • Acrylic Paints
  • White School Glue
  • Printed Tissue Paper (Recollections)
  • Mod Podge
  • Adhesive Foil (I used Cricut Gold Metallic)
  • Scrabbook Paper (C'oredinations Cream and Black) 
  • Misc Embellishments
  • Die Cut and/or Electronic Cutting Machine (Silhouette and Cuttlebug)


The wooden wings will be part of another post but I took a pic of the unfinished cabinet door with them so more on that later in the week. 


I painted the "frame" of the door with black acrylic paint (I used Craftsmart). Taped off the edges and then painted the interior with cream acrylic paint. 


I didn't worry about complete coverage of the interior because I knew I'd be putting the tissue paper here.  Cut the tissue paper to size and then apply using Mod Podge. 

Measured out my tissue paper before I painted
Using my favorite white glue technique, I crackled the frame of the door. Basically paint a layer of glue ; let dry until tacky but not completely dry ; paint over w/ contrasting color. 

Tip: You want to use long even strokes and go in one direction, not up and down. Back to School is the perfect time to stock up on cheap, white, glue! 


While that was drying, I laid out my design on my Silhouette Cameo, then cut the images and lettering using Cricut Gold Foil. 

Enter frustration. When I applied the foil pieces, the transfer tape pulled up the Mod Podged tissue paper in some spots. The nice thing about working w/ the tissue paper was that it was easy to tear some "matching" pieces and just repair those spots with a little more Mod Podge. 


I don't think you can really tell where I had to patch. I used my Cuttlebug to cut the flowers ( Tim Holtz Tattered Florals) rolled the edges and added rolled roses in the center. I rummaged around in my mismatched embellishment stash and found some swirly things ( technical term) that I painted to match and put on the nest image and the corners of the door. 


Sunday, February 19, 2017

For the Cost of a Donation: Upcycled Cabinet Door Tray


I dragged Mr. Chocolate to a flea market last month. It was held at an architectural salvage place in Seattle called Second Use. While the flea market didn't yield any treasures, a stroll through the Second Use Warehouse did. 

Of course Mr. Chocolate looked at the two cabinet doors and me like we were nuts. I'm used to it. He now loves the tray I made from one of the doors. All for the cost of a $5 donation to Habitat for Humanity. Two good things in one! 


This is what I started out with. I liked the panels and the way this door was framed. I mean I immediately saw a tray!  So I painted it with a white bisque acrylic paint. I didn't care about full coverage because I knew the look I was going for and it wouldn't matter. 

Back Side of Door

After my first coat was dry, I went over it with a coat of Espresso acrylic paint. Again, I didn't care that it was all streaky. In fact that was better. 


Then, using my tried and true glue crackle technique, I slathered on a thick coat of cheap white glue, let it dry until tacky, then went back over top with another coat of the Bisque White and watched the magic crackle process happen. 

Crackle Step 1 : Cover With Glue


One of my New Year's resolutions was to use things in my stash that I hadn't because I was hanging on to them for some irrational reason. So I pulled out a stencil that I'd never used and added some leaves using  Martha Stewart acrylic paint: Grey Wolf: 


To finish, I added a pair of door handles I picked up at Target ( the screws weren't long enough for the thickness of the door so I just glued on using extra strong glue) . 


The cup is one I painted at a paint your own pottery place. 

Not so crazy now am I Mr. Chocolate?


Thursday, June 9, 2016

BFF Open House Link Party

The Answer Is Chocolate

Happy Friday Eve everyone. Hope the week has been kind to you. Summer is gearing up and since I haven't done features for a couple of weeks I have some extra ones this week from the last two parties. Let's get right to them! 


Summer means lots of movement between indoors and outdoors right? Carrying things out to patios and decks. So this tray  makeover from Altered Artworks is perfect. I know some of you will recognize the before of these trays and might even raid your parents basements to see if they have any! 

These DIY Citronella candles would go perfectly with the trays wouldn't they?  From One Little Proejct


Speaking of candles and Summer, love the bold graphics of this one from Crafty Lumberjacks. Make a set to give as gifts using all four seasons! 


This bold ampersand project goes well with the candle doesn't it? See Lynda Creates for the details. She used a Sizzix die but if you have a Cameo or Cricut I bet those would work too. 


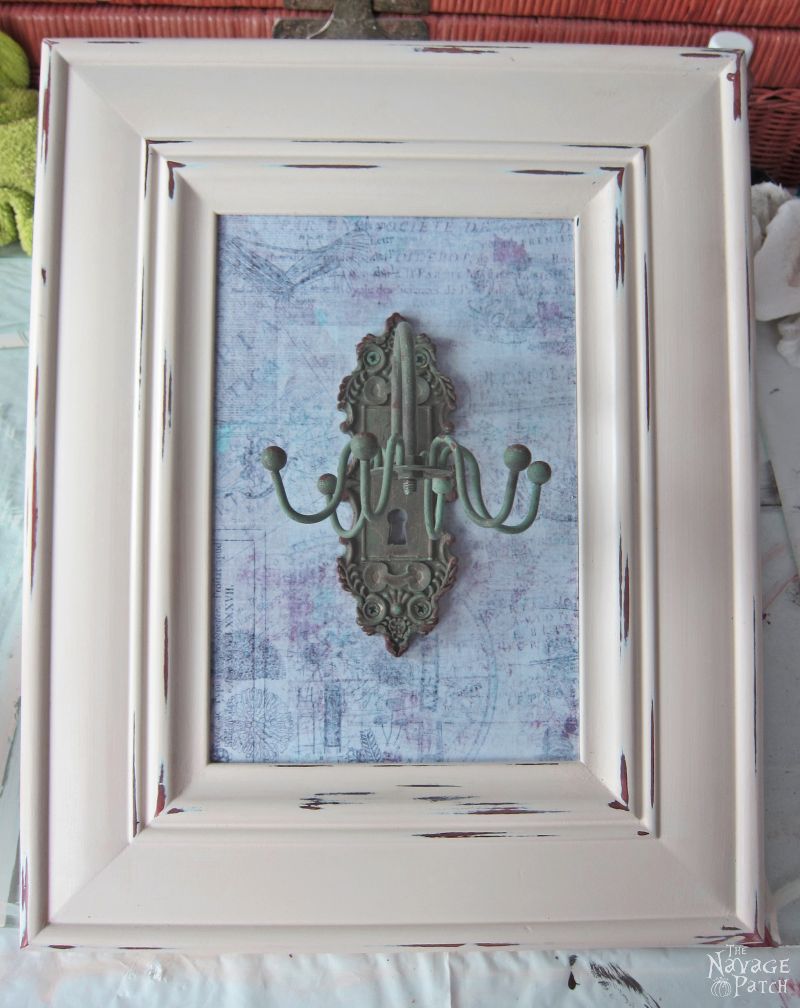
I could see this Carousel Jewelry organizer hanging next to the project above! Love the vintagey goodness of a transformed cabinet door used as the base. Visit The Navage Patch for the how-to. 


With Fourth of July approaching, check out this awesome flag project that Artsy Va Va did with a broken Adirondack chair. Nothing goes to waste in this woman's hands. 


Finally, with all the Summer entertaining, decorating, re-purposing etc. you're going to need a super Summer dessert. Look no further than this Oreo cheesecake from Lou Lou Girls. YUM!

OK on to this week's party !


Thursday, April 3, 2014

BFF Open House Link Party #151

The Answer Is Chocolate

Friday Eve...best day of the week! Hope none of you endured any awful April Fool's day pranks. Not a fan of that day. 

Here are some inspiring ( inspire Spring?) ideas from last week's party: 


My readers know I love making cards. This one from It's Always Ruetten is a must make idea. Perfect for so many occasions. 


Spring and birds go together don't they? I really like this layered stencil bird project from Laura at Pet Scribbles


Doreen over at Altered Artworks took her love of altering things to a bigger level. Ab fab makeover of this flea market found metal file cabinet to some new Industrial Chic storage for her workroom. 


I couldn't believe that this gorgeous cake was Diane's first attempt at cake decorating. Visit An Extraordinary Day for the details. I can assure you , my first attempt looked nothing like this. I'm not even sure it looked like cake! Easter, Mother's Day, showers ...


Finally this week's chocolate feature. Simple, classic, delicious and never tire of this combination. Chocolate Peanut Butter Bars from The Pin Junkie


Thursday, September 16, 2010

SO Excited! Open House Tomorrow and Giveaway Details Today!!!

I'm channeling Paula Deen..."Hey Y'all".

I'm so so excited that tomorrow is my third "Open House" link party; that I get to celebrate reaching 300 followers, and a wonderful giveaway!!! So now the details.

Open House Link Party!
  • Link up whatever you want to feature. Holiday, not holiday, home decor , cards, jewelry, decorations, apparel...if you made it, link it. No advertising or etsy stores though pretty please?
  • Recipes welcome...especially chocolate! 
  • Link to your specific post, not your general blog
  • Link party will run from Friday to Sunday with giveaway winner selected on Monday
PLEASE READ CAREFULLY!!!
In order to keep the selection of the giveaway winner simple using random.org, you MUST leave  a comment.  You don't have to link up anything, but you MUST leave a comment. Even if you link up you (say it with me ) MUST leave a comment.  Additional entries if:
  • You are a follower of The Answer Is Chocolate (leave comment saying so)
  • You blog / tweet / facebook about the link party and giveaway ( leave one comment for each thing you do)
Now on to the good stuff!!! The giveaway will consist of two fun things! My friend Cindy, whom I have known since our kids started first grade together (and now they're HS Seniors yikes!), is an Independent Rep for Silpada Sterling Silver Jewelry and has kindly offered as a giveaway a $25 gift certificate!!! If you are not familiar with Silpada , their jewelry is gorgeous and I love that they provide entrepreneurial opportunities for women!  Look at some of their gorgeous stuff!
 
You can browse through their current catalog at Cindy's site here

But wait, that's not all! I've been so delighted with the wonderful feedback you've given me on my Stashbusting projects, so I thought it might be fun to share a few things from the closet of magical mystery! So in addition to getting to shop for some jewelry, the winner will also receive some "stash"!

This collection includes the owl and raven images ( from The Graphics Fairy) printed on clear label paper; a sheet of the vinyl I used on my upcycled cabinet door; a package of Magenta peel offs; a paper mache star like the one from my Witch Wand,  and other misc embellishments.

Thanks again for making this one of the most fun experiences I've had, ever! See you tomorrow!