Thursday, November 17, 2022

BFF Open House


Happy Friday Eve Creative Peeps! Can you believe Thanksgiving (American) is one week from today? You know what happens after that. It's full steam ahead for Christmas and Hanukkah. I'm almost done with this year's Christmas cards since for the first time in thirty years, I won't be hosting Thanksgiving. We're actually going away which will be completely different yet exciting for us. I loved doing it and with my Martha Stewart compulsions, always did it big, but last year when it was just the two of us for the first time...my mom was visiting her sister, we didn't have any other family to host since moving to AZ etc. I realized by not doing all the work how much work it really always was. No complaints! I loved all the years I did it but life is about trying something new and I'm actually really excited about it. This week I shared the Thanksgiving Cards I made and sent to family and friends. 

Let's take a look at some of the great things shared at last week's party! 


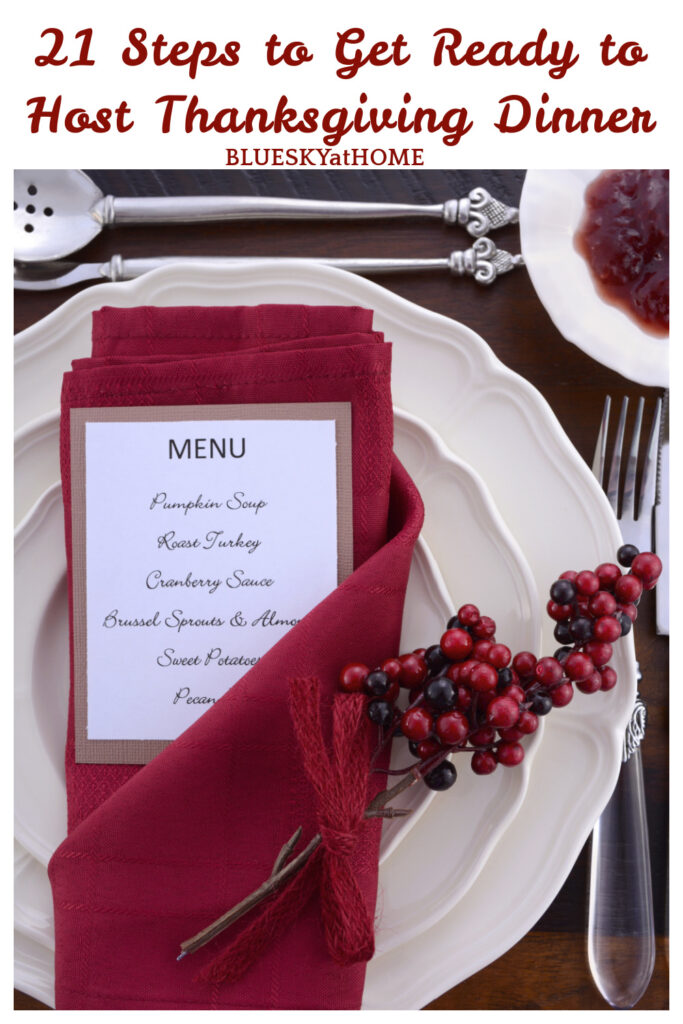
If this is your first time hosting or you would like to be better organized, then Blue Sky At Home has the perfect thing for you with 21 Ways to Prepare.


Whether your guests are young, older, or everywhere in between, this printable Thankful Tree from Creatively Beth is a great way to entertain them and make a memory. 


As we get close to counting down to Christmas, I LOVE this Advent Calendar for Couples from The House on Silverado


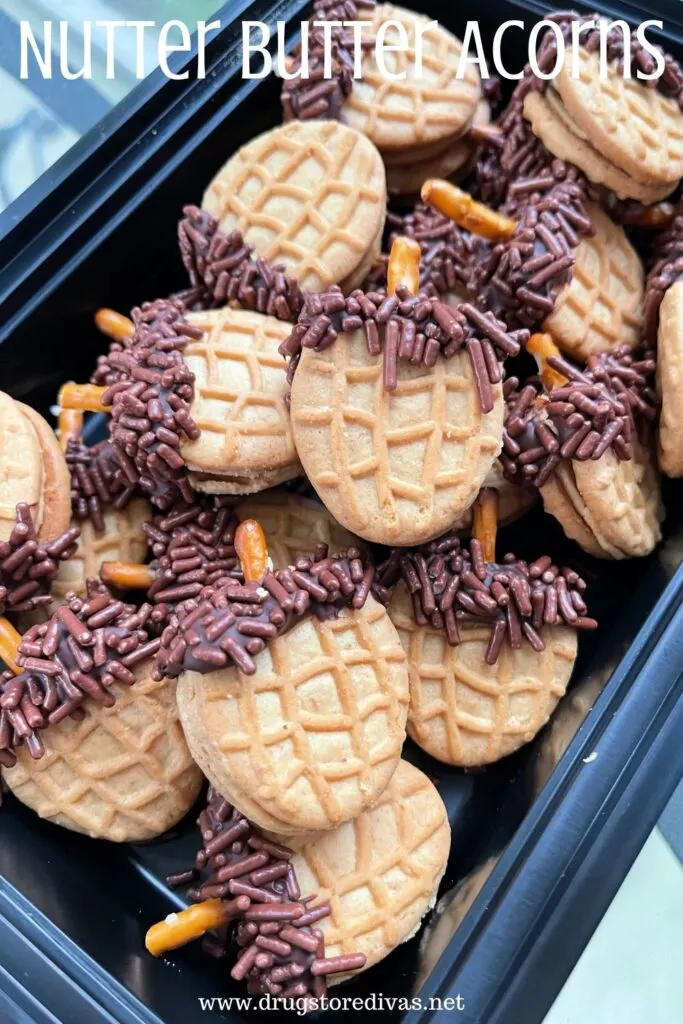
Finally, while we're still on Thanksgiving, if you want to add a little something to your dessert table (and I'm all for adding chocolate to Thanksgiving which is the most chocolate free celebration) or bring a dessert where you're going, check out these Nutter Butter Acorns from Drugstore Divas

Thanks to everyone who linked up and let's see what you've been up to this week! 


You are invited to the Inlinkz link party!

Click here to enter

Monday, November 14, 2022

Papercrafting: Copper and Berry Layered Pumpkin Thanksgiving Cards


Cardmaking has always been and probably will be my first love. I should probably have kept track of the number of cards I've made! And I love making Thanksgiving cards to send to friends and family. This year, I went with copper and berry for my colors. Technically, the "copper" is considered rose gold but it's copper to me! 

Supplies:
  • Scrapbook Papers (I had these on hand. Craftsmith, Craftsmart, and Recollections from Michaels.)
  • Layered Pumpkin SVG (I used one from Creative Fabrica)
  • Digital Cutting Machine (I used my Cricut Explore 2)
  • Tape Gun and Spray Adhesive
  • Iridescent Sequins


The great thing about "building up a paper collection" (or what Mr. Chocolate calls "How can you possibly need MORE paper?") is how you can pull out different stacks and mix and match. It's also a  great way for me to find inspiration. These were the stacks from the stash I used. 


I downloaded the image, imported into Cricut Design Space and used 3 of the 4 layers. (Orange, Pink, and Grey).


This is the first layer. 


Second layer.


Layers one and two. I used a 3M Spray Adhesive to attach each layer since they're so delicate. 


And finally, all three layers combined! For the cards, I used a 110lb cream cardstock (Recollections) and then cut panels from the paper stacks I'd selected. 


I used foam tape to attach the layered pumpkin to the cards just to give things a little depth. To finish, I grabbed some iridescent sequins from my stash and used a dimensional glue to attach. 


Sharing At: 


Thursday, November 10, 2022

BFF Open House


Happy Friday Eve all. Thanks again for understanding my oops on last week's party. Our "seasons" change when they decide to and I think Fall allergies are acting as my nemesis right now. I hope everyone's had a great and creative week! I was very excited and honored to have my Copper and Silver Earrings featured in the Upstyle newsletter this week. If you're not familiar with Upstyle, it's the sibling site to Hometalk and features DIY Fashion projects. My infatuation with copper extended to these Textured Copper Candles and Silver and Copper Pumpkins


Let's take a look at some wonderful Fall inspired ideas from last week's party!


This gorgeous card from Paper Seedlings is perfect any time of year (especially the message) but is so perfect for Fall isn't it? The color blending is gorgeous. 


Speaking of perfect for Fall, check out these DIY Fall Bracelets (that should totally be shared on Upstyle BTW) from Within A World of My Own. Coordinated to match Fall outfits, there are several combos to see. 


With Christmas on our heels, there's always room for a new Tree Topper and you will NEVER guess the genius trick Lamberts Lately used for this one. If you do guess it (no cheating!) you're better than me! 

Finally, I love all of the creativity that's sprung up around charcuterie boards and this S'Mores Board from Rose Bakes is no exception. Rose also includes how to do this with or without a fire pit! 


Thanks to everyone who linked up and can't wait to see what you've all been up to this week! 


You are invited to the Inlinkz link party!

Click here to enter

Tuesday, November 8, 2022

Fall Decor: Silver and Copper Geometric Pumpkins


I love it when a plan you didn't have comes together. I mentioned in my post about the Textured Copper Candles, that I'd show what I did with the vinyl that was left on the backing sheet so here we go! 

Supplies:
  • Foam Pumpkins (Dollar Tree)
  • Multi-Surface Craft Paint, Bright Silver (Michaels)
  • Geometric Textured Vinyl (Previous Project)
  • Kraft Butcher Paper
  • Strong Wire
  • Mod Podge


I'd picked up a couple of these foam pumpkins at Dollar Tree when their Halloween supplies came out and didn't end up using them but they still work great for Thanksgiving/Fall Decor. I painted themwith a couple o coats of multi-surface paint (Craftsmart from Michaels). I also removed the "stem" that came with them since I had another idea in my head. 


To make the stems, I tore some kraft butcher paper (guestimated the size) and some strong wire. I twisted the paper, leaving enough at on end to fan out a bit so I could attach to the pumpkin. I utwisted the wire, the using hot glue, tacked the wire in the middle, then re-twisted. 


I left a little tail of the wire at the bottom to push into the pumpkin to stabilize then fanned out the bottom and hot glued in place. If you don't have enough to fit, just tear some more small pieces of paper. 


Don't worry if the paper is sticking up. You can bend and twist your "stem" as you like, and trim if needed. 


To finish the stems, grab some Mod Podge and a brush and then go over the paper, soaking it pretty well. Once it dries, your stem will be secured to the pumpkin. 


Now it's time for the "leftover" vinyl from my candles! I cut the backing paper in rows, then applied transfer tape, then cut strips of each set of triangles and half circles and then applied them to the spines or whatever they're called, of the pumpkin.


Sharing At: 


Monday, November 7, 2022

Fall Decor: Textured Copper Wrapped Candles


Thanks all for understanding about my party oops on Thursday. I think Fall allergies are the culprit. There's no better medicine than creating though, right? Had fun making these Copper Wrapped Candles which were easy and make a statement! 

Supplies: 
  • Dollar Tree Plain White Glass Candles
  • Cricut Textured Copper Vinyl (JoAnn)
  • Cricut Design Space Image #M9BB7EA
  • Digital Cutting Machine (I used my Cricut Explore 2)


I got my candles at Dollar Tree but they can be found wherever Saint candles are sold. You can remove the sticker or leave it. I left it and just made sure the vinyl seam was in the back. The Cricut vinyl is available wherever Cricut products are sold. I got mine at JoAnn when they had a 40% off sale. I have a Cricut Design Space subscription so I found an image I liked and then sized to fit the candle. 7.5 height x 8 inch width. Doing this again, I would cut 1/2 inch shorter in height I think. 

This is the image I used which, if you're not a Design Space subscriber is $.99 to purchase. 


Once the vinyl was cut, I weeded (peeling the top layer from the backing). Normally, this would bethe piece you discard, using what remained on the backing paper. I chose to use it to make a candle wrap! 


Clean your candle with glass cleaner or alcohol (especially if you used a product to remove the label) and then with the vinyl sticky side up, lay the candle on its side and carefully roll it until covered. 


That's it! 


Want to know what I did with the vinyl that remained on the backing paper? Come back tomorrow and I'll show you! 

Sharing At: