Showing posts with label Fourth of July. Show all posts

Wednesday, July 3, 2013

Last Minute Fourth Of July Project: Firecracker Candle


I don't do a lot of decorating for the Fourth, but I have a few things on my mantle. Since we can't light fireworks in our city I wanted something that symbolized them so I altered a candle 

For this project you will need: 

  • Tall jar candle ( ie prayer candle available at Dollar Tree or grocery store) 
  • Patriotic colored papers (I used products from CutCardstock.com)
  • Coordinating cupcake liners ( mine were left over from Christmas!)


Here's the plain candle and papers. To add a little extra sparkle to the "sparkler" go around the top and bottom rims of the candle with clear embossing ink and then dip in bright gold embossing powder and heat emboss. 


Measure and tear cream cardstock, trim it as well with gold embossing powder and adhere to candle. I used extra strong double sided tape but hot glue would work too. 


For the stripes, tear strips of the red paper and crinkle them ( I like vintagey looking Americana) and adhere them to the candle. 


I was going to make a lollie for my focal point and then remembered some red and white cupcake liners I had left over from Christmas so I ran to the kitchen and got those. 


Punch a circle from cardstock, fold cupcake liner in quarters and adhere to cardstock circle. Repeat until satisfied with thickness. 


The cupcake liners I had came in two different sizes so I made another layer of them using the smaller ones. Finished up with smaller punched circle in the middle, a navy button, and gold rhinestone center.  Shown here on my mantle with a previous Fourth project you can see here


Monday, July 2, 2012

BFF Open House Link Party #60 Wrap Up and Features: Festive Fourth Edition!

Thanks everyone for another great BFF Open House. As always, there was no shortage of creativity and fabulous ideas. Since we are celebrating Fourth of July this week in the US, I’m featuring some of the great Fourth inspired ideas that were shared.

Malia, from Yesterday on Tuesday shared a fantastic collection of printables you can use to whip up some décor for the 4th:
Yesterday on Tuesday-Free 4th of July Printable Collection by FPTFY
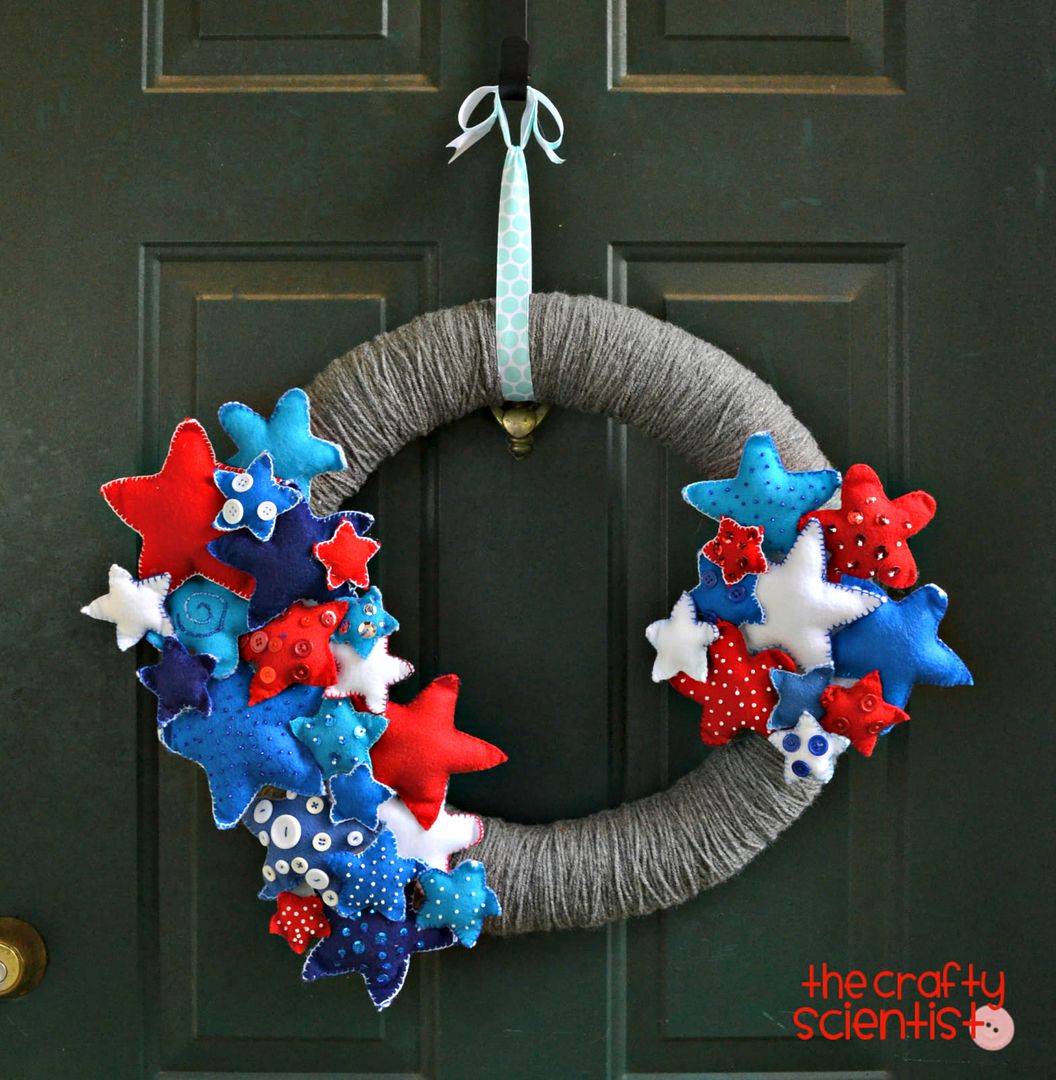
Wreaths are a wonderful way to decorate and I have two really cute ones to share. The first from The Freckled Optimist:

I just love those letters! And the second is from Mel, The Crafty Scientist that is part of her interchangeable wreath series and can be updated for other holidays:


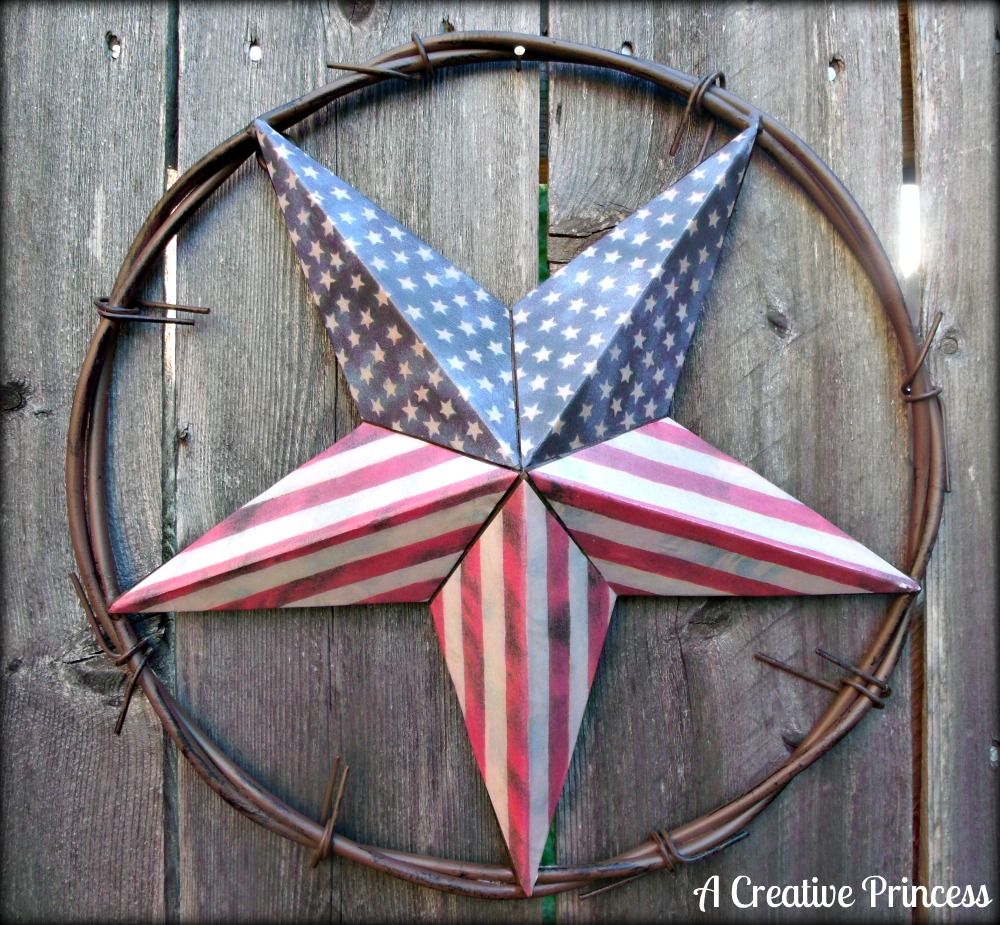
Transform a plain dimensional star with Mod Podge and scrapbook paper. Visit A Creative Princess to see how:


If you want to wear your festive Fourth colors, pop over to see Ellen at Creative Passage for this crocheted wire and bead bracelet!

100_4688

Of course you know I have to feature something chocolate, so I think these Drumstick cupcakes from White Lights on Wednesday are an ingenious interpretation of the iconic ice cream treat, perfect for a 4th of July barbecue:

As always, thanks for choosing to share your creativity here each week!

Thursday, June 30, 2011

Patriotic Paper Pinwheels

Fourth Pinwheel (3)
I’m alliterative  among other things! These pinwheels aren’t a new idea but I’ve actually never made any! You can free fold  the paper accordion style or you can score it like I did using my Martha Stewart score and fold board. I love this thing! I use it for all my cards and anything I have to fold or score.

I thought it would be fun to use two papers together, So I cut 12x12 papers to 6x12, then scored and folded them at the one inch mark and joined the two different halves together.
Fourth Pinwheel How To
Once you’ve completed your accordion folding fold your folded piece in half and staple in the middle. STAPLE. You need to STAPLE. After you STAPLE stick the the two sides of each half together with your adhesive of choice ( I used my ATG gun) and then you’ll stick the two halves together:
Fourth Pinwheel How To
You could be done here. But that’s no fun now is it? So…I used some scrap paper and cut circles using a decorative edge scissor to make a layered flower center middle thingy and used leftover stickers from my medallion banner project to finish the centers. I just scatted these along my mantel for a little extra dose of Fourth of July flavor:
Fourth Pinwheel (2)
Candlesticks aren’t just for candles!
Fourth Pinwheel (4)
Fourth Mantle (2)
Or they can stand up by themselves!
Linking Up At: 


Paper Issues Blog Design
A Little Knick Knack

Tickled Pink at 504 Main


Tuesday, June 28, 2011

Vintagey 4th Medallion Banner

Photobucket
4th Banner
I tend to like old, vintage, Americana looking décor for the Fourth. Last year was the first time I put up any decorations for the Fourth and this year I made a new “old” banner. I decided to make several medallions to use as my banner. Cut out different shapes with my Cricut Expression:
4th Medallion Banner
I found this great ribbon at Michaels for 40% off plus they had an additional 15% off your entire purchase coupon on Sunday. Yeah!
4th Medallion Banner (2)4th Medallion Banner (3)
I also found these dimensional stickers from KandCo’s Americana Collection.
Cut the ribbon and notched the ends. Adhered to the red circle and then layered the other cutouts according to size. After I took the pic I added a 2.5” circle punched red layer. Mounted a sticker in the center:
4th Medallion Banner (4)
I used red tulle ( too bright for me but I bought it for some reason and never used it) and some clothespins I’d made for one of my son’s grad banners to hang it:
4th Medallion Banner (5)
I probably would have used a cream tulle to make it more muted but….

Linking Up At: 
homework
Photobucket


Paper Issues Blog Design

Friday, July 2, 2010

"Fourth" Bling

Since I decided for the first time to decorate for the Fourth, I thought hmmm.....maybe I should decorate myself too. My wardrobe staples are black, white, grey, neutrals...boring I know but then everything goes! But I did buy one of "Old Navy's" patriotic tees ( they had BLACK woo hoo!) so to get in the spirit, I made some earrings and a bracelet to wear with. I started making jewelry because I have to wear clip earrings (long story...nothing against pierced ears but apparently there's "stuff" in your ear lobes that supports pierced ears and I don't have it) . And...I like "bold" earrings. Put those two together and they're hard to find because someone has decided that anyone who wears clip earrings wears very dainty small ones. I'd like to have a word with you.  I started out buying two pairs of earrings and combining them and then decided if I was going to do that, I might as well go all in. So now that I've put you to sleep with how I began making jewelry...


Findings are just stuff from Michaels, silver faceted beads I bought in a ginormous bag, and blue and red Czech crystal. The red enamel stars I picked up from Ben Franklin Crafts.

Welcome to those stopping in from


New Friend Fridays

Friday, June 25, 2010

Final Fourth Project...#3

Unless of course I make something last minute next week which I probably will since I called this final. I thought my mantle needed some "bunting". What do you think?
I made coffee filter and crepe paper medallions and used up some patriotic bear iron on transfers I picked up "because they were a steal deal" words that are a permanent fixture in my vocabulary! It's more "cute" than I normally do but at the same time it's vintagey and oh who cares, I like it.

For the coffee paper medallions:

  • 4 natural coffee filters for each medallion
  • 3 " circle cut from scrap cardboard...mine was a cereal box I cut on my Cricut
  • White crepe paper
  • Red and blue w/ white star scrapbook paper scraps
  • Buttons
  • Self adhesive rhinestones
I scrunched the coffee filters, opened them back up, stacked on top of each other and then folded in half, stapled...opened, folded in half the other way, stapled. I don't know why I did this. It seemed like a good idea.

I used a glue stick to attach my crepe paper to my cereal box circles. To me it's the perfect medium for this because it holds the crepe paper yet you can still pull it up without ripping if you need to re-pleat. I just glued down an edge, made a fan pleat, put some more glue stuck on, made another fan pleat and so on. I went around twice to give them some body.

Cut out cirles from the red paper, and then slightly smaller from the blue / white starred paper and crumpled the latter. Stick those in the middle of the crepe paper circle; stick to the coffee filter base. Punched a rustic star from some scrap kraft paper. I added a white button, and because I'm blingy that way, an antique gold self adhesive rhinestone.  I punched a hole on either side of the medallion and added an eyelet so it wouldn't tear when I went to hang it.

For the canvas pennants:
  • Scrap canvas, muslin, whatever
  • Iron on transfer
  • Pattern ( I made one from a scrap piece of paper)
  • Eyelets
Cut pennant; iron on transfer, punch holes on either end, place eyelets, string to rest of your banner.


Thursday, June 24, 2010

"Fourth" Project #2

Welcome to those stopping in from


New Friend FridaysSmart and Trendy Moms

 I hope you'll look around and make yourself at home. Virtual chocolates are calorie free!


Told you I didn't buy only one of the table leg / post thingys I used in my first project. I like things in twos I guess...they don't have to match, but coordinate. So I started with another bare one and added a wood ball to the top of this one:
Painted this one cream and dry brushed with gold. I also went around the raised edges with a gold paint pen. I decided I wanted this one to hold an image so I Mod Podged a piece of cardboard that was an insert for a vinyl monogram (re-use, recycle!) with the blue star scrapbook paper and I had some gold paint left on my brush so I went around all four sides with it because....because I did.  I was feeling a vintage vibe and found a piece of clipart in my graphics program that I liked, printed it out, mounted it to a scrap piece of red paper and then to another scrap piece of black mat board:
Almost there...I MP'd another scrap of the star paper onto a wooden clothespin, hot glued that to the post ( I don't know what to call it) added some adhesive rhinestones to the drum and remembered I had some stars and stripes wired ribbon and:


Linking Up At:
Visit thecsiproject.com

 All Thingz Related


Photobucket