Thursday, October 22, 2020

BFF Open House


Happy Friday Eve all! We're only a little more than a week from Halloween, which seems like it's been far away and showed up like that. We don't get any Trick or Treaters where we live but I have been seeing SO many creative ways people are thinking of giving out treats this year and the creativity is amazing. From pulley systems to PVC pipe "chutes", it's incredible. Has anyone rigged up anything cool?  

Both for Halloween and in general, you all keep coming up with some brilliant ideas. Let's take a look at some ideas! 


I look at bottles as "cycles". Upcycle or recycle! They are fabulous simple items that can be transformed into pieces of art or home decor. Like this one from Artsy Va Va! So pretty! 


If you've ever looked at an armillary in a boutique, you know they can be P R I C E Y. Naush, from Doodlebuddies has a fabulous and much less expensive alternative using embroidery hoops. LOVE!


I know many of us have been wearing "Pandemic Chic" for a while now but when we do get to go back out and dress up, these DIY Lace Up Ballet Flats from Howling Liz would be a welcome addition to any wardrobe. 


Finally, if you're looking for a special Halloween cocktail, you need to check out this one from Jodie Fitz which reminds me it's been a few years since I last watched the movie "Beetlejuice".  And it's kid friendly and alcohol free! 

OK! Let's see what everyone's been up to this week and as always, thank you for sharing your creations here at The Answer Is Chocolate! 


You are invited to the Inlinkz link party!

Click here to enter

Wednesday, October 21, 2020

Fall Decor: Make Fall Acorns and Pinecones from Plastic Easter Eggs


While Halloween hasn't even arrived yet, I think my house is sufficiently haunted so I've started in on some Fall decorations for November. I'm so excited about how these came out and I hope you like them! 

I've always loved acorns for no reason that I can put my finger on. I just think they scream Fall. Growing up in the Pacific Northwest, pinecones were literally everywhere. Now living in the desert, I don't have either so I did what Makers do and made my own versions! 

Supplies: 
  • Plastic Easter Eggs (had some in my craft stash)
  • Acrylic Paints ( I used Craftsmart Dark Brown and Martha Stewart Rust Metallic)
  • Scrapbook Paper ( Pinecones)
  • Jute Cord
  • Coordinating Sequins (I love the Kids Craft section at Michaels) 
  • Copper Beads
  • Glue Gun and Hot Glue 
  • Aleene's Turbo Tacky Glue


I wasn't sure how well the paint was going to stick to the plastic so I coated a couple with Mod Podge to increase the adhesion and then I decided to try directly on the egg which worked fine. It was easier to open the eggs to paint vs paint them whole. 


I used a bamboo skewer to help hold the eggs in place as I painted. I started with a coat of the plain brown paint and then went over that with a couple of coats of the metallic rust. I made some "egg holders" from scraps of paper glued together in a circle. 


I'm a "figure it out as I go along" person so initially I didn't think I needed to paint the tops of the eggs since they would be covered with sequins but after I could still see a little of the color when I did the first one, I decided to do that w/ the rest. 

Once your egg is completely painted ( you can see here I reached my decision to paint the tops after I'd already added the twine to one, so it's shown here w/out paint) then add a drop of hot glue on the seam, wrap around the egg as shown and when satisfied, glue then trim the end. 


For the acorn stems, I just folded some of the jute twine over itself 2 or three times and sealed the ends w/ a dab of hot glue and then glued to the middle of the top of the egg. Then, using the Tacky Glue, start gluing the sequins around the egg, starting at the top edge of the twine. Work up to the top and voila!


I had some copper beads in my stash so I added on sequin to the bottom along with one copper bead. 

Pinecones:
For the pinecones you will need an oval craft punch or a digital cutting machine. I used my Cricut Explore 2 and created an oval shape in Design Space for my pine cone parts. 


I had some silver polka dot foiled kraft papers in my stash and I liked the way I thought they'd look with the acorns so to coordinate, I used silver sequins around the small end of the egg. Starting around the sequins, start gluing the ovals around the egg. I did use the hot glue for this. Continue until you get to the top of the egg, slightly offsetting each row of petals. Once you get to the other end, decide if you want them more open or closed and glue the petals down accordingly. 


I hope you've found some inspiration! 


Honored To Be Featured At


Monday, October 19, 2020

Halloween : Witch Switch Girlfriend Gifts and Haunting My House


Pre-pandemic when I would get together with girlfriends, I always liked to bring a little seasonal something. Makers love making things right?! So will we let a pandemic stop us from showing our friends that we love (and miss) them? No, we will NOT! That's what mail is for and I get to help out the USPS. 

In this project, I'll show you how to make your own crackled surfaces without needing a specific crackle medium. 

Supplies: 
  • Wood Plaques ( Dollar Tree)
  • Acrylic Paints
  • White Glue
  • Vinyl ( I used Cricut's Glossy Black)
  • Cut File (I got this fun file from designbundles.net )
  • Wire
  • Ribbon


I found this pack of 6 wood plaques at Dollar Tree ( 4.25 x 4.25 ) and of course I now wish I'd bought several packages. 

Since we're crackling these, you want to start with the color you want to peek through the crackles. For all of these, that was black. 


I painted both sides and the edges so I'd have a finished look when done. 


For the crackle, all you need is some white school glue. I stock up on this during back to school when they're like $.50 a bottle. After your base coat is dry, cover with a medium layer of glue. Too thin, and it will dry too quickly. Too heavy and it takes longer. So in the middle!


Wait a a few minutes (or you can speed things up with a blow dryer on cool but you don't want to dry it completely) and then go over with your accent color. The important thing here is to only paint in one direction, don't go back and forth with the second color of paint. 


You can let the top coat air dry or you can be impatient like me and use a blow dryer. Now it's OK to use a warm setting which will help the crackling. Do NOT use a heat gun which will bubble your paint. 

I kept two of the signs black and white to match my friends style; others, I used different colors to match their styles but did another layer of glue and white paint. 


While your plaques are getting good and dry, you can cut your vinyl. I re-sized the file in Cricut Design Space and then cut using glossy black vinyl.


Take a Valium and weed your vinyl. Just kidding. I hate weeding like Indiana Jones hate snakes. Do some deep meditative breathing and keep telling yourself "My friends are worth it. My friends are worth it".  Then use transfer tape to apply your vinyl to your sign. 

To finish, I cut pieces of medium gauge wire and wrapped around a paint brush handle to curl. Glue to each end with hot glue. Make bows from black ribbon and glue atop where you glued the wire ends as shown. 


I was really happy to hear from the recipients that they liked them. For a couple this is their only Halloween decor this year because have you met 2020? 

I did decorate because no matter what, I like being surrounded by seasonal decor . It's kinda what we do right? So here is a glimpse at my "Haunted House". 


Entryway table with my Witch Hat Wreath, Upcycled Goodwill Candle Holders, Mackenzie Childs Pumpkins and Glam Skulls from this year's projects. 


I also did my coffee table:


And a Poe vignette in the fireplace we don't use! I made Mr. Skully's Hat years ago and it's held up. 


Even the light fixtures aren't safe. Gold and black tulle, Dollar Tree glitter skulls and skeletons. 


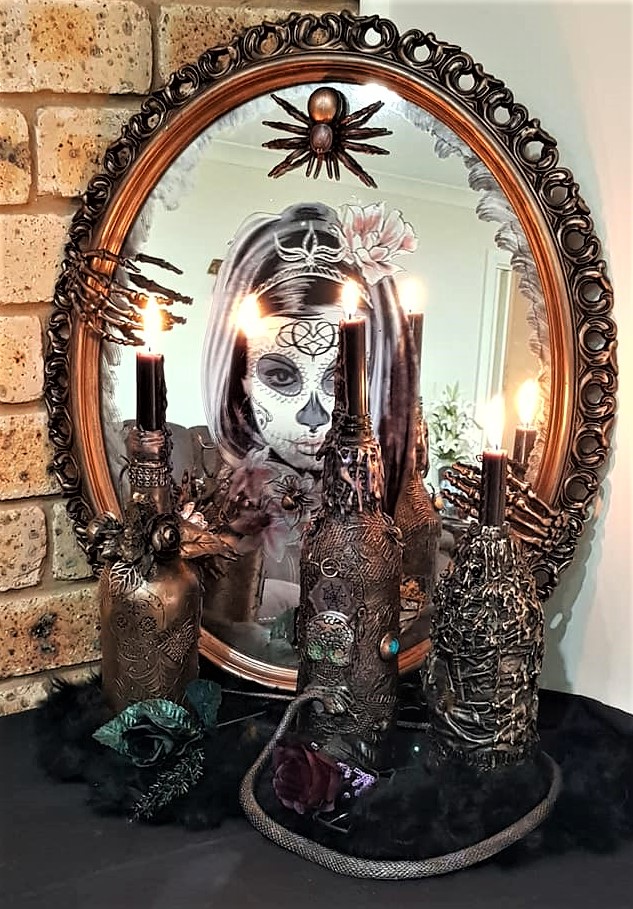
And while most of my Halloween decor is black, metallics, and neutrals, I did add some color with a Dia De Los Muertos corner: 


Michaels had this pretty striped ribbon on sale which I used as the inspiration for the banner and pinwheels. I cut the images (Silhouette Design Store) from metallic vinyl. The banner itself I cut using black and orange cardstock and then added a "papel picado" (pierce paper) feel using different punches. The pinwheels are Astrobrights paper and the black pom poms are Dollar Tree. 

Happy Haunting! 


Thursday, October 15, 2020

BFF Open House


Happy middle of the month Friday Eve all! Hope you've all had a good week. It's finally starting to cool down below 100 here in the desert. I don't think I'm ever going to get used to still being in shorts in October. We're moving full speed ahead towards Halloween so let's take a look at some spooky and fun ideas shared at last week's party. 


Anita from Unique Creations by Anita is blowing her creations out of the park. I happen to love this style, and these bottles are...chef's kiss! 


What is Halloween without some Edgar Allen Poe?!  Maryjo from Masterpieces of My Life has a wonderfully creative vignette inspired by his perfect for Halloween spookiness! 


If your tastes are chic but not scary, then check out this gorgeous Tiered Tray idea from Andrea at Living on Cloud Nine. I adore the buffalo check! 


Finally, these Peanut Butter Blossom Cupcakes from Butter With a Side of Bread, would be perfect with some hot cocoa on a chilly Halloween night! 

OK, let's see what everyone's been up to this week! 


You are invited to the Inlinkz link party!

Click here to enter