Thursday, November 8, 2018

BFF Open House Link Party

Happy Friday Eve all! Hope you've had a great and creative week. In this month of gratitude, I'm thankful for many things. This week it's some good news about my mom's health at a recent Dr. visit. As always, thankful for all of you who choose to share your creative talents here on my little corner of the internet. 

Let's see some ideas from last week's party! 


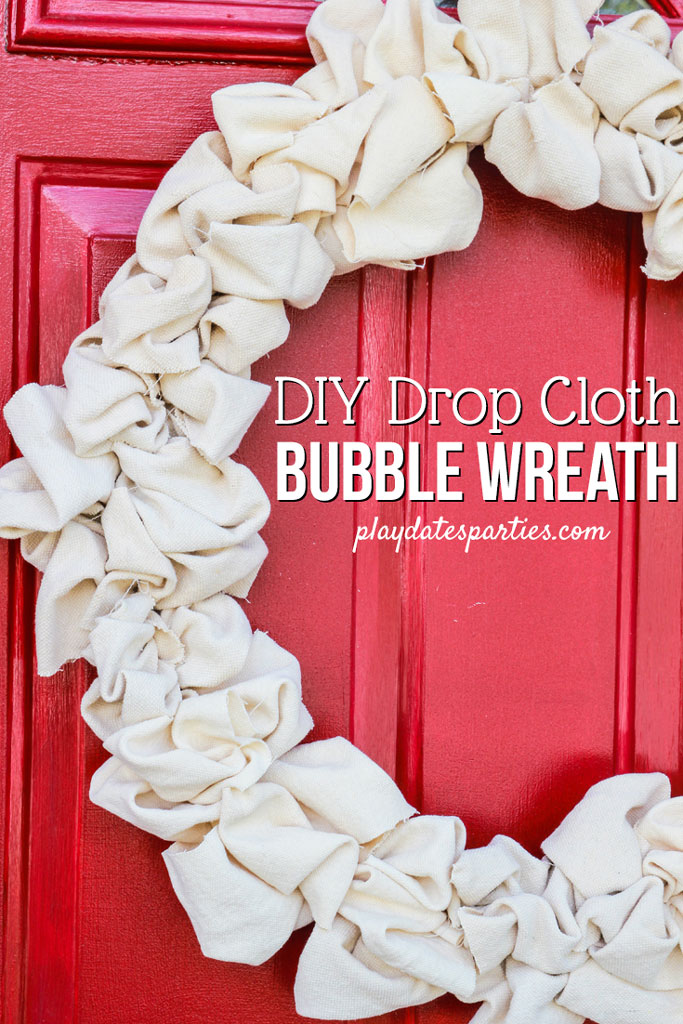
I'm always down for a good wreath project and this Drop Cloth wreath from Play Dates to Parties is one that can be up year round. 


Printables are such a great way to change things up and bring a little seasonal decor in without to much fuss. This is a beautiful one for Fall from Clearwater Cottage


Got fabric scraps ? That means you could easily whip up this cute Fabric Turkey Wall Hanging from Adventures Of A DIY Mom


Finally, I know some of you are already decorating for Christmas or planning your Christmas decorating. There are some AMAZING ideas here from Satsuma Designs

Now let's see what you've been up to this week! 


Thursday, November 1, 2018

BFF Open House Link Party

OMG it's NOVEMBER! How is that possible? Hope everyone had a safe and fun Halloween. 

We are in full holiday making mode now aren't we? Let's see some inspiration from last week's party!


Love this Rag Wreath from Vintage Paint and More. How perfect is this until it's time for Christmas / Hanukkah decor ?! 


LOVE this Faux Hand-Lettered Paper Scroll from Hazel and Gold. This would be fun for every day decor or a special one for the holidays. 


You know how you can see the same thing over and over again at thrift shops? Things that were trendy at some point but no longer? Shoppe No. 5 took one of those and udpated it to still look beautifully vintage but go with today's design trends. You have to check out her post to see what "Paddle With A Heart" means! 


Finally, while caramel isn't limited to Fall, for me it's the time of year that screams it. So how about an easy 3 Ingredient Caramel sauce like this one from Fluster Buster?

Now, let's see what everyone's been up to this week! 


Wednesday, October 31, 2018

Til Death Do Us Part Couples Shower Candles


 Happy Halloween all! Hope those of you with Trick or Treaters are prepared for tonight. We are winging it. We have no idea if we'll get any at all but I was a Girl Scout so I'm prepared with candy ( my favorites just in case no one shows!).

My BFF just threw an amazing couples shower for "our" daughter and future son-in-law. The inside joke is that I'm her "real" mom because we tend to like a lot of the same things, and those things are very different from what my BFF tends to like. We all converge around Harry Potter!  Since we were pregnant together, there's always been a connection there.

The wedding isn't until January but "our" daughter LOVES Halloween and all things skully and gothic so October was the perfect time for the shower.

Supplies:

  • Plain Prayer Candles (Dollar Tree)
  • Black Vinyl ( I used Cricut Glossy Black)
  • Skull Image ( downloaded from Silhouette online store)
  • Decorative Paper ( I had this in my stash)
  • Washi Tape (also stash)


Tip: if you need Dollar Tree items in a specific quantity and don't want to risk your store not having enough, you can order online and have sent to your store for you to pickup. I had a little hiccup with mine but it's the first time it's happened and luckily the store still had the 20 candles I needed.


I wrapped the bottom of 10 with the silver paper and 10 with the black and silver paper.


I used a strong double sided tape to adhere. I had some coordinating washi tape in my stash so I used it with the silver paper. 

My images were busy  cutting on my Cameo while I was wrapping the candles. Once they were cut, the fun began: weeding. Not my favorite part of vinyl, but oh so necessary! 


Weeding As Art ! These are all my little scraps removed from the images. 


Once the weeding was complete and the transfer tape applied, applying the images to the candles was easy peasy.  My BFF was so happy with them and they went perfectly with how she'd decorated for the shower. 


Monday, October 29, 2018

DIY Felt and Zipper Bat Collar


I think I love dressing up at Halloween as an adult almost more than I did as a kid. We had some "Halloweekend" fun at some local festivities in our new hometown and I wanted to make sure I was dressed for the occasion so I whipped together an ensemble using a mini Jack Skellington themed top hat I picked up on a trip to Disneyland. I'm showing the basics of the collar here but I finished my ensemble off with a zipper ring and skull earrings. 

Supplies: (I had everything in my stash which made things even better!)
  • Felt
  • Flat Backed Rhinestones
  • Beads
  • Zipper
  • Glue ( I love love love Beacon 3 In 1)
  • Old Broken Jewelry


I wasn't going for perfection so I freehand drew a bat themed template on a piece of scrap paper to use as my pattern. Cut two of these from black felt. Set one aside. 


Cut both ends of a black zipper off so you have two sides. Set one aside. Measure along each side and down the middle as shown  and sew ( I just did a hand stitch) your zipper to the felt. 


I will pick up jewelry pieces when they're on sale or at thrift shops etc. because sometimes it's cheaper than buying actual supplies. These were a pair of chandelier earrings that had additional dangles I used for a different project. I found these at Top Shop for $2!  I sewed these on either side of the middle zipper as shown. 


The rest I just kind of winged. I had some clear rhinestones I glued to each side and did a little bead embroidery with gunmetal and white seed beads. I finished the top of the collar with other silver beads in my stash.  When you're done with your collar top, grab the other piece of felt that was set aside and some scrap ribbon. Sandwich the ribbon between the two pieces of felt and glue using either hot glue or as mentioned above I love Beacon 3 In 1 glue. It holds and is water proof if (not that I plan on getting this wet). 


Of course, "makers gonna make" right? I had that other side of zipper sitting there staring at me. Oh hey I could make a rosette or something! I was thinking pin but thought nah , I want the collar to stand alone. How about a ring? OK! Found a ring blank in my stash. Did a spiral rosette with the zipper. Glued to the ring. Easy peasy! 


I already had a pair of skull themed earrings I made for a different occasion. They went perfectly with my look! 


I'd made these to wear to a fun "Til Death Do Us Part" bachelorette party and shower for my BFF's daughter. 


I was really humbled by the compliments I got because we were at a few artisan markets and galleries this weekend and what creative person doesn't feel validated when other artists compliment you on your work? !

Who says Halloween's just for kids? Where's my candy? Chocolate, of course!


Thursday, October 25, 2018

BFF Open House Link Party


Happy Friday Eve all and can you believe a week from now, we'll all be recovering from our Halloween candy comas? We're not sure whether we'll get any or many Trick or Treaters yet so stocking up just in case.

Let's see some ideas from last week's party. 


One of my favorite rides at Disneyland is The Haunted Mansion. We've been lucky to be there when it's decorated for Halloween which is a sight to see!  Bring a little Disney into your decor with this DIY Haunted Mansion Door Sign from DIY Party Mom


It's not to late to whip up a little magic under glass like this "No Snow" Halloween Snow Globe from Artsy VaVa


Since we'll quickly be changing out Halloween decor for Fall / Thanksgiving, I love this Leather Leaf Garland from Shoppe No. 5


Finally, I adore this Buffalo Check Drum Shade from Faeries and Fauna. Isn't there just something about buffalo check? 

Now let's see what you've all been up to this week!


Monday, October 22, 2018

2018 Halloween Cards Gothic Grey Gold and Purple


Michaels Recollections collections continue to make my card making life easy! I 

I fell in love with these papers the instant I saw them. The colors and designs were perfect for my more gothic Halloween style, and the fact that they were already foiled left me with not a lot to do. 

I was also thrilled that it happened to be when the focal papers and washi tape were 50% off AND on a day when I had an extra 20% off coupon on my phone. 


I knew I had coordinating papers in my stash at home since I tend towards similar styles and colors. I couldn't wait to get home to start playing! With sale and coupons, my cost for the new materials was $5.99!  

Supplies: 

New: 
  • Recollections Halloween Cards stack, 24 double sided sheets
  • Recollections Moonlit Manor Paper Pack, 24 sheets
  • Recollections Foiled and Spider Washi Tape

Stash:
  • Black and White Cover Stock (Recollections)
  • Gold Foil Paper (Recollections)
  • Black Kraft and Gold Foiled Stack ( This was a Michaels "Hot Buy" when they have 12x12 Stacks for $5)
  • Misc. Embellishments
  • ATG  Tape Gun and Tape

The cards are all 5 x 7, trimmed from 8.5 x 11 sheets, and then scored using a scoring board. I selected sheets and trimmed panels of the Kraft Black and Gold foiled papers measuring 4.75 x 6.75 ; trimmed panels of the Halloween Cards stack and layered onto the gold foil paper and attached to cards as shown. 


I had some gold Halloween themed word stickers in my stash so I mounted those on scraps of cardstock and mounted to the cards with foam tape. To embellish I used the washi tape, and Stickles Glitter Glue. 


Thursday, October 18, 2018

BFF Open House Link Party


Happy Friday Eve all! Hope you've survived the week. I have, barely, but fortunately taking tomorrow off and told my day job to lose my cell number. 

Let's see some projects from last week's party! 


I am a total coffee queen. So this coffee tray from Lisa at Fresh Vintage by Lisa S definitely caught my eye! Love!


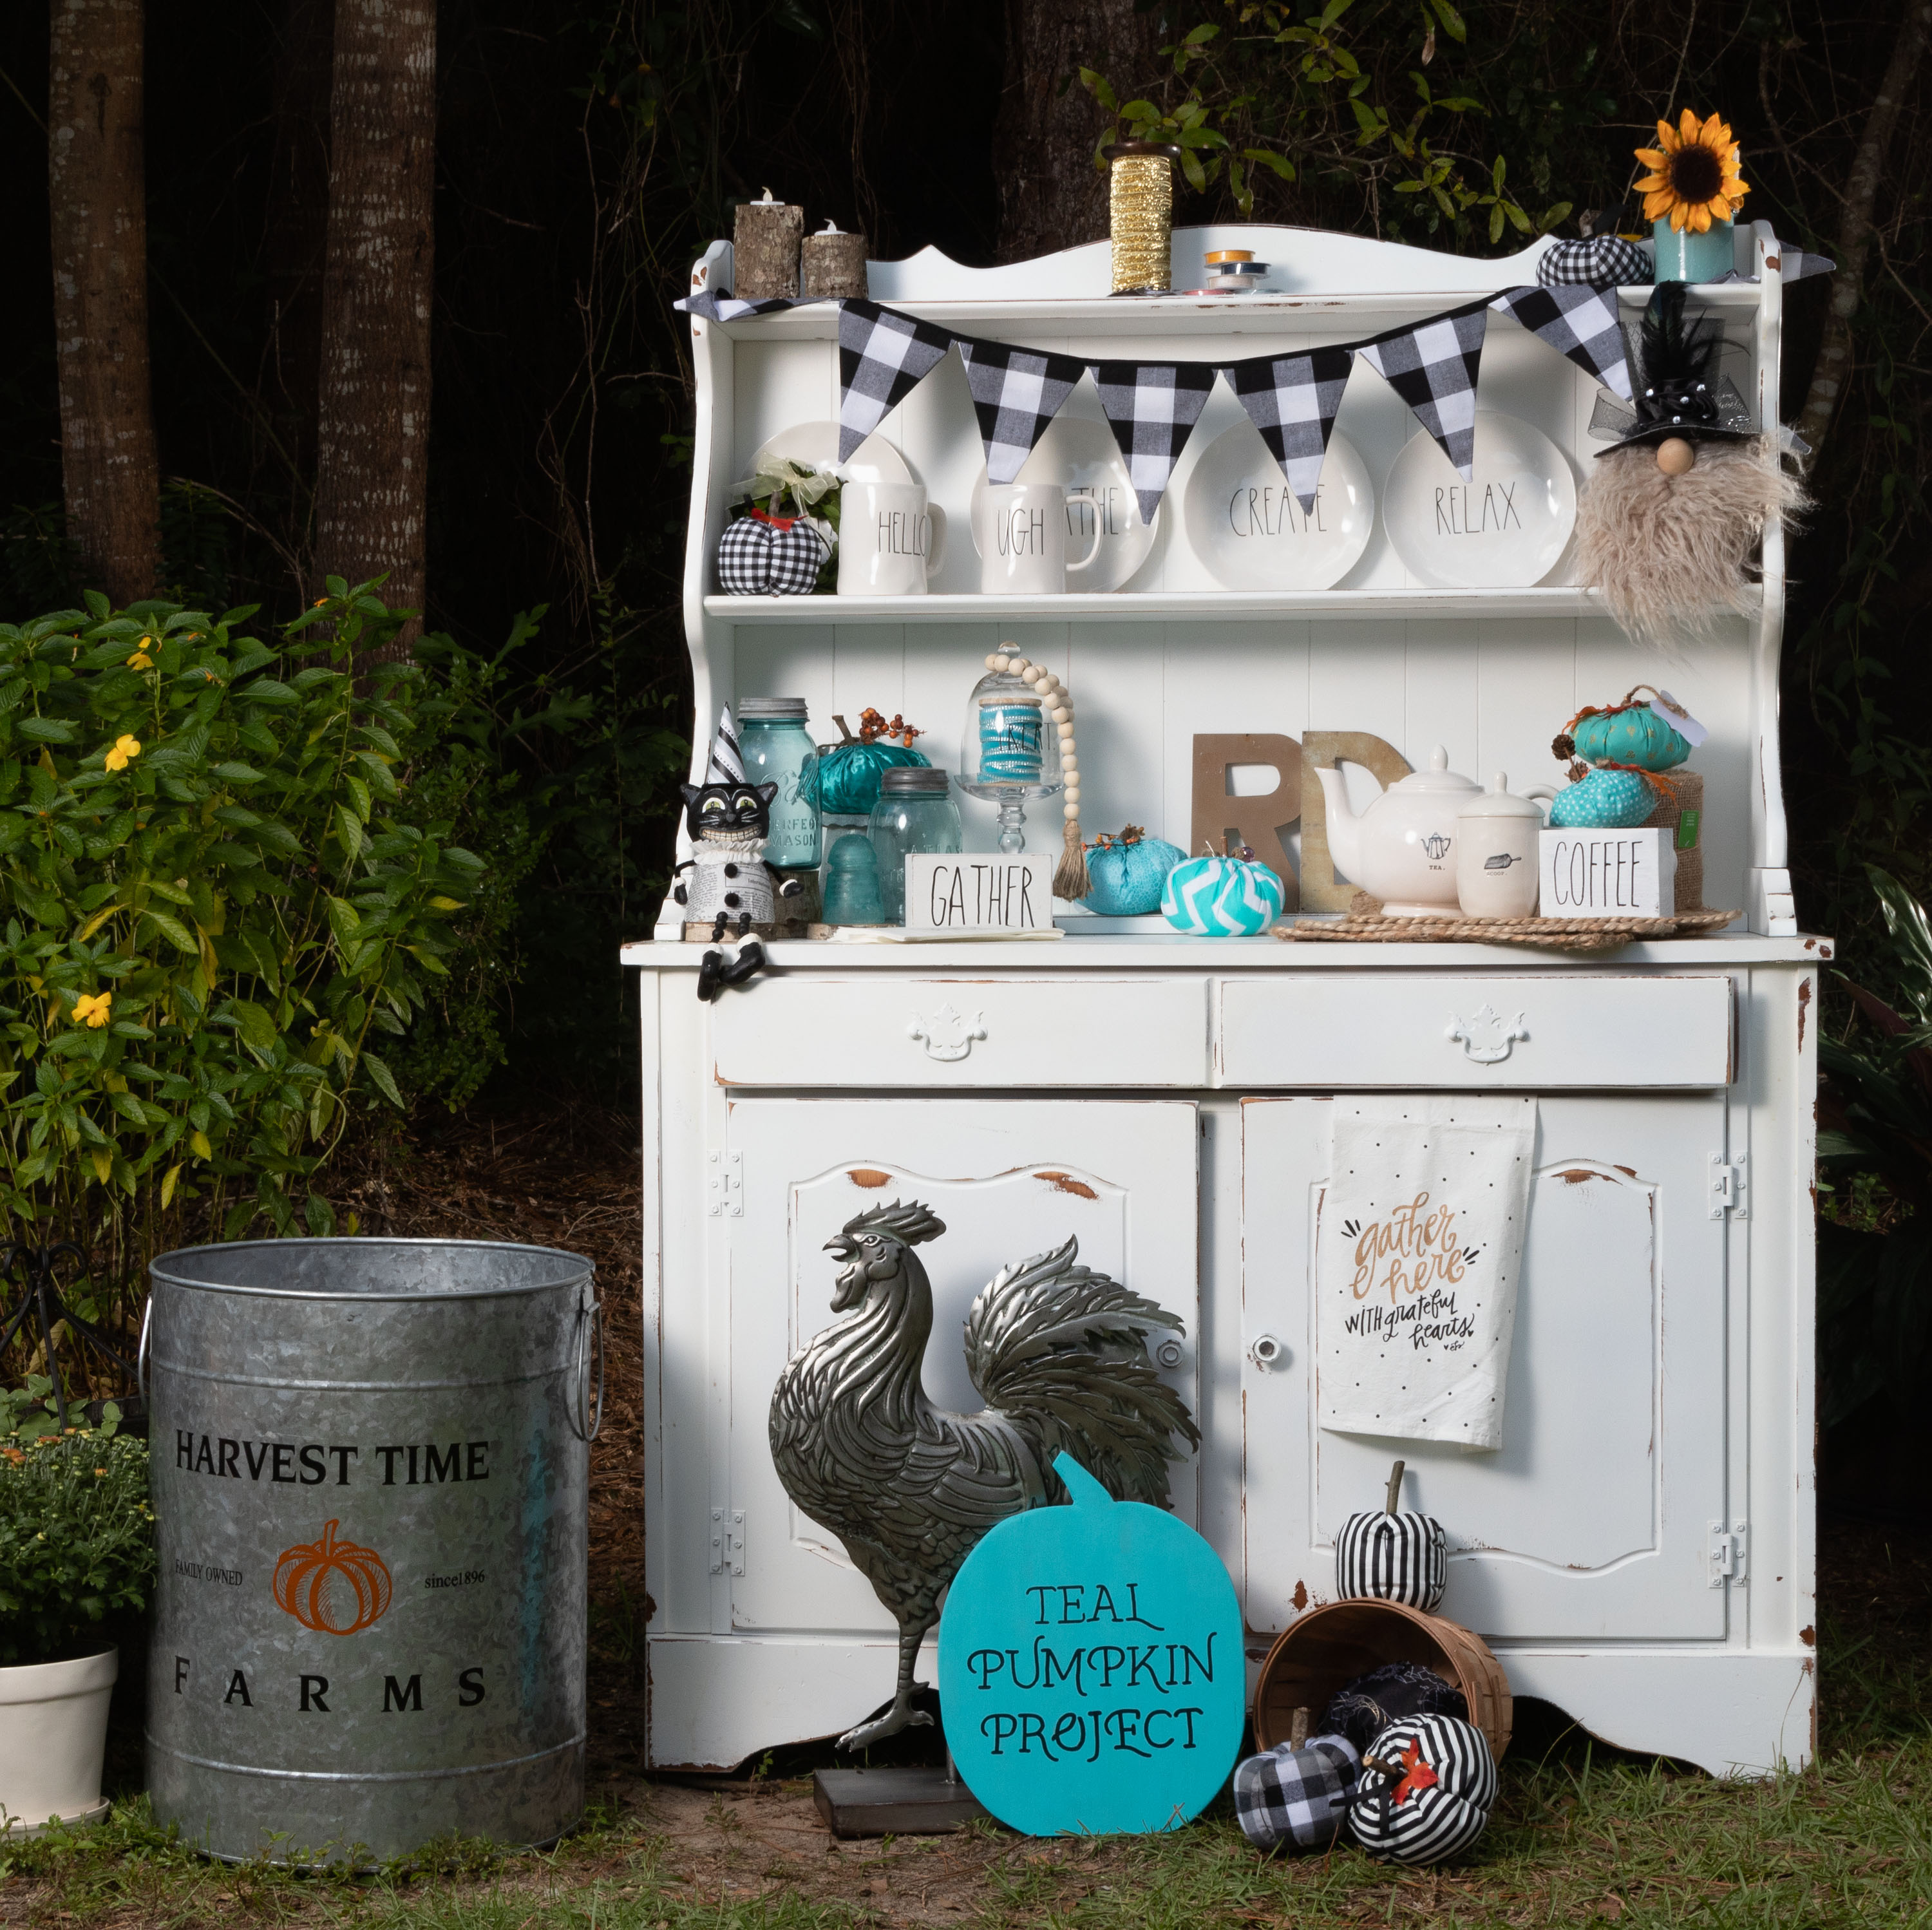
If you've seen teal pumpkins in the stores it's not just because it's a fun color to play with . Teal pumpkins let your Trick or Treaters know that you have non-food options available to them. This is a very important thing for those with food allergies and makes Halloween more inclusive for children who have them. Learn more and check out these ideas at Kippi At Home


Do you have something on hand that you would love to make into something else? Using a mold is an easy way to do that. Sheri, from Hazel and Gold Designs shows you how to use a silicone putty to do just that! 


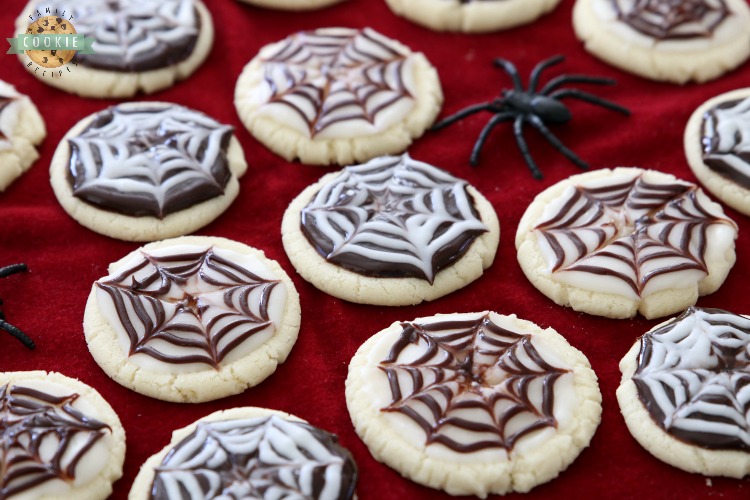
Finally, how cute are these Spiderweb Cookies from Family Cookie Recipes

Now, let's see what you've been up to this week!