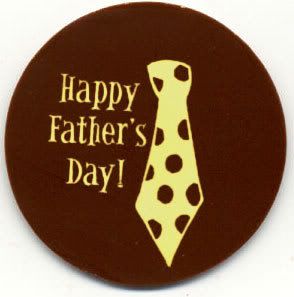
and most especially, "Mr. Chocolate". I love you.
My Dad's gone and I miss him all the time. I miss that he didn't get to walk me down the aisle, or that he never got to know the man I married, or meet his amazing grandson. Still, I know he's with me always...I catch a glimpse of him in an expression or gesture my son makes, or something he likes that I get to tell him his Grandpa also liked. My son is fortunate to have my husband's Dad, who's been a wonderful grandfather to him. Above all, my son has a Dad who has been and always be there for him. Who loves him unconditionally and proudly. My Daddy would definitely have approved!
Sunday, June 20, 2010
Friday, June 18, 2010
And The Winner Is..........
Thank you first of all to all who enabled me to reach 100 followers. As I said in the post announcing the giveaway I didn't know what to expect when I decided to jump into the great big bloggy pool. So , without further delay....from random.org....out of 30 entries....the WINNER...is...
which means the winner is Jenni from Vintage Songbird !!!
Congrats Jenni. Email me through my profile with your address so I can get this on its way to you.
which means the winner is Jenni from Vintage Songbird !!!
Congrats Jenni. Email me through my profile with your address so I can get this on its way to you.
Thursday, June 17, 2010
Card Tute
Welcome to those stopping in from
Thanks for coming over and visiting my blog!
Here's a card that doesn't require either stamps or any cutting or die cut machines. It's especially easy if, like me, you're one of those people who picks stuff up when you see $.97 and $1.97 stickers on things so you have them on hand when an idea strikes. I use a lot of neutrals in home projects so when it comes to cards, I get to play with color a lot more and since I'm a bit of a paper addict ( a bit?) well let's just say I have pretty much every color in the rainbow and then some. Anyway, start with a basic card. My go to size is 5x7 because I buy A-7 envelopes in bulk when they're on sale. You can cut your own or buy a package of blank cards. I used to buy cardstock in every conceivable color but lately, I just use white or cream as my base card and let the colors come from the scrapbooking paper and accents. This is cheaper since you can almost always find white or cream cardstock on sale.
So there's my 5x7 ( which if you're cutting your own is 10x7 scored at 5 inches) and a package of scrapbooking borders I picked up for $1.97 at JoAnn's. When my husband is looking for me he doesn't call my cell, he just has them page me. Just kidding. Mostly.
I found a piece of scrapbook paper that coordinated and cut out a panel (6.75x4.75) with a smaller white panel (5.75x3.75). I had some rub ons that I picked up guess where, and put corners on the white panel.
Top pic: Rub-ons and panels. Bottom pic: Two of the borders from the package cut to 6.75 and layered
For my focal, I used two paper flowers from packs I picked up at a stamp show, used one of the flowers from the border for the center and put an adhesive rhinestone in the middle.
OK last last thing....some of the borders were left over so I put those on as accents in the top right and bottom left corners. It's for ateenager, young woman, and I was going for not too old, not too young, but fun. And if her mom is reading this, don't show her! It's going in the mail right now!
Thanks for coming over and visiting my blog!
Here's a card that doesn't require either stamps or any cutting or die cut machines. It's especially easy if, like me, you're one of those people who picks stuff up when you see $.97 and $1.97 stickers on things so you have them on hand when an idea strikes. I use a lot of neutrals in home projects so when it comes to cards, I get to play with color a lot more and since I'm a bit of a paper addict ( a bit?) well let's just say I have pretty much every color in the rainbow and then some. Anyway, start with a basic card. My go to size is 5x7 because I buy A-7 envelopes in bulk when they're on sale. You can cut your own or buy a package of blank cards. I used to buy cardstock in every conceivable color but lately, I just use white or cream as my base card and let the colors come from the scrapbooking paper and accents. This is cheaper since you can almost always find white or cream cardstock on sale.
So there's my 5x7 ( which if you're cutting your own is 10x7 scored at 5 inches) and a package of scrapbooking borders I picked up for $1.97 at JoAnn's. When my husband is looking for me he doesn't call my cell, he just has them page me. Just kidding. Mostly.
I found a piece of scrapbook paper that coordinated and cut out a panel (6.75x4.75) with a smaller white panel (5.75x3.75). I had some rub ons that I picked up guess where, and put corners on the white panel.
Top pic: Rub-ons and panels. Bottom pic: Two of the borders from the package cut to 6.75 and layered
For my focal, I used two paper flowers from packs I picked up at a stamp show, used one of the flowers from the border for the center and put an adhesive rhinestone in the middle.
Last thing I did, and these are something I always have on hand, took some clear alphabet stickers and spelled out "BIRTHDAY" on a scrap piece of paper, tore it to fit where I wanted and:
OK last last thing....some of the borders were left over so I put those on as accents in the top right and bottom left corners. It's for a
Wednesday, June 16, 2010
Be Still My Chocoholic Heart
Stephie, over at her blog Made By Stephie made these delicious bits of chocolatey goodness.
They are Chocolate Salted Caramel Cupcakes
I saw them yesterday over at Today's Creative Blog "Get Your Craft On" linkup. I want now!!!!! You know you do too :)
She's got all kind of other yumminess..foodie and non foodie, but she had me at chocolate.
Monday, June 14, 2010
Winner Winner, What's For Dinner...
Welcome to those stopping in from
Now my son can check our new "Dinner" board when he comes home from school instead of it being the first question he asks me. The debate was chalkboard or dry erase since there have been so many great examples of each. But I finally decided last week when Erin at Crafts & Sutch did a cute dry erase message board ( so cute that it was picked as a favorite thing this week at All Thingz Related ) that dry erase was the winner.
Started w/ a $.01 frame from one of Aaron Bros $.01 sales (they're a national chain and a couple of times a year the have a sale where you buy one frame for reg price and get another one for $.01 so who knows if this frame was the $.01 or the full price one but I digress):
That's my stack of acetate thingies in the rubber band. Then I got out some clear acrylic stamps and spelled out dinner and realized there's only one "n" in the pack so I turned a "u" upside down because I didn't want to go back in and squeeze the 2nd "n" in. Both to fit the letters on the acrylic block and because I knew I wouldn't get them perfectly straight, and then I would be cranky, I put the letters on kinda jumbled.
Here's the whole thing (together with Tuesday's dinner plans ... if you can't read my handwriting, it's chicken skewers, broccoli, pasta) :
I'm not much of a week at a time meal planner....more of a this is what's for dinner TONIGHT kind of planner so you won't see a M,T,W etc. board here lol.
Linking up at:
Now my son can check our new "Dinner" board when he comes home from school instead of it being the first question he asks me. The debate was chalkboard or dry erase since there have been so many great examples of each. But I finally decided last week when Erin at Crafts & Sutch did a cute dry erase message board ( so cute that it was picked as a favorite thing this week at All Thingz Related ) that dry erase was the winner.
Started w/ a $.01 frame from one of Aaron Bros $.01 sales (they're a national chain and a couple of times a year the have a sale where you buy one frame for reg price and get another one for $.01 so who knows if this frame was the $.01 or the full price one but I digress):
It was too shiny and I wanted to tone it down so I painted it with a taupe acrylic and then dry brushed it with black. I used the cardboard backing that came in the frame to make the main part, covering it w/ scrapbook paper and an acetate border I got at a sidewalk sale at one of my favorite haunts. They were on sale for $.10 each so of course I bought 10 of them. They were a dime! How could I buy just one? :
Here's the whole thing (together with Tuesday's dinner plans ... if you can't read my handwriting, it's chicken skewers, broccoli, pasta) :
I'm not much of a week at a time meal planner....more of a this is what's for dinner TONIGHT kind of planner so you won't see a M,T,W etc. board here lol.
Linking up at:
Vintage "Diamond" Birthday Card
We celebrated a 75th birthday this weekend, and with diamonds being the traditional item associated with 75th anniversaries, I decided to go with that theme. I used sheet music from an old book of the same that I bought at a used book store, glued to numbers I cut out on my Cricut from a recycled cereal box.I also cut a circle out and covered it w/ sheet music to serve as a base. I wrapped a silver pipecleaner from a package I bought on sale after Christmas last year ( I mean in preparation for Christmas THIS year because I'm just that organized...mkay, that works) around the circle and stuck the numbers on top w/ foam tape. I think it's a vintage-y looking card...maybe of a type from around the time the recipient was born?
I had a package of tulle circles I picked up at the $1 Tree and folded those in quarters which I put behind the circle thingy and then embellished the number with adhesive "diamonds". NOTE: not a mailing friendly card...best given in person.
Subscribe to:
Posts (Atom)