Thursday, August 20, 2020

BFF Open House


Welp. August is both flying by and standing still like the rest of 2020. Hope you've all had a wonderful and creative week. I've been working on some Halloween stuff, trying to get ahead of things this year since I have some more time on my hands. 

Let's take a look at some of the wonderful ideas shared at last week's party! 


Card making remains my first love and like Antonella from White House Crafts, I love finding and using 12x12 pads which usually contain a few pages of panels you can use as the focals of your cards. Mr. Chocolate won't believe him if I say I don't have this cute collection in my collection and need to remedy that! 


Eccentricities by JVG shared how to make a pretty and practical Diffuser Bracelet. These work w/ body heat to release scent and can be used w/ essential oils. 

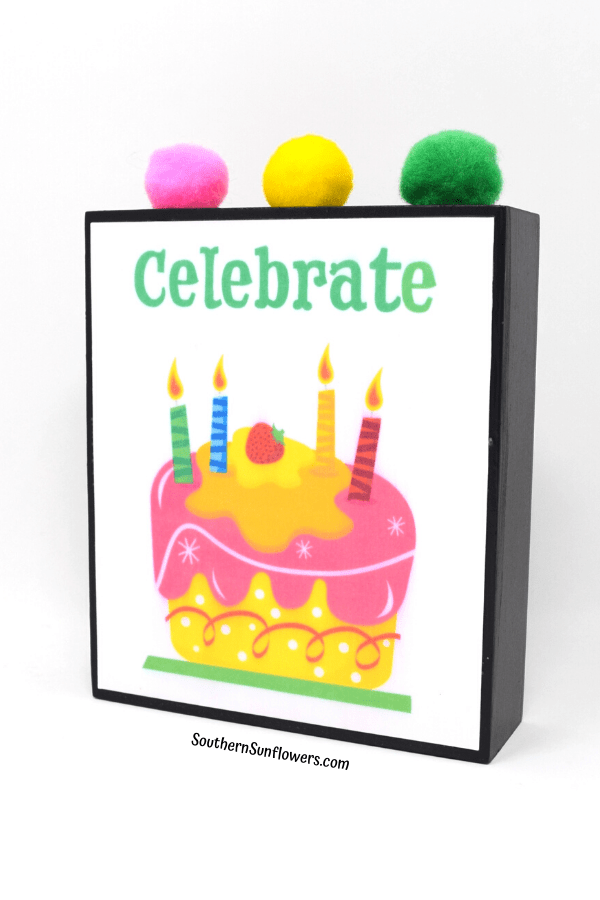
Southern Sunflowers shared a wonderful makeover of a box sign thrifty find and is also sharing the printable she made and used!

Picture

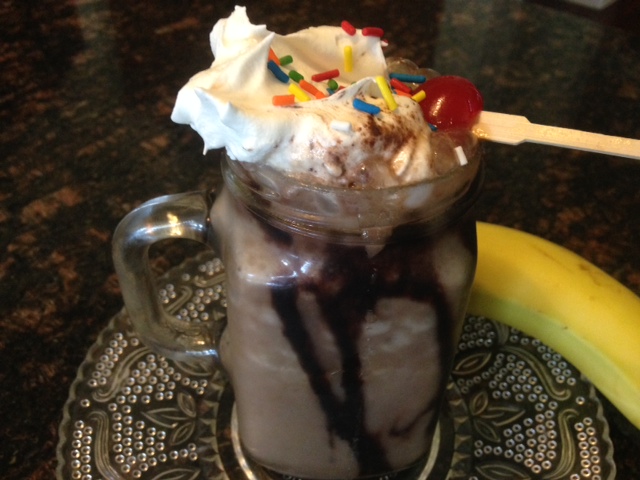
Finally, Cindy's Online Recipe Box shared this adult version of a banana split via this Frozen Banana Split Cocktail. Oh my! 

Now let's see what everyone's been up to this week! 


You are invited to the Inlinkz link party!

Monday, August 17, 2020

Quillermania Continues: Monogrammed Letters


I recently made three different gifts for three different friends. As my quilling mania continues, this time I made coordinating gifts and cards. 


Left to right: A monogram for a friend's daughter who recently moved into her first post-college home. Her initial done in colors to match her bedroom.  Middle: A gift for a friend in her furbaby's colors. Right: A monogram for one of my BFFs daughter in her brand new son's initial. 


For this one I used this fun bow themed background paper, cut the letter using my Cricut, and then quilled in colors to match her bedroom.  For the card I made to go with, I stuck w/ the same color theme but did a dog paw for her furbaby. 


I used the same background paper for the paw card and then coordinating quilling strips for the paw. 


For the paw hoop, I used a bone print background paper and then used different shades of brown to make the paw. Did the reverse as the hoop above and did the paw print here and the monogram of the furbaby's initial on the card. 


For the last one, I used the nursery colors and made the monogram, again cutting the letter using my Cricut Explore Air 2 and then made quilled "baby feet" and a rattle for the card. using a chipboard letter sticker to finish. 


For this one I used a navy paper layered with a vellum paper with silver dots. 

My husband is almost ready to stage a "quillervention" because I keep popping out of my craft room with new projects. Almost. Because he keeps claiming a few of them! 

Vintage Charm weekly party button
2

Thursday, August 13, 2020

BFF Open House


Happy Friday Eve again friends! Hope you've all had a creative and peaceful week. Still on my Quilling journey ( latest here) and filled w/ a burst of energy starting on some Halloween pieces which I'll show in the future! Looks like everyone's keeping busy as well so here's a look at some of the great ideas from last week's party! 


I'm clearly not the only one thinking about Halloween. LOVE these wine glasses from Unique Creations by Anita which are simple yet bold and elegant! 


Chas's Crazy Creations also has Halloween on the brain and made these wonderful Bottle Pumpkins that are so cool! 


Look at this BEAUTIFUL paper feather from Priyam at Simple Joys! Not cut using a digital cutter or die, but by HAND! 


Love Chocolate Chip Cookies? Love Nutella? How about the two combined! That's exactly what The Kitchen Is My Playground did and they look scrumptious! 

Now, let's see what all you creative people have been up to this week! 

You are invited to the Inlinkz link party!

Monday, August 10, 2020

Quilled Cupcake Birthday Card Tutorial


One thing I was excited about when I started my Quilling journey was the ability to incorporate it into my cardmaking. I'm so happy with how this card came out, inspired by some fabulous papers I found at JoAnn. 

Supplies: 
  • Pebbles Double Sided Scrapbooking Paper (JoAnn)
  • Cardstock ( 110 lb)
  • Coredinations Glitter Scrapbook Paper (JoAnn)
  • Juya Quilling Paper Strips
  • Quilling Tool
  • Glue (Aleene's Turbo Tacky, Elmer's)
  • Paper Trimmer
  • Tape Gun

JoAnn recently had a mega sale on scrapbook paper. I couldn't resist these at $.19 each!! Hello my name is Carol and I have a paper problem. 


They're double sided so it's like two, two, two papers in one. My older followers will get that joke. 


TIP: 
In learning Quilling, I've watched different videos on how to outline an image but the thing that works the easiest and best for me is to cut the image I want to outline using my Cricut Explore Air 2. My trick that I think I invented but who knows, is to cut two of the image, layer on top of each other with a thin foam tape, which gives some depth to make it easier to go around it with the Quilling paper. 


I went around the image with the light acqua strip, then made a cupcake liner design with pink. Another TIP: I do these atop wax paper since the glue doesn't stick. Wax paper is inexpensive ( OK cheap!) and a little will go a long way. 


Once my image was outlined, I did a bunch ( technical term) of brown open coils and some darker pink tight coils for the "frosting", and then yellow, acqua, and cream to fill in the wrapper. 


As the focal image was drying, I made the actual card. Simple 5x7 card, and alternating layered panels of the acqua glitter paper and the cupcake paper. 


I use the Aleene's Turbo Tacky Glue for the outline and to fill large spaces and the Elmer's in the fine tipped bottle for detail, small spaces. 

To finish, I made a small coil of red for the cherry on top !


Since the friend this is for lives in another state and we can't enjoy a real cupcake, this will have to do! 


Thursday, August 6, 2020

BFF Open House


Happy Friday Eve all. This week I remembered what day it was lol. Hope everyone's had a creative and peaceful week. Let's take a look at some of the wonderful ideas shared at last week's party! 


Michelle from My Bijou Life shared a post that for me was both timely and helpful on the topic of Creating vs Selling. Now that I'm retired, I am focused on jump starting my blog and being a full time creative and also maybe finally opening an online shop. This is so helpful if you're in a similar decision making position! 


From Simple Joys, Priyam shared how to take the simplest of things, a paper towel roll, and make something beautiful. I've had some ideas about incorporating these into my Quilling so this is inspiring! 


I love the "Rae Dunn" style and T'onna from Sew Crafty Crochet has taken it to her crochet hook to make this fun scarf. Love! 


Finally, since masks aren't going anywhere anytime soon and not everyone has a sewing machine, Hello Sewing has a great tutorial showing how to make one without a machine. 

Now let's see what you've been up to this week! 


You are invited to the Inlinkz link party!


Wednesday, August 5, 2020

Quilled Silhouette Self Portrait


My Quilling journey continues so apologies if you're tired of Quilling projects but I'm on a roll! Pun intended. 

I've been doing completely filled Quilling where you don't leave any (or not a lot of) open space and wanted to play with doing only a partial image quilled. I decided to do a "self portrait" which was a royalty free image I found online that was close enough to what a silhouette of me would look like. I googled "Black woman silhouette" and this one popped up. Since I usually wear my hair in a big pony or bun, it was perfect. I chose a palette of silver/grey , yellow and white. 

This is my new "favorite project ever" and my photography doesn't do it justice. I'm really happy with the project but not so much the photos. Sigh. 

Supplies: 
  • Grey 12x12 Scrapbook Paper
  • Yellow, White, Grey Quilling papers (Juya available on Amazon)
  • Silver Vellum Paper (had in my stash and cut my own quilling strips)
  • Black 12x12 Cardstock
  • Quilling Tool
  • Glue (Aleene's Turbo Tacky and Elmer's)
  • Tweezers 
  • 12x12 Shadow Box Frame (Michaels 2 for $29.99)


I uploaded the image into Cricut Design Space and cut it from black cardstock on my Cricut Explore Air 2. I wasn't originally going to offset it but once I cut it and it was sitting on my desk like that, once again...welcome to how my brain works! 


I set the negative aside, made a bunch of tight and loose coils ( just like my big hair!) and some teardrop shapes as shown. Then I just played with laying them out on the image until I had a plan. 


I laid it next to the negative again to make sure that's still what I wanted to do and it was. Glued down the negative to the grey background paper and then glued the Quilled image in place. 


I used the teardrop shapes as a kind of crown and the silver vellum coils as a kind of necklace. Finised with a swirled flourish using all the colors from the project. You can see I took pics before the glue dried, but it dries clear! 


To finish, I framed using a 12x12 display case frame (Michaels). 


Was able to get a little better picture outside before my canine assistant had a chance to topple it!