Sunday, March 16, 2025

Spring and Easter: Dollar Tree Bunny Candy Containers to Ornaments


After a hectic couple of weeks, I had time to sit down with a Spring project. I had so much fun with making Valentine Candy Containers from The Dollar Tree into ornaments for my Valentine's tree that when I saw they had bunnies for Spring, well...you know how it goes! I decided to use my VDay tree for Easter decor so I decided to do the same with these. I also got some chick eggs to play with so look for those later in the week!

Supplies
  • Dollar Tree Bunny Shaped Candy Holders
  • No Prep Acrylic Paint, White (Waverly)
  • Sponge Spouncer
  • Double Sided Tape (Dollar Tree)
  • Floral Ribbon

I mean they're adorable as is! 


They'd be cute in a bowl or vase even if you don't use them as candy holders.


I used a foam paint spouncer to apply the paint. I like these with the Waverly no-prep paint. Cover each of your candy holders front and back. I get these at DT and there's a small one in the pack that worked great in the curves between the ears!


 I didn't worry about the two halves staying together (some do better than others) because I'd already decided I'd use double-sided tape to go around the seam and to attach the floral ribbon I pulled from my stash. 


YEARS ago when we were in LA I got to go the the garment district which was heaven! All kinds of trims, embellishments etc. A Creative's candy store! I had some of this left over and used it to outline each bunny. 


To finish, I grabbed some jute twine to use to make the hangers. 


I cut into four equal lengths, then attached to the tops of the bunnies with hot glue. 

I debated about dry brushing the ears, eyes, nose and whiskers but decided I liked them as is. Mr. Chocolate thinks they look like marshmallows! 


I love them on my tree! Now to work on the chicks that will join them. 


Thursday, March 13, 2025

BFF Open House


Happy Friday Eve all! It's bound to be a crazy weekend out there with people getting an early start on St. Patrick's Day celebrating so pace yourselves and be careful out there. 

THANK YOU so much for the kind comments about our son's dog attack last week. He and Grand Pup are doing well. After a couple nights of interrupted sleep he took the cone of aggravation off at night and they both immediately slept well. We also got some great news. He was referred to a hand surgeon because they thought the damage to his nail bed warranted it and the hand surgeon said that despite what the ER thought, the nail is already showing signs of regeneration. This whole thing could have been SO much worse. What a difference a week makes! 

Here at Casa Chocolate, Mr. Man has been dealing with a health issue so I haven't had time or energy to make anything this week but we're on the right path which is all any of us can hope for. 

OK let's take a look at some of the wonderful ideas shared at last week's party! 


Steph Creates shared this beautiful Spring and Easter Floral Bunny Plaque


Master Pieces of My Life shared all kinds of creative ways to incorporate Moss Elements into Spring Decor. 


Moois Van M(i)e from the Netherlands shared these beautiful Circles of Color DIY Earrings. So fresh for Spring! 


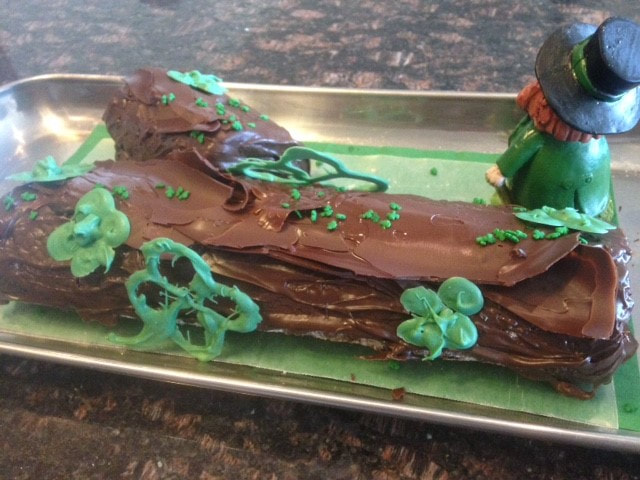
Finally, this Chocolate Mint Shamrock Log from Cindy's Online Recipe Box is perfect for St. Patrick's Day! 

Thanks to all who linked up and for sharing your creativity here each week. I think now, more than ever, we need both an outlet and to see pretty things. Be well!


You are invited to the Inlinkz link party!

Click here to enter

Thursday, March 6, 2025


Happy Friday Eve all. Hope everyone's had a good week. We had a big scare when our son and his dog were charged at on their evening walk by another dog that lives in his building and has been aggressive in the past. They were very lucky despite ending up at the ER and Emergency Vet and now the passing of the buck between Animal Control, the police, and the property manager. This is when it's hardest to have your adult child in another city. 

This is a PSA to not get a dog that's too big or strong for you (the case here) and get some training how to handle strong breeds.

Spring is coming although our pre-Spring weather cooled slightly this week. It was perfect last weekend and we got to go to a wonderful Artisan Market that's an annual fundraiser for the Tucson Art Museum. Here's what I shared this week including a gift for Mr. Chocolate inspired by something he found there. 


Now let's take a look at some of the fun ideas shared at last week's party! 


Fresh Vintage by Lisa S shared how she used a Dollar Tree Placemat as Stencil tomae this beautiful Spring Gift Bag. 

Master Pieces of My Life shared these gorgeous Floral Easter Eggs! So pretty displayed on candlesticks. 


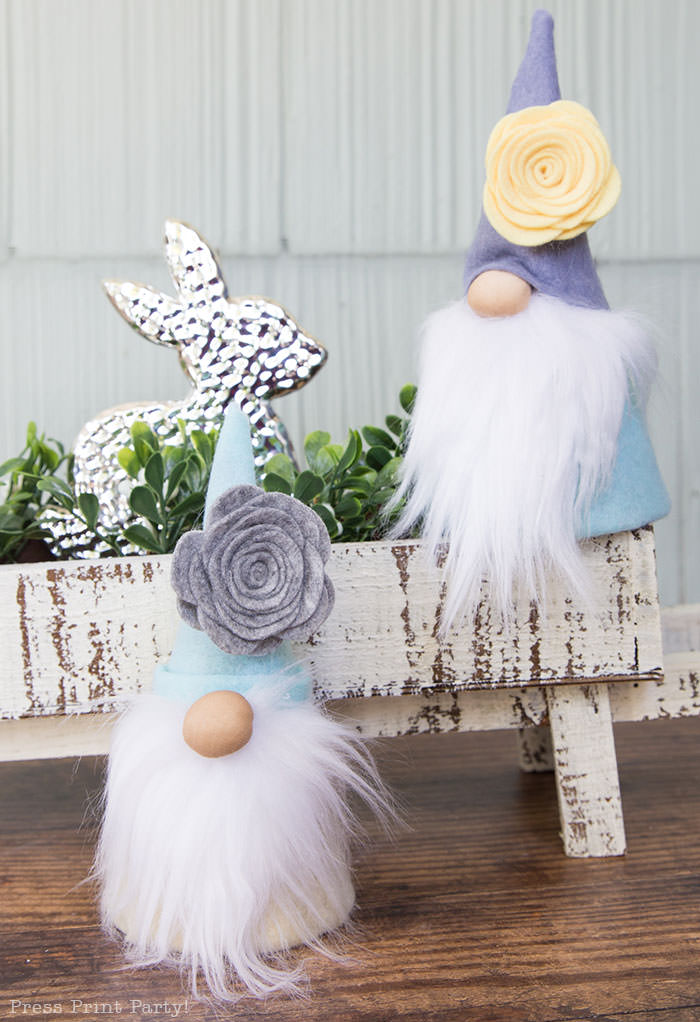
Press Print Party shared these adorable NO SEW Spring Gnomes. Aren't they fun?


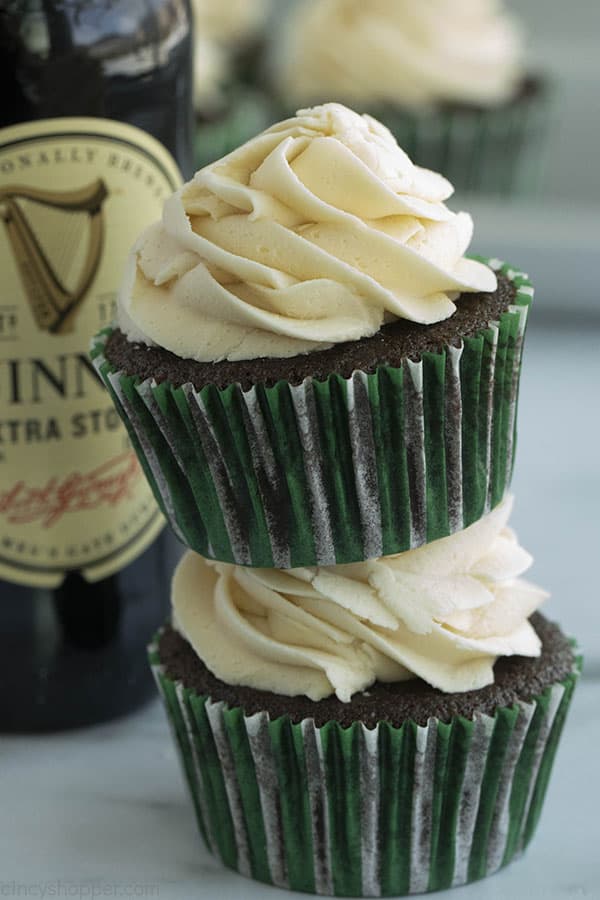
Finally, what's more perfect for St. Patrick's Day than Guinness Cupcakes with Bailey's Frosting? From Cincy Shopper!

Thank you to everyone who linked up and I really need to see pretty things this week so can't wait to see what you've been working on! 

Don't forget to change your clocks this weekend. We don't change but I still get confused. 


You are invited to the Inlinkz link party!

Click here to enter

Wednesday, March 5, 2025

Life Inspires Art Inspires More Art: Layered Octopus


Mr. Chocolate fell in love with Octopuses when he watched "My Octopus Teacher" a while ago and I watched it for the first time recently. We then watched a Nat Geo series on them and they are absolutely fascinating and so smart. This past weekend we attended an art festival and came upon an artist who works in lampwork glass and guess what she makes? 


You guessed it! Octopuses. He fell in love with this pendant but was initially hesitant because it's glass but she explained the type and process makes it more like Pyrex and very difficult to break easily. SOLD! He said "You can't make this!" which is true, although I would love to learn but I realize I can't do every medium I'd like. 

However, it didn't mean it couldn't inspire me to make something, so I did! I found an SVG via my Creative Fabrica subscription and then went to my paper stash and found colors that complemented his pendant. 

Supplies:
  • Coordinating Scrapbook Paper
  • SVG (Creative Fabrica)
  • Digital Cutting Machine (Cricut Maker 3)
  • Foam Adhesive Dots


The copper undertones of the pendant made copper an easy choice and this brown glitter paper was perfect. I imported and sized the SVG into Cricut Design Space and used the offset tool to create the copper layer. 


I used glue to attach the glitter layer to the foil layer, and then used coordinating rhinestones and pearlescent embellishments to add texture on the tentacles. I cut the patterned paper to 8x8 to fit the shadowbox frame (Michaels) and then attached the octopus to it using foam dots. 


He might not be able to swim with them since we live in the desert but now he has two octopus friends! 


Monday, March 3, 2025

Repurposing: From Thrift Store Drawer to Serving Tray


Mr. Chocolate laughed at me when we were talking about the need for a serving tray to bring things from the kitchen to the patio. We've been eating outside since the weather's been nice. The reason he laughed is I said "Oh I'll go to the Jimmy Carter store" (aka the Habitat for Humanity Re-Store store) and look for something I can use. He said "Well, I was thinking of Amazon, but OK". Pffffftttttt.

I was originally thinking I'd use a cabinet door but they were all beveled and I wanted something flat. Right next to those were other things salvaged from the cabinets and they had a couple of shallow drawers. I said to myself "Self, even better because it has sides so things won't slide off" and the lady nearby looked at me like "There there dear" since I said it to myself out loud. 

Supplies:
  • Shallow Drawer
  • Handles
  • No Prep Acrylic Paint (Waverly) and Sealer
  • Dollar Tree Wallpaper Sheets

This is the drawer I got for $5! And they threw in the handles for free when I said what I planned to make! I want to go back because I saw this very cool large ornate frame I hope is still there. 


It came with the slides on so I removed them and being a good Maker, set them aside until my brain comes up with something to do with them or I'll donate them back because you never know what people are looking for.


I painted the bottom black with Craft Smart multi surface paint. 


Then, I painted the rest with Waverly No-Prep Acrylic paint in Truffle. The drawer was already lined with contact paper which I left on until I was done painting.

The contact paper pulled up easily leaving clean lines for my own lining. 


You know those Dollar Tree Wallpaper sheets? Enter those. I tried to line up the patterns since I had to use more than one sheet and let's face it, stuff's going on top of it so yes, the little seam shows but who cares!


Here's the tray fully lined. 


I don't seal every project but this one I did. I used the corresponding Waverly sealer which goes on milky and dries clear. The recommendation is to let it dry for 24 hours which I did, then buffed with a soft lint free cloth.


I used E-6000  glue to attach the handles. I'm not intending to carry really heavy things on this so I think that'll suffice. 


And now, Mr. Chocolate is a believer!