Thursday, January 25, 2018

BFF Open House Link Party


Happy last party of January because can you believe next week's party will be on Feb 1?! That means Valentine's Day and Galentine's Day ( the day before V-Day dedicated to celebrated our bestie girlfriends) is right around the corner. So here are some ideas from last week's party to get you ready! 


Let's start with this super cute Milk and Cookies idea from Satsuma which includes a recipe for homemade Nutter Butters and a milk carton template you can download. How cute for a friend, teacher, kiddo, spouse. 


We love party crackers at Christmas but they don't have to be just for Christmas. Bird's Party has some fun ones for Valentine's Day! 


Valentine's Day is prime time for chocolate so these Peanut Butter Cookies with Chocolate Heart Centers from The Frugal Sisters are perfect! 


Finally, if you're looking for a "wow factor" dessert for Valentine's Day, you will want to check out this "Rare Cheesecake" from All That's Jas ( as well as for the explanation of what makes it rare). Gorgeous! 

Time to see what everyone's been up to this week! 


Monday, January 22, 2018

2018 Cards: No Stamps Needed. Two Birthdays and a Retirement


While I started my cardmaking journey by stamping, there are so many more paper options now that have great textures and images that I often just use the papers and diecuts in my cards. Don't get me wrong, I will always love my stamps! 

For the Dream Big card ( for my son's 25th birthday which I still can't believe!) I used a paper from the DCWV "Confetti" stack, a diecut I cut using the "Graphically Speaking" cartridge from Cricut, and a foiled transparency from Michaels as my main pieces. 


I cut the "Dream Big" die from gold metallic paper and layered in on a black printed scrap. The card is Onyx metallic Stardreams, layered with the foiled transparency and a panel from the birthday sentiment page of the "Confetti" stack. 


I used the same birthday sentiment paper and the foiled transparency on this Crown Card. 


I layered the crown using the printed paper and a solid pink paper.


Bad lighting I know. I layered a scrap of the transparency on a panel of the pink paper, added a torn scrap and strips of gold scraps. 


You need neither stamps nor a cutting machine though if you want to make cards! For this Retirement card, I simply cut the sentiment out of a page of sentiments in a stack by Craft Smith ( $5 Hot Buy at Michaels!) which coordinated with papers from the "Eclectic" stack by DCWV. I cut the foiled base panel to size and then trimmed and layered the sentiment panel as shown. Finished with oversized self adhesive rhinestones. 

Cards can get expensive. Have you priced them lately?! But between the $5 Hot Buy stacks which Michaels has regularly, 40-50% off coupons and/or sales on stacks at Michaels and JoAnn's, you can easily whip up a LOT of cards for a fraction of the cost. 

Thursday, January 18, 2018

BFF Open House Link Party


Happy Friday Eve again all! Can you believe we are already past the halfway mark of the first month of a new year? Me either. As always, there were so many fun ideas shared at last week's party. Here are just a few! 


I'm seeing lots of white and winter white decor like the ideas Carol from The Red Painted Cottage has in this post. I'm in love with that Pom Pom wreath.  I think there's something refreshing and clean about the white and naturals after all the colors of the holidays. 


I also love this fun Winter White Felt Garland from Suzer Space


With Valentine's Day right around the corner, these little treat boxes from My Thrift Store Addiction are just the thing for small treats. 


Finally, if you've got power tool skills (or know someone who does) these Wood Shim Hearts from Hazel and Gold should go on your "must make" list! Love the dimensionality and the weathered look. 

OK let's see what you've all been up to this week! 


Monday, January 15, 2018

Pinned It. Tried It. LOVE It: Homemade Honey Almond Granola


A while ago, I  wanted to get more protein and better grains in my breakfast and switched from cereal in the morning to Greek yogurt. Even chocoholics understand we can't live on chocolate alone! 

I usually add some blueberries , dried cranberries, chia seeds, almonds and granola. Granola can get expensive though, especially if you're looking for the kind with better ingredients, so I finally remembered to search Pinterest to see about making my own. Another moment of "Why didn't I do this sooner".

I found this HOMEMADE COCONUT OIL HONEY ALMOND GRANOLA recipe from Julie at  Lovely Little Kitchen that combined all my favorite granola flavors and had easy instructions to follow. 

Please pin recipe directly from Julie's blog (fair is fair!). 

You will need: 

  • 1 cup whole almonds, divided
  • 3 cups old fashioned oats
  • 1/2 teaspoon salt
  • 1/3 cup brown sugar
  • 1/3 cup honey
  • 3 tablespoons coconut oil
  • 1/4 teaspoon vanilla extract
  • 1/4 teaspoon almond extract

and then follow the instructions on Julie's blog. 

Couple of tweaks I made to suit my personal preferences: 


I didn't chop my almonds too finely, barely at all. Since I was already putting whole almonds on my yogurt, including some chunkier and whole in the granola made sense. 


You can see where I left some whole, some chunky and some just broken. I did mine by putting them in a Ziploc bag and pounding them w/ the flat side of a meat tenderizing tool! I threw all of my dry ingredients in a bowl and then put the honey and coconut oil in a glass measuring cup and zapped it in the  microwave per instructions. 


Your honey / coconut oil mixture will thin when heated which makes it really easy to coat your dry mixture. 


Here's my granola spread out on a baking sheet (make sure you use one w/ a rim) before going into the oven. 

Another tweak I made was to leave mine in for a few minutes longer than the original instructions. Again, just personal preference. I wanted a darker toastiness if that makes sense, so mine was a total of about 15 minutes over the original 10. 


Golden goodness after coming out of the oven! Spread your toasted granola out on wax paper sheets to cool. Once cool, enjoy! 


Eat alone as a snack, in a bowl as cereal, or sprinkle on yogurt! Thanks Julie for a delicious and easy recipe.


Thursday, January 11, 2018

BFF Open House Link Party


Happy Friday Eve all and welcome to another week's opportunity to share what creative things you've been working on. Hope you're staying warm ( or in our case, up here in the PNW, dry).  Let's see some ideas from last week's party! 


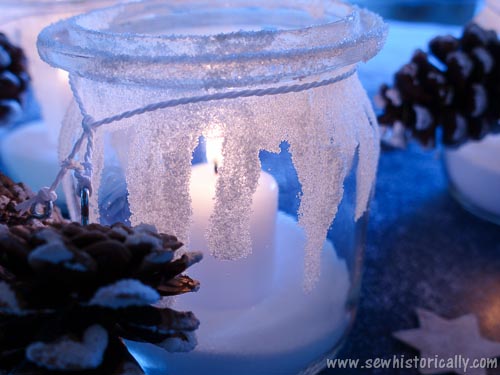
The holiday decorations may all be put away but it's still nice to have a touch of Winter in our inside decor. We still have our Gingerbread Cottage up and it will remain all Winter. I love these DIY Icicle Candle Holders – Winter Luminaries With Snowy Pinecones from Sew Historically. 


I also love the monochromatic simplicity of this Winter White French Farmhouse Mantel from My Thriftstore Addiction that includes more re-purposed Christmas decor. 


Artsy VaVa shared this awesome cooler ( made by her friend Chuck) that she painted for him using stain. I love how the stain lets the grain of the wood shine through. 


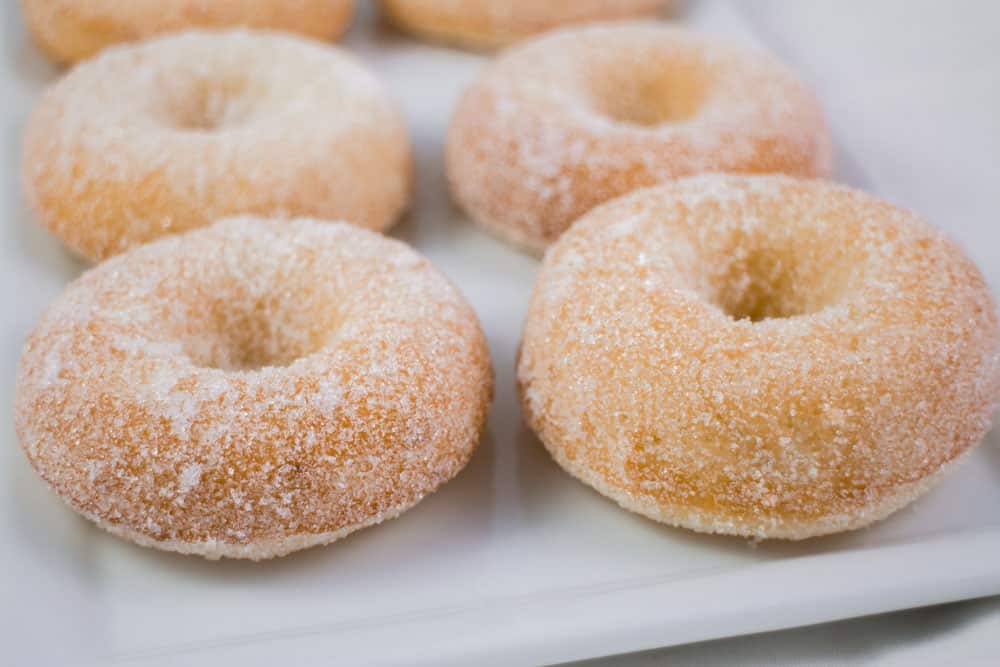
No chocolate feature this week but I am drooling over these Homemade Baked Sugar Doughnuts from Brooklyn Farm Girl. Simple perfection!

Now, let's see what everyone's been up to this week!


Wednesday, January 10, 2018

Simple Sewing: HTV Drop Cloth Pillows


My sewing skills are not even skills IMO. I can do straight lines and manage some curved things (barely). I won't even attempt any apparel.  

Should have listened to the Mumster and stuck with the sewing classes. At any rate, I can manage some pillows but hadn't tackled pillow covers. It got silly just making new pillows vs changing the covers, so before Christmas I finally tackled this. What a dummy! Why didn't I do this sooner?! It was so ( no pun intended) EASY! Thanks to Pinterest, I found this tutorial from Apartment Therapy and if I can do it, anyone can! 

It was fabulous taking the Christmas decor down knowing I could slide the covers I made off the pillows and make new covers. Look out she's dangerous now! 


Supplies: 
  • HW Store Drop Cloth. I got mine at Home Depot.
  • HTV Vinyl. I used Siser Easy Weed
  • Images. Mine were from the Silhouette Store $.99 ea
  • Digital Cutter. I used my Cameo 3
  • Pillow Forms. Mine are 16x16 ( JoAnn's when they were 50% off)
  • Basic sewing supplies, thread, pins etc. 


Wash dropcloth and then cut to size based on tutorial instructions and size of your pillow form.   Even if you can't sew perfect seams, they're on the back of the pillow so who cares?! 


This is what the back will look like when you're done. 


Here's the opening through which you put your pillow form. Et voila!

Once the pillow covers were done, I chose my designs, sized and cut them using my Cameo 3 and Siser Easy Weed Heat Transfer Glitter Vinyl. I LOVE THIS STUFF!!! It really is easy weed ( weeding is the removal of the parts you don't want, revealing the image you're using) but for some reason the "E" in the "HOME" pillow decided not to cut cleanly so I had to do some work w/ my X-acto knife. 

REMINDER: if you're using words , remember to mirror your file before you cut. The great thing about the Cameo 3 is that if you've chosen HTV as your material, the software will prompt you to choose "mirror". Whew! 


Here are the ones I made for Christmas: 


For these I used polar fleece and flannel (backed with Iron On Pellon) for the images, also from the Silhouette Online Store.


Monday, January 8, 2018

Cardmaking: Cupcake Birthday Cards, First Cards of 2018


I've been easing back into the creative world with the New Year, but January always starts off fast with several birthdays, including a big one for my son later this month. 

The first card  is for a couple whose birthdays are a day apart, so I made them a joint card with one birthday cupcake for each.  The other is for my brother in law and the colors and style worked for him so easy peasy. 

I stashbusted my paper supplies and used one sheet each of :
  • Flocked damask paper
  • Acetate sheet with gold script
  • Antique gold glitter paper
  • Gold and white foiled paper
  • Black cardstock, matte and metallic
Along with:
  • Foam dots 
  • Self adhesive acrylic rhinestones
  • Coordinating washi tape


I was a Girl Scout so "make new friends but keep the old" is a thing with me and that applies to tools too, so for this one I used my "old" Cricut Expression I've had for years (while I've acquired other machines) but it still works like a charm and I bought those cartridges for a reason! I used an image from the Damask Decor cartridge. Not going to lie , I dream about a black Cricut Explore Air 2 machine (hear that Cricut people...just sayin') . 

I cut the base layer cupcake in black matte and the top in the white and gold foil paper . I like layering images using foam dots, and offsetting them slightly for depth. 


While the images were cutting, I cut my panel layers, and layered as shown: 


Once my panel was finished I attached it to the card base which I'd cut from metallic black cardstock , and then attached the cupcakes, finishing with a self adhesive gold dot. 


The second card followed a similar process, I just changed up the paper combo a bit.