Thursday, February 9, 2023

BFF Open House


Happy Friday Eve, and Happy (almost) Valentine's Day! After almost 32 years of marriage, we don't do a big thing. I'll probably still make a nice dinner and dessert but I've kinda outgrown it. That's not being a Debbie Downer for anyone who does it up big. For us, it's about the day-to-day love we know we have for each other. The little things that you do just because. But am I ever not going to celebrate a day in which chocolate features so prominently? Hello! 

I do love making special Valentine's cards to send to friends and family. I shared those here: Black White Gold and Pink Valentine's Cards In recent years, I've enjoyed celebrating Galentine's Day with friends. I made some special gifts I'll share next week. 

Thanks for another great party. Seeing the link-ups is a weekly treat for me. Let's take a look at a few of the wonderful ideas shared so this week, I'm featuring treats that are perfect for Valentine's Day. 


Claire Justine shared Heart Shaped Recipes to make for Valentine's Day and isn't this gorgeous?!


Then there are these Kahlua Mocha Parfaits from The Kitchen Is My Playground. So much chocolate...so little time! 


If you're not into chocolate (*GASP*...just kidding I know not everyone is or people have allergies etc.) then this Lemon Cheesecake With Lemon Curd and Blueberry Sauce would be lovely! From Scratch Made Food For Hungry People


Finally, couldn't resist these Fancy Pigs In A Blanket from Homemade On A Weeknight. This hits on so many levels: childhood memories and adult appetizers. Comfort food. Perfect if you're celebrating with kids but want to make them feel fancy. You name it! 

Now, onto this week's party! 


You are invited to the Inlinkz link party!

Click here to enter

Tuesday, February 7, 2023

Papercrafting: Black White Gold and Pink Valentine's Cards


I will always LOVE making Valentine's cards for family and special friends. Over the years, like other holidays, these have become part of people's Valentine's decor which makes my own HEART soar. This year, I grabbed some graphic metallic papers from my supply shelves and kept them fairly simple by using this image from Cricut Design Space and going with a color palette of black, white, gold, silver and metallic pink!

Supplies:
  • Patterned Scrapbook Papers 
  • Glitter Scrapbook Paper
  • Metallic Cardstock 65 lb
  • White 110lb Cardstock 
  • Digital Cutting Machine and Images
  • Foam Tape
  • Self Adhesive Rhinestones 


I neglected to take in process pictures but the process is pretty straightforward. 


I browsed Cricut Design Space for an image I liked and found this one. I subscribe so I was just able to add to my canvas. One thing I like to do in Design Space is change the image as close to the colors I want to cut which helps me remember what to cut! This image cuts in three pieces. 

I sized the grouped image to fit my card, then cut out each section. The main heart from gold glitter paper; the other two hearts from silver and metallic pink papers. 


For the card base, I cut white 110lb cardstock (Recollections) 10x7 to make a 5x7 card. I use my Martha Steward scoring board and bone folder to get a crisp fold. Then I cut the metallic papers 6.75x4.75 and the patterned metallic papers 6.5x4.5. Layered these as shown on the card and then attached the heart pieces using foam tape. The smaller hearts nestle in the cutout spaces of the larger heart. 


To finish, I added black and iridescent self-adhesive rhinestones to the smaller hearts. 

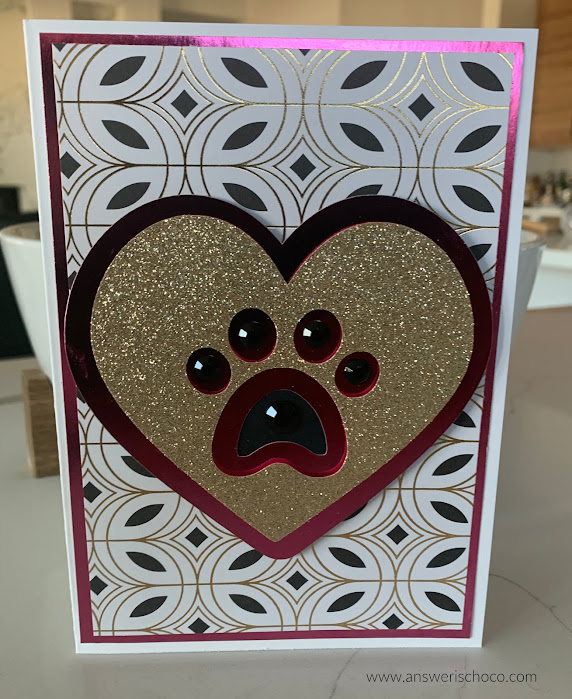
Not to leave out those who will be celebrating LOVE day with their furbabies, I made a couple of pet-themed cards too! 


Similar to the other cards, I found an image in Design Space and cut out using the same papers and finished the paw with self-adhesive rhinestones!


Sharing At:


Thursday, February 2, 2023

BFF Open House


Happy February! Happy Love Month! Happy Black History Month! 

I can't believe we're already in the second month of the year already. January flew by. One of the things I was excited about when we decided to move close tom Tucson was the chance to finally get to experience the Jewelry and Gem shows that take place at the end of each Jan / early February. I knew this was a big deal here but OMG! 42 SEPARATE VENUES all over the city. HUGE ones at that. I've made it to one so far and was overwhelmed. I'll do an upcoming post just on this. 

Managed to knock out a couple of projects this week. A new wreath for our bedroom using great finds from Dollar Tree: Wood Bead Wreath and Tag and an easy Valentine's Cloche

You all have been busy getting ready for Valentine's Day so let's take a look at some great ideas! 


You can't go wrong with these Valentine's Treat Baskets from Whitehouse Crafts


These Beaded Hearts by Steph Creates are beautiful on their own or as an addition to a gift! 


If you want to set a special table for Valentine's Day, check out this beautiful Floral Tablescape from  Thrifting Wonderland

Finally,  perfect for dessert or to give as a sweet treat, these Valentine's Day Peanut Butter Cookie Bars from Our Tiny Nest definitely fit the bill! 


Thanks to EVERYONE who linked up and can't wait to see what you've all been up to this week! 


You are invited to the Inlinkz link party!

Click here to enter

Tuesday, January 31, 2023

Valentine's Day Easy Cloche


I use this cloche I found after Christmas one year at Pottery Barn for seasonal decor. OK non-seasonal decor too but...

Getting my Valentine's decorating going this week and made this very easy vignette from things I had on hand. 

Supplies
  • Heart Shaped Picks (I found these last year at Walmart and forgot to use them)
  • Small Clay Pot
  • Glass Votive Holder (Dollar Tree)
  • Scrap Vinyl
  • Heart Shaped Confetti


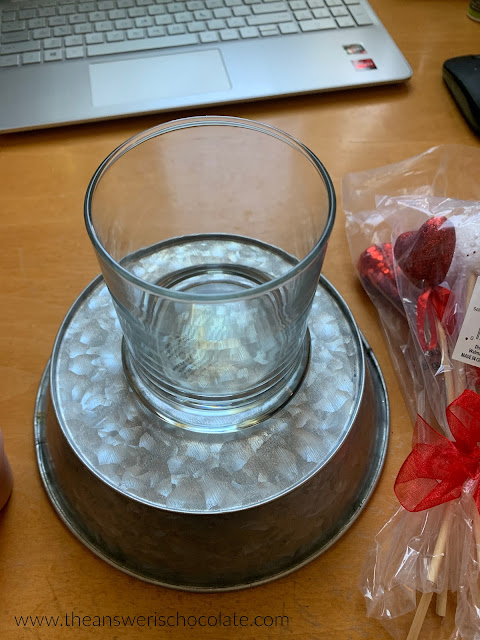
Since I like to use this for different things, I grabbed a glass candle holder I had in my craft closet to use as the centerpiece of the cloche. I knew I wanted to use the confetti and this kept it neat. 

I also had a small clay pot in my stash which fit perfectly (upside down) inside the glass candle holder. I painted it white with one coat of acrylic paint. 


Sometimes I'm smart enough to keep things from previous projects like this silver heart that remained after cutting a vinyl project last year. You could easily just cut a heart or use a sticker. Put this on my painted clay pot. 


Then, I added my picks with the stems cut to fit under the cloche dome. 


To finish, I sprinkled heart-shaped confetti around the clay pot and put the dome on!  


Easy to switch out for its next use!

Sharing At: 


Monday, January 30, 2023

Home Decor: Beaded Wood Wreath and Tag


I love how you never know what you're going to find a Dollar Tree. When I turned the corner of an aisle and found not only a Wood Bead Wreath form but in black? Squeal! And then when I saw a tag to match? Double squeal!

Supplies
  • Wood Bead Wreath Form (Dollar Tree)
  • Wood Bead Strung Tag (Dollar Tree)
  • Faux Leather (On Hand)
  • Silk Flowers (On Hand)
  • Hot Glue and Glue Gun
  • Twine


I remembered I had some faux leather in my stash from JoAnn. Decided this project needed a center bow and that this was perfect for it. I chose a bow image from those I have saved, sized in Cricut Design Space, and cut. 

When you cut faux leather, you need to use a strong grip cutting mat (I use Cricut's purple one) and you also want to lay your leather right side down. 


All of the faux leather I've seen has this woven backing so you want to cut through the back side to minimize fraying.


Here are the bow pieces cut out. I opted out of using the tail. Back in the stash for something else!


To assemble the bow, use hot or other strong glue (eg E6000) and fold in each side. Since this is a layered bow, repeat for the other layer. 


Layer one bow atop the other, then using the rectangle strip from the bow pattern, wrap around and glue to secure. 


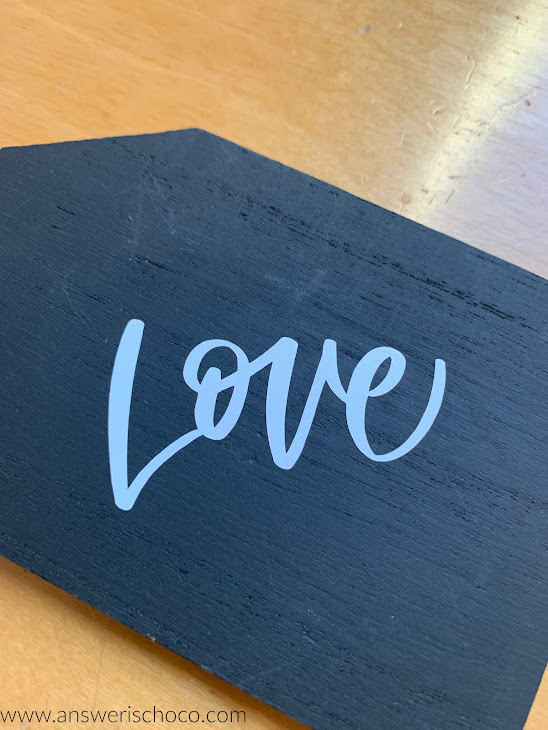
The flowers I had on hand from a post-holiday 80% off sale so they were like, $2? I stripped the leaves, cut the stems to where I wanted them, bound them together with floral tape and hot glued to the wreath, then glued the bow on. I left the tag pretty much as-is, just adding the word "Love" cut from white vinyl. 


I decided to angle it just because that's what my brain decided to do. Once I had it positioned the way I wanted, I burnished with my scraping tool and ...


In hindsight, I probably should have attached the tag before gluing the bow on but, I didn't! So I grabbed some twine and used the existing twine loop on the tag to secure it to the wreath. 


Simple. Inexpensive. Love! 

Sharing At: