Monday, January 28, 2013

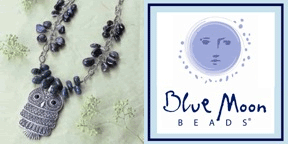
Double Strand Hammered Metal Connector Necklace

Blue Grey Metals

So apparently I really have lost my mind because I had this ready to post in DECEMBER and thought I had. That’s the sound of my palm hitting my head.

I made this necklace ( shown here doubled) with Blue Moon Beads and Bead Landing chain. The lightbulb went off yesterday when I was wearing it and someone asked me if I made it. That made me start thinking about when I made it and I realized I never posted it!

Blue Grey Metal

Whenever I’m making jewelry, I gather up what I think I’m going to use so here are the things I started with. The blue grey beads came in a pack of 23 coordinating pieces as shown on the card.

Blue Grey Metal

I cut different lengths of chain and made varying sections of beads and then randomly put them together with jump rings and hammered silver connectors:

Hammered Connectors

I made it really long so I could either wear it that way or double it. It’s hard to get a good photograph of it the long way but I’ve mostly worn it doubled anyway.

A mind is a terrible thing to lose!


Sharing At: 


BFF Open House #89 Wrap Up and Features

Thanks as always to everyone who linked up at last week’s BFF Open House. No shortage of talent and great ideas that’s for sure. Can you believe January’s almost over already? I am really not ready to see Easter stuff out so soon but I did at JoAnn’s and spotted Reeses Peanut Butter Eggs at the grocery store! Can we get through Valentine’s Day first please?

Speaking of which, take a look at this cute burlap and paper Valentine’s banner from Artsy VaVa:


These Valentine’s mailboxes from Fonda at Southern Scraps would go great with the banner and are so stinkin cute!


I’ve written about how much I love black and white. I also have a thing for French writing and chalkboard. Betsy from My Salvaged Treasures brings all of these elements together in made over cases.

LOVE!

Doreen from Altered Artworks gives us a sneak peek into her Valentine’s Workshop where she is hard at work. Some lucky recipient will get this :

Valentine's gifts

Doreen has a tutorial so you can make one for your own special someone.

Now sit down. I mean it. Because you will pass out over this week’s chocolate feature and I don’t want anyone to get hurt. OK ready?


It’s a Kit Kat cake! Jenn from Rook No17 made this incredible creation. I am so in awe of it , it needs another pic:


Leaves me speechless!

Hope you all have a wonderful and creative week and hope to see you all back again on Friday!

Thursday, January 24, 2013

BFF Open House Link Party #89 and Giveaway!

And I thought last week went by fast! College Boy's settled back in at school and celebrated his 2nd birthday away from home. Does that make him 2?

Before we get to the party, I have a fun giveaway for you this week. Sweet Kelly, from Kelly's Avenue Designs recently hosted a giveaway of one of her Elite Design Packages. Well yours truly won but my schedule's so crazy right now I don't have time to really think about this properly. I hate people waiting for me and Kelly has been nice enough to let me "giveaway the giveway" to one of you, my readers! Thank you Kelly! Won't you pop over to her place and say hi?


The giveaway is open to all Blogger bloggers ( so no Wordpress or other platforms) and here are the details:


Good luck!! Now on with the party. 


Kraft and Yellow Sympathy Card

Kraft and Yellow Sympathy

Unfortunately, Sympathy cards are a fact of life. I decided that they didn’t necessarily have to be bleak . It’s a fine line to bring some color into them and this muted palette of browns and yellows seemed to work.

David Tutera Sympathy

My inspiration for this color combo came from a dimensional sticker from the David Tutera Celebrate It card collection.
Kraft and Yellow Sympathy

I pulled out a coordinating yellow paper from my stash, and used some more of the David Tutera pieces ( pre-embossed brown and tan panels) and some brown Colorbok rub-ons I’d picked up on clearance for $.97.

Covered a blank card with the yellow panel, applied the rub ons, mounted the brown and tan panels, applied a rub on to the Sympathy sticker, embellished with coordinating washi tape and finished with an embossed chip board bird from my stash. Waste not want not, I also used scraps from the embossed brown panel to decorate the card.

Kraft and Yellow Sympathy

Tuesday, January 22, 2013

Medium Time Commitment Coffee Filter Wreath

Medium Time Coffee Filter Wreath

I’ve always wanted a coffee filter wreath. And I’ve always wanted one that’s fluffy and dense. But I haven’t always wanted to spend what seemed like ton of time to get that really dense look. So here’s my take on spending a medium amount of time on one ( 1hr give or take) plus I re-purposed a styrofoam wreath I already had on hand. For this project you will need:
  • Recycled or new wreath form
  • Basket Coffee Filters
  • Glue Gun
  • Cheesy Lifetime Movie on in the background ( optional)
I started with this monster:

Repurposed Styrofoam Wreath

Skeleton of an early crafty experiment. We’ll call this wreathus formicus.  Decomposed down almost to the bones.

I was originally going to fold coffee filters in quarters and then lay them flat all around the wreath. But I like fluffy and when I was folding, started twisting the bottoms of my quarter folded filters thinking after I got them glued on I could fluff them out a bit. It was at this point I started thinking about doing more video tutorials because I need more hands!
Coffee Filter Folds

Fold a coffee filter in half, then in half again to quarter and then grab and twist the bottom until it looks like a badminton thingy. Now you’re going to ask me “how many badminton thingies” did you make? To which I answer: “A bunch” . Serious answer is I started with an open package of coffee filters about 3/4 full, finished that up and used another maybe 1/8th to 1/4th of another pack so I’m going to say a package should do you.

Here’s where I wish I had the video because I got busy twisting, gluing, pulling glue strings off myself that I didn’t want to get on my camera so didn’t take pictures along the way bad blogger! I glued the twisted part down, then guaged where the next one should go, glued the next one down and so on. I starte in the middle of the wreath went all the way around then did a row on the inside and outside of the first row. After that, I just fluffed.

Coffee Filter Wreath

Kind of reminds me of daffodils. This is to try to illustrate what I mean by fluffed vs unfluffed:

Unfluffed Coffee Filter Wreath

Unfluffed, you can see the natural creases of the coffee filters. Fluffed, is just softer.

Coffee Filter Wreath Fluffed


Sharing At:


Monday, January 21, 2013

BFF Open House Link Party #88 Wrap Up and Features

Wow! What a great turnout for last week's party. Thanks everyone for sharing your creations here. Let's get right to some of the wonderful ideas that caught my eye!


I'm hooked on chalkboard printables and this Winnie The Pooh inspired one from Michele at The Scrap Shoppe is just too too cute. Perfect for Valentine's Day or all year. 


I love card making and this card by Linda at Paper Seedling is a stunner. 


Rox, from Four Eleven Rox, has inspired me to pick my doodle pad back up with her amazing Zentangle inspired heart. 


And this week's chocolate feature comes from Karyn at Pint Sized Baker. These are almost too pretty to eat. Almost! That wouldn't stop me from devouring these beautiful chocolate rose frosted shortbread cookies. You can read about the extra special meaning behind them at Karyn's blog. 

Thanks again to everyone who makes the BFF Open House Link Party a part of their week. It means a lot to me! Have a great week and make it a creative one! 

Sunday, January 20, 2013

Empty Nest Musings and A Chalkboard Printable

I am feeling a little melancholy today since after a wonderful and fun month long break, College Boy is on his way back to school. I'm so proud of the adult he's become /  becoming,  and it was fun to watch him over break be more naturally independent and comfortable in his own skin. There was a time when we'd go out to dinner and Mr. C and I did most or all of the interacting and question asking with our servers and "suddenly"  the tables have turned. Little day to day differences that you blink and they take place.  I'm not even sure he realizes the changes but they are the kind of things that make mama and papa bears smile inside and out.

It's that kind of confidence and independence we want for our children right? After all that's the job we signed up for or at least my interpretation of it. We have always been parents first (vs wanting to be his friend) and I know there were times when we were more strict than other parents, especially in HS. On the other hand, we also accepted that as he grew into adulthood, the pendulum would begin to shift and we wanted him to be equipped with the skills to make his own good decisions because he knew they were good decisions.  It's more fun than I thought seeing that take place and it means the world to us that we have the kind of relationship where he wants to spend time with us.

All of this introspection reminded me of this quote which I think sums up our whole parenting journey and my mood today. So I made it into a  chalkboard printable.


 Can anyone else relate?