Showing posts with label recycle. Show all posts

Sunday, April 22, 2018

Happy Earth Day! Recycled Project Roundup


Happy Earth Day! For us it's also the birthday of our best friend Kristine who we lost far too young. She was a teacher, loved kids, and LOVED Earth Day. So in her honor, here are some projects from my Repurposed Ideas Pinterest board that are perfect for Earth Day and use things we all likely have laying around the house. 

Paper Crafts:

We all have magazines laying around so these projects from DIY Sweet Home is a way to use them to make some pretty things: 

More magazine ideas here from Picky Stitch

Got jeans? Who among us doesn't have some too big / too small / too holey jeans? 


How about this jean pocket phone charger holder from DIY & Home


Who can't use an extra totebag? This one comes from a roundup of "21 Things You Didn't Know You Could Do With Old Jeans" at Tip Hero.

Boxes and Tubes: 

Keep your pencils and your thoughts together while re-using cereal boxes. Turn them inside out , leave them plain, paint, add paper, doodle, or use the fronts with these ideas from One Good Thing By Jillee


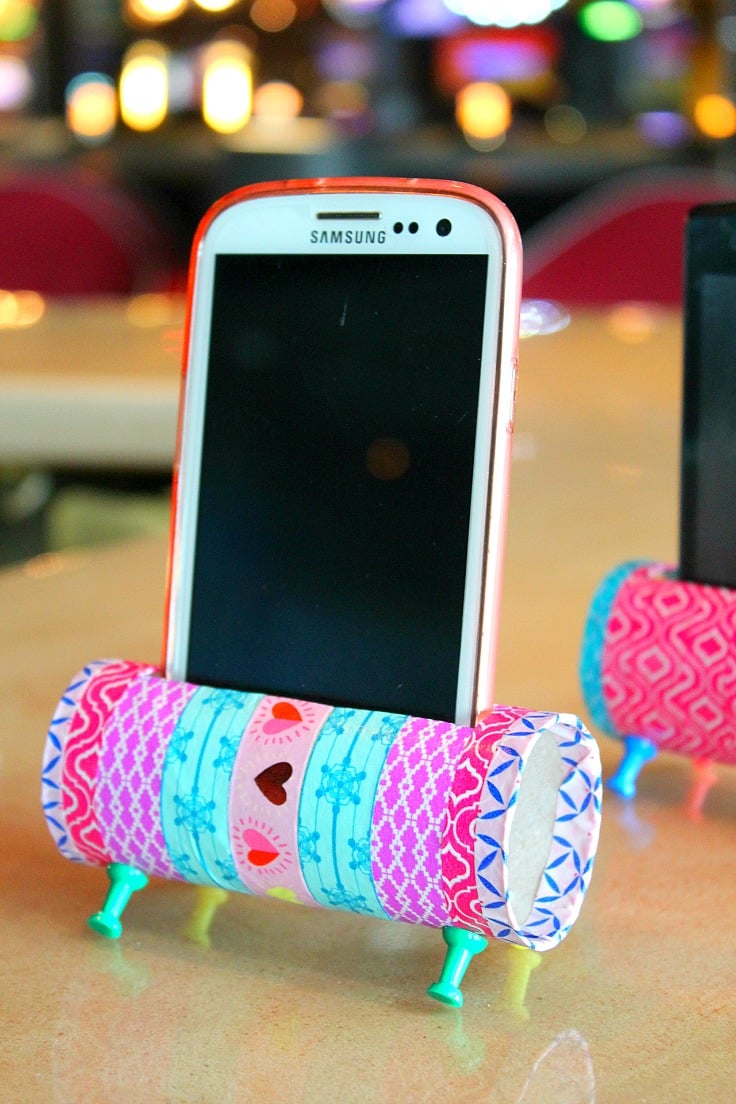
Use toilet paper tubes and Washi tape to make a pretty phone holder. Details at Easy Peasy Creative


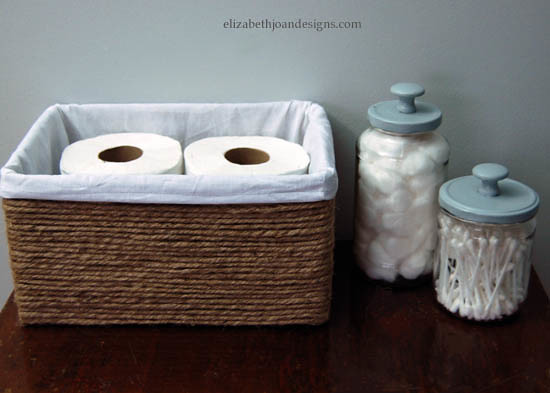
One too many Amazon boxes ? Make a pretty storage basket. Elizabeth Joan Designs will show you how. 

Got Milk (jugs)? 


LOVE these Votives from Bliss Bloom Blog !


Now that I'm living in the desert, I'm going to have to get creative about snow this Winter so making some from repurposed milk jugs is on my list! From Eve of Reduction

Water and Soda Bottles: 

101 Days of Organization has a great roundup on what to do with these that seem to multiply like Tribbles. 


Think of all those little things ( paper clips, binder clips, rubber bands, pushpins) you could store in a pretty little bowl made from a water bottle? From Dishfunctional Designs

Jars: 

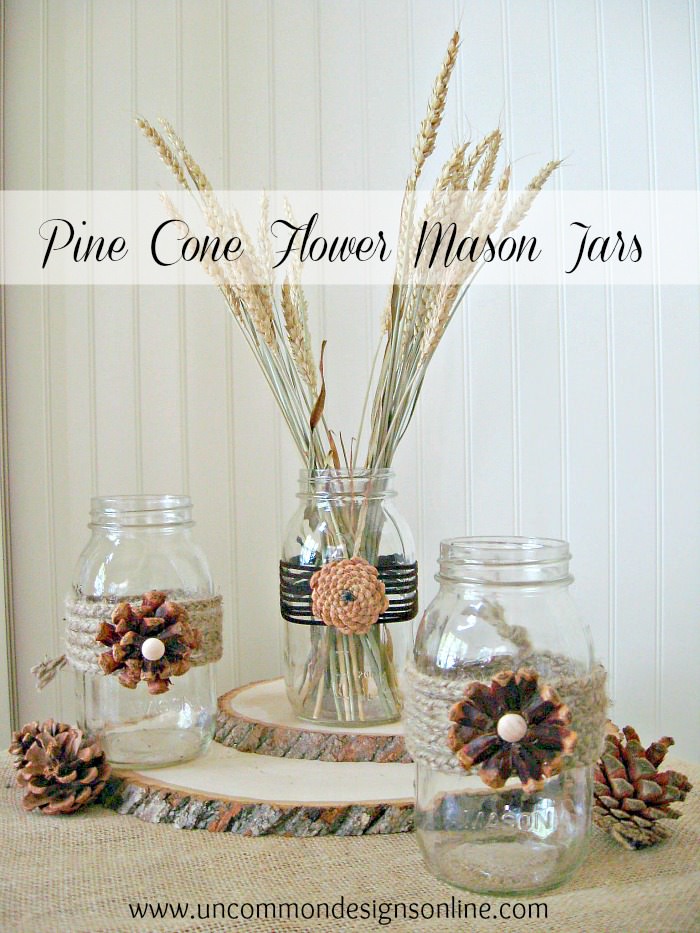
Here's a two-fer idea. Repurpose empty jars ( or you can buy a matched set of mason jars) and embellishe with pine cone flowers, perhaps from a nature walk. From Uncommon Designs


I recognize these jars because they are from my husband's favorite jam. So will definitely have some of these to play with ! From Make Calm Lovely

I hope I've given you some inspiration! 


Monday, April 22, 2013

Happy Earth Day: The Tale of the Upcycled Scarf Ring Tree of Life Bangle Bracelet

Tree of Life Bangle Bracelet

I’m starting a new meme. “Craftsplaining”. Like when you get an idea in your head to use something for a completely unrelated purpose ( eg I have "craftsplained" my way through Home Depot, Lowes, Dollar Tree, Target…) I've had conversations like : ”oh how old is your baby” because I’m buying baby wipes. “20 but these aren’t for him. I use them to clean up after my Mod Podge projects

Or when someone says “what made you think of that”. OK sometimes there’s not even a “craftsplanation” for that. Like this project. I received a scarf for Christmas and it came with his big acrylic ring that you could use to tie it different ways. HA! It’s a bangle bracelet DUH!

For this project you will need:
  • Plastic or acrylic bangle type device
  • Mod Podge
  • Paper Scrap
  • Metal leaf adhesive
  • Metal leafing
  • Charm(s)
Scarf Ring Bangle

Since this was an Earth Day project, everything I used came from my stash.

Scarf Ring Bangle 1

Trace around your bangle on your scrapbook paper scraps. I hadn’t decided yet which paper I was going to use so I cut two paper “bangles”. I also hummed the Olympics theme song.

Rough up your bangle. I just used an emery board. Apply Mod Podge (I used Matte finish, my go to) apply paper, smooth, apply coat on top of paper. Go make dinner or surf our favorite blogs.

Metal Leaf Adhesive

Now, once your MP side is dry you’ll want to apply your metal leaf. If you’re not familiar with metal leafing, supplies are available at fine art stores or I know Michaels carries them. Metal leaf is not the same as FOIL. Foil has a dull side and a bright side. If you use foil ( which you could for this project) makes sure to keep the shiny side up. Also, the label is not green and Mona Lisa doesn’t usually look seasick on it. I spilled a green alcohol re-inker on my bottle.

Silver Leafing

Unlike foil, when you apply metal leafing entire portions of it stick to the adhesive. Lay your foil over your sticky surface ( adhesive takes about 20-30 min to set up before you apply your leafing) and then I just use a stiff stencil brush to pounce on the leafing. Go all over your surface.

P4229137

As you go around your surface, the portions with nothing to stick to will tear away. If you are a neat freak can’t stand any uncontrolled mess, this is NOT for you. The leafing is very light weight and pieces will fly away. HINT: I lay down a piece of wax paper to help control things and then I can just toss it. You should also save your scrap pieces for other projects.

Tree of Life Charm

Once I had my leafing on, I attached a “Tree of Life” pendant from Blue Moon Beads to my bangle using a large jump ring. I thought this was perfect for Earth Day.  I like big clunky jewelry but of course you could use something smaller. You’ll just need a big enough jump ring to hold your bangle. I also used up some little charms from my stash. Yay stashbusting!

Silver Leaf Mod Podge Bangle

Tree of Life Bangle 2

I would love to hear some of the "craftsplanations" you've had to give. Share in the comments!

Sharing At:


Tuesday, January 22, 2013

Medium Time Commitment Coffee Filter Wreath

Medium Time Coffee Filter Wreath

I’ve always wanted a coffee filter wreath. And I’ve always wanted one that’s fluffy and dense. But I haven’t always wanted to spend what seemed like ton of time to get that really dense look. So here’s my take on spending a medium amount of time on one ( 1hr give or take) plus I re-purposed a styrofoam wreath I already had on hand. For this project you will need:
  • Recycled or new wreath form
  • Basket Coffee Filters
  • Glue Gun
  • Cheesy Lifetime Movie on in the background ( optional)
I started with this monster:

Repurposed Styrofoam Wreath

Skeleton of an early crafty experiment. We’ll call this wreathus formicus.  Decomposed down almost to the bones.

I was originally going to fold coffee filters in quarters and then lay them flat all around the wreath. But I like fluffy and when I was folding, started twisting the bottoms of my quarter folded filters thinking after I got them glued on I could fluff them out a bit. It was at this point I started thinking about doing more video tutorials because I need more hands!
Coffee Filter Folds

Fold a coffee filter in half, then in half again to quarter and then grab and twist the bottom until it looks like a badminton thingy. Now you’re going to ask me “how many badminton thingies” did you make? To which I answer: “A bunch” . Serious answer is I started with an open package of coffee filters about 3/4 full, finished that up and used another maybe 1/8th to 1/4th of another pack so I’m going to say a package should do you.

Here’s where I wish I had the video because I got busy twisting, gluing, pulling glue strings off myself that I didn’t want to get on my camera so didn’t take pictures along the way bad blogger! I glued the twisted part down, then guaged where the next one should go, glued the next one down and so on. I starte in the middle of the wreath went all the way around then did a row on the inside and outside of the first row. After that, I just fluffed.

Coffee Filter Wreath

Kind of reminds me of daffodils. This is to try to illustrate what I mean by fluffed vs unfluffed:

Unfluffed Coffee Filter Wreath

Unfluffed, you can see the natural creases of the coffee filters. Fluffed, is just softer.

Coffee Filter Wreath Fluffed


Sharing At:


Monday, November 21, 2011

Cleaning Out Your Refrigerator for Craft Ideas...More Snow Jars


Since cleaning out my refrigerator the other day kept me from playing in my craft room, there had to be SOME upside right? Pickle jars!!
Snowman and Flocked Tree Jars
I had so much fun with my Snowman in a jam jar ( I’ve named him Marcel ) that once I had more jars to play with, I knew what I wanted to do. I didn’t take step by step pics but the process is basically the same. This time I added trees ( I picked up a couple of packs of bottle brush trees at Dollar Tree…$1 for a pack of 2) and used some wood thread spools I had in my stash.
Snowman Spool
I’m sticking with plain white glue with my Epsom salt. I tried Diamond Glaze just to see what would happen. Not so good! So the process is:
  • Coat the bottom of your jar with glue ( remember bottom will become the top) and invert to let a few drips run down wherever).
  • Pour in some salt
  • Swirl / shake ( cover your opening!) until coated
  • Spray some spray adhesive ( I used Elmers )
  • Sprinkle coarse glitter, spritz a little more sprinkle fine glitter
  • While that’s drying, paint your lids
Once everything was dry, I glued the snowman to the spool and the spool and tree to the lid. For one of these, I wrapped a spool in a scrapbook border:
K&Co Spool

Flocked Tree Jar Spool
Spritzed the inside of the lids with some spray adhesive and sprinkled some more Epsom Salt, then lowered the jar onto the lid ( you want to make sure and keep the salt out of the rim of the lid so your jar screws on correctly) . I dribbled a little glue in the rim too.
Flocked Tree Jar
On these, I went around the neck with plain twine. Start and end with a dab of hot glue.
Snowman Spool Jar (2)
Finished by adding a glittered snowflake from a pack of ornaments ( $1.49 or $1.99 for a pack of 12 @ Michaels, by Darice) to the top ( formerly the bottom!) of the jar.
Snowman Spool Jar Top

Tree and Snowman Jars

Now I’m craving a pickle.
Sharing At:
Tip Junkie handmade projects
Photobucket
homework
The Stuff of Success
A Crafty Soiree