Showing posts with label Christmas. Show all posts

Saturday, November 24, 2012

Easy Christmas Countdown Banner

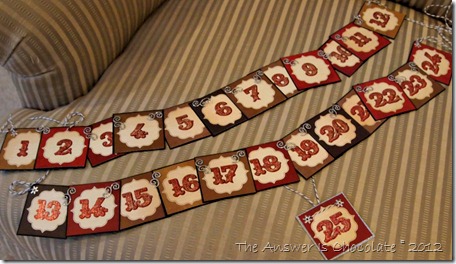
Coundown Banner

I haven’t hung this up yet since I haven’t decided where it’s going but thought I’d share this quick Christmas Countdown banner.

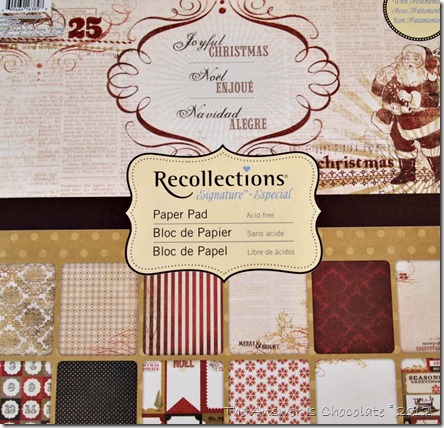
Once again, I fell in love with a paper stack. It’s an illness. I accept  I have it.

Joyful Christmas

This time it was “Joyful Christmas” by Recollections at Michaels. Lots of vintagey goodness with some sheets full of glitter accents. Yum.

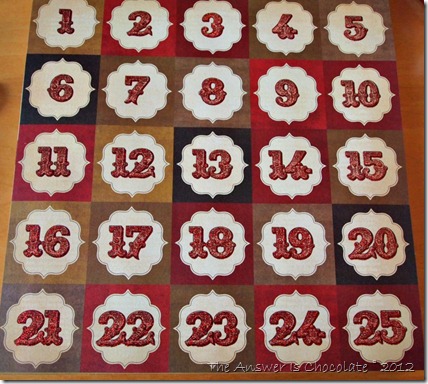
Countdown Page

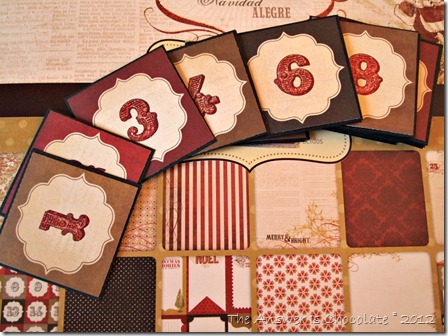
You can see how easy they made it to make this banner since there are a couple of countdown sheets in the stack. I just cut each one out and mounted onto a black panel.

Countdown Numbers

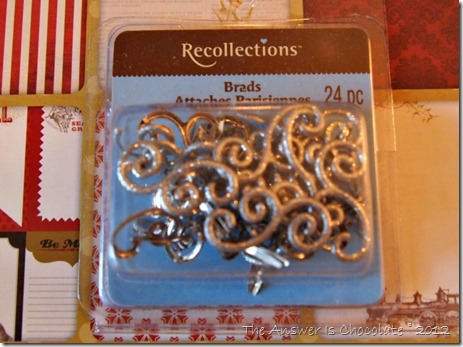
I had these brads in my stash from after Christmas shopping last year:

Recollections Brads

Connected the corners using the brads but decided that 1-25 all together would be way too long so I did 1-12, 12-24 and then 25 as a standalone.

Coundown Banner

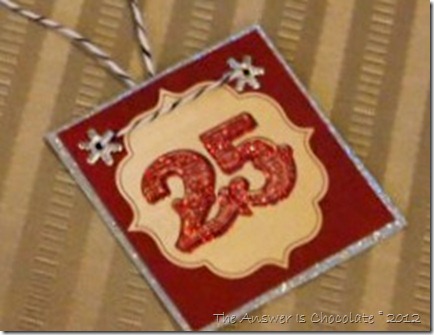
Framed "25" with a silver glitter scrap and snowflake brads. Used black and white bakers twine to finish things off.

Sharing At: 

Monday, November 5, 2012

BFF Open House Link Part #77 Wrap Up and Features

Thanks to everyone who linked up to last week’s party ! You all are way ahead of me on Thanksgiving and Christmas ideas! Here are just a few to share:

Let’s start with this gorgeous burlap wreath from My CreativiT:


I am in love with all of those gorgeous ruffles!

Would you believe these leaves are made from brown packaging paper? Me either!


Go visit Twigg Studios to learn how to make some of your own.


Jenn, over at One Thrifty Chick, gave out mulling spices to teachers for Halloween. I love this idea as something you could send home with guests at Thanksgiving ( or take as a hostess gift).

Rachel over at Holy Craft shared how to make these lovely twine and book page pumpkins:


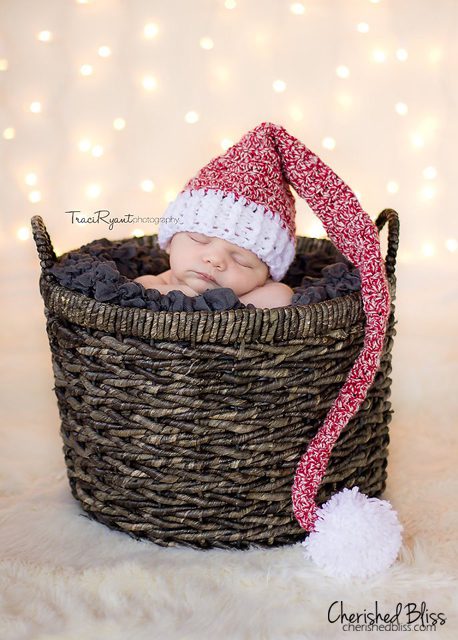
Jumping ahead to Christmas, could this be more adorable? The idea and the model?  Visit Cherished Bliss to get the hat pattern. You’re on on your own for the model.

Adorable FREE Stocking Hat Crochet Pattern via cherishedbliss.com

Awwwwwww!

And finally, this week’s chocolate feature. OMG:

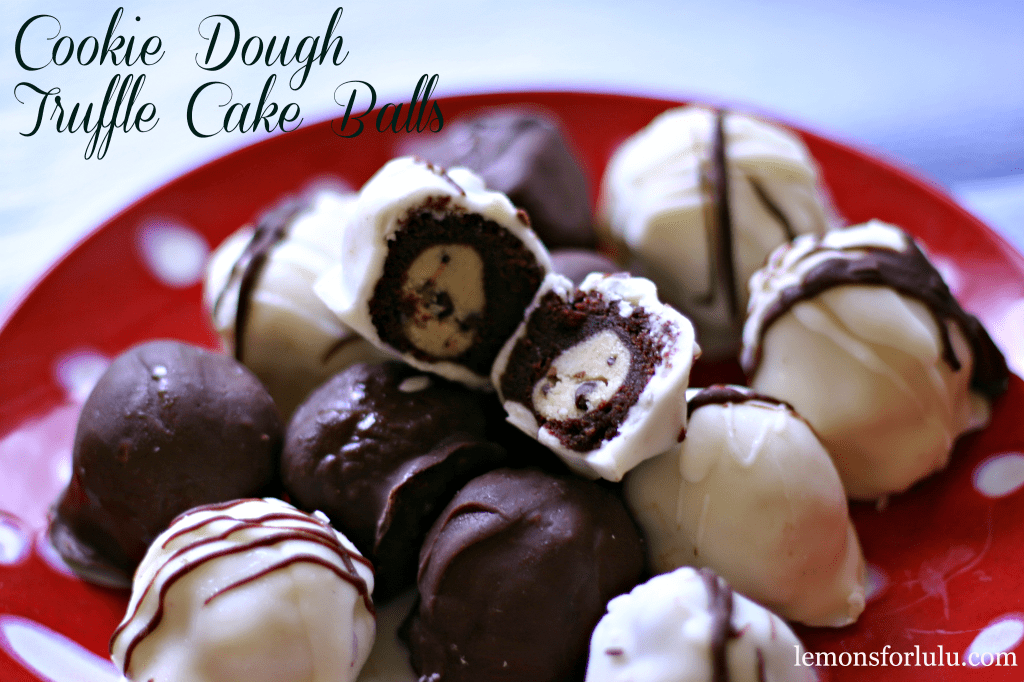
Cookie Dough Truffle Cake Balls

Cookie Dough Truffle Cake Balls from Lemons for Lulu. There are no words to describe how yummy these look!

Thanks again for choosing to share your creativity here at The Answer Is Chocolate. Make it a creative week!

Wednesday, July 18, 2012

Photobucket

Christmas Tag Collage

Welcome back to another Workshop Wednesday! I hope you’re getting lots of good ideas to get ahead of the holidays. If you’re following the hop, thanks for coming over from Mine For The Making!

This week’s project: Gift Tags.

You shop for, make , and wrap gifts. Then if you’re like me, you forget or run out of time for the tags. I have been known to be making a last minute tag on Christmas morning.  Not this year!

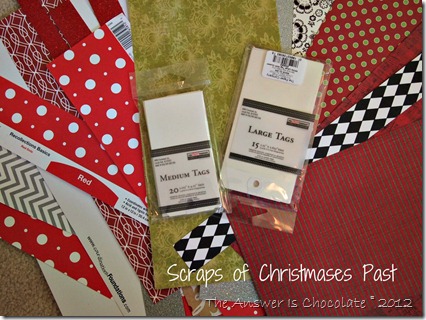
This week I’ll show you how to be ready AND bust some scrap stash. If you work with scrapbook paper for any reason, you’ve likely got scraps.

Christmas Scraps
Or you’ll tell me you do so I feel better. My scraps have scraps. I went to my scrap stash and pulled a bunch of coordinating colors out. I also remembered to pick up some blank tags when they were 50% off at JoAnn’s. I spent less than $5 for both packages…40 tags.

Other options: tags from the office supply store , cut your own with a die cutter, or using a template.

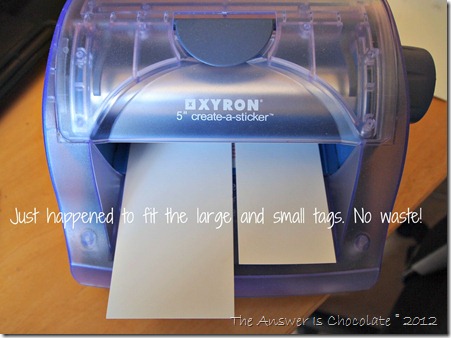
Xyron'd Tags

You can use whatever kind of adhesive you have (tape runner, glue stick, double sided tape etc.). I  have um, several sizes of the Xyron adhesive machines. I used the 5 inch one to apply adhesive to my tags. In a stroke of pure genius luck the two sizes of tags I had fit side by side.

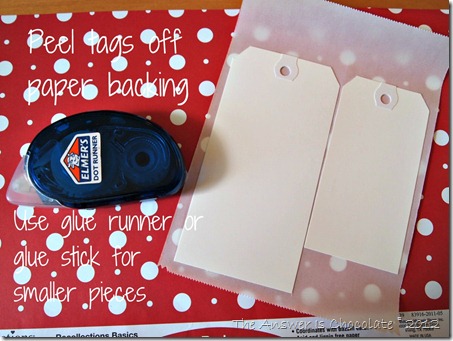
Sticky Tags

Peel your sticky tags off of the backing paper and then attch to the underside of your paper. Trim around your tags. Cover your entire tag and then grab some more scraps and tear, glue, trim ….whatever you feel like. A great way to use smaller pieces up.

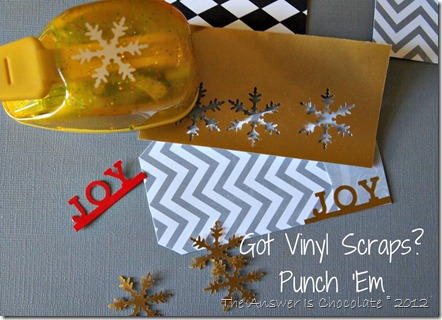
Vinyl Scraps

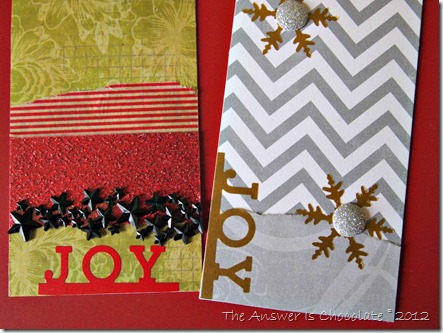
I save my vinyl scraps too because I just know there’s something I can use them for. Too small for your electronic cutter. Go old school: PUNCHES! I used a snowflake punch and a Martha Stewart “JOY” border punch.

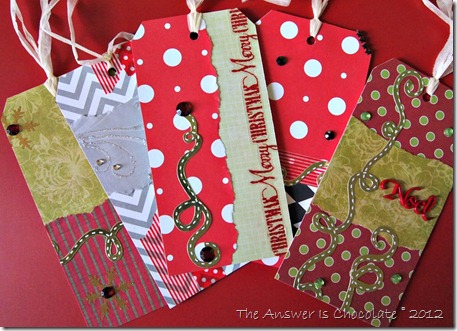
Tag Embellishments

I may have a slight problem with self adhesive rhinestones, pearls etc. I know I never use all of any one package so I have a stash of partially used ones. Out they came for the tags! Washi tape too.

There’s no rhyme or reason to these, just kind of wing it. I had some self adhesive scrapbook borders from other projects. Threw some of those on too.

Large Tags 


Small Christmas Tags

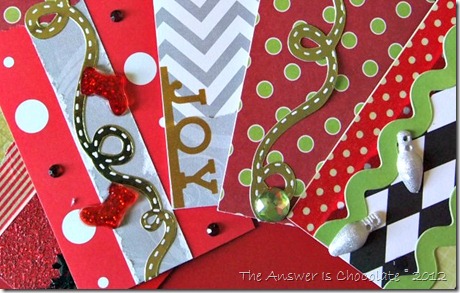
Got buttons? The stockings and lights on a couple of the tags are buttons from my button stash. Basically if it’s small enough to fit on a tag…

Christmas Tags Closeup


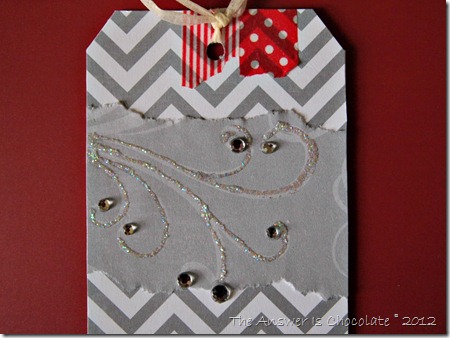
Chevron tag

Went over the swirl pattern on this paper scrap with iridescent Stickles glitter glue and then stuck clear rhinesones on the ends. Tore off pieces of washi tape and stuck them.

Here’s one important thing to remember. I wait until I know I’m completely done adding papers, tape etc. to my tags to punch holes. That way you punch through all the layers you’ve used cleanly and only one time.

Small Christmas Tags

To finish, I used some ribbon yarn I had on hand. So if you’ve got paper, you’ve likely got scraps. If you’ve got scraps, you’ve got the makings for gift tags! Hope this gave you an idea you can put to use.

Next stop: Michele at The Scrap Shoppe!

Tuesday, July 3, 2012

It's Christmas! In July...Workshop Wednesdays

No you did not lose time on your calendar. It’s still July but time flies when you have all these great intentions of being organized for the holidays and then suddenly you realize you DID lose time on your calendar.

Michele, from The Scrap Shoppe had a great idea to get ahead of this. She and I , along with Kara from Mine for the Making, Bev from Flamingo Toes, and Tracey from My CreativiT decided that since Santa isn’t using his sleigh right now, we’d borrow it for a Christmas in July Blog Hop !

Would you like to get a jumpstart on your gifts for this year or get some great decorating ideas? Then join us for Workshop Wednesdays starting tomorrow!

We will be sharing ideas such as how to get organized for the holidays, how to make personalized ornaments, and some great gift ideas.

Turn on some Christmas music and dust off your Santa hat as you join us as we dash through blog world by visiting these participating blogs in Workshop Wednesdays. Spread the word and dust off your elf shoes!

Photobucket


Cool Yule !

Tuesday, September 6, 2011

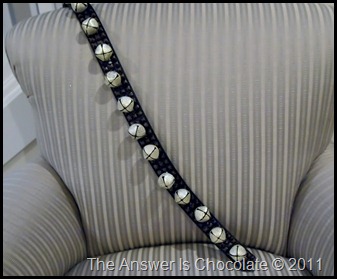
Jingle Bells…Repurposed Belt

I’m anxious to start working on Halloween stuff so naturally I did a Christmas project first. What can I say? When an idea comes, it comes.
Jingle Bell Belt (2)
For years I’ve seen old sleigh bells on leather straps in antique stores. Unfortunately, they tend to be really pricey and I haven’t been able to justify the purchase because if you ask Mr. Chocolate, the last thing I need is more Christmas stuff. PS. Don’t ask Mr. Chocolate !
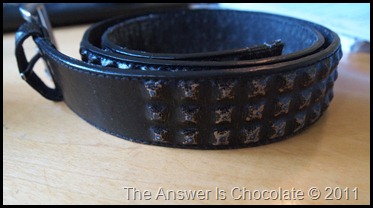
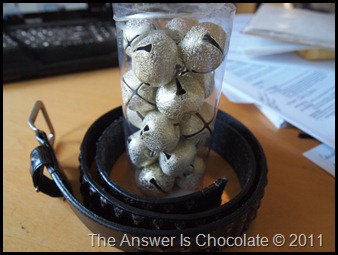
Speaking of him, one of his favorite belts recently bit the dust so he dropped it off in my craft room because he figured I could do something with it. Then the Christmas stuff started showing up in the stores and… belt plus bells = my sleigh bell strap!
Jingle Belt 
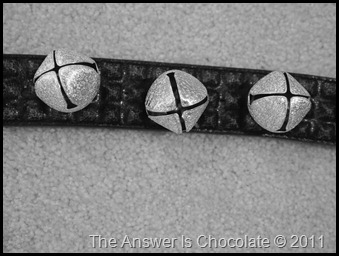
This was one of those things that looked old when it was new so it was even better after being worn. I liked the texture until I went to punch holes in it. My Cropodile made it through!
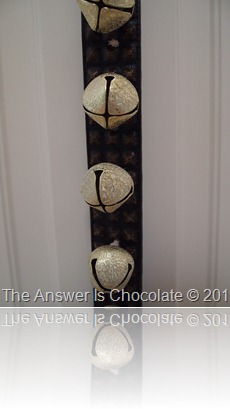
Jingle Bells (2)
Michaels had these great bells that are kind of textured, almost hammered looking.
I punched holes all along the belt , and tied each bell on with twine. My brain said it was better to do each one individually so they wouldn’t all come off if one came off.
Jingle Bell Belt
P9062939
I left the buckle on which I’ll use to hang my “sleigh belt”. And now that I have this, I feel totally justified next time I see an antique sled ‘cause I don’t think you know who has one of those in his closet!
Linking Up At:
homework


Saturday, November 27, 2010

Our "Black Friday" Traditions...

do not consist of getting up before the chickens and waiting in long lines to shop. For as many years as I can remember, we have gone to downtown Seattle to see the Christmas decorations. The Fairmont Olympic hotel ( which used to be the Four Seasons Olympic) is a very special place for us. It's where we got engaged; where we spent our wedding night; where we've celebrated birthdays, Mother's day, or just gone for a weekend getaway. Every year, the hotel is host to a huge gala fundraiser (which we don't attend!) auctioning off gorgeous, professionally decorated Christmas trees. The proceeds from the auction benefit Seattle Children's Hospital.  They're only on display the weekend after Thanksgiving before they're whisked away to their new homes.
I'm very into the red and lime green color combo right now so this one caught my eye. Each one of these trees is so detailed , words don't do them justice. Of course this one with a chocolate dipped strawberry was one of my faves!
Even once the trees are gone, the hotel remains a magical wonderland: 
One of the traditions we love the most is visiting the "Teddy Bear Suite". The hotel decorates one of their junior suites with, as you can guess...teddy bears, and its open to the public to view:
Here are some of the bear friends all comfy on a beautiful bed, surrounded by the spirit of Christmas. After the Fairmont, we usually head over to the Seattle Sheraton which hosts the annual gingerbread house village...giant gingerbread houses decorated by their pastry chefs with amazing themes. The line this year was waaay long and we decided not to wait but maybe another day during the season.  From downtown, we headed over to another area we love, University Village, near the University of Washington, which is an outdoor shopping center that's beautifully decorated. Seattle weather being what it is, I didn't take a lot of pics here because of the rain but guess who we found? Not Santa but his helpers!
Waiting for the boss man to kick things off. A few years ago, our own hometown started its own holiday celebration called "Snowflake Lane" ( well it's called that until 12/26 and then the week between Christmas and New Year's it's called "Celebration Lane") where every night live toy soldier drummers appear to perform to a music and light show complete with "snow"...the fake kind...we've had enough of the real stuff! Giant drum shaped stands line the road on both sides in front of the mall with lighted snowflakes on top.

Remember I'm short! So this pic was an "up shot"
Every night there are other toy soldiers walking around on stilts handing out candy, as well as Sugar Plum Fairies and other Winter Wonderland guests. Isn't this a lovely couple?

Frosty the Snowman, Rudolph, and a giant polar bear and Christmas Mouse also made an appearance. It was a great day, just focused on soaking in all the seasonal fun.

Tuesday, November 23, 2010

Playing With Printables

OK I'm one of those people who when I get on a kick...you know the rest! I feel like such a dork because while I have played around with graphic design: A.) My brain just won't work with Photoshop so B.) I keep going back to the program I know which is Broderbund's Printshop but didn't know how to share anything like a printable. I've been able to share some PDF files but I wanted to play just like others who have printables you can click on from directly within a blog post. Did I mention I'm stubborn and I want what I want? Did I also mention I'm one of those people who hate manuals because I think I can intuit my way through? Uh-huh. So I finally broke down and consulted "the manual" and figured it out!!! Sssshhhh...don't tell anyone.

I love the "Keep..........and ............On" variations so here are a few I came up with to share:
Linking Up At:


Thursday, November 18, 2010

Christmas Garland Kits

You're almost out of the woods of me mentioning this craft show I'm doing (If I sell 1 thing I'll be happy because I'm starting to panic!). I got this idea when I did a giveaway of my "Gratitude" banner and thought this might be something good for the show. And it really came together when I did the graphics for my "Framed Christmas Art" and liked the end result enough to play some more.

The colors aren't really showing up well in this pic but it's an olive-y green and burgundy combination. Here's a better look at one of the letters:
Each letter has a heart shaped ornament graphic which I embellished with gold adhesive rhinestones. Added dark garnet rhinestones to each letter which combines a sheet music graphic ( this one from within my graphics program but the others I'll show are from The Graphics Fairy) and mounted on green then black cardstock. Each "kit" includes tulle and embellished clothes pins. 
In addition to the "WISH" series, I did NOEL : 
Packaged in cello bags, black and natural cardstock

The letters that I used in my framed piece, and JOY: 
Can't see it so much, but the ruby cardstock used here is textured
I used a drop shadow effect on the letters for this one.

Monday, October 25, 2010

Need I Say More....

They're called Double Sin Brownies. You can see why! Go visit Songberries for the recipe!

Photobucket

Oh, and it's exactly TWO MONTHS til Christmas! Just sayin'