Monday, November 7, 2022

Fall Decor: Textured Copper Wrapped Candles


Thanks all for understanding about my party oops on Thursday. I think Fall allergies are the culprit. There's no better medicine than creating though, right? Had fun making these Copper Wrapped Candles which were easy and make a statement! 

Supplies: 
  • Dollar Tree Plain White Glass Candles
  • Cricut Textured Copper Vinyl (JoAnn)
  • Cricut Design Space Image #M9BB7EA
  • Digital Cutting Machine (I used my Cricut Explore 2)


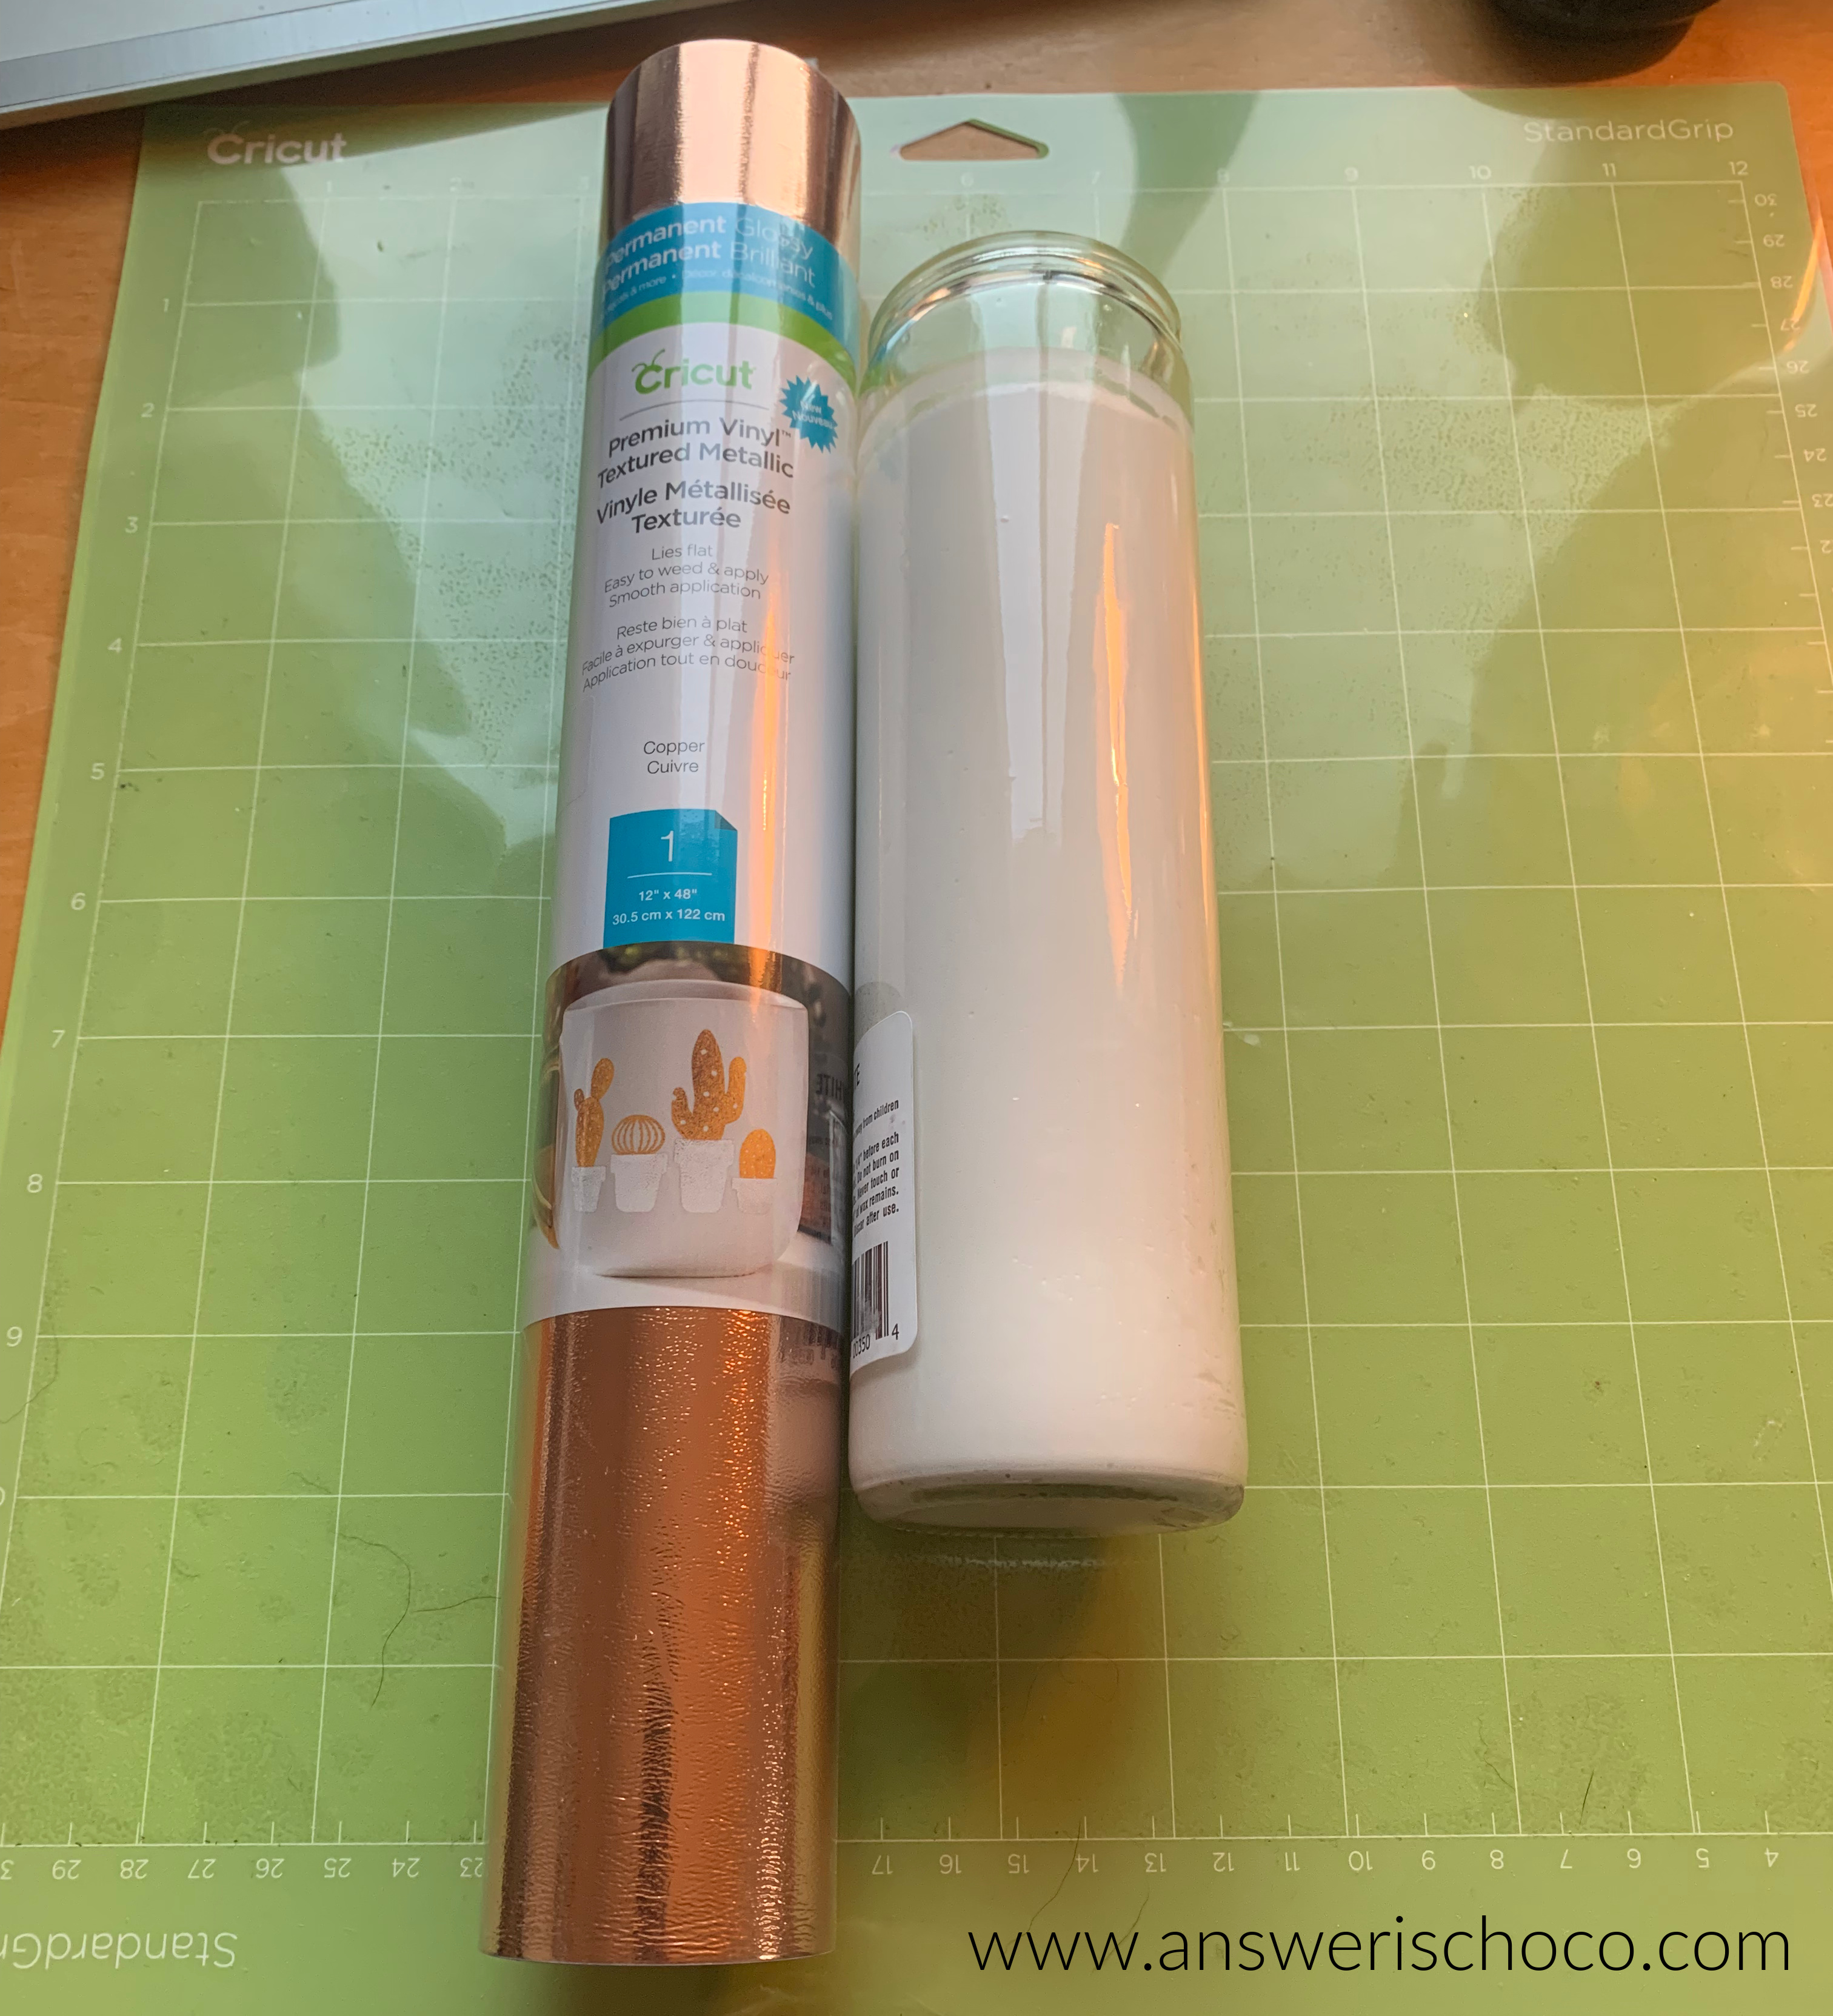
I got my candles at Dollar Tree but they can be found wherever Saint candles are sold. You can remove the sticker or leave it. I left it and just made sure the vinyl seam was in the back. The Cricut vinyl is available wherever Cricut products are sold. I got mine at JoAnn when they had a 40% off sale. I have a Cricut Design Space subscription so I found an image I liked and then sized to fit the candle. 7.5 height x 8 inch width. Doing this again, I would cut 1/2 inch shorter in height I think. 

This is the image I used which, if you're not a Design Space subscriber is $.99 to purchase. 


Once the vinyl was cut, I weeded (peeling the top layer from the backing). Normally, this would bethe piece you discard, using what remained on the backing paper. I chose to use it to make a candle wrap! 


Clean your candle with glass cleaner or alcohol (especially if you used a product to remove the label) and then with the vinyl sticky side up, lay the candle on its side and carefully roll it until covered. 


That's it! 


Want to know what I did with the vinyl that remained on the backing paper? Come back tomorrow and I'll show you! 

Sharing At:


Thursday, November 3, 2022

BFF Open House


Hi Creative Peeps! Yikes, not feeling the best and almost missed my own party. It'll be just links this week and no features. Hope everyone had a safe and Happy Halloween!


You are invited to the Inlinkz link party!

Click here to enter

Wednesday, November 2, 2022

Jewelry Making: Copper and Silver Chain Earrings


I have a bunch of jewelry supplies left over from a stint on a design team. Of course, that doesn't mean I haven't or won't continue buying more but I wanted a pair of earrings that were "Fall" now that it's actually feeling like it here in the desert. I primarily wear silver but decided to branch out and use some copper. I was in Michaels (see...impossible not to add new supplies!) and saw some copper earring pieces ON SALE and remembered some chain I had in my stash. 

Supplies: 
  • Copper Earring Components (Michaels)
  • Copper and Silver Chain (Stash)
  • Clip Earring Backs (Michaels)
  • Silver Floral Charms (Shipwreck Beads)
  • Jewelry Glue or Super Glue (Aleene's Jewelry Glue, Walmart)


NOTE: I don't have pierced ears, hence the clip on backs. To get the same look for pierced ears, use post style findings to glue to the floral charms. 

The chain I used also had gold links. Since I don't really wear much gold, I removed these and set them aside for other projects. 


After taking off the gold links, I separated six sets of three links using just the copper and silver. 


Each earring component can hold three sets so I did silver, copper, silver for the ends and copper, silver, copper, for the center. 


The earring components came with their own jump rings which I used to attach the trio of links. 


At this point you could attach fish hook ear wires. 


With the earring backs glued to the charms, I attached these to the earrings using a silver jump ring from my stash, et voila!

I love the copper for "Fallvember" especially since I always associate Fall with copper. 


Sharing At: 


Thursday, October 27, 2022

BFF Open House


Yikes. Another week flew by like that. Happy Halloweekend Creative Peeps! Can you believe Halloween is already here and Thanksgiving isn't far behind. 

Remember last week when I mentioned Summits? Well there's another one I just signed up for and whether you're already a cardmaker or have wanted to become one, this is perfect. Check out the Card Maker Success Summit that will be hosted by Brandi McMahon and sponsored by Stamp Me Some Love on November 12: 

It will be a full day of livestreams with different brands and makers complete with some giveaways. Can't beat the price which is FREE! 

I was also very honored to have my Spooky Season jewelry featured at this week's Vintage Charm Party (held every Wednesday) hosted by Our Hopeful Home!

As always there were so many wonderful ideas shared at last week's party so here are a few. 


Jennifer Adams from Studio 27 shared her thrifted and repurposed Easter to Halloween Tree! Make a note to start scouting the thrift stores now through Spring for one of these! 


Meet Leonard, the Debonair Vampire who graces this tablescape shared by The Yellow Corner Store. Dashing, isn't he? 


I've seen a lot of mushrooms throughout the past couple of years' holiday decor. Check out the ingenious way Cecelia from My Thrift Store Addiction has taken them up a notch with these fragrant and pretty Cinnamon Stick Mushrooms. Love these! 

Finally, need a quick but fun snack for Halloween? You can't go wrong with these Edible Spiderwebs from Simple Joys!


Thank you to everyone who linked up. I love seeing all of your creations. 

Let's take a look at what everyone's been up to this week. I hope you have a wonderful Halloweekend and a 


You are invited to the Inlinkz link party!

Click here to enter

Tuesday, October 25, 2022

Jewelry Making: Glass Opalite and Obsidian Bracelet and Earrings


I recently made a Thank You gift for a family friend. I don't know her well but still wanted her to know how much we appreciated her recent help with my husband's dad and black and silver seemed pretty universal. I have some "special" beads that I keep set aside for special gifts so I grabbed a pair of black and white Murano style glass beads and some coordinating Opalite and Snowflake Obsidian beads from my stash, along with solver spacer beads and bead caps and went to work. 

Supplies:
  • Murano Style Fused Glass Beads (Specialty Bead Shops or Shipwreck Beads/Fire Mountain Gems)
  • Natural Gemstone Beads (I used Snowflake Obsidian)
  • Silver Bead Caps and Spacer Beads (Sterling or Plated, Bead Landing from Michaels)
  • Earring Wires
  • Jump Rings
  • Head Pins
  • Stretch Jewelry Cord
  • Jewelry Glue (Aleenes, Walmart)


The black and white glass beads worked perfectly with the Opalite, picking up its luminescence.  I love the head pins by Bead Landing at Michaels because they're strong yet bend smoothly. 


I strung an Opalite bead on the pin followed by the black and white bead and finished with a bead cap before making a closed loop.  


Once you're done with both pieces, attach to the ear wires using jump rings


Then I went to work on the bracelet which used a combination of Snowflake Obsidian and Spacer Beads. 


The design on these coordinated well with the bead caps. Spacer beads are also by Bead Landing. I strung a spacer bead and then a black crystal bead followed by another spacer bead and completed the rest of the bracelet alternating spacer bead, gemstone bead, spacer bead until I had the right size. As I shared in my Spooky Season Jewelry post, clamp on end of your stretch cord length, and I just eyebal until I have the size I need for my wrist which is pretty average-sized. 


To finish, I added a small rhinestone charm (Charm Along, Michaels) using another jump ring. Since this was a gift, I wanted to present it as such. I love these organza bags which you can find at Michaels, JoAnn, bead and packaging shops. 


I cut an earring card using my Cricut and placed the bracelet in a small bag and the earrings in a medium one to accommodate the earring card. .


I love making gifts for special people but I also always hold my breath. I think as makers, we know we love what we do but maybe wonder if other people do? Maybe that's just me! I exhaled when I got the nicest thank you note stating that the recipient LOVED her gifts. 

Sharing At: 


Thursday, October 20, 2022

BFF Open House

Happy Friday Eve once again friends! This week seems to have flown by for no particular reason. It feels like Monday was yesterday. Then again, I saw a meme that was so accurate which said when someone says 30 years ago I think the 70s when they meant the 90s. The years fly by! 

This week I shared some jewelry gifts I made for friends for "Spooky Season". I love that so many fun beads and charms are available.

And of course, you all were up to your usual creative brilliance with the projects shared at last week's party so let's take a look at some of those!


I adore this "Spooktacular" Bone Appetit Tablescape from Masterpieces of My Life! What an elegant ghostly setting! 


This Chandelier Witch Hat would go so well with the Bone Appetit Tablescape, wouldn't it? From Thrifting Wonderland


If you're not big on Halloween and/or as you start to plan a transition to Thanksgiving, these Copper Pumpkins from The House on Silverado are perfect. Living in the "copper state" I'm planning on doing more copper for Thanksgiving. 
 

Finally, if you're looking for an addition to your Halloween or Thanksgiving dessert table, check out this Pumpkin Nutella Earthquake Cake from Lamberts Lately. I was not familiar with an Earthquake Cake, so here's the definition shared with the recipe: "An Earthquake Cake is a fun way to integrate lots of different ingredients into one cake." Works for me! 

Thank you to everyone who linked up! Let's see what everyone's been up to this week. 


You are invited to the Inlinkz link party!

Click here to enter