Thursday, November 18, 2021

BFF Open House


Happy Friday Eve all! By this time next week we'll be stuffed like the turkeys many of us will have just consumed and busy in our workshops or online shopping because the final countdown to Christmas will have begun! Hanukkah starts the Sunday night of Thanksgiving weekend and comes early this year. Everybody panic and freak out! OK, no. Because WE'VE GOT THIS right? We're Creatives, Bakers, Holiday Gift Makers! We are Crafters and Cooks and our work will get looks! Are you fired up and ready to go? GOOD! Let's take a look at some ideas from last week's party! 


If you need one more EASY PEASY piece of decor for your Thanksgiving gathering, printables are the way to go and this one from Building Our Hive is perfect! You could do smaller sizes for each place setting even. And it's available in multiple colors! 


Another quick and easy idea for your Thanksgiving table are these Silverware Wraps from Satsuma Designs. These were designed with kids in mind but no reason they can't be for adults too right? 


I love Gnomes and they're everywhere, especially at Christmas. What's better than a No Sew Gnome?! Check out this one from Condo Blues


Finally, if you already have a chalkboard laying around or you're lucky enough like Lisa to find one at a thrift store, then this idea is for you. Fresh Vintage by Lisa S will show you how to stencil with more than one color to achieve this look! 

OK Chocoholics! We were made for this. Let's get to making!!


You are invited to the Inlinkz link party!

Click here to enter

Tuesday, November 16, 2021

Thanksgiving Decor: Gather Dollar Tree Sign


I know lots of people went straight from Halloween to Christmas decorating but I'm contrary and like having my Fall / Thanksgiving decor in between! No judgement...that's just me. I swear I'm going to end up owning every single one of these Dollar Tree signs but I can never pass them up! They're an easy way to decorate and easy to do whatever you want to them from paint to decoupage and many things in between. I decided to do this one in the palette I used for my Thanksgiving Cards

Supplies: 

  • Gather Sign (Dollar Tree)
  • Acrylic Paints in choice of colors. I used Delta Ceramcoat Mulberry and Craftsmart Bright Gold
  • Dimensional Glue. I used Ranger Glossy Accents
  • Craft Foil. I used Recollections from Michaels in Copper
  • Coordinating Sequins 


I always start these by painting the interior of the letters, then the edges, then the back and front. For me, it helps ensure I don't leave bare spots in the nooks and crannies!


These take paint really well so it only took one coat. Next I dry brushed with the gold. 


I really wanted just a hint of gold so I kept it very light. After that, I added some copper accents using the same foil I'd used for the interior sentiment of my cards. 


NOTE: I thought plain Elmers was going to be enough because I was going for a very light effect with the foil...kind of like a dry brush...it was not! So I brushed on some dimensional glue ( Ranger Glossy Accents ). You can put the foil down almost as soon as you brush it on and then I burnished with the handle of a pair of scissors. 


I grabbed some bright gold sequins along with the metallic brown ones I'd used for my cards and just randomly placed them using the same Glossy Accents. 


You can get a better feel for the copper in this pic. I layered the sequins, using the large gold ones and then smaller brown ones. 


Easy. Pretty, Inexpensive. Three of my Crafting food groups! 


Sharing At: 


Monday, November 15, 2021

Hanukkah: Modern and Bright Layered Dreidels


Hanukkah starts early this year, beginning at sundown on November 28th, the Sunday following Thanksgiving. So I needed to get some gifts done earlier this year! I'd picked up some deep box frames on one of my Michaels trips and decided they'd be perfect for what I wanted to do! 

Supplies: 
  • Deep Box Frames 
  • Handmade Paper (JoAnn)
  • Foil Cardstock (Michaels)
  • Chalk Paint (Folk Art, Michaels)
  • Mod Podge Matte
  • Digital Cutting Files 
  • Digital Cutting Machine
  • Coordinating Sequins and Rhinestones

I had this gorgeous handmade paper in my stash from a prior JoAnn's trip that I'd been holding on to for the right inspiration and this was it! 


The picture doesn't do it justice. I knew it would make the perfect background for my project. I pulled out coordinating foil cardstock from my stash (Recollections, from Michaels in bright gold, turquoise, and royal blue) and got to work. 


The first step was to prep the frames. I chose this Home Decor Chalk Paint by Folk Art which goes on smoothly with great coverage and only needed one coat. 


After the paint was dry, I sealed it with a coat of Mod Podge Matte. Then it was time to get to work on the interior. 

I'd downloaded a beautiful Hanukkah set of layered files from Special Heart Studio. You will just need to sign up with your email to get access to a wonderful set of files that Gjoa graciously provides for FREE! It comes with a Menorah and a Dreidel and I used the Dreidel. I downloaded and imported into Cricut Design Space, sized to fit the frames and cut on my Explore Air 2. 


I assembled the different layers of the dreidel using foam squares. 


I used gold for the bottom of each then switched up the turquoise and royal layers for each dreidel. Then using the backing insert from the frames, I Mod Podged the handmade  paper that I'd cut to size. 


After that was good and dry, I mounted the dreidels using Aileene's Turbo Tacky Glue, let that set, then put them in the frames. 


Of course I had to make cards to go with! For these I used a file I had downloaded in Silhouette Studio and then brought into my Cricut Design Space software which is easily done if you make sure you check the SVG box when purchasing your Silhouette image. 


As you can see, I went with the Chevron pattern and in Design Space used the "offset" function to create the layer behind the Chevron. Then I cut those from the foil cardstock as shown, used a spray adhesive to attach the gold top layers, and embellished with coordinating sequins and self adhesive rhinestones. I cut white cardstock 10x7 to make 5x7 cards, then a gold panel 4.75x6.75 to which I added strips of the handmade paper and then mounted the dreidels using foam squares. 


Sharing At: 


Thursday, November 11, 2021

BFF Open House


Happy Friday Eve once again and welcome back to another fun party here at The Answer Is Chocolate. I hope everyone's had a great week and survived the changing of the clocks.  We don't change here in AZ but we do get confused about what time it is everywhere else. 

We are already almost mid November with American Thanksgiving (I had Canadian colleagues who trained me well) two weeks from today! My mom will be spending the holidays back east with her sister and while we'll miss her, I think this is a fabulous opportunity to do something she hasn't done in forever. 

I had a ton of fun with girlfriends at a "Candle Bar" last weekend. Check out the details here: Light and Bark Candle Company and got my Thanksgiving cards done which you can see here

Lots of festive Fall goodness shared at last week's party. Let's take a look at a few ideas! 


Can you tell I'm in love with yarn based pumpkins? I just think they look so cozy. This herringboned patterned one is from Howling Liz


This DIY Long Box from Thrifting Wonderland is one of those pieces that can stay out all year round and be updated seasonally. PERFECT for the holiday season and I'm picturing it filled with everything from mini gourds to bottlebrush trees, ornaments and greenery, paperwhites, amaryllis...you get the idea!  


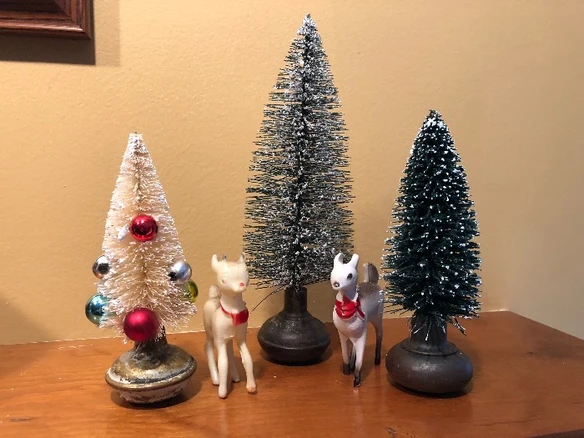
Speaking of bottlebrush trees, check out this ingenuity from Junk Journal who used vintage doorknobs as their base! 


Finally, if you're looking for a star addition to your Thanksgiving dessert table, look no further than this pretty Pumpkin Caramel Trifle from The Kitchen Is My Playground! She just keeps coming up with amazing desserts! 


Thank you as always to all who linked up and can't wait to see what you've been up to this week!


You are invited to the Inlinkz link party!

Click here to enter

Wednesday, November 10, 2021

Fall Crafts: Layered Leaf Cards (Intermediate to Advanced Skill Level)


My first love was and remains card making. And the more I play with my Cricut Explore Air 2 and layered SVG files, the more I stay in love with card making. SVGs are Scalable Vector Graphics which means they can be re-sized easily in things like Design Space. 

Supplies: 
  • Layered Leaf Images (I used a bundle from Creative Fabrica)
  • Cutting machine (I used my Cricut Explore Air 2)
  • Scrapbook Paper (I used CraftSmart "Dark Elegance" which I bought last year at Michaels and is no longer available but you can use comparable dark papers)
  • Recollections Gold and  Copper Foil cardstock (Michaels)
  • Coordinating Plum Cardstock (Stash)
  • Cream Recollections 110lb Cardstock (Michaels)
  • Copper Foil
  • Fall Themed Embellishments ( I used K&Co border stickers from my stash)
  • Coordinating Sequins (Michaels
  • Foam Squares
  • Dimensional and Double Sided Adhesive
  • Paper Trimmer and Scoring tool
The first step was to decide on the focal image for my cards. I knew I wanted a leaf theme, especially since living in the desert, I miss the changing leaves of my former Pacific Northwest home. I found this set of layered leaves at Creative Fabrica.  If you do choose to purchase, full disclosure...I get a small benefit if you go through my affiliate link


Download, extract, and import chosen design into your machine's software, in my case Cricut Design Space. If you don't have a cutting machine you can print out the PNG images and hand cut using scissors and an X-Acto knife. 

I selected the leaf from the bottom row, leftmost image. 


I deleted two of the 5 layers in my Design Space Software because I liked how just three layers looked. Then I cut each layer from the colors I chose ( plum, foil gold and copper). 


To assemble, attach the middle layer ( gold ) to the base ( plum ) using foam squares. Since the top layer is more delicate, I used a spray mount. 


Here's the middle layer mounted to the base. Since you need to work fast with the spray adhesive, I didn't take pics of the top layer but you get the idea...spray the back, lay atop the middle layer and done. 

Once I had my leaves assembled, I made my cards by cutting the cream cardstock to make 5x7 cards, cut panels of the copper foil cardstock to 4.75x6.75 then selected papers from the Dark Elegance Stack and cut to 4.5x6.5. I added the Fall themed border stickers and then mounted the leaves to the cards. 

To finish, I grabbed some coordinating sequins from my stash and added them along the stem of the leaf using Glossy Accents dimensional glue. 

But of course I wasn't done! Copper is such a fall color to me that I wanted a touch more so I'd picked up some copper foil on a trip to Michaels and thought I'd do the interior sentiment using the foil tool that works with my Cricut. 


For this step, you need to make sure you get the foil as taught as possible atop the paper you want to foil so I used painter's blue tape to tack it down. The Cricut foils also come with tape strips to do this. 


It still needs a little give so don't worry if it's not absolutely flat. Then select a font or image for whatever you want to foil, follow the instructions for the tool / in Design Space and send to your Cricut. 


I chose the word "Fallsgiving" since this time of year for me is about celebrating the gifts of Fall. It was also a great way to use up the copper, and plum scraps from this project which I used to mat the sentiment! I adhered these to the inside of my cards using my tape gun. 

My way of giving a little bit of Fall to friends and family! And the pictures don't do the metallic goodness of the colors justice so if you are seeing this on here first and know you're getting one, just wait!