Monday, January 11, 2016

Game Board: Necessity Is The Mother of Invention


It was great having our son home over the holidays and we spent a lot of time just hanging out, watching movies, playing games, even doing some crafty things.

We played Yahtzee one night and spent the first part of the game chasing the dice as they skidded off of our marble table. Then we tried using a Tupperware lid which worked but the whole time I kept thinking "I can make something better than this" so I did.


 Supplies:

  • Wood surface with lip ( you can always count on me for the technical terms).  I found this at Michaels...it's technically called a Wood Plaque. OK. 
  • Paint ( I used Burnt Umber)
  • Glazing medium
  • Paint brush
  • Template 
  • Felt 


Pretty straightforward. Paint the wood with as many coats as you are happy with. I wanted a stained look more than a painted one so I thinned with glazing medium.  When dry, I sealed it with a coat of Mod Podge glossy. 

Measure the inside of your wood surface and cut a paper template to fit. I rounded the edges with a pair of edge rounding scissors. Use template to cut out felt. Glue felt to painted wood. I just used a spray adhesive. Pay closer attention to rounding the edges. My fancy scissors didn't cut through felt so I had to do this manually and oops'd.   


This is still better than the Tupperware lid! I had everything on hand except the wood piece so my total cost for this was $2.99 less 40% coupon! 


Thursday, January 7, 2016

BFF Open House : First Party of The New Year!

The Answer Is Chocolate

Happy New Year and welcome to the first party of the year. I'm still working out my blog goals for 2016 but keeping this party going is still among them. We'll start with just the party today and resume features next week! 


Tuesday, January 5, 2016

Bright and Shiny Cards for The New Year


Happy New Year! Little slow getting started but have some cards to share. Sometime between Thanksgiving and Christmas I picked up a steal deal at Michaels. Their "Hot Buy" paper pads were on sale for $5 and of course I couldn't resist. I picked up two gorgeous metallic 12x12 pads ; one in gold and one in silver. These papers are so gorgeous that I let them stand alone and didn't do a lot of embellishing. 

January brings several occasions so this week it's a Birthday, a Retirement, and a Thank You note. 


I was able to make all three cards using two sheets from the deck. One was an embossed quatrefoil pattern that I used as the background and the other was a sheet with sentiments (12 on one page) that  you can cut down and use for multiple projects. For the Birthday card I chose this one that says "Happy" and mounted on dark silver metallic and glitter paper before adhering to the card using foam dots. I love love love metallics. I hate hate hate photographing them. Things to work on in 2016!


For the Retirment card, I used the same idea, choosing this sentiment "Live A Beautiful Life" . I did embellish this one a bit with some silver glitter washi tape , sequins, and buttons. 


The Birthday and Retirement cards are 5x7. With the paper I had left, I made a Thank You card (5.5x 4.25) using another sentiment "My Favorite Things"...perfect since this was a Thank You for a chocolate gift basket I received! 

For my big $5 investment, I still have 29 more sheets of paper and 9 more sentiments from this one page to play with ! 

Supplies Used 
  • Craft Smith Silver Foil Paper Pad 12x12
  • Cardstock
  • Double Sided Adhesive
  • Foam Dots
  • Misc. Embellishments


Thursday, December 24, 2015

BFF Open House Link Party #237: Merry Christmas !


Merry Christmas Eve all! Wishing you and yours a very Merry Christmas. Ready or not, here we are. Opening up the party early. Here are some things you may still have time to squeeze in ( or definitely pin for next year) .


I love all things paper...fom detailed patterns to the simplicity of brown paper. The guys at Crafty Lumberjacks used kraft paper and paint to make this wonderful wrapping paper. I keep a roll of brown kraft paper in my craft room and use it for everything. The simple elegance of this idea is so lovely! 


In keeping with a simple, rustic, yet elegant theme, Mich in LA has a fantastic ornament stand that can be made from garden wire! Love the snowflake she has hanging on this one! 


Whether for a last minute gift or to have extras on hand for guests, Heather at Woods of Bell Trees has a great way to dress up cork coasters. These could be done in so many ways...not just for Christmas. 


I think these would still count as cookies for Santa if you left out Oreo cookie cake pops don't you? Check out Logan Can for the how to . 


Thursday, December 17, 2015

BFF Open House Link Party #236


Crunch time people! One week until Christmas Eve....EEEEEEEEEEEEK! Are you ready? I'm not. 

Here are some ideas from last week's party that you still have time for though! 


Love  this card from Paper Seedlings. The little dots around the word "peace"? A happy accident that I think adds a great dimension to the card. 


Fantastic on trend makeover from Lou Lou Girls. I love updating and re-purposing pieces I already have.


I love lights and would have them everywhere if left to my own devices. But I hate seeing the cords. Sweetwater Style shared a great post on how to get the lights without the unsightly cords. 


I think Santa, or his hardworking Elves would love a batch of these Chocolate Candy Cane Cookies from Strength and Sunshine don't you? 

Now, on to this week's party.


Wednesday, December 16, 2015

Tagmania: Pretty and Practical Gifting


Being addicted to paper as I am, I hate to see any beautiful papers go to waste. So I've had a lot of fun making gift tags to give as gifts figuring who can't use more gift tags this time of year? I know I've wrapped many a present and then realized I had no way to personalize it / indicate the recipient. 

This is one of those things that the more you make, the more you want to make! 

Simple process: 
  • Gift tags (you can buy packages of ready made tags or cut your own. I cut mine using my Silhouette)
  • Paper scraps
  • Random embellishments : rhinestones, washi tape, punched shapes buttons, etc. ( this is a great way to use up onsie twosie leftovers)


These are some I made for a Hanukkah gift. I cut the dreidels using my Silhouette, randomly covered them w/ embossing ink and then embossed with gold embossing powder. 


One friend of mine decorates her tree in bright greens, pinks, purples so I coordinated these tags around those colors. To embellish I used punched glitter stars, snowflakes, sequins, and glitter ribbon and had some Japanese Mizuhiki cord in my stash that coordinated. 


Tip: I apply the papers slightly wider than the tag and then trim the edges all at once so they're uniform. 


I used the same idea for these in black, white and green, using white Mizuhiki cord on some. 


After seeing these, Mr. Chocolate asked "where are our tags" so guess what I'm working on ? 


Sunday, December 13, 2015

Christmas Mantle : Black and White Tree Makeover


I made over my mantle decorations this year, going with a black , white and gold theme w/ accents of red. 


Waste not want not so I try to repurpose pieces I already have which is what I did with these black and white felt trees. They used to be these from a few years ago: 

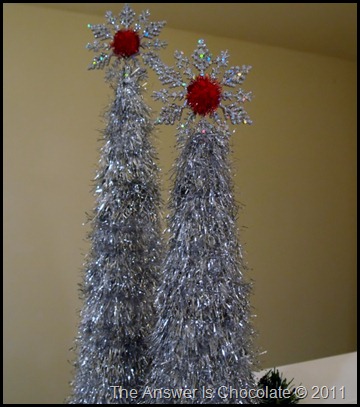
Tinsel Tree With Topper

which were fun and I still liked them but was tired of them. 


I'd pinned the tinsel to the tree ( see thinking ahead to when I might want to rip them apart!) so removing it was easy. I created a pattern for my felt freehand on a piece of scrap paper and then cut out a bunch of shapes in black and white felt. I started off counting them. That ended quickly. 


These trees are a little more permanent since I hot glued the felt pieces to the styrofoam cone.  Working from the bottom up, glue one color around the cone then offset your pieces and glue the next color around the cone. Continue until your cone is covered. 


Slightly more work than the tinsel trees but only slightly. 


They fit right in on my mantle with a black and white Father Christmas I painted years ago, and my mantle focal of a chalkboard sign I also  made this year. 


The chalkboard sign was made from a pre-cut piece of plywood from Home Depot, painted with chalkboard paint  and bordered with gold glitter paint ( Martha Stewart). 


The right side of the mantle contains a large vase filled with pinecones I've picked up on walks, birch and glittered branches left over from my Thanksgiving mantle and filled in with silver and gold balls. 

Vintage bottle brush and live  mini cedar trees in antique cordial glasses finish out the mantle along with collectible ornaments.