Showing posts sorted by relevance for query egg. Sort by date Show all posts

Tuesday, March 26, 2013

Bird's Nest Easter Cards

Kraft Blue and Gold Easter Card

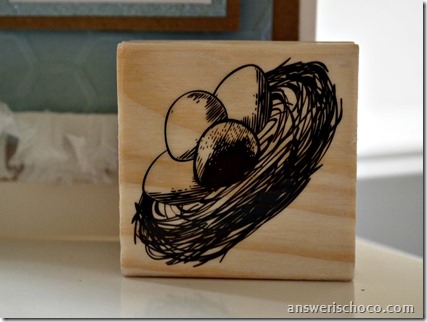
Sometimes the least expensive materials have the biggest impact. I saw potential in this “nest of eggs” stamp I found on sale at Michaels for $1.  It was perfect for my Easter cards.

Bird's Nest Stamp

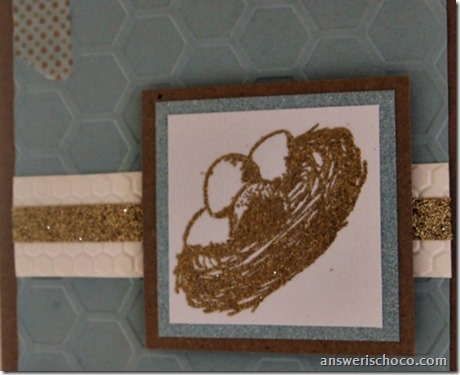
For these cards I went back to my card making roots and stamped the nest on white paper with clear embossing ink and embossed with gold tinsel embossing powder. I went back and forth deciding whether to color the eggs in or ink up some papers before stamping,  but ultimately decided on the simplicity of a white and gold heat embossed image. I wanted a fresh Spring look so decided on Robin’s egg blue and Kraft papers.

Embossed Nest

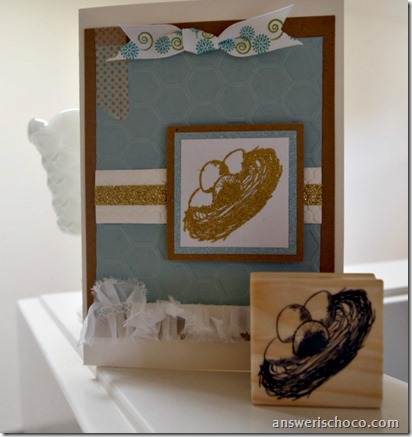
I cut my 5x7 cards from plain white cardstock, then panels of the blue and kraft. Ran the blue panels through my Cuttlebug using a honeycomb embossing folder and then a scrap leftover from the card through a border folder from the same package. All by Cricut.

I mounted my embossed nests onto matching blue glitter paper by American Crafts , scraps from the kraft paper, and added a strip of gold metallic American Crafts glitter ribbon to the white embossed panel. Layered as shown and finished with a strip of gold and white washi tape.

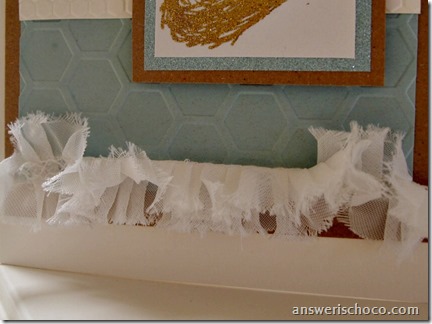
Melissa Frances Trim

I thought my cards needed just one more thing and remembered this fun shabby Melissa Frances ruffled ribbon I picked up at a scrapbook show, and made a bow from some color coordinated ribbon I had on hand.

Bird's Nest Easter Card

Sharing At:


Thursday, April 13, 2017

BFF Open House Link Party

Happy Friday Eve all! Hope it's been a good week for everyone. Easter weekend is upon us so here are some last minute ideas to try or Pin for next year! 


This Spring vignette from An Extraordinary Day can stay up well after Easter. I love all the pussy willows and that big moss egg along w/ the golden eggs and birds. Wondering if that little bunny is chocolate? 


The only thing better than Pottery Barn is a great PB knockoff like this glittered bunny from Pugs and Paisley. Fess up. Who (else) walks through PB saying "I can make that". 


Speaking of Pottery Barn, this stunning floral table runner from Bird's Party looks like it could have come out of their catalog doesn't it? So pretty and and would be perfect for a Mother's Day or bridal shower table. 


If you need an addition to your dessert table, these Chocolate Cake Bites Wrapped in Coconut from Make Easy Cakes is just the thing. For me, chocolate and coconut is an irresistible combination! 

Now on to this week's party! 


Thursday, March 14, 2013

BFF Open House Link Party #96 and Last Week's Features

The Answer Is Chocolate

It's time again already for another party! As I mentioned last week, starting with this week's soiree, I'm going to combine features from the prior week's party into one post. You all are making it harder and harder to highlight just a few things because there is so much talent shared each week. Here are just a few ideas: 


From a cute new blog called I Dig Pinterest and I Did It Too, blogger Christine shared these super cute Easter egg candlesticks. 


As someone who loves neutrals, I couldn't resist these cotton tailed bunny napkins from Natalie at Sophisticated Yellow


A yarn wreath is still on my craft bucket list. Check out this beautiful Spring wreath with burlap flowers from Life On Lakeshore Drive


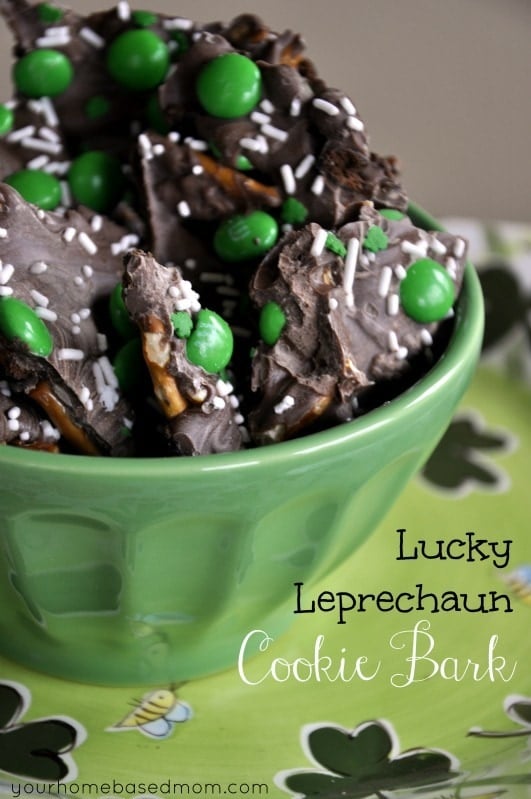
Since St. Patrick's Day is this weekend my chocolate feature was obvious. I'm not sure there would be any of this Lucky Leprechaun Cookie Bark leftover for any Leprechauns at my house. Visit Leigh Anne at Your Home Based Mom for the how tos. 

Now let's get to this week's party. If you're new, following isn't required but I love to follow back and meet new bloggers. Thanks to everyone who links up each week. Don't forget to share the bloggy love. Who doesn't love comments? Happy Weekend everyone. It will indeed be one here. College Boy comes home tomorrow for Spring Break. So excited! 


Monday, August 22, 2011

Today's Guest Chocoholic: Jocelyn from Inside BruCrew Life

Hi, fellow chocolate fans!
Jocelyn from Inside BruCrew Life here with you today. I am so thrilled to be guest posting on The Answer is Chocolate.  Carol is an amazing blogger with so many fun things to keep you busy.  I always look forward to seeing what she has come up with. Thank you so much Carol for asking me to be a part of your blog today!   This summer has been crazy!  Can anyone else believe that is almost over???
joce8
I am a SAHM mom to 3 kids, and I have been married to my best friend for 13 years.  I enjoy spending lots of bonding time with my kitchen aide.  I have quite the sweet tooth and my blog has become an outlet  for me to share those crazy baking concoctions with others. My family is used to me making something yummy at least 2-3x's a week. In fact, I tease my husband that we like to eat brownies for dinner when he is working. (ok, not really) I also find time each week for card making, scrapbooking, and making flowers for my etsy shop, The Trendy Owl.

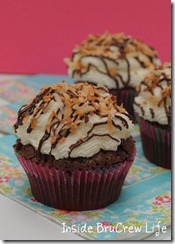
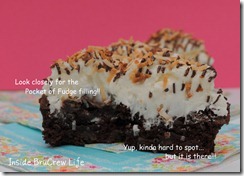
Now since I am posting on a blog named after chocolate, I felt it would only be right to give you a recipe full of chocolate.  How about a chocolate brownie cupcake filled with fudge and topped with coconut butter cream?  Yup, it doesn't get much better than that:-)  I hope you enjoy this crazy creation.  Please stop in my blog sometime.  Any friend of Carol's is a friend of mine:-)
May 11 cinnamon rolls, whoopie pies 050-1
Brownie Cupcakes with Coconut Butter Cream
1 brownie mix
1 c. chocolate chips
1/2 c. chocolate chips melted with 1 tsp. butter
hot fudge topping
toasted coconut

Preheat oven to 350*  Fill your cupcake pan with cute liners and set aside.  Mix up the brownie mix according to the 3 egg directions.  Stir in the 1 c. chocolate chips.  Fill liners 3/4 full and bake 20-22 minutes.  Cool on a wire rack.  Scoop out a small portion of the middle and fill with the hot fudge topping.  Frost with coconut butter cream.  Drizzle with melted chocolate and sprinkle with toasted coconut.

Coconut Butter Cream
1 c. butter
1/8 tsp. salt
1 1/2 tbsp. water
1 tsp. vanilla extract
1 tsp. coconut extract
4 c. powdered sugar
1 c. shredded coconut

Beat butter until creamy. Add the salt, water, and extract and cream again. Slowly add the powdered sugar until all is incorporated. Stir in the shredded coconut.  If you are going to use a piping bag to frost your cupcakes, use a very large tip, so the coconut doesn't get stuck in the tip:-)

May 11 cinnamon rolls, whoopie pies 065-1
Thank you for letting me share one of my chocolate creations with you today. I would love for you to visit me over at my blog...
just don't judge me when you see how much sugar I consume weekly:-)

Hugs, Jocelyn
Inside BruCrew Life

Thursday, March 24, 2016

BFF Open House Link Party Happy Spring!


The Answer Is Chocolate

Happy Friday Eve and Easter Weekend for everyone celebrating. Is it Spring where you are now that the calendar says it's official? Signs of it here between the raindrops.  Here are some fun Springtime ideas from last week's party. 


If you're dyeing eggs this weekend Practical Mom has a great tutorial on these gorgeous marbled eggs. 


I'm seeing lots of metallics in home decor and Lynda Creates shared this fun geometric metallic pillow along with the how to. 


Nothing says Spring like flowers and Twenty Something in the 2010s share a lovely way to dress up mason jars to hold your Spring blooms. 


If you're looking for another kind of egg this weekend, how about these Chocolate Chip Cookie Dough eggs from Sugar Spice and Family Life? 

OK now on to this week's party! 


Monday, March 25, 2024

Papercrafting: Faux Chocolate Bunny Cards


My inspiration for this year's Easter cards came from a classic Easter staple, the foil-wrapped chocolate bunny. I used dark brown cardstock and glitter cardstock.

Supplies:
  • Dark Brown Cardstock
  • Pastel Glitter Paper (Recollections)
  • Foiled/Marbled Background Papers (Recollections)
  • White Cardstock (110lb)
  • SVG File (I downloaded a set from Creative Fabrica)
  • Cricut Cutting Machine
  • Cricut Design Space
  • Self-adhesive rhinestones
  • Foam Tape
  • Tape Runner


I used these papers by Recollections at Michaels for the background panels. I had these in my stash but was thrilled to find they still carried the Spring Marbles stack and picked up another one during their recent sale. 


I found a collection of bunnies at Creative Fabrica, downloaded, and selected the one I wanted to use. 

A moment of self-congratulatory pride...drumroll please! The middle of the top layer was empty and I found an egg design in Cricut Design Space and added it to the middle! Please clap!

This idea was inspired by foil-wrapped Chocolate Bunnies so I used dark brown cardstock for the bottom layer (used the offset tool in Design Space to create) and then cut the glitter layers. 


I attached the glitter layers to the "chocolate" layers using foam squares.


The thing I love about the Recollections papers is how well so many of the patterned papers work with solids. Being a paper hoarder, I have stacks from different years and they work together. I chose solids from the Spring Pastels stack to coordinate with the Spring Marbles papers and the Glitter Stack is also Spring. 


As always, my cards are 5x7 and the panels are 4.75x6.75 and 4.25x4.5. I attached the marbled papers to the solid using my ATG tape runner, then attached the layered panel to the card, then the "Chocolate Bunny" to the center using foam tape.

To finish, I grabbed my stash of self-adhesive rhinestones and added as shown. Now, family and friends have a calorie free Chocolate Bunny!


I did versions in pink:


Blue


Green

Lavender


When I make multiples, I use the same image even if I do different colors to make it easy to keep the settings in the software and machine the same and not confuse myself! 


Monday, November 9, 2020

Fall Decor: Rustic Silk Leaves and Feathers Wreath


Happy Monday all! We in America move full speed ahead to our national day of thanks and gluttony and I've finished the last of the things I'll make ( I think ) for this short season between Halloween and Christmas. Anxious to get started on some Christmas goodies so be on the lookout! 

Also humbled and excited to have been again featured in the Hometalk weekly newsletter last week! They included my Plastic Egg Acorns and Pinecones and I couldn't be more tickled. If you aren't on Hometalk, you should check it out both as a place to share your creations and to find even more inspiring ideas! 

Supplies:
  • Square Wreath Form. I actually had some inserts from 12x12 shadow box frames that I used but you  could also use a square frame. 
  • Silk Leaves (Michaels 80% off)
  • Twig Vase Fillers (Dollar Tree)
  • Feathers ( Michaels)
  • Hot Glue Gun and Glue Sticks

From left to right: Shadow Box Frame Inserts, Silk Leaves, Dollar Tree Birch Stumps and Twigs

The frame inserts are not the sturdiest so I glued two of them together to stabilize them. The silk leaves I found for 80% off at Michaels. I used two packages of 30 with a few left over.


These came in two sizes, the larger having some gold veining and the smaller being plain. I alternated these around the wreath. Pretty straightforward. After I glued the leaves around the frame I placed a few of the birch "stumps" , offset, "because I did" which is a technical creative term!


I have a ton of these twigs left over so may save them for next year or throw them in a vase. 


I grouped three feathers (Michaels, Art Minds or Creatology) at the base of each "stump", then added some of the twigs. 


To finish, I had some of these Acrylic Gem Maple Leaves in my stash from a past project so glued a few of those on. Living in the West, this may be another thing I leave up year round. Haven't decided yet. We don't have specifically "Western" decor but I like some bits here and there. 

Et voila!