Monday, February 25, 2013

BFF Open House #93: Wrap Up and Features

No your clock isn’t off. Usually I post the features from Friday’s party on Monday mornings but let’s just say hopefully today is not a sign of the week to come.

First up, two of my favorite bloggers got together last week and held a weeklong jewelry tutorial extravaganza. You’ll want to check out the whole series by Michele at The Scrap Shoppe and Bev at Flamingo Toes. Two of their fun ideas:


Michele’s gorgeous braided chain and pearl necklace. Isn’t it stunning?

Gold Dipped Earring Tutorial

And how about these elegant gold dipped earrings that Bev made? The best part? Each of them has detailed tutorials of all the projects they shared last week.

Before you know it, St. Patrick’s Day will be here. I’m seeing some really great ideas around the blogosphere including this wreath from Sarah at Alderberry Hill:

Shamrock Wreath 4 thumb Yarn Wrapped Shamrock Wreath

I love that it’s multiple shades of green to which she added grey and white.

Easter is right on the heels of St. Patrick’s Day and these bright and festive bouquets from Jenn at RookNo.17 are “peeptacular”


And this week’s chocolate feature is simple and classic and  mouth watering. From Six Sister’s Stuff:


Yum! Thanks to everyone who linked up and hope to see you all again on Friday. Make it a creative week!

Sunday, February 24, 2013

Mr. Chocolate's Birthday: Altered Cigar Box

Altered Cigar Box

Mr. Chocolate recently had a birthday and I made him an altered cigar box as part of his gift. He actually contributed to his own present because one day he came back from Total Wine with a bunch of cigar boxes he’d found there for $1.50 ea. I was thrilled since when I’ve tried to buy these at different places they’ve been anywhere from $5-$10 ea. Ridic.


Cigar Box

Here’s my “before” cigar box. Can’t stand the smell of cigars, but love the boxes. Luckily the empty boxes don’t smell.  I panted the edges of my box in black and then Mod Podged coordinating papers onto the box.

Mod Podged Cigar Box

I used a different paper for the inside of the lid.

Cigar Box Lid

And went around the edges with coordinating washi tape. I wanted a vintage 1920’s feel and was thrilled when I found this Susan Lenart Kazmer antique license plate pendant on sale for $2.99 at Michaels.

Susan Lenart Kazmer Pendant

I loved it as it was but wanted it to coordinate better with my color scheme so painted it with black acrylic paint and then went over it with silver Rub n Buff .

Altered Cigar Box Top

I stamped an antique car and sentiment (Tim Holtz) onto a torn dictionary page and distressed it with Ranger Distress inks. Mod Podged that onto the lid and added some coordinating chipboard stickers I’d found at Michaels (Recollections). Added a watch charm I’d also found at Michaels.

Altered Cigar Box Top

Altered Cigar Box Corner

I’ll share the other parts of his present in an upcoming post.


Thursday, February 21, 2013

BFF Open House Link Party #93

The Answer Is Chocolate

Happy Friday Eve once again friends! Hope the week has been good to you. Was Valentine's Day really already a week ago? St. Patrick's Day is just around the corner. I don't normally do too much for St. Patrick's but College Boy will be home for break so crafter that I am, it's an excuse reason to go overboard right? Let's see what everyone's been up to this week. If you're new,  introduce yourself in the comments. Following isn't required but I do follow back! OK on with the show. 


Sunflower Card in Orange and Green

Sunflower and Butterfly Card and Envelope

One of the reasons I like making cards so much is because they’re a  way to show someone you’re thinking about them. I feel like I can send some of myself along with the card and hopefully the recipient feels that.

We have a family friend who’s going through some health issues so I thought this card might brighten her day. I started with a Magenta brand Sunflower stamp which I stamped on white cardstock using black pigment ink.

Magenta Sunflower Closeup

I filled in the flowers with colored pencils and then went over lightly with a complementary alcohol ink pen. I used Spectrum Noir alcohol ink pens.

Sunflower and Butterfly Card

I chose an orange damask print paper and a green script paper, (both Recollections from Michaels) and covered the front of my 5x7 card as shown. I guess tearing paper is my “signature” card style.  Mounted my sunflower panel to scraps of the same papers, and finished with pieces of self adhesive scrapbook borders, coordinating ribbon, and a piece of washi tape.

Since I hate wasting pretty paper, I usually add some of it to the envelope. No reason the envelope can’t look nice too right?

Sunflower and Butterfly Card and Envelope

Tuesday, February 19, 2013

The Unintended Urban Warrior Trilogy: Chain and Pearl Bracelet

Urban Pearls

OK so what became part deux of my metal and pearl “industrial chic” Urban Warrior necklace has now become a trilogy! Part 1 is here. Part deux is here .

I still had a lot of pierced ear wires left over so I made more eye pins out of them, strung pearls on them, and made double loop bead sections.

Double Loop Pearls

I connected these together with jump rings, making a bracelet out of them and attaching to a Blue Moon Beads hammered metal toggle clasp.

Pearl And Jump Ring Chain

I could have stopped there but I like chunky funky stuff so I added two strands of Blue Moon Bead chain and twisted them around the pearl strand. I had one metal pendant left from the previous two projects so I mad a focal from it and some of the pearl “drops”.

Blue Moon Bead Chain

Mixed Metal Urban Warrior

Attached this to the middle of the chain and then randomly attached some of the pearl loops to the chain with more jump rings  to fill out the bracelet.

Multi Strand Chain and Pearl Bracelet

Urban Warrior CHain and Pearl Bracelet


Sharing At:


Monday, February 18, 2013

Industrial Meets Pearls Part Deux : Urban Warrior Earrings

Blue Moon Urban Warrior Clip Earrings

This is an unplanned part two to the necklace I shared on Friday using materials from Blue Moon Beads Urban Warrior line. But first a little share. As much as I love making jewelry, I hate self promotion. I know…”you have a blog where tons (hopefully) of strangers can see your work and you say you don’t like self promotion?”

I didn’t say I was without contradictions. Anyhoo….I’ve gotten better when receiving complements on pieces I’ve made and comfortably saying “Thank you, I made it”. Anyone else struggle w/ that? Fess up! I wore the necklace on Saturday and got several compliments and pulled up my big girl panties and said “Thank you, I made it”.

I already have some earrings that I can wear with it but I had some of the pieces left over and then spotted some large charms in my supplies that would make perfect earring pieces. I don’t have pierced ears and wear clips which are hard to find so I'm always looking at things for their possible use as earrings.

Urban Warrior Earrings

I grabbed some clip earring backs, the charms and my leftover pieces and went to work. First I straightened some more pierced ear wires to use as eyepins and added pearls to them.

Straightened Earwires

They don’t have to be perfectly straight…just enough to thread a bead. Then I glued my earring backs to the charms. I generally use Loctite’s Gel Super Glue. Low odor good strength for small pieces.

Clip Earring Backs

The one on the right isn’t glued on yet…just laying there so you can get the idea. Important to make sure you line up the bottom of the backing with the hole in the bottom of your charm. I’m not speaking from experience of having super glued these on upside down before or anything.

P2187941

I attached the leftover dangly things to my pearl “eyepins” with a jump ring and added a couple of leftover connector pieces. Used another jump ring to attach these to my earring base.

Urban Warrior Blue Moon Beads Clip Earrings

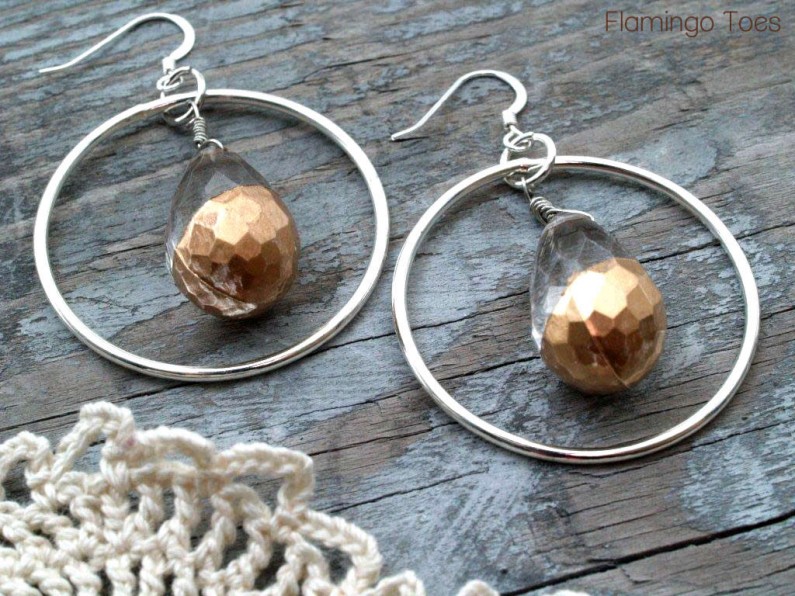
I love that this hammered metal looks heavy but is very light.

Sharing At: 

BFF Open House Link Party #92 Wrap Up and Features

Thanks to everyone who linked up at Friday’s BFF Open House. Each week is a visual and creative feast! Let’s get right to some of the items that caught my eye.


I am in total love with this grey and yellow paisley chair makeover from 24 Cottonwood Lane. So bright and fresh don’t you think?

This stenciled pallet clock from Bev at Flamingo Toes would go really well with it:


Stencilled Pallet Clock

Even though Valentine’s Day has come and gone, love is eternal. Check out this adorable Love Bird themed art piece from Bethany at Pitter and Glink:


And this week’s chocolate feature is just the right size for two love birds to share:


YUM. Chocolate cream cheese “baby” cake from Erika, The Hopeless Housewife.
Again, thanks to everyone who linked up and hope to see you all back again “Friday Eve” . Make it a creative week!