My son is almost done with his PhD and is focused on writing his dissertation. He's wanted a dog since he left for undergrad, and the timing was finally right for him to adopt and he found the cutest 8 month old shelter pup and is in total love! Of course being a Maker and a Mom, that meant I was going to make him something special, and I'm so happy with how this turned out.
Now that I too have more time since I retired last year, I've been focused on growing my skills and learning new things. I'm totally obsessed with layered cut files like the ones I've shared from Maggie Rose. I will have a couple more projects coming using her designs. And there are soooo many talented people out there making these, but since childhood, I've been one of those people who wants to know how to do things myself as well! I watched some You Tube videos and read some tutorials, but my brain works how it works ( ask Mr. Chocolate) and I had to figure out what made sense to me. In the event that your brain works like mine ( I'm sorry!) hope the tutorial in this post is helpful.
First things first. Meet "Spinach Boy". The shelter was on a vegetable name kick and that's what they named him when they took him in. Poor guy was sick and sad but he's fully healthy now. PhD son wasn't sure he was going to keep the name but when they finally met he felt it suited him. He's calling him "Spinny" but his official name remains Spinach Boy.
The "S" monogram can also work for "Socks" since he has a thing for them! Now for my attempt at a tutorial which I hope makes sense. Also on my list is making videos so look for one of those in the future. Since I haven't mastered creating an exportable SVG file yet, these instructions are specific to Cricut Design Space.
Supplies:
- Three sheets of scrapbook paper (I used a glitter sheet, a plain sheet, and a textured sheet) for Monogram
- One sheet of scrapbook paper for background ("Let's Wander" paper stack by Recollections, Michaels)
- Cricut Cutting Machine (eg. Explore Air, Maker, Joy. I used my Explore Air2)
- Foam Squares or small dots
- Shadowbox Frame (I used a 12x12 frame)
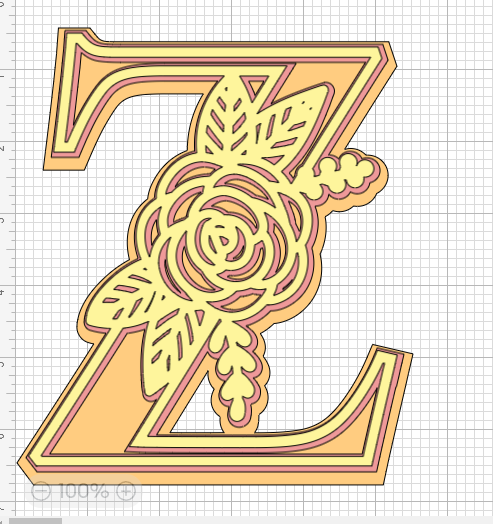
Both because of the name and because my son is also into plants, I went with a green palette with silver accents. Silver for the base, solid green for the middle layer, and textured green for the top layer.
Layer One:
The first layer you'll create is your base layer. For this tutorial we'll call this the "Weld" layer since you're adding a shape to the letter and you want to create one piece for cutting.
- Open Design Space (this tutorial assumes basic familiarity with the software)
- Upload or Select Text to generate the letter you want to work with.
- Size as appropriate
- I matched my colors to the color papers I chose because it made it easier for my brain to remember what was needed for each layer
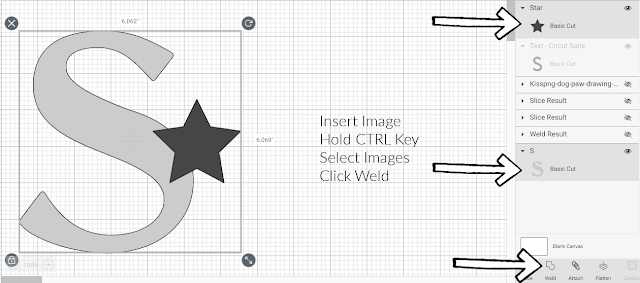
- On the left side of the Design Space window, look for Shapes. Click on, select the shape you want to add. You can see I chose a star.
- Size the image as appropriate and using your mouse, place where you want it on your letter
- What I did learn from one video is making use of the right hand tool bar. This is where you will see the images you've brought into your project. To work with specific images for specific steps you can select from here vs clicking on the images themselves. When you hold your CTRL Key down the space on the right side turns gray so you can see you've chosen it. In this case it's the star image and the S.
- While holding your CTRL Key click "Weld" on the bottom of the right hand side of the screen
- This fuses, or welds, your two images into one
After Welding:
After you've welded your image you can see how this is now one combined shape. For the next step, duplicate your welded image, change the color, and close the original by clicking on the little eye symbol that corresponds to it. Again, changing the colors of each layer helped me with this!
Layer Two:
Layers two and three will use the "Slice" function which is located to the left of the "Weld" function on the bottom right of the Design Space Screen. These will remain grayed out until images you want to use are selected.
You can see here, I changed this now welded layer to green.
- Again insert a shape ( I used the star again and sized slightly smaller than the welded star).
- Position the star shape as appropriate
- Hold CTRL Key and select the star and the welded S and click "Slice"
Now this is where I got frustrated. Once I hit slice the first time, it didn't appear anything had changed. By accident, I moved the S and that's how I figured out it had actually worked.
The shape you previously inserted along with the shape you sliced out all appear as one until you move your image around and can see the white space. Several swear words resulted from this until I accidentally moved the image! You can keep or delete these images depending on whether you're going to need then again for your next layer.
Layer Three:
As you did after you welded layer one, make a duplicate of your sliced layer two, change the color to keep things straight, click on the eye symbol to close layer two.
- Upload or select any additional Design Space images you want to use.
- For this layer I added a paw and a dog bone
- Repeat the "Slice" process for Layer Two
Here are my three separate layers:
Now you can click on the eye symbols for any of the layers you've closed, overlay them, and then click "Select All" in Design Space or via CTRL Key to select as outlined above, lay them atop each other and you can see how all three layers work together and if satisfied, click "Group" just to ensure if you change the size of any layer they all stay in sync.
(Ignore that my star is green here...I changed the color after I got the screenshot)
Then if you're satisfied that this looks like you want it, send your project to your machine to cut each layer.
To assemble, use foam dots or squares in between the layers. I was lazy and just punched a couple of extra stars from scraps but you could easily cut these using your machine.
I selected a coordinating background paper and framed in a 12x12 Shadowbox frame!
And now, I may become a layered cut file maniac. I need my brain to slow down and stop thinking of everything I want to know how to do all at once! Like how to export these. And how to edit videos. And and and....
I hope this made sense! I figured if I was having a mental block others might be too. Or, could just have been me! Wouldn't be the first time. For sure won't be the last! 😂