Showing posts with label JoAnn. Show all posts

Monday, February 13, 2023

Jewelrymaking: Filigree Silver Heart Valentine's Earrings


I often buy supplies for my stash without having a specific project in mine. In this case, JoAnn was having a great sale on beads when I bought the silver heart beads I used in this project. Something like 70% off during one of their sales last year. So when I decided I wanted some Valentine's themed earrings...into my stash I went!


Supplies:

  • Silver Heart Beads (JoAnn or Bead Stores)
  • Head Pins and Jump Rings
  • Black Crystal Beads 
  • Hammered Links (Bead Landing,Michaels)
  • Floral Charms and Earring Backs for Clips
  • Jewelry or Strong Bond Glue 


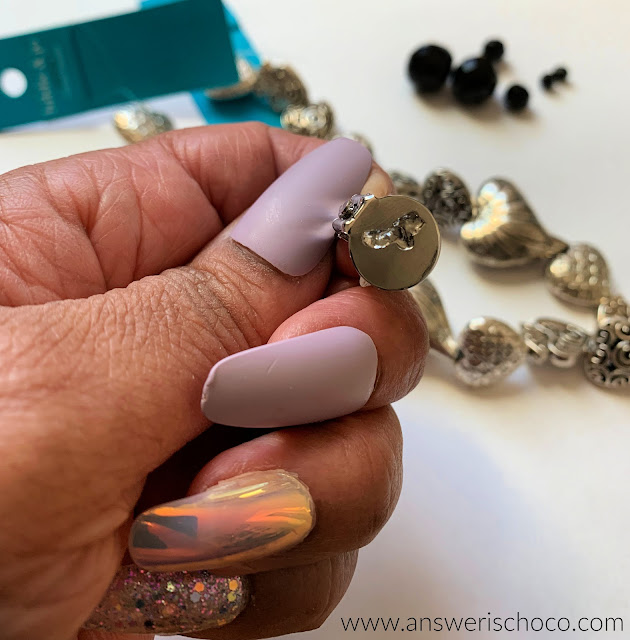
Since these beads were such a great deal on sale, of course I bought two sets! I chose the filigree design for my earrings. Since I wear clip-on earrings, I chose some floral charms (Shipwreck Beads) big enough to accommodate my clip earring backs. 


I like the Loctite Gel Superglue. It's low odor and holds as strong as jewelry glue. Put a little dab on the earring back and then position on the back of the floral charm. If you have pieced ears, skip this step and use a fish hook ear wire. 


I love these little clamps I found at Dollar Tree which are the perfect size for small projects. I always clamp my glued earring backs to ensure the strongest bond.


Next, I grabbed a couple of pins from my supplies, along with some black Czech glass beads. I strung the black and heart beads on the pins and made a closed loop.


To put things all together, I used some hammered silver links and jump rings I had on hand to connect the earring clips and the heart pins.


Connect the jump ring to the link and then using regular jump rings, attach the heart pins and floral sections.


The best part is, these don't scream Valentine's Day to me so I can wear them whenever but they also work for V-Day!  Come back to see what  I did with the remaining beads! 

Sharing At: 


Monday, October 17, 2022

Jewelry Making: Spooky Season Jewelry


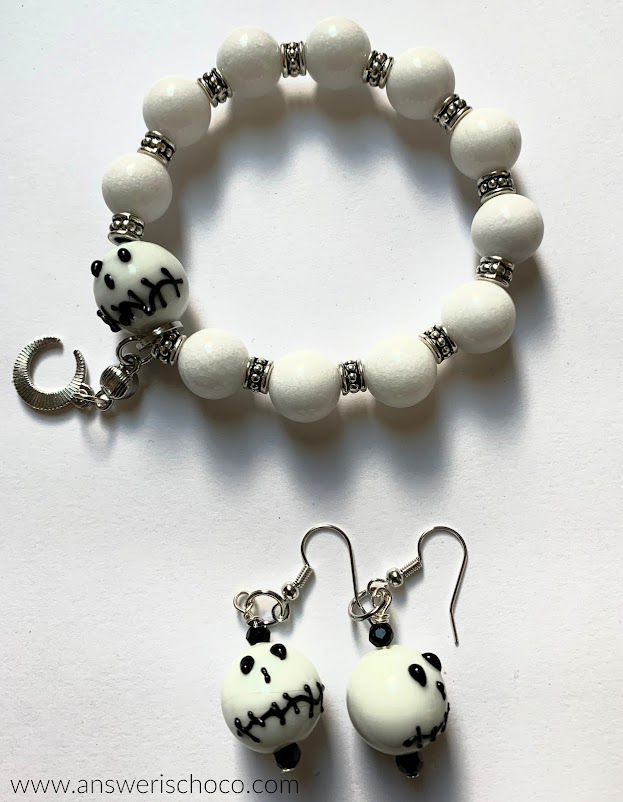
I recently made some birthday gifts for fellow September babies and since Spooky Season would soon follow their birthdays, made them each a coordinating pair of earrings and a bracelet. 

Supplies: 
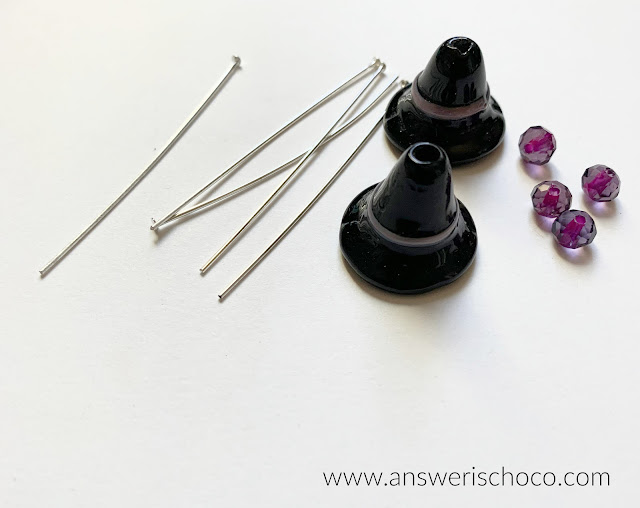
  • Hildie and Jo Witch and "Jack" Beads (JoAnn)
  • Bead Landing Coordinating Beads (Michaels)
  • Fish Hook Ear Wires (Michaels)
  • Jump Rings, Head Pins (Michaels)
  • Stretch Jewelry Cord (Michaels)
  • Jewelry or Super Glue (Walmart)


I found the Halloween-themed beads at JoAnn over the Summer and got them in the off-season. The other beads are ones I keep stocked in my stash. I hit the Michaels and JoAnn sales or use coupons! It's what we do, right? 

The process is the same for each set. 


For the earrings, string desired beads onto a head pin, then make a wrapped loop. There are a ton of tutorials on You Tube that can show you better than I can. I've linked one here but I find that I have to look for tutorials that make sense to my brain so watch a few different ones.  You will need a pair of small round nose pliers like the ones shown here which are available in jewelry sections of craft stores, bead stores, or online. 


Once you've completed your loops, attach to the ear wire using a jump ring (and here's another video on how to open and close jump rings) and you're done!

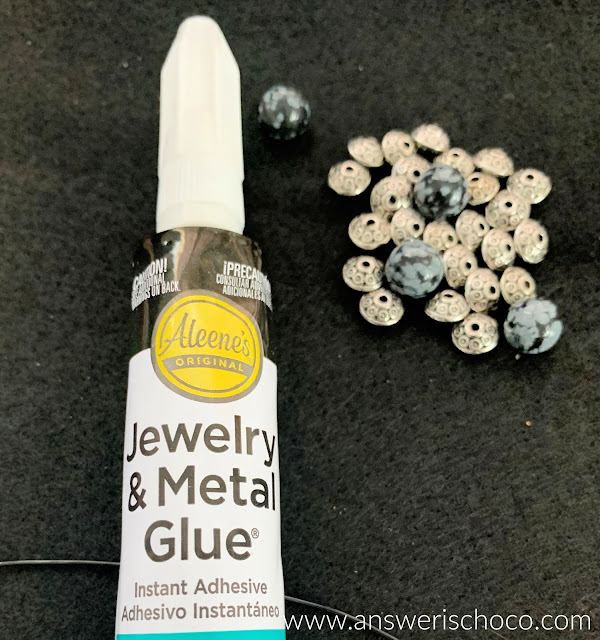
For the bracelets, cut a length of stretchy jewelry making cord longer than you need. Some people measure precisely. I don't. I cut about 12 inches for a bracelet because I like having the ends longer for knot tying. Use a clamp (they sell specific ones for jewelry...I use a binder clip or a cheap plastic clamp I found at Dollar Tree). String beads in whatever pattern you like. I just string, do a checkpoint aroung my wrist for size and when I'm good, tie a tight basic knot and add a tiny dab of jewelry glue or I like the gel formula super glue. 


This stuff is great and you really only need a tiny bit. I always make another knot with another dab. Give the glue a minute to dry then trim as close to the knot as possible with wire cutters or sharp scissors. 


I used extra beads and related charms to add a little dangle to my bracelets. String the bead on the head pin as shown for the earrings, close the loop, use a jump ring to attach to the bracelet. Same with the charm. 


Happy Haunting! 

Sharing At: 

Featured At: 


Tuesday, September 27, 2022

Halloween Decor: Jeweled Tarot Card Halloween Tree Skirt


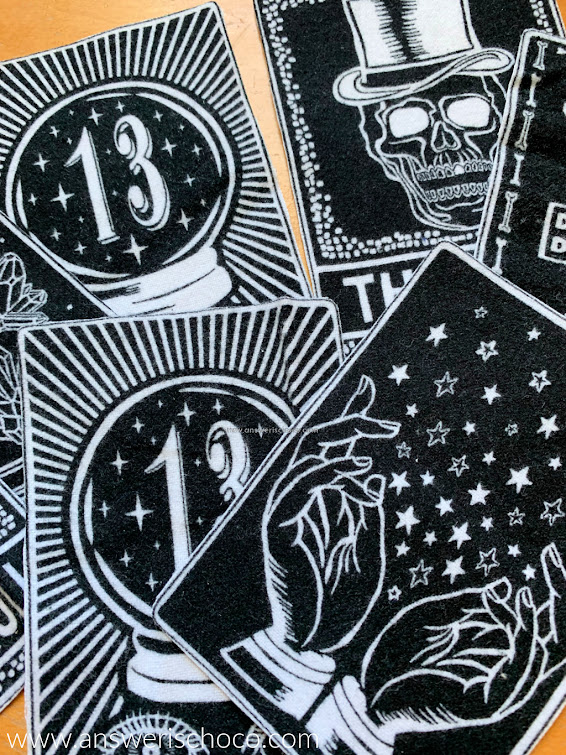
I've been teasing this Halloween Tree Skirt and I'm finally done. I didn't start out with the intent that it would end up as bejeweled as it did but I love it! I found this Tarot Card fabric on clearance at JoAnn for an additional 50% off and I think the total cost ended up at $3. The felt and polar fleece I used, I had on hand, as well as the purple jewels. 


Supplies
  • Black Felt (On Hand)
  • Purple Polar Fleece (On Hand. You could also use felt)
  • Tarot Card Flannel (JoAnn)
  • Coordinating Jewels (Michaels)
  • Glue Gun and Glue Sticks
  • Dimensional Glue for Rhinestones (Ranger Glossy Accents)


Kind of like how I cook, I sometimes don't measure twice, cut once like we're supposed to. So I folded my felt in fourths, drew an arc, and cut a circle, approximating the size I wanted. Likewise witht he purple triangles. I ended up using 15 of these. I thought I was going to use the fabric glue shown in this photo to apply both the triangles and appliques from the Tarot Card fabric but I ended up using hot glue for the triangles and iron on interfacing for the Tarot Cards. 


I cut out a horizontal panel of the cards, ironed them to the adhesive, then trimmed. This way the appliques hold their shape better and you don't get fraying of the fabric. I used the placement of the triangles to eyeball the placement of the appliques and ironed them on. 


I had a package of purple gems from a prior project and at first, I thought I was just going to put them on the corners of the cards. Then I went all the way around one and thought I'd maybe just do every other one all the way around. And then I did ALL of them all the way around. 


Of course after doing that, I decided I needed to do the neck (at least that's what I call it because tree skirts remind me of capes so this part would be on the neck and there you have my brain). 


I'm putting up my tree later in the week but can you tell my color palette? I finished up by adding some of the jewels to select spots on some of the cards. Eyes, and as you can see here, the spiders. 


I also added one gem to each of the points but don't think I wasn't tempted to do the tops too. Still am but Mr. Chocolate already thinks I'm off my rocker. Just need to spot press some places with my travel iron and oops, just now noticed some fuzz on one spot there but too lazy to re-take the pic!

Sharing At:


Monday, January 31, 2022

Easy Decor : Gnome Garden


I have a quirky fun and easy project for you today that started with leftover corks from Tequila bottles and an inspiration from Sum of Their Stories, whose project I featured at last week's party! 

I know Faerie Gardens are super popular, but me being me, I wanted to do something a little different and when I found the gnome...


Supplies: 
  • Mushroom shaped corks ( eg champagne)
  • Acrylic Paints 
  • Gnome Figurine (Target)
  • Reindeer Moss (JoAnn)
  • Glass Cloche
  • Cork
  • Floral Pick


I had a couple of corks from the bottles I used for my Clay Pot Bottle Toppers. I thought they'd make perfect mushrooms...the kind that are cute to decorate with but not eat because they're poisonous! I also have a metal and glass cloche I found a couple of years ago after Christmas at Pottery Barn for 60% off and I use it seasonally for small vignettes. When I saw plain white gnome figurines at Target for $1, I hollered and it all came together in my head. 


First thing was to make my "mushrooms"


Grabbed my corks, some red and white paint and went to work first painting them all white then painting the caps red. I took a ball end tool (an embossing tool or the end of a paintbrush would also work) and dotted the caps with the white. 


I only did one coat of the read leaving a little of the white to shine through because it looked more natural. 


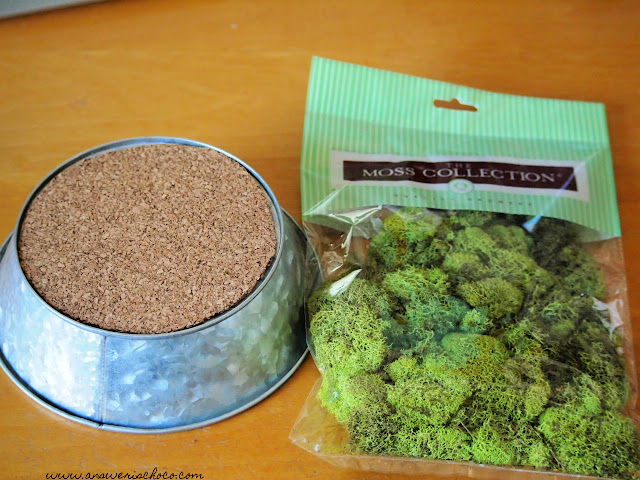
Since I wanted to be able to continue to re-use the cloche I grabbed a scrap piece of cork and cut to fit the bottom. I knew I was probably going to have to use a little hot glue so I wanted a removable base. 


I picked up a package of Reindeer Moss at JoAnn (50% coupon so $2.99 / $5.99 regular price). I made a ring atop the cork (not glued, just laid it down) to figure out positioning. I did glue the mushrooms and the floral pick to the cork then placed the gnome and put the top back on. 


Total cost? $4 since I had most stuff already! There's no place like a home with a gnome right? 


Monday, August 2, 2021

Papercrafting: More Cards For Box Of Balloons !


I wrote in May about an organization called Box Of Balloons that works to ensure that children get to be celebrated on their birthdays. They were then partnering with several of my local Starbucks locations to collect cards, wrapping, decorations etc. and as a Cardmaker and a Mom, it was right up my alley. I did it for the sheer joy of combining those two loves and because I want every child to know the feeling of being special on their birthday. 

I was honored and humbled to receive the following email from the local chapter President, Amy:

"I'm so impressed with your handmade cards and gift tags and wanted to say THANK YOU so much for your wonderful donation.

I've been putting a card and gift tag in each birthday box I've been creating and it adds such a personal touch to each box. Thank you so much for donating these as I'm sure they took a lot of time and energy to create. They're so beautiful and made so well and I'm just blown away and grateful :) "


I was thrilled they were happy and would be put to use and immediately planned on making more! As I've written about (probably ad nauseum!) June was a bust for creating between prepping for a planned move and spending an unplanned week in the hospital. So once things had settled ( somewhat...life is life!) in July, I wanted to get back to it and on Saturday dropped another three dozen cards in the mail! 

Supplies:

  • Birthday Themed Papers (American Crafts, The Color of Memories Collection from JoAnn and Happy Cake Day stack by Recollections from Michaels)
  • Cardstock
  • Birthday Themed Washi Tape ( Park Lane, JoAnn) 
  • Glitter Papers ( Recollections, Michaels) 


 This time around I used some American Crafts birthday themed papers I found at JoAnn along with some Park Lane birthday themed washi tape I scooped up on sale there. 


Like some of the sheets from the Recollections "Cake Day" stack, this sheet had panels I cut up to use as the focal for the cards, matting each with coordinating glitter papers. The washi tape coordinated perfectly with the colors (and it didn't hurt that it was an additional 50% off clearance). 


The Balloon background paper is from the same American Crafts collection. I kept things simple, matting the image on glitter paper, then another coordinating paper ( great way to use scraps) and attaching to the card with foam squares. 


Since I still had plenty of papers from the "Happy Cake Day" stack I previously used (and may or may not have bought another stack when Michaels had another buy one get two free Hot Buy sale which is my kryptonite) I made some more using those. 


Unintentionally, I usually make my cards in a portrait vs landscape orientation...no reason...just do...but since these panels didn't lend themselves to that, made some that way too. 


It's very fulfilling to feel like doing something you absolutely love can make a difference. Especially now. Especially in a child's life!