Showing posts with label DIY Jewelry. Show all posts

Monday, October 17, 2022

Jewelry Making: Spooky Season Jewelry


I recently made some birthday gifts for fellow September babies and since Spooky Season would soon follow their birthdays, made them each a coordinating pair of earrings and a bracelet. 

Supplies: 
  • Hildie and Jo Witch and "Jack" Beads (JoAnn)
  • Bead Landing Coordinating Beads (Michaels)
  • Fish Hook Ear Wires (Michaels)
  • Jump Rings, Head Pins (Michaels)
  • Stretch Jewelry Cord (Michaels)
  • Jewelry or Super Glue (Walmart)


I found the Halloween-themed beads at JoAnn over the Summer and got them in the off-season. The other beads are ones I keep stocked in my stash. I hit the Michaels and JoAnn sales or use coupons! It's what we do, right? 

The process is the same for each set. 


For the earrings, string desired beads onto a head pin, then make a wrapped loop. There are a ton of tutorials on You Tube that can show you better than I can. I've linked one here but I find that I have to look for tutorials that make sense to my brain so watch a few different ones.  You will need a pair of small round nose pliers like the ones shown here which are available in jewelry sections of craft stores, bead stores, or online. 


Once you've completed your loops, attach to the ear wire using a jump ring (and here's another video on how to open and close jump rings) and you're done!


For the bracelets, cut a length of stretchy jewelry making cord longer than you need. Some people measure precisely. I don't. I cut about 12 inches for a bracelet because I like having the ends longer for knot tying. Use a clamp (they sell specific ones for jewelry...I use a binder clip or a cheap plastic clamp I found at Dollar Tree). String beads in whatever pattern you like. I just string, do a checkpoint aroung my wrist for size and when I'm good, tie a tight basic knot and add a tiny dab of jewelry glue or I like the gel formula super glue. 


This stuff is great and you really only need a tiny bit. I always make another knot with another dab. Give the glue a minute to dry then trim as close to the knot as possible with wire cutters or sharp scissors. 


I used extra beads and related charms to add a little dangle to my bracelets. String the bead on the head pin as shown for the earrings, close the loop, use a jump ring to attach to the bracelet. Same with the charm. 


Happy Haunting! 

Sharing At: 

Featured At: 


Tuesday, March 16, 2021

DIY Jewelry: GROGU (The Mandalorian) Inspired Bracelet


I have watched both seasons of The Mandalorian on Disney Plus, and like so many others, am totally smitten by the character named GROGU aka "The Child" aka "Baby Yoda" . If you're not familiar he's the same type of being as Yoda ( whom I also love ) but is not in fact the baby version of him. 


While going through my bead stash, I remembered I had some Kiwi Jasper beads that were PERFECT for a GROGU inspired project.  This is an easy bracelet to make using stretch cord. 


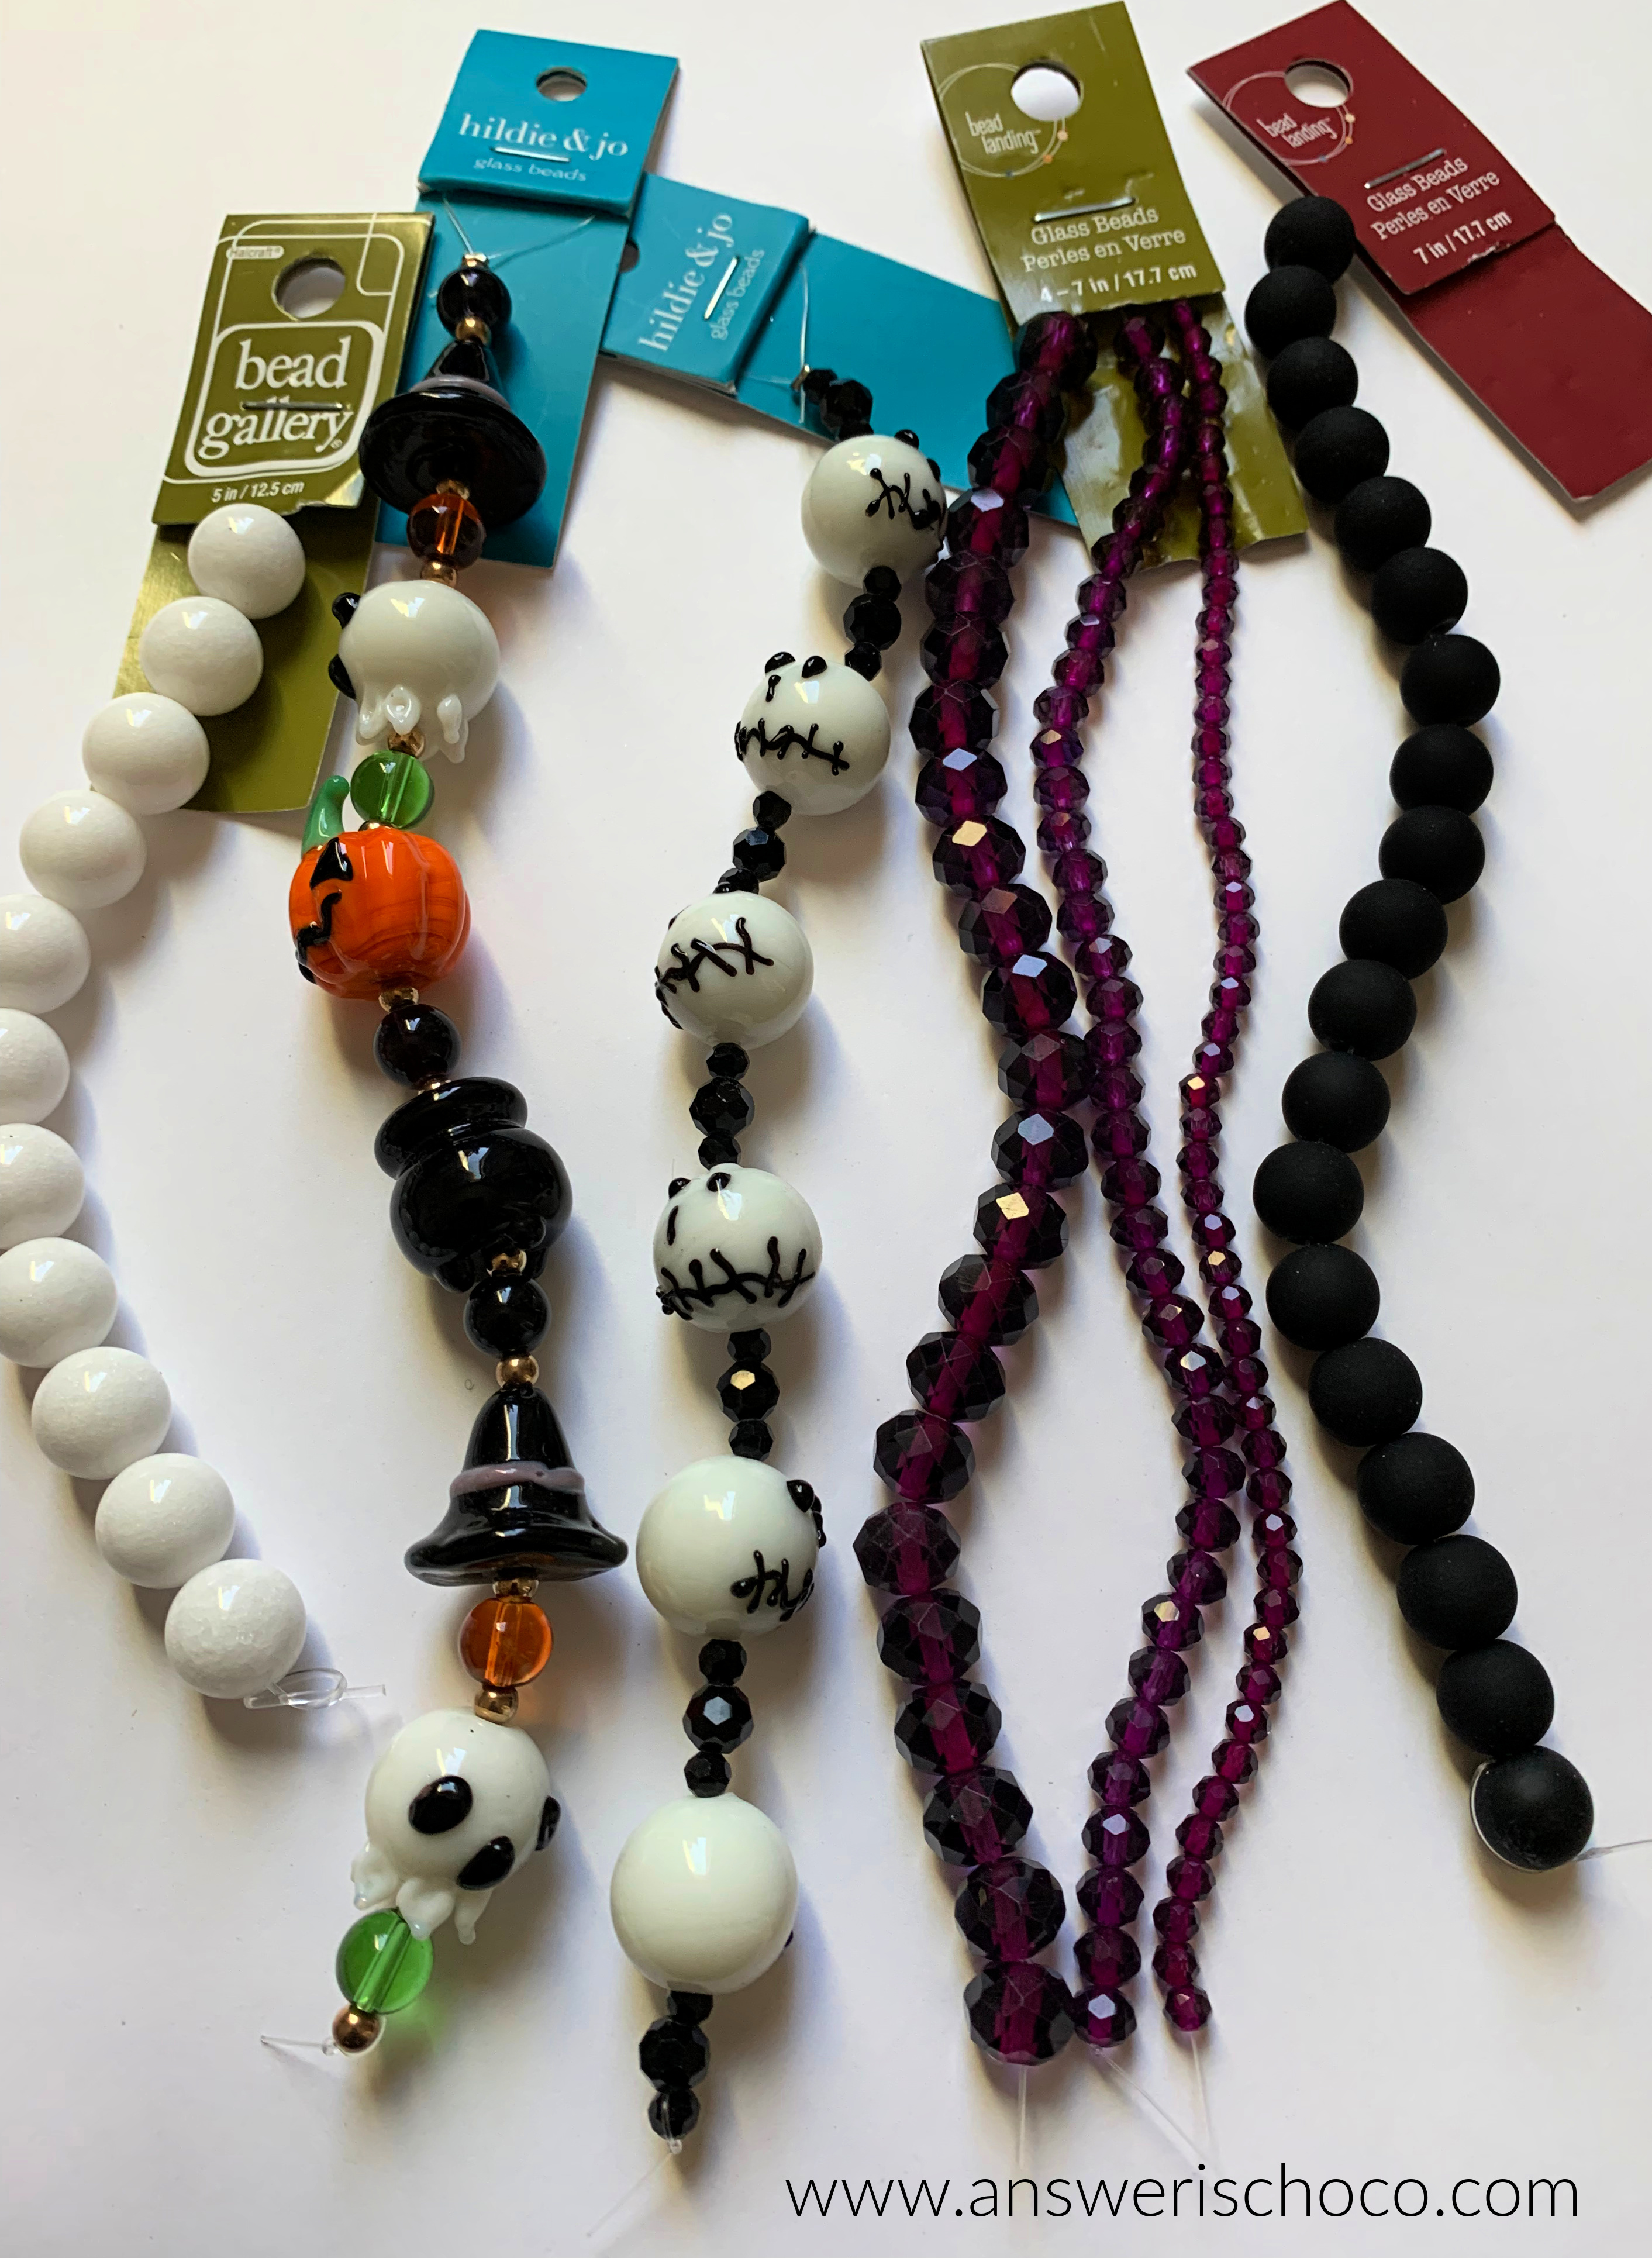
Mr. Chocolate surprised me with one of the animated toys as one of my Christmas gifts. They were almost impossible to find but he did and he is so cute. Our dog loves it when I activate him and just cocks her head at all of his movements and sounds.  I gathered up the supplies I thought I'd use and I ended up not using the white beads. No worries. They'll get put to good use! 

Supplies: 

  • Stretch Magic Bead & Jewelry Cord 1mm ( Michaels)
  • 10mm Kiwi Sesame Jasper (Shipwreck Beads...no longer on their site but Etsy, Amazon have)
  • 10mm Matte Black Glass Beads (Michaels)
  • 10mm Silver Beads (Michaels
  • Bead Landing Rhinestone Dangles ( Michaels)
  • Charm Along Metal Tags (Michaels)
  • Loctite Gel Control Glue
  • Head Pins and Jump Rings

Since I tend to make bolder jewelry, I like the thickness of the 1mm Stretch Magic cord. If you're using smaller beads you can use thinner versions. 


I like to spread the beads I'm working with out so I can easily grab them and a piece of felt works great to keep them from rolling away. 


Cut a length of the Stretch Magic a few inches longer than the finished bracelet size. Some people try to measure exactly which maximizes your cord, but I like ends long enough to not cause me to swear when I'm trying to tie the knot and things go wrong and beads go everywhere, which may or may not have happened one too many times. 

I bought these clamps at Dollar Tree forever ago and they work great for clamping one end so you don't have beads to chase. 


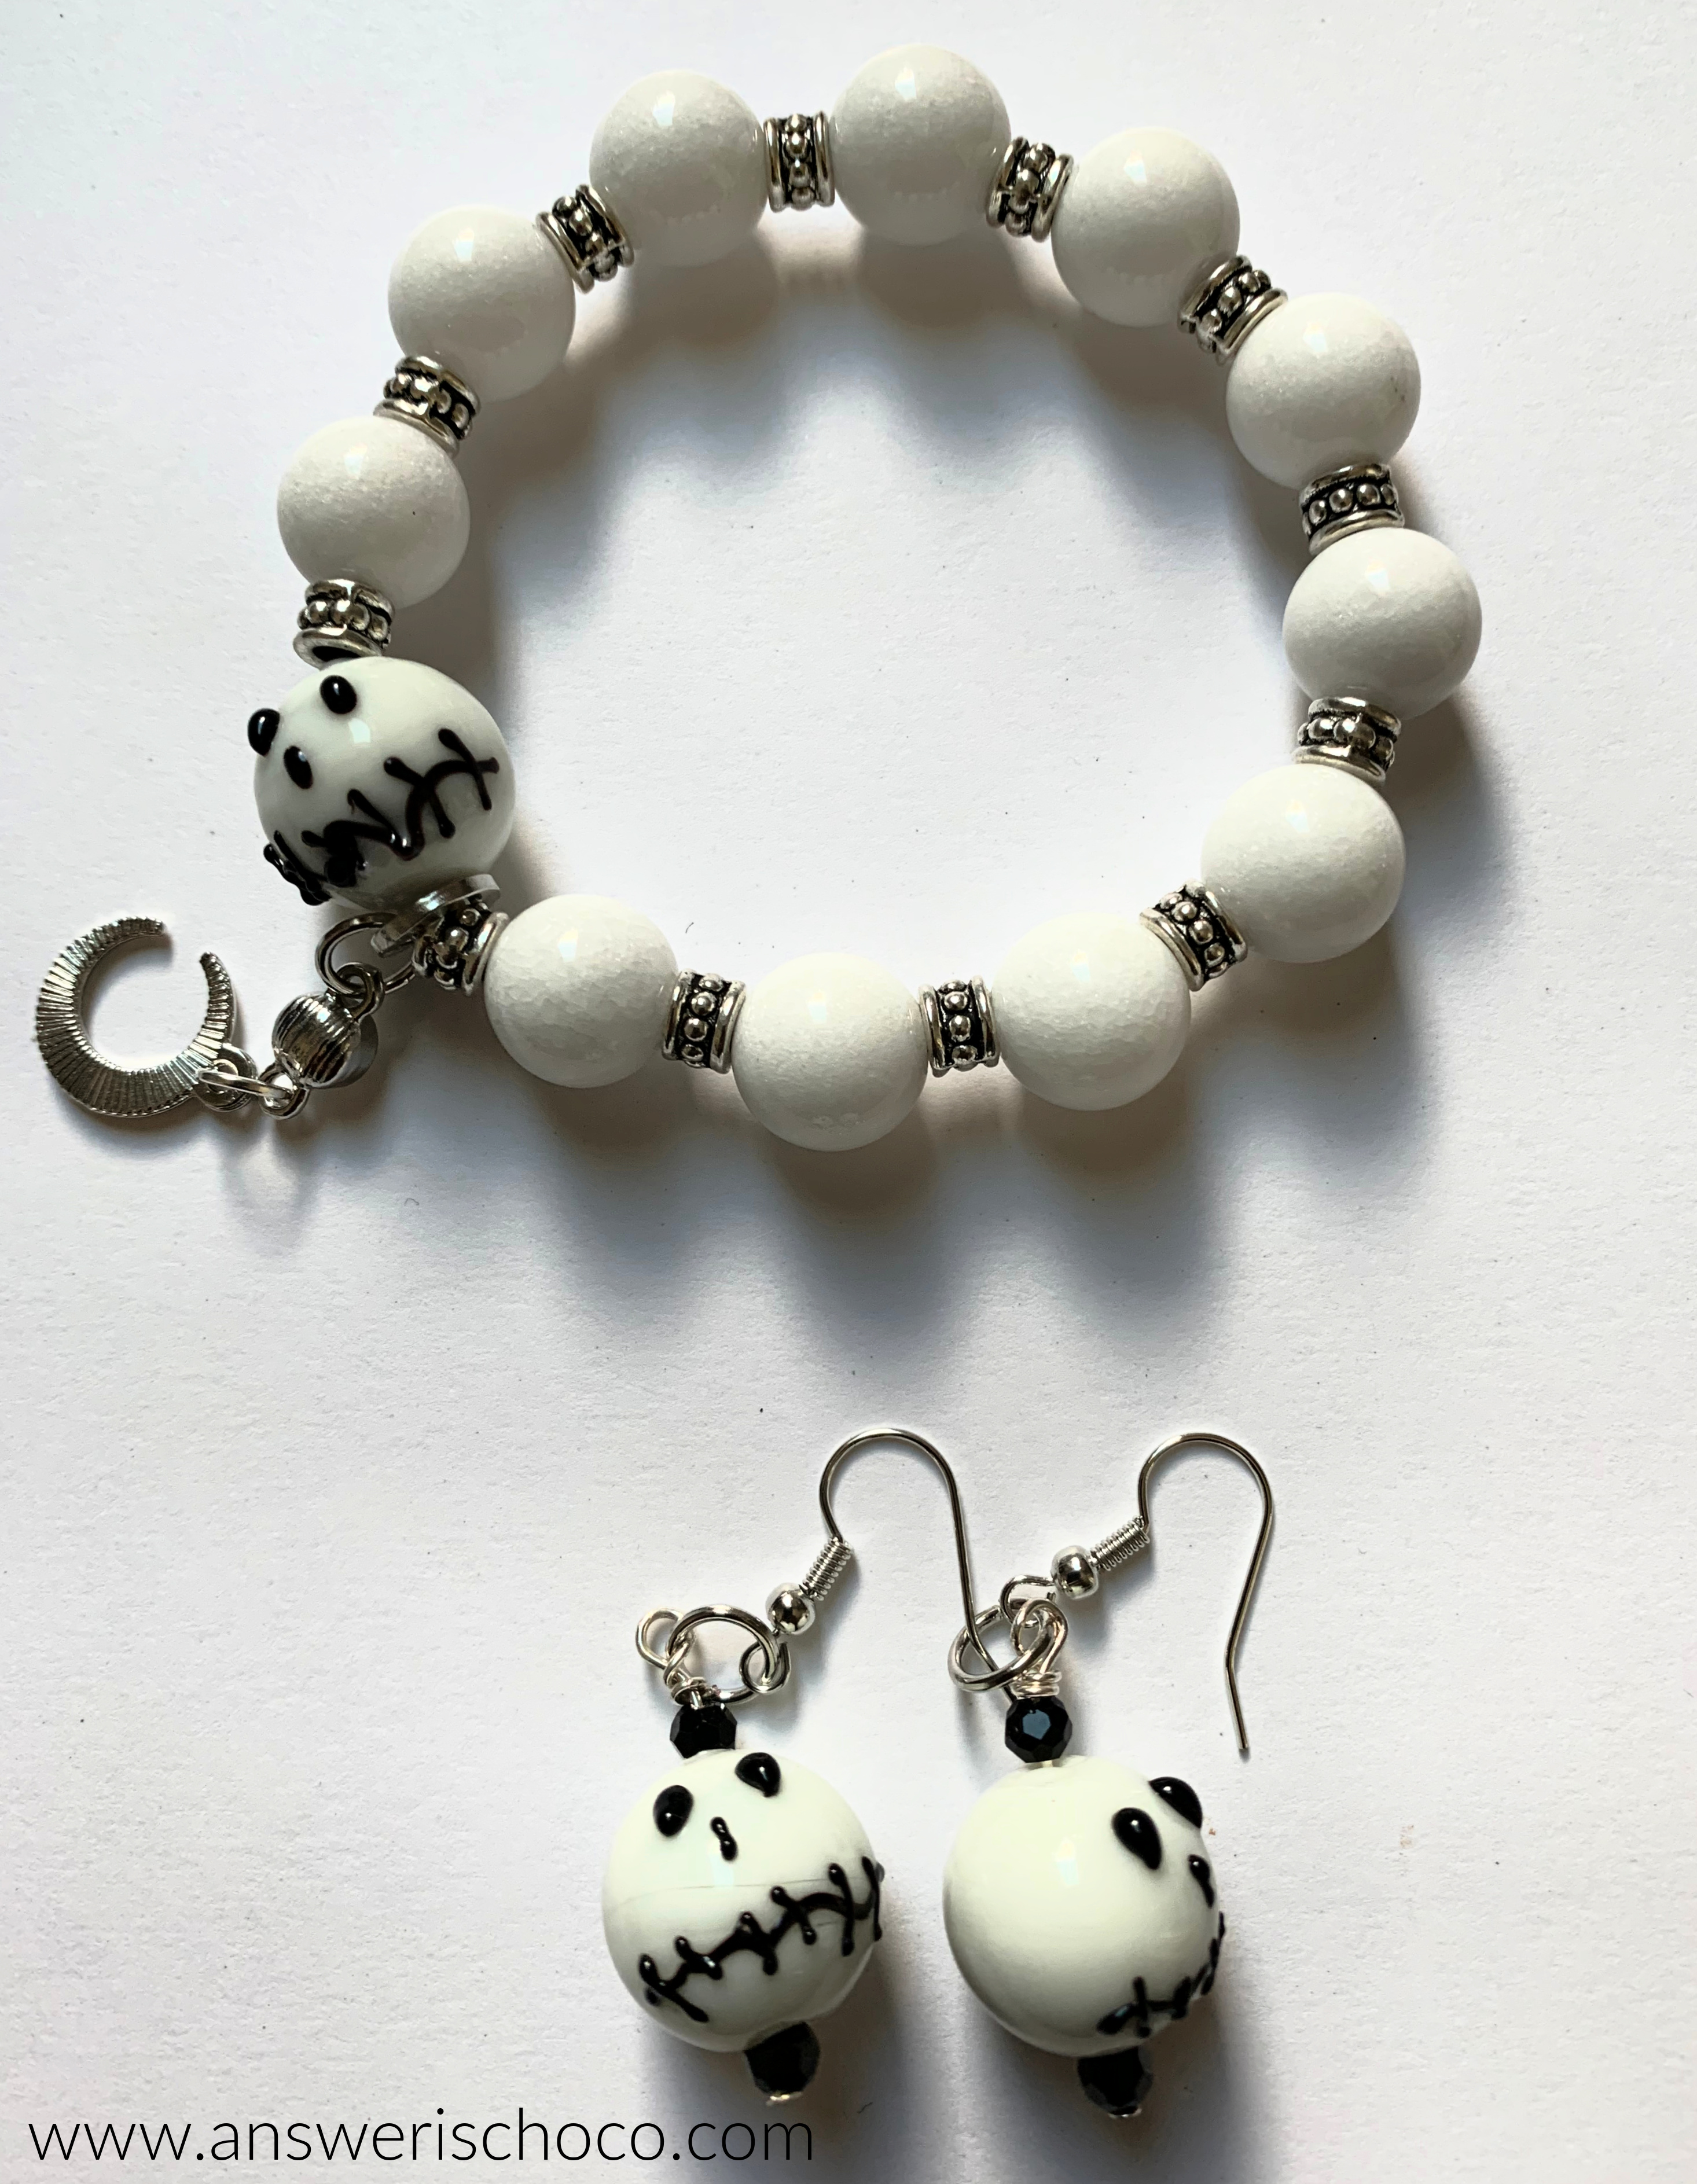
Measure your bracelet once you have your beads on. I know from experience 7.5 is the right length for me. Tie with a basic knot. Dab a little Loctite or jewelry glue onto the knot, then tie another knot and trim. 


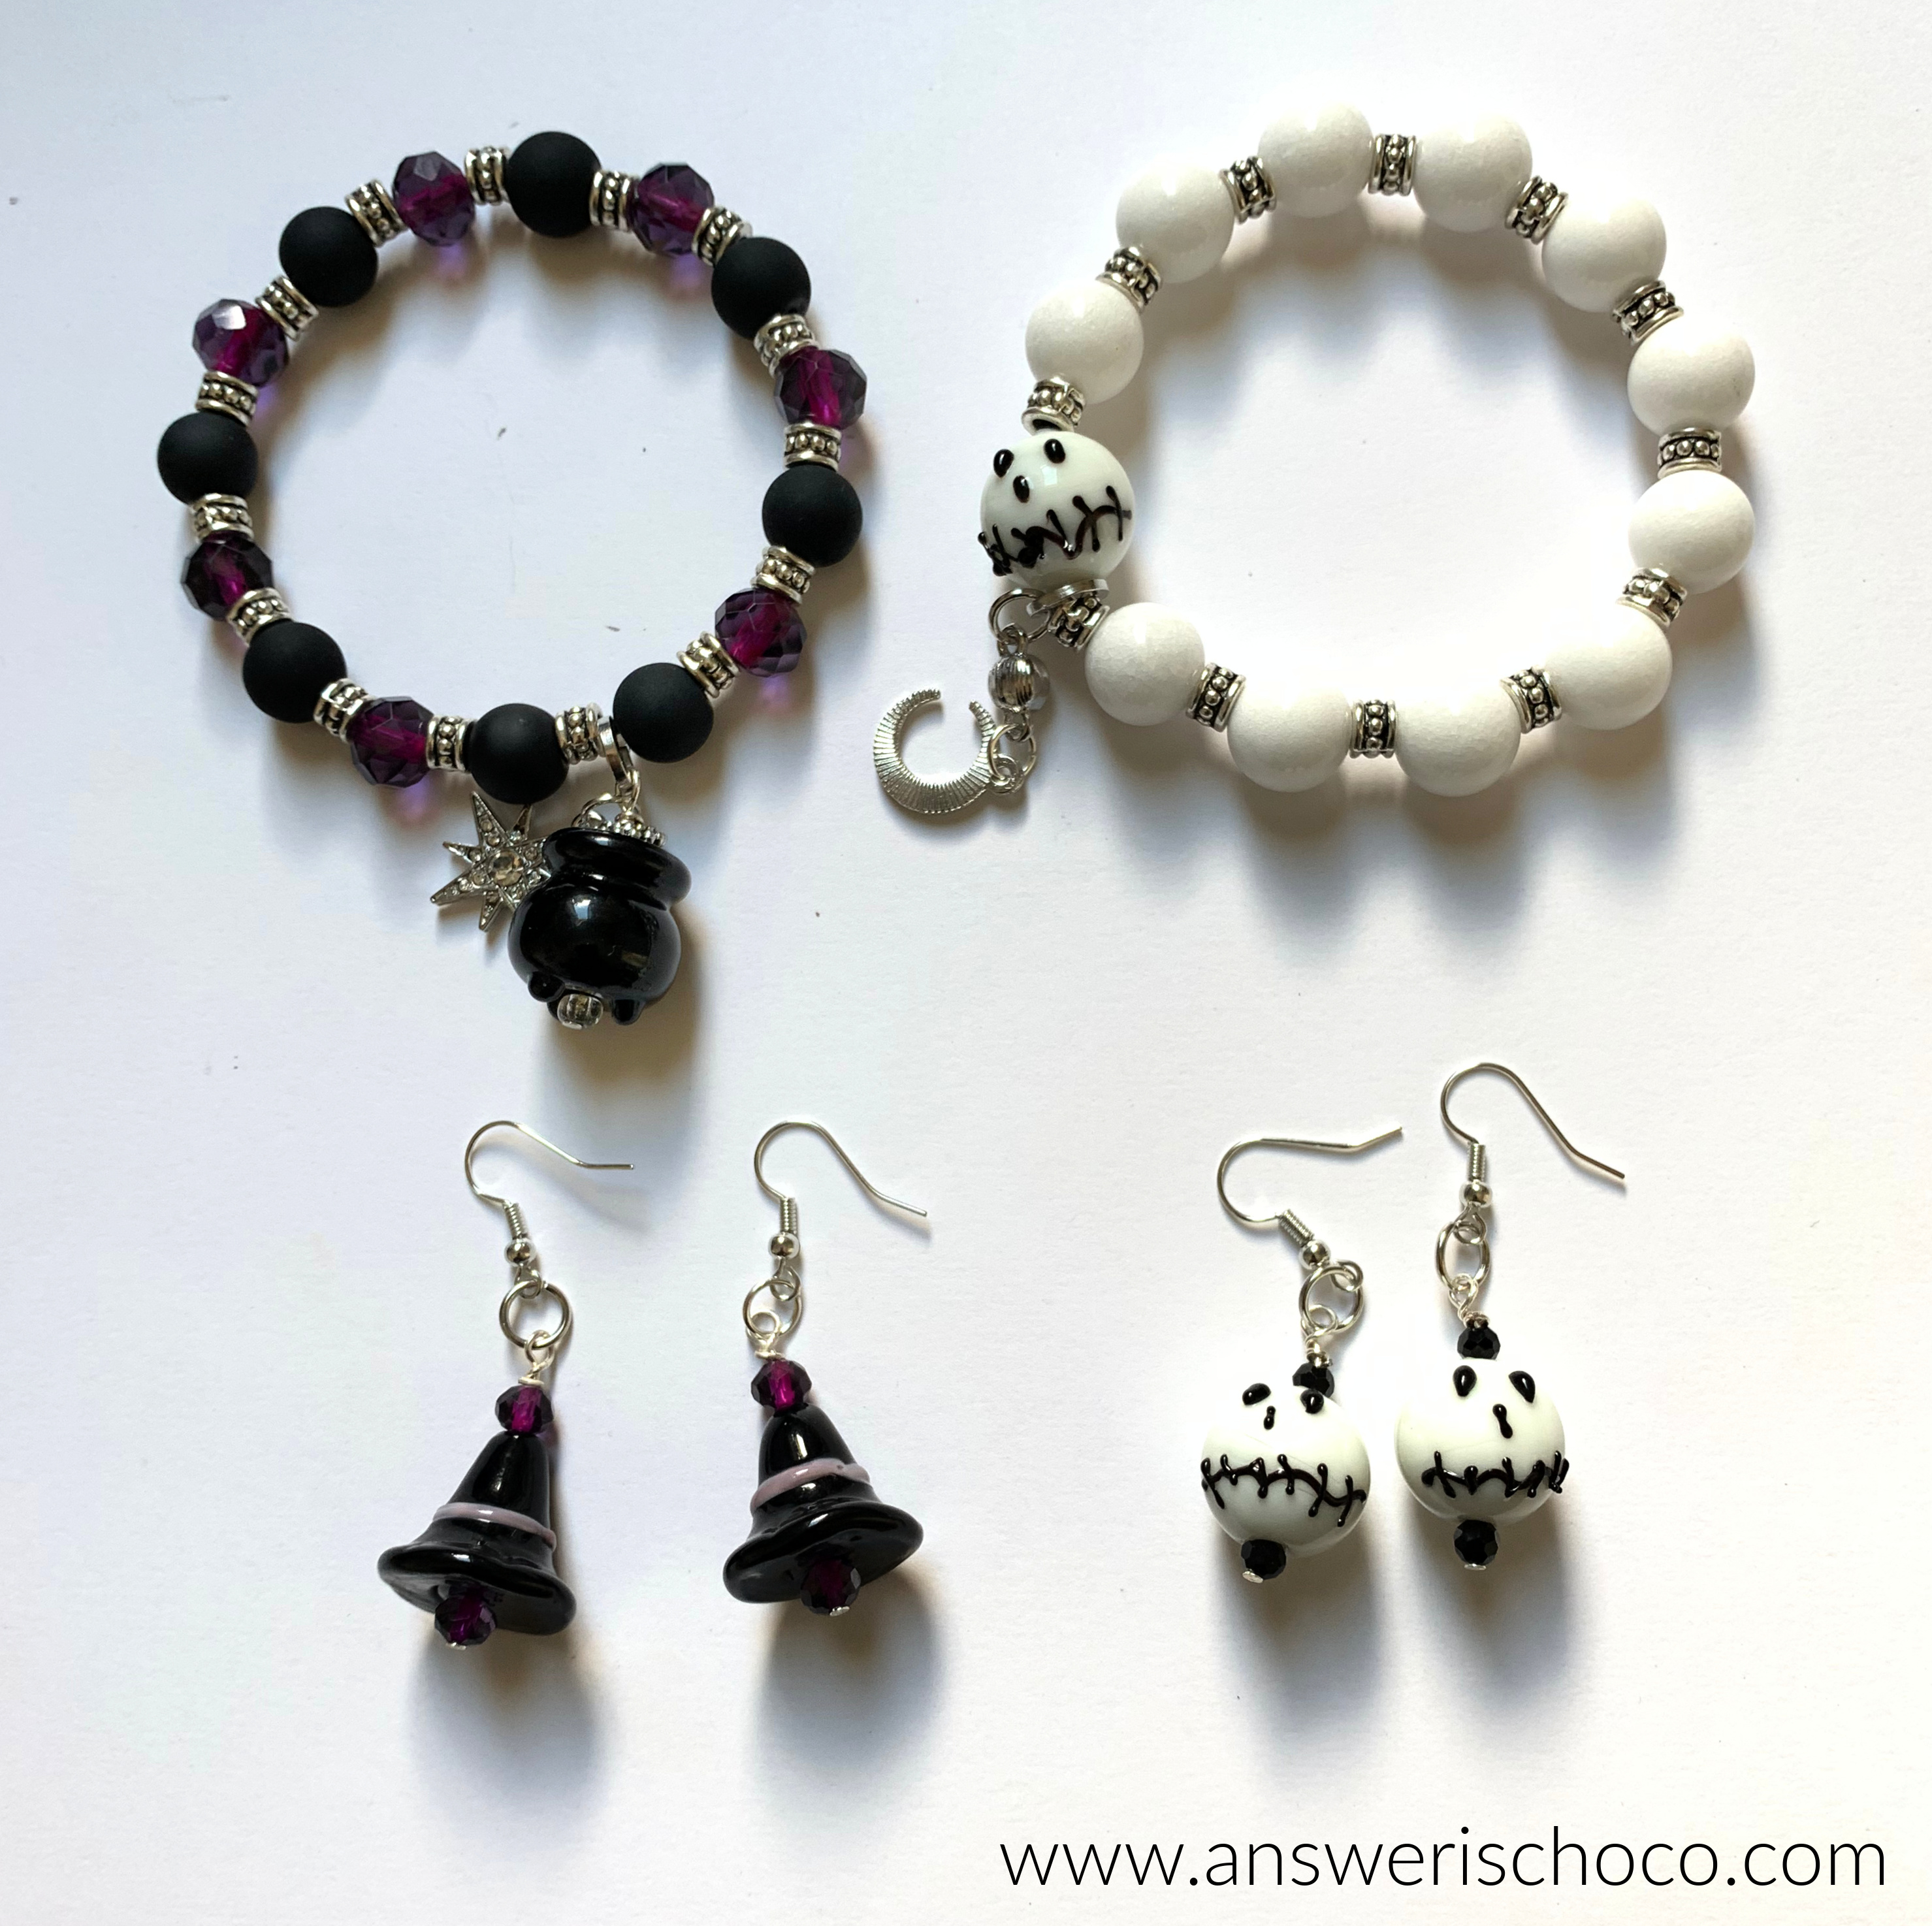
I usually add a little dangle on my bracelets, especially when I'm giving as a gift, and especially since I found some cute charms that say things like "Made With Love" "Handmade" etc. I also love these little rhinestone dangles to add just a touch of bling. 


To create the bead dangle, thread one of the jasper beads and one of the silver beads onto a head pin and close with a wrapped loop

Then, attach your tag, rhinestone, and bead dangle onto your bracelet using jump rings. 


I love how the jasper represents GROGU, the black beads his eyes, and the silver is for Beskar, the elite armor worn by worthy Mandalorians. Geek Alert! 


This is the way !

Sharing At: 
Our Hopeful Home 
The House On Silverado 


Sunday, March 14, 2021

DIY Jewelry: But First Coffee Earrings


As a Seattle girl originally, I am an "OG" Starbucks customer. I'm talking from the days when there wasn't one on every street corner, in every mall or grocery store or Target. And my drink has always been a Mocha. Hot, usually iced, always a Mocha. While I make my iced Mochas every morning at home and most evenings as well, Mr. Chocolate knows that if we're out...there's a stop involved. I live for the mobile app which has been my lifeline during this pandemic! So when I found some coffee themed charms at JoAnn, it was a no brainer that I was getting them! 

These instructions are the same for clip earrings or pierced with the only change being using an earwire instead of the clip bases. 


Supplies: 
  • hildie & jo charms (JoAnn)
  • Clip earring backs ( Michaels
  • Clip earring "base" (eg something to cover the backs... had these in my stash)
  • Jump rings (Michaels and Jo Ann)
  • Connector Links 
  • Jewelry Pliers
  • Glue ( I use Loctite Gel Control Super Glue)

If you're making clips, the first step is to glue the clip back to the base with a good drop of the Loctite Glue. I like this because it's thicker and doesn't run. Use clamps or clothespins to secure and let dry while you assemble the other pieces. If you're making pierced earrings, see below for when to attach the earwire. 


I chose to go with these two charms and make a par of asymmetrical earrings. The bolder jump rings on the right (also hildie & jo) I had in my stash and used to connect the larger connector links shown at the bottom. I used three connector links for each earring. 


To connect the connector links, open one of the jump rings, thread all three onto it, close. Repeat for the other earring. Add another jump ring to each set of now joined links. 


Repeat the same process to attach the charms. 

If you're making pierced, at this point use one more jump ring to attach an earwire. For clip earrings, attach a jump ring to your completed clip base and use one more to attach the body of your earring. 

This is an easy process to whip up a pair of earrings that can be worn with anything! 


and Iced Mochas too ! 

Sharing At: 


Our Hopeful Home
The House On Silverado 

Tuesday, January 26, 2021

DIY Jewelry: Hildie and Jo Leather and Silver Earrings


Faux leather earrings are everywhere and I have made some and love them, but nothing beats the real thing! It can get expensive to buy leather though so naturally if you see real leather that's already pre-cut and designed for earrings you buy it right? Especially when it's 60% off which was the case with the Hildie and Jo Leather shapes I got from JoAnn. Hildie and Jo is JoAnn's in house brand of jewelry making supplies and if you're a new or experienced jewelry maker they're a great resource. I loved the simplicity of these shapes but me being me, couldnn't just leave them alone! 

Supplies: 
  • Hildie and Jo Leather Shapes (JoAnn)
  • Hildie and Jo Jump Rings ( JoAnn)
  • Misc. Charms and Metal Beads ( Stash )
  • Head Pins ( Stash )
  • Jewelry Pliers
NOTE: I won't go into basic jewelry making how tos in this post but You Tube is filled with them for the following: 


I had the heart charms in my stash and thought they'd be perfect with the silver leather and just in time for Valentine's season but also universal enough to wear all year round. Since I don't have pierced ears, the earrings I make for myself ( or my mom ) are clips. I used to stress about not having enough different pieces to adhere the clip backs to thinking "they'll all look the same". Then it dawned on me that for pierced ears, ear wires all look the same so I got over it. 


The construction of these is pretty simple. Thread Heart Charm and two small silver beads on head pin and close with a wrapped loop. Replace the jump ring that came with the leather shape and use matching jump rings to attach the the threaded head pin. 


Use jump rings to attach base to earring clip. DONE!

The same process was used for the black earrings. The leather on this was more natural since it's not painted so the edges were a little rougher as you'll see in these pics but when I was all done I just went around the edges with my scissors to trim up. 


Using the same process as with the heart charms, thread the beads on the head pins and close with a wire wrapped loop. Attach to leather with jump rings and attach earring clips. 


And I still have one more pair of leather pieces to play with! 


Sharing At: