Tuesday, January 22, 2013

Medium Time Commitment Coffee Filter Wreath

Medium Time Coffee Filter Wreath

I’ve always wanted a coffee filter wreath. And I’ve always wanted one that’s fluffy and dense. But I haven’t always wanted to spend what seemed like ton of time to get that really dense look. So here’s my take on spending a medium amount of time on one ( 1hr give or take) plus I re-purposed a styrofoam wreath I already had on hand. For this project you will need:
  • Recycled or new wreath form
  • Basket Coffee Filters
  • Glue Gun
  • Cheesy Lifetime Movie on in the background ( optional)
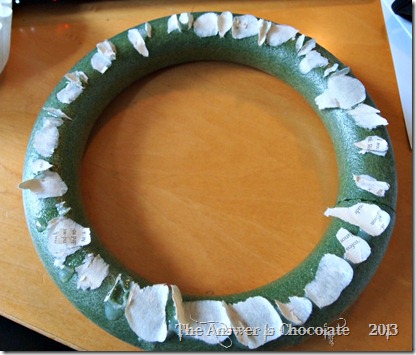
I started with this monster:

Repurposed Styrofoam Wreath

Skeleton of an early crafty experiment. We’ll call this wreathus formicus.  Decomposed down almost to the bones.

I was originally going to fold coffee filters in quarters and then lay them flat all around the wreath. But I like fluffy and when I was folding, started twisting the bottoms of my quarter folded filters thinking after I got them glued on I could fluff them out a bit. It was at this point I started thinking about doing more video tutorials because I need more hands!
Coffee Filter Folds

Fold a coffee filter in half, then in half again to quarter and then grab and twist the bottom until it looks like a badminton thingy. Now you’re going to ask me “how many badminton thingies” did you make? To which I answer: “A bunch” . Serious answer is I started with an open package of coffee filters about 3/4 full, finished that up and used another maybe 1/8th to 1/4th of another pack so I’m going to say a package should do you.

Here’s where I wish I had the video because I got busy twisting, gluing, pulling glue strings off myself that I didn’t want to get on my camera so didn’t take pictures along the way bad blogger! I glued the twisted part down, then guaged where the next one should go, glued the next one down and so on. I starte in the middle of the wreath went all the way around then did a row on the inside and outside of the first row. After that, I just fluffed.

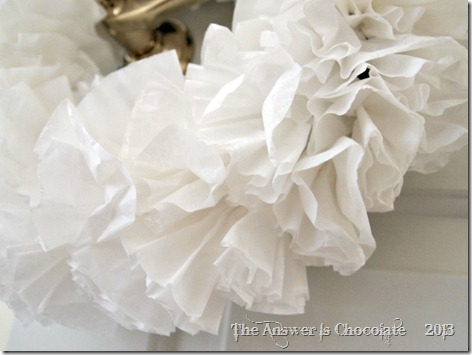
Coffee Filter Wreath

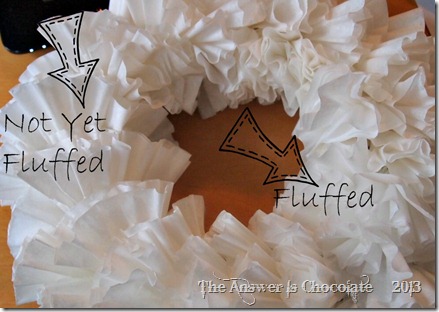
Kind of reminds me of daffodils. This is to try to illustrate what I mean by fluffed vs unfluffed:

Unfluffed Coffee Filter Wreath

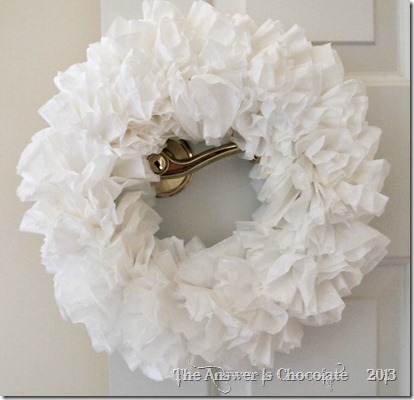
Unfluffed, you can see the natural creases of the coffee filters. Fluffed, is just softer.

Coffee Filter Wreath Fluffed


Sharing At:


Monday, January 21, 2013

BFF Open House Link Party #88 Wrap Up and Features

Wow! What a great turnout for last week's party. Thanks everyone for sharing your creations here. Let's get right to some of the wonderful ideas that caught my eye!


I'm hooked on chalkboard printables and this Winnie The Pooh inspired one from Michele at The Scrap Shoppe is just too too cute. Perfect for Valentine's Day or all year. 


I love card making and this card by Linda at Paper Seedling is a stunner. 


Rox, from Four Eleven Rox, has inspired me to pick my doodle pad back up with her amazing Zentangle inspired heart. 


And this week's chocolate feature comes from Karyn at Pint Sized Baker. These are almost too pretty to eat. Almost! That wouldn't stop me from devouring these beautiful chocolate rose frosted shortbread cookies. You can read about the extra special meaning behind them at Karyn's blog. 

Thanks again to everyone who makes the BFF Open House Link Party a part of their week. It means a lot to me! Have a great week and make it a creative one! 

Sunday, January 20, 2013

Empty Nest Musings and A Chalkboard Printable

I am feeling a little melancholy today since after a wonderful and fun month long break, College Boy is on his way back to school. I'm so proud of the adult he's become /  becoming,  and it was fun to watch him over break be more naturally independent and comfortable in his own skin. There was a time when we'd go out to dinner and Mr. C and I did most or all of the interacting and question asking with our servers and "suddenly"  the tables have turned. Little day to day differences that you blink and they take place.  I'm not even sure he realizes the changes but they are the kind of things that make mama and papa bears smile inside and out.

It's that kind of confidence and independence we want for our children right? After all that's the job we signed up for or at least my interpretation of it. We have always been parents first (vs wanting to be his friend) and I know there were times when we were more strict than other parents, especially in HS. On the other hand, we also accepted that as he grew into adulthood, the pendulum would begin to shift and we wanted him to be equipped with the skills to make his own good decisions because he knew they were good decisions.  It's more fun than I thought seeing that take place and it means the world to us that we have the kind of relationship where he wants to spend time with us.

All of this introspection reminded me of this quote which I think sums up our whole parenting journey and my mood today. So I made it into a  chalkboard printable.


 Can anyone else relate?


Thursday, January 17, 2013

BFF Open House Link Party #88


Yikes, I blinked and another week went by. Clearly 2013 is not going to go by any slower than 2012 did. I hope everyone's surviving flu season. I think it's trying to sneak in the door here and I'm pushing just as hard to keep it OUT. 

So let's see what everyone's been up to this week! 


Wednesday, January 16, 2013

College Boy's Chicken Gumbo


I don't post a lot of my own recipes ( not even chocolate ones) primarily because most of them I make up as I go along and don't measure precisely.  But my camera was in the kitchen when I was making this ( another reason I don't post a lot of recipes...it's usually in my craft room) so I decided to share. 

Somewhere in his Senior Year of HS, my genes kicked into now College Boy's palate. I came from a background where a pot of pepper sauce was on the table at all times ( the kind where you use a toothpick, not a spoon to apply to your food...guests were warned and didn't alway listen) and hubs came from a background where salt was the spiciest thing in the house. After I made this the first time it became College Boy's ongoing request for special meals. His graduation dinner, when he first came home from college, on each college break. 

For this recipe you will need: 
  • 1 medium onion chopped
  • 1 red pepper chopped
  • 1 green pepper chopped
  • 2 ribs of celery chopped

  • 2 chicken breasts, cooked and chopped (you could even use a rotisserie chicken from the grocery store)
  • 1 "box o chicken broth"
  • 1 can crushed tomatoes and 1 can tomato sauce ( or two cans tomato sauce if you think you have crushed tomatoes in your pantry and you don't
  • 1/2 C flour
  • Salt , cajun spice (can omit if you're from my husband's family) black pepper to taste
  • 2 Tsp Gumbo File powder ( cannot omit!)
  • Olive oil
  • 1TBSP Butter


I'm not from New Orleans or Louisiana but love gumbo and started making this recipe a few years ago. 

  • Coat the bottom of a heavy pan ( dutch oven ) with olive oil, add butter til melted
  • Add flour and stir (and stir and stir). This will make your "roux" which thickens your gumbo. Ideally you want this to brown and not burn.
  • Add your chopped onion, peppers, celery
  • Add your salt, pepper, cajun seasoning 
  • Stir until your roux is well blended into your veggies
  • Add a little chicken stock, stir
  • It should be a thick gravy consistency
  • Keep adding chicken stock and stirring and watching it thicken
  • Add tomatoes / tomato sauce and stir
  • Add gumbo file powder 


While I'm chopping my veggies, I poach two chicken breasts. You can also do this ahead of time or as mentioned above, you can use a rotisserie chicken from the store. Depending on your family's level of pickiness, you can also add shrimp, andouille sausage etc. You'll notice those aren't here lol. You'll also notice that there's no okra in this. Yuck. Sorry. Tried it. Yuck. 

Let your pot simmer for at least 30 minutes but I usually make this a couple of hours before we eat it or I make it ahead and refrigerate so the flavors really settle in. If you do let it simmer for a while, stir periodically so it doesn't stick to the bottom. 


Serve over rice or you can eat like a soup. If you really want your family to swoon, make garlic cheddar biscuits with melted butter. 


Tuesday, January 15, 2013

DIY : Upscale a Dollar Store Tray (With Matching Journal)

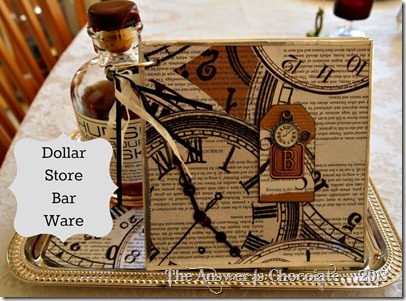
Dollar Store Bar Ware
I might have to start calling Mr. C, Mr. B. He’s become an aficionado of small batch bourbons (not to excess!)

I don’t mind because I get all kinds of cool bottles to play with. He mentioned the other day that he saw an online bourbon journal but it only allowed 5 entries until there was a charge for it, so I decided I’d go old school and make him a hardcopy journal. He’s also into watches and time pieces, and I already had some very cool clock themed paper in my stash. Win-win since I’m working to bust some stash this year.

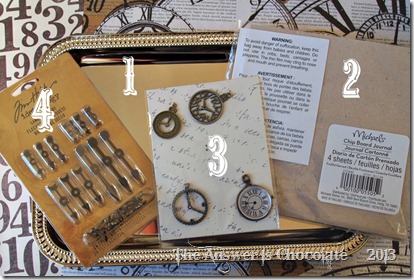
DIY Bar Tray Supplies

For this project you will need:
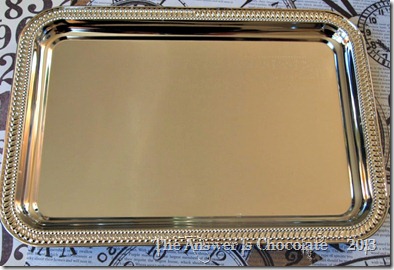
1.) Dollar Store Silver Tray ( I got mine @ Dollar Tree)
2.) Pre-made (or make your own) chipboard journal….This was on sale after Christmas at Michaels for $.25! A whole quarter. Cheaper than making my own.
3.) Coordinating charms to match your paper of choice. These were NOT on sale at Michaels but they were $2 for the pack and totally justified given the $.25 journal ( which I may or may not have purchased more than one)
4.) Embellishments. In this case I had these Tim Holtz game spinner thingies in my stash. So my total cost was $3.25.

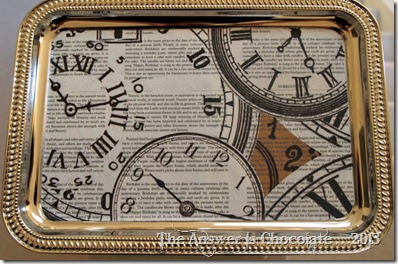
I cut my watch themed paper to fit the inside of the tray. Applied Mod Podge to the tray, applied the paper and finished with two coats of MP.

Dollar Tree Silver Tray

Mod Podged Dollar Tree Tray

Before Christmas we saw some high end barware at Macy’s . Gorgeous, but $$.  I like my price a lot better!

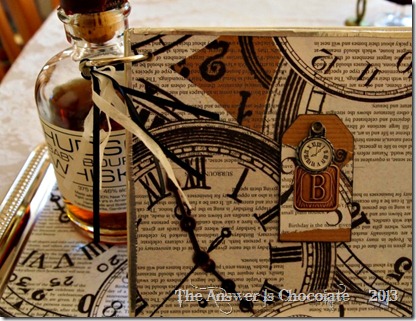
Bourbon Journal and Tray

For the journal, I covered two pieces of the chipboard ( it actually comes w/ four pieces but I’ll use the other two for something else) with the watch paper on one side and some number themed paper on the other. Mod Podged these on. Went around the edges with some aluminum tape.

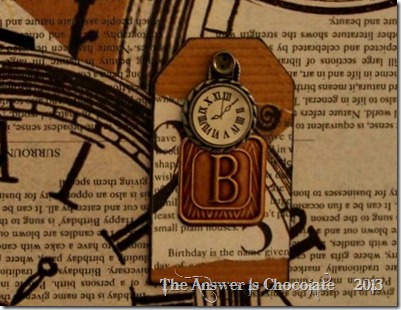
I had a chipboard tag in my stash which I left naked and applied a scrap of the watch paper to, then edged with black ink.  I added one of the watch charms (one of four from my $2 package so this was $.50), and an antique embossed monogram sticker I had in my stash.

Bourbon Journal and Tray

To finish off the journal, I added some of the game spinners to the watch hands on the paper.

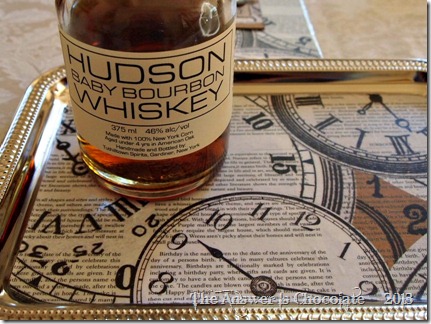
Dollar Store Bar Ware

Just gives it a little dimension. I cut the inside pages to size from paper I had on hand, and put on the ring that came with the journal ( added some ribbon on hand just cause) and done.

So now Mr. C or Mr B or whomever I’m married to , has a place to display his current favorite find, as well as keep track of what he likes, doesn’t like, etc. about them.

Barware Tray

If adult beverages aren’t your thing, you could easily adapt this for any kind of theme from coffees / teas, flavored syrups, olive oils, balsamic vinegars or just cause you want to decorate a tray!


Sharing At:


Monday, January 14, 2013

I Love The Winter Weather Snowflake and Valentine's Printable

I'm excited to be participating with a bunch of other bloggers in celebrating snowflakes today! Living in the Pacific Northwest we're not guaranteed snow every Winter ( and then we come to a screeching halt when we do get it) and I know there are people in other parts of the country who would gladly forego snow right now. But, there's something just so serene about snow ( especially when you get it infrequently!).

We went up to the mountains to get our snow fix this weekend. Of course as a crafter what did my eyes see by extra fine glitter in twinkling in the snow and dimensional glues and embossing ideas on the trees. Prior to that though, I was inspired to make a printable based on the song "Winter Weather" made famous by Peggy Lee and then by Vanessa Williams.


(Click on image to bring to full size; right click to Save As)

I'm loving chalkboard printables right now so I did this one on a chalkboard background and to make it multi-purpose, I did "LOVE" in red with a chalk outline so I can keep this up ( once I frame it ooops) through Valentine's Day.


I took a little artistic license with the lyrics changing "got my love" to "got your love" but I don't think anyone will mind. And why is this solely a Christmas song?


Sharing At: