Thursday, April 16, 2026

BFF Open House


Happy Friday Eve, Creative Peeps. I hope you've had a good and of course, creative week! Nothing too exciting here at Casa Chocolate, which is just fine by me. Boring is good, and gave me a chance to play around with a couple of things. I had a chance to play with ideas and techniques I've wanted to play with, so this week I shared:


Some really good thrifting and repurposing ideas were shared at last week's party, and now more than ever, "frugal" the word, so let's take a look at some ideas. 


Thrifting Wonderland shared how she made this handmade card using Thrifted Craft Supplies! Don't sleep on your local thrift stores for all kinds of craft supplies. I've been thrilled to find things at these and you just never know! Plus, have you seen the price of cards?! You can make several for what one costs. 


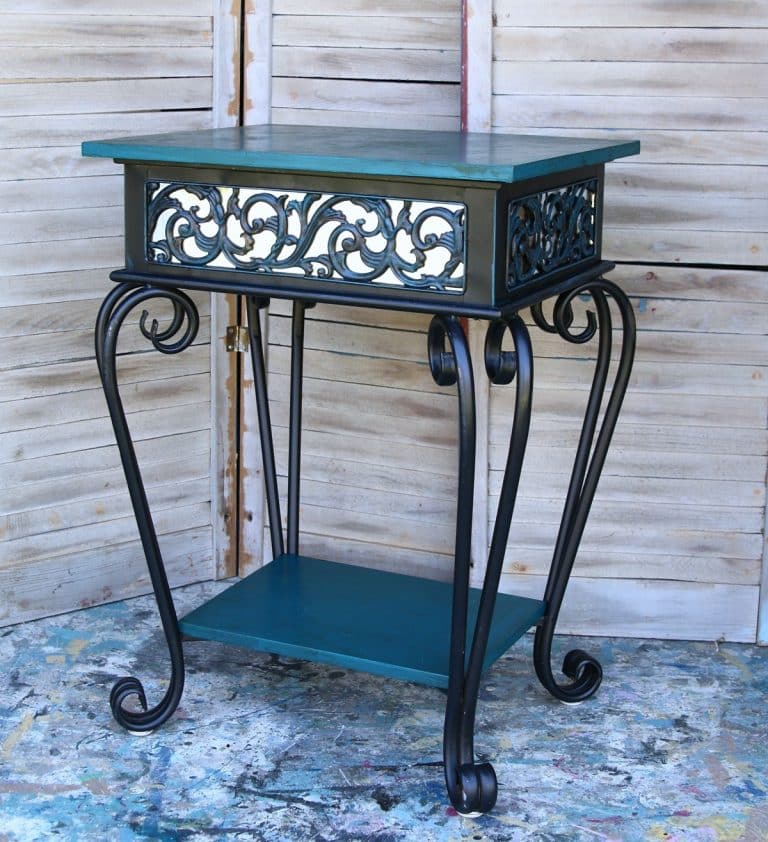
My Thrift Store Addiction shared a beautiful Garden Armillary Sphere she rescued and refinished. Looks brand new! 

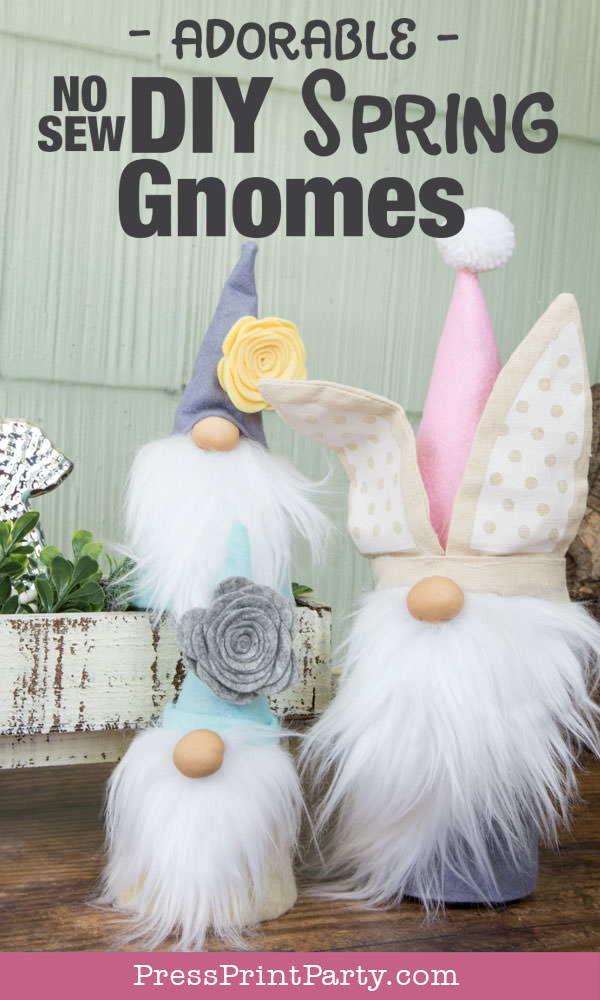
Press Print Party shared how to make No Sew Gnomes. These are for Spring, but could easily be adapted to other seasons, and doesn't a Gnome just make things more fun?


Finally, wouldn't any Spring dessert table be made better with this Strawberry Chocolate Kahlua Swirl Bundt Cake? Yes...yes it would! From Cindy's Online Recipe Box

Thanks to everyone who linked up and can't wait to see what you've got in store this week! 


You are invited to the Inlinkz link party!

Click here to enter

Wednesday, April 15, 2026

Art Techniques: Adventures in Scrape Painting


Have you heard of Scrape Painting? It's something I've wanted to try, and finally did! It involves creating a mask of an image, then, as the name implies, using a tool like a squeegee or other flat surface to pull the paint down in a scraping motion. I'll share some lessons learned as we go along.

Supplies:
  • Canvas or Flat Surface
  • Masking Tape
  • Craft Knife
  • Assorted Acrylic Paints
  • Paint Pens 

For my surface, I grabbed a canvas board I had in my stash. For my image, I downloaded one I found online, sized, printed, and cut out the outline. 


You can either use the canvas as is or paint a background. I wanted a background so I grabbed thse two colors and lightly covered the canvas. 


Once the canvas is dry, then it's time to make your mask, using...masking tape! Layer so each piece slightly overlaps. This avoids lines in your final image. 


Continue applying the masking tape until your surface is covered. To ensure good adhesion, I went over the masking tape with a scraping tool...eg the kind you use to apply vinyl. 


You can draw directly atop the masking tape or trace an image like the one I printed and cut out. I just used a Sharpie for this. 


Grab your X-acto or craft knife, and cut around the interior of your traced image. You want to remove the tape from the interior of your drawn or traced image. Once you have your whole image cut out, it's time to paint!


This is a total free-for-all with whichever colors you want to use. I just dripped these directly from the 2oz bottles, but you can also put the paints in smaller squeeze bottles or, as I plan to do, get some pointed tips to place directly on the paint bottles for cleaner application. Or not! For the next step you'll need a squeegee or a scraper wide enough for your image. I didn't get pics of this part but it's pretty straightforward. 

NOTE: Here's where I messed up! You should just scrape once from slightly above the top of your paints. I missed so I did it twice which overblended my paints, but I'm still good with things! Practice, right? 


As you can see, I got a little bleed on the paints. No worries. The next step will take care of things! 


I grabbed an Apple Barrel Paint Pen in black and went around the image to outline it. Then I took a gold paint pen and added dots and the needles on the cactus. 


I also grabbed my paint-dotting styluses and added some larger white dots in the background, and smaller ones on the cactus pads. 


Despite my goof with the double scrape, I'm still happy and can't wait to do another one of these! 


Sharing At:


Monday, April 13, 2026

"SPRUMMER" Decor: Dotted Bowl Vases


I'm not a big Spring or Summer Maker. So I kind of combine the two seasons in my home decor because it overlaps both seasons. I'm a master word masher, so Spring+Summer = Sprummer!

Last year, I went bright with some Llamas I still love and did a little Tucson-focused theme. I added it to it this year with these bowl vases from Dollar Tree. 

Supplies:
  • Fishbowl Vases, Dollar Tree
  • Variety of Acrylic Paint Colors
  • Dotting Tools, Paint Pens, or Pointed Brush


I grabbed a variety of paint colors and my paint dotting tools and this was a very "go with the flow" kinda project. 


I cleaned the outside of the bowl vases with alcohol, and then started dotting! I randomly went around the vase with white to start, then added colors from there. 


Shown here with yellow and turquoise added. 


Kept going until I was happy! Most of the paints I used are multi-surface use. I don't plan on these needing to go in the dishwasher, so I didn't "cure" them by baking them in the oven. 


For storage reasons, I don't glue things like this together because I like to use things differently so they just rest on these wide candleholders. Also from Dollar Tree. I filled them with some white rocks, and then placed some embossed metal flowers I also made last year atop the rocks. 


That's it! Mr. Chocolate claimed them as his because I don't usually do a lot of bright colors, and he is the King of bright colors!


What do you think?

Sharing At:


Thursday, April 9, 2026

BFF Open House


Whew! Another week basically on the books. I hope everyone who celebrated had a Happy Easter! April is cruising right along. With all of the chaos and stress in the world, it's great to have a creative outlet. I keep seeing articles about what we Makers have always known...picking up an analog hobby (although yes, we have lots of digital/electronic tools too) is a way to refocus ourselves and reduce stress. So knitting, crocheting, sewing, papercrafts, etc.? We were ahead of the curve, right? 

An assortment of features from last week's party. Some ideas to Pin for next year, others to try yet this year!


Coffee Filters are such a versatile crafting material, and Steph Creates shared yet another way to use them in this Wild Daisy Wreath

Petticoat Junktion transformed a "seen better days" sale find into this beautiful Side Table, and I definitely vote for the "after" when it comes to the "before and after" which you can see in the post. 

Waste not, want not, especially with things being expensive. My French Twist shows how to make Fabric Scrap Twine because where there is fabric, there are always scraps. Perfect to use in other creative projects! 

Finally, got leftover Peeps? Save this idea for next year: Instant Pot Rice Krispies Treats using Peeps! From Crystal and Co

Thanks to everyone who linked up and can't wait to see what you've got in store this week! 


You are invited to the Inlinkz link party!

Click here to enter

Monday, April 6, 2026

Free Art: Random Rocks


I hope everyone who celebrated had a lovely Easter! 

When we were at the Tucson Botanical Gardens recently, Mr. Chocolate found a rock intended to be found and enjoyed. This isn't new...it's something that's been done for a while now...but it reminded me that I have a "big ol" bag of rocks in the garage that I bought for reasons I don't remember, and decided to play. 

With the world in the state that it's in, I think things like this are more important than ever. A reminder of shared humanity. Art is one thing that has gotten people through difficult times. So, I'll leave these anonymously when I'm out and about. Inspired by the one he picked up. Paying it forward in some small way. It was also very therapeutic for me. It also led me down a rabbit hole of some great You Tube accounts to learn from as I do more of these! And my oldest friend (as in one I've known the longest!) sent me a fun kit to play with, which I still need to!

Supplies:
  • Found or purchased rocks. 
  • Acrylic Paints, Pens, Dotting Tools
  • Sealer, I used Mod Podge Crystal


These are the river rocks I picked up at Lowes. I gave them a quick wash before painting to remove any dust etc. 


I painted some of them with white paint as a background. Then I used a pencil to do letters / images, and went over it with acrylic paint pens. Easy peasy! 


That's how I did this flower rock. 


Others, I used mandala dotting tools to make, some with backgrounds, some directly on the rock.


I grabbed my Crystal Formula Mod Podge to seal them. I debated whether to include a hashtag or anything on them, but decided that in the real spirit of randomness, just to leave them anonymous. I'll leave them around town.