Wednesday, March 9, 2011

My Can Needed A Friend

And thanks to the garbage man who took out the utility pole that supplies power, cable, and phone service to our house today, I had time to make him one.
IMG_5102
You know you’re a craft addict when you buy salad dressing because you like the jar:
IMG_5088
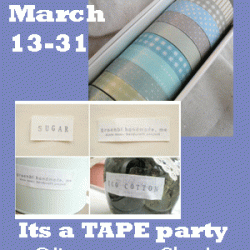
I also liked that the label came right off! Used my contact paper leftover from my can to cover the jar and then went around that with more of my typography tape (two strips). The white contact paper sets off the tape because the numbers are clear. Went around the middle with a K&CO scrapbook border.
Mod Podged a scrap of polka dot paper to the top of the lid and went around it with another K&Co adhesive scrapbook border. Sealed that w/ Mod Podge too.
IMG_5100
The whole reason for this “jarring” transformation was something to hold black, white, and neutral colored buttons that were here, there, and everywhere. Finished it off with a big fat black button in the middle:
IMG_5098
Did I mention I’m in love with this tape?!
Linking Up At: 
giveaways
Beyond The Picket Fence
Catch a Glimpse Button


Photobucket


Tuesday, March 8, 2011

I Knew I Saved That Can For A Reason!


Thank You Monique! 


My son was on a smoothie kick requiring pineapple juice which I could only find in the kind of can that juice doesn't come in that often anymore. It's about 7 in tall. I saved one of them because it seemed like a smart thing to do and with my addiction  collection of K&CO adhesive scrapbook borders continuing to grow, I needed a better way to contain the mess  organize them!

Large juice can

Ordinarily I would have covered with scrapbook paper, but I remembered I had some contact paper scraps and thought they'd work. I also had some decorative tape I picked up from Michaels $1 section so that went into the plan.

Wrapped the can in the contact paper, went around the top and bottom with the tape. Then I went to my sticker stash and got out some clear stickers from American Crafts. I love these sticker books that have pages and pages of stickers and I'm pretty sure I got this one for $2, 3 bucks at Michaels w/ a coupon!

Since this was going to hold my K&CO scrapbook borders, I thought I should use some of them too: 

For the focal, I took a small flower sticker from the pack and mounted it on a white card stock scrap and then mounted to the middle of the medallion sticker on the can using a foam dot.

Here are my scrapbook borders all neat and tidy ( and there's even room for a few more!!!)

Linking Up At: 


giveaways
Beyond The Picket Fence
Catch a Glimpse Button

Photobucket


Saturday, March 5, 2011

Knock Off or Knock It Off #2

Copycat Crafts
Call it ICTMTM ( I Can Totally Make That Myself) Inspired By-itis or Knock Off Fever, all of us creative types have it in some form or another.

I had fun with my first real knock off piece that even got featured over at Copy Cat Crafts, it emboldened me to try again. I may have exhausted my skills!

This time, the inspiration came from Ballard Designs. Both in their current catalog and on their website they have several pieces of abstract art, either paintings or digitally printed glicee prints…and they range from $249 to$459. GULP. I can’t draw to save my life but these aren’t still lifes they’re abstract so no one can tell me that my apple looks like a pumpkin.

I liked these from Ballard:
Breaking Through II Handpainted Canvas
First Light I Giclee Print
Grey Haze Hand Painted Print
because even though our house isn’t contemporary, these are really muted and I think they go with many styles. And they’re $249-$429!

So, I had a canvas (previous DIY art) that had been hanging up that I was tired of, and I had paint, and I even had some Golden Gel Medium molding paste that I bought for reasons that weren’t clear to me at the time. I think an art store was closing.

I covered the whole thing in black paint, then smudged ( sorry all you Fine Arts people whom I do truly respect) some of the Gel Medium goop all over with a plastic knife. Dried that overnight. Then I started splotching ( another technical term) various paints on. I used a combination of pewters, silver, grey, black, white, gold. Whatever I had wherever it went. Added some silver rub n buff in places.
IMG_5060

IMG_5056
Closeup of the layering of molding paste and paints
IMG_5057
Another closeup from another section

I know the Louvre or MOMA won’t be calling any time soon but hey, it was stuff I had on hand and it works for now. Be honest. I can take it…I have chocolate.
Linking Up At: 
UndertheTableandDreaming


The DIY Show Off
Tip Junkie handmade projects
Photobucket
Photobucket