Showing posts with label JoAnn. Show all posts

Sunday, March 14, 2021

DIY Jewelry: But First Coffee Earrings


As a Seattle girl originally, I am an "OG" Starbucks customer. I'm talking from the days when there wasn't one on every street corner, in every mall or grocery store or Target. And my drink has always been a Mocha. Hot, usually iced, always a Mocha. While I make my iced Mochas every morning at home and most evenings as well, Mr. Chocolate knows that if we're out...there's a stop involved. I live for the mobile app which has been my lifeline during this pandemic! So when I found some coffee themed charms at JoAnn, it was a no brainer that I was getting them! 

These instructions are the same for clip earrings or pierced with the only change being using an earwire instead of the clip bases. 


Supplies: 
  • hildie & jo charms (JoAnn)
  • Clip earring backs ( Michaels
  • Clip earring "base" (eg something to cover the backs... had these in my stash)
  • Jump rings (Michaels and Jo Ann)
  • Connector Links 
  • Jewelry Pliers
  • Glue ( I use Loctite Gel Control Super Glue)

If you're making clips, the first step is to glue the clip back to the base with a good drop of the Loctite Glue. I like this because it's thicker and doesn't run. Use clamps or clothespins to secure and let dry while you assemble the other pieces. If you're making pierced earrings, see below for when to attach the earwire. 


I chose to go with these two charms and make a par of asymmetrical earrings. The bolder jump rings on the right (also hildie & jo) I had in my stash and used to connect the larger connector links shown at the bottom. I used three connector links for each earring. 


To connect the connector links, open one of the jump rings, thread all three onto it, close. Repeat for the other earring. Add another jump ring to each set of now joined links. 


Repeat the same process to attach the charms. 

If you're making pierced, at this point use one more jump ring to attach an earwire. For clip earrings, attach a jump ring to your completed clip base and use one more to attach the body of your earring. 

This is an easy process to whip up a pair of earrings that can be worn with anything! 


and Iced Mochas too ! 

Sharing At: 


Our Hopeful Home
The House On Silverado 

Saturday, March 6, 2021

St. Patrick's Day: Acrylic Paint Poured Shamrock Sign


This week's BFF Open House Link Party continues here

I've been having fun with some St. Patrick's Day decor. In addition to my Layered Shamrock I had fun with this $1 wood sign from Dollar Tree. 

Supplies:

  • Wood Shamrock Sign ( Dollar Tree)
  • Acrylic Paints 
  • Zinsser Paint Booster ( Lowes)
  • Silicone ( Hardware Store )


Ignore the red hearts. I thought I was going to layer them onto the sign and changed my mind. I found this line of Top Notch paints at JoAnn. I'm not sure if it's an in house brand or not but they are another line of reasonably priced acrylic paints. They make a whole host of other products as well. The Zinsser paint booster is an alternative to Floetrol which is used in a lot of paint pour projects. The silicone you can get at any hardware store. 


I chose to go with a more muted green palette along with some white and a couple drops of gold. So first step was to mix the paints. My formula for small projects is about a capful of the paint booster to 1/3 cup of paint. It's not scientific, I just found it gives the right flow. If you're starting out with paint pouring play around to find the consistency YOU like for your projects. There's no absolute. I squeezed 2-3 drops of the Silicone in and mix well until your paint just looks like paint again. 


Re-using cups is great in practice but I didn't think about pictures. Note to self. Use new cups. But I didn't, so don't be confused by the other colors you see. 


For this project I did what's called a "dirty pour". What this means is layering  the paints in one cup vs pouring each color individually. You can see them start to interact in the cup which they'll do more as they flow once they're on the surface you're painting. 


For a "clean pour" you pour your paints from their respective containers onto the surface one by one. For a "dirty pour" there's the flip step. Place your surface atop your cup, then holding the cup, flip until your surface is on the bottom and the cup with your paints sits atop it. Some paint may leak out but that's OK! 


When you lift your cup you'll see your paints begin to spread and how they've blended and their magic is revealed. I love this part the most! From here, just tilt your surface to spread your paint until your surface is covered. I ended up having to add a little more paint to my pour cup which was fine. I was trying not to have too much and ended up with too little. It's a Goldilocks process!


I love paint pouring so much because no two pieces are alike and each takes on its own personality. If you want exact replication, this art is not for you! 

Once dry, I finished with some black and white check ribbon and kept it simple, just hanging it on a mirror in our entryway. 


I'm happy with it and it was $1! 


Tuesday, January 26, 2021

DIY Jewelry: Hildie and Jo Leather and Silver Earrings


Faux leather earrings are everywhere and I have made some and love them, but nothing beats the real thing! It can get expensive to buy leather though so naturally if you see real leather that's already pre-cut and designed for earrings you buy it right? Especially when it's 60% off which was the case with the Hildie and Jo Leather shapes I got from JoAnn. Hildie and Jo is JoAnn's in house brand of jewelry making supplies and if you're a new or experienced jewelry maker they're a great resource. I loved the simplicity of these shapes but me being me, couldnn't just leave them alone! 

Supplies: 
  • Hildie and Jo Leather Shapes (JoAnn)
  • Hildie and Jo Jump Rings ( JoAnn)
  • Misc. Charms and Metal Beads ( Stash )
  • Head Pins ( Stash )
  • Jewelry Pliers
NOTE: I won't go into basic jewelry making how tos in this post but You Tube is filled with them for the following: 


I had the heart charms in my stash and thought they'd be perfect with the silver leather and just in time for Valentine's season but also universal enough to wear all year round. Since I don't have pierced ears, the earrings I make for myself ( or my mom ) are clips. I used to stress about not having enough different pieces to adhere the clip backs to thinking "they'll all look the same". Then it dawned on me that for pierced ears, ear wires all look the same so I got over it. 


The construction of these is pretty simple. Thread Heart Charm and two small silver beads on head pin and close with a wrapped loop. Replace the jump ring that came with the leather shape and use matching jump rings to attach the the threaded head pin. 


Use jump rings to attach base to earring clip. DONE!

The same process was used for the black earrings. The leather on this was more natural since it's not painted so the edges were a little rougher as you'll see in these pics but when I was all done I just went around the edges with my scissors to trim up. 


Using the same process as with the heart charms, thread the beads on the head pins and close with a wire wrapped loop. Attach to leather with jump rings and attach earring clips. 


And I still have one more pair of leather pieces to play with! 


Sharing At:


Tuesday, April 28, 2020

Why Yes I Do Still Make Things! RAK Thank You Cards Essential Workers


Followers of this blog must wonder "does she actually ever make anything anymore?" and the answer is "she does!"

Things have been crazy busy for a while between a lot of work things, real life things, and some things had to give. I make stuff all the time. What I haven't had or made as much time for is taking photos and editing them to put up here on the blog, or writing blog posts besides my weekly party.  I finally made sure I did. 

Regardless of what our Governor decides next week (which is when he's supposed to make his decision) about relaxing our shelter at home order, we will continue to practice social distancing based on the modeling that shows we haven't yet hit our peak. I'm in a high risk group and don't want to take any chances and I'm also an only child to my little Mommy. So that's that. 

We go out strategically. Grocery shopping and essentials and do some takeout dining to help support local businesses. I've been making it a point to thank the people working who are keeping us going and don't always have a choice whether to be there. I wanted to do something more and one glance at my scrap paper stash gave me the idea to make "Thank You" cards that I could give to them. Maybe it's silly but I'm appreciative of them doing the work to keep us all going and unfortunately I've witnessed some people whose manners are let's just say, absent. 


I bought this great Park Lane Paperie in a curbside order from JOANN's. I like heaving (110 lb) card stock for my cards and this is perfect plus tons of colors to work with. Then I grabbed my baggies of scrap paper leftover from other projects and played. 


I cut each sheet in half so they measure 4.25 x 5.5.  The focal sentiment I did in PrintShop and printed out in three different colors. Measured and cut panels 4 x 5.25 from the scraps and then just mixed and matched. 


Some I did with more than one paper. Others just one sheet. Some embellished w/ glitter tape. Others just simple with the sentiment matted on coordinating scraps. 


I'm trying to be mindful of all that people are going through and I think the world can always use a bit more kindness don't you? 


Monday, February 4, 2019

Black White and Antique Gold Birthday Card


Sharing an easy birthday card that requires no cutting machines or equipment besides a paper cutter and a punch. 

Supplies: 
  • DCWV "Decor Noir" Stack ( I've had this one for a while so not sure if it's still around but I know I've seen similar stacks at JoAnn)
  • Black Cardstock ( I used Recollections 110 lb, Michaels)
  • Antique Gold foiled transparency ( Michaels)
  • Cream and Antique Gold glitter scraps
  • Recollections ( Michaels) Washi Tape
  • Self adhesive 3D sticker embellishment strips ( stash)
  • Star Punch
  • Foam Tape
  • Double sided tape ( I used my trusted tape gun)

The Deco Noir stack includes a couple sheets of different sentiments / sayings like the one I used for the focal. Cut from sheet, trim, add two strips of washi tape, add 3D embellishment strip,  mount to cream glitter scrap. Punch Antique Gold star from glitter scrap and mount with foam tape as shown.


Cut the black cardstock to 5x7 and trim a sheet of the "alphabet" paper from the stack to the same size. Adhere to front of card.  Cut  the transparency to 4.5 x 6.5, and layer the front panel to it, then adhere to card and voila. Done and done!


Monday, April 25, 2016

Lavender and Gold Birthday


The  Mumster's birthday was last week and before knowing that we were losing The Purple One, Prince, I'd made some things for the other Purple One, my mom. She truly could have given Prince a run for his money with her love of purple. 

I'd picked up the lavender beads at Michaels without really having a plan. The plan came together when I found the lavender, gold, and silver handmade paper which gave me the inspiration for the necklace and bracelet I made. 


The bracelet and necklace combine the lavender beads with antique gold. For the pendants, I used antique gold bezels (Darice, avail at JoAnn's) , gold glitter paper (Michaels) and glass domes (CraftFantastic.com).  


The necklace is gold chain with sections of lavender and gold beads. 


I used the handmade paper to make some altered candles ( plain candles, Dollar Tree) and finished them with strips cut from rhinestone sheets ( DCWV) ribbon, and charms.  I used a leftover scrap of paper to cover the box for the jewelry. 

What's a birthday without a card? 


The crackled paper is from Oriental Trading company. I'll have a post later in the week featuring more OTC goodies. The flower is suede paper I picked up when I found the handmade papers. I used a Tim Holtz die to cut the flowers. 

I had some beads and charms left over from the candles so I used them to make a few ribbon bookmarks. One for my mom and a couple extra as gifts. 


Sharing At: 


Wednesday, March 20, 2013

Dear Lizzy Fifth and Frolic Cards...And They Can Be Yours

Dear Lizzy House and Home

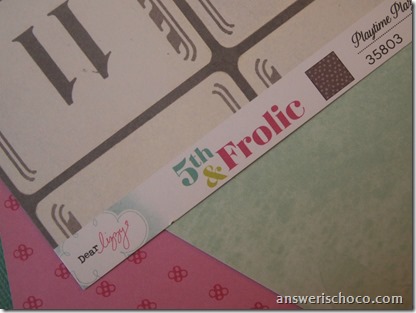
I recently had the chance to play with a new line of papers  available as of March 17th at JoAnns: Dear Lizzy Fifth and Frolic by American Crafts. This is a new line from designer Elizabeth Kartchner. Playing with these papers just put me in a happy mood and how could they not?

Dear Lizzy

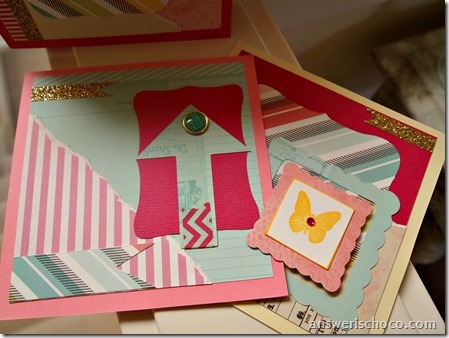
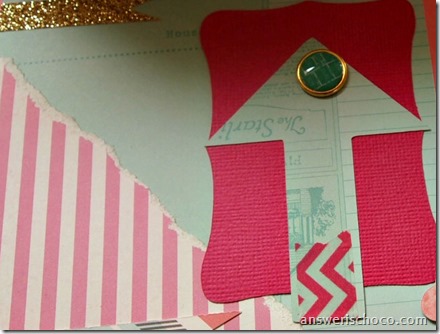
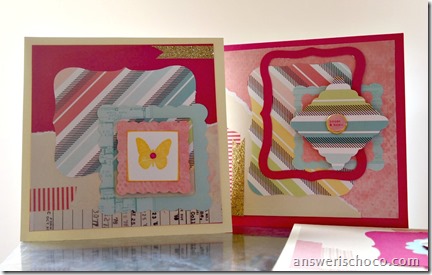
The papers are all double sided in shades of light blue, pinks, yellows, naturals, greens and they all work with each other. I decided to make some cards and went with a really random process in doing so. I chose a couple of the papers and cut several different shapes using my Expression. The papers are great for manual and electric die cutting machines.

Dear Lizzy Shapes

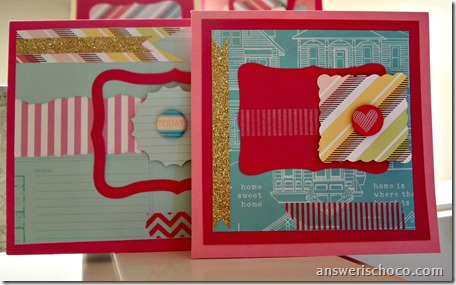
I had some coordinating blank cards in my stash and just kind of started putting pieces together.

Dear Lizzy Cards


Dear Lizzy Cards


Dear Lizzy 5th and Frolic

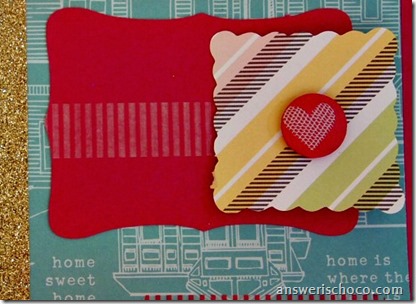
The collection also includes great embellishments like these coordinating brads that I used in the cards:


You can see the entire line here as well as follow the frolicking fun with American Crafts on Facebook, Twitter, Pinterest, Instagram, or
JoAnn Stores on Facebook, Twitter, Pinterest

Fifth and Frolic Dear Lizzy Cards


Dear Lizzy 5th and Frolic

And since I had so much fun making them just because, I’m giving them away “just because”. Super simple. Leave a comment and a winner ( US or Canada only) will be randomly selected.

Disclosure: I received the products used in this post from American Crafts. Opinions and giveaway of cards are my own.