Thursday, December 19, 2013

BFF Open House Link Party #136 "We're In Crunch Mode People!"


The Answer Is Chocolate

OK people. It's crunch time! Less than a week to go before Christmas. More exciting here at the Chocolate house is: THREE DAYS UNTIL COLLEGE BOY COMES HOME!!!!! Not that I'm at all excited. 

Let's take a look at some of the fantastic ideas shared last week and then see what you busy elves have been up to this week. 


I have so much fun walking through Dollar Tree and seeing what I can come up with from what I find. So does Shellie from Saving With Shellie who made this glam gold wreath without having to break the bank. 


Shellie's wreath would look great next to this genius idea from Rachel at Holy Craft. Rachel used up some of her vinyl scraps to make this beautiful gold dot tree using an old window . I can easily see a big heart for Valentine's Day using this technique. 


Wesens Art shared these adorable Wineglass Lampshades. Don't you love the silhouette of the reindeer from the tealight? Again, infinite possibilities for any occasion. 


Oh dear. Bad enough that Hershey's has come out with a chocolate spread but Karyn from Pint Sized Baker has gone and gotten her hands on it. That can only mean more temptation like these mini no-bake cheesecakes. Trouble!

On to this week's party!


Wednesday, December 18, 2013

Did You Know There Were Triple Double Oreos? Oh and Snowman Goodie Bags and Ornaments

College Treats 2013

By now my readers know that I love to send treats to College Boy whenever I get the chance. Those of you who’ve been here through "my" college journey have heard me say that college kids really do love being kids again especially during the stress of finals.

This year I went with a Snowman  / Winter theme and decided to go with dipped Oreos which are my go to treat. I actually screamed out loud in the grocery store when I saw these:

Triple Double Oreos

Triple Double Oreos! The regular filling and chocolate filling and three layers of the cookie all in one. Had to get!

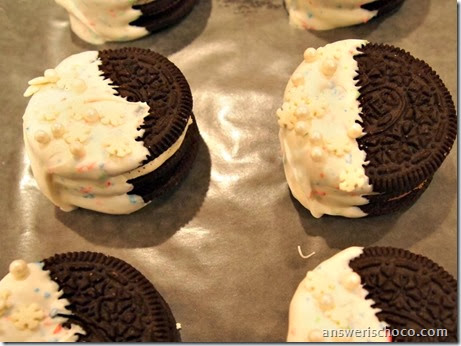
Dipped Triple Double Oreos

And because clearly there wasn’t enough sugar involved as is, I dipped them in confetti candy melts and sprinkled them with sugar pearls and snowflakes ( All cookie decorating supplies: Wilton). The look like they’ve been dipped in snow .

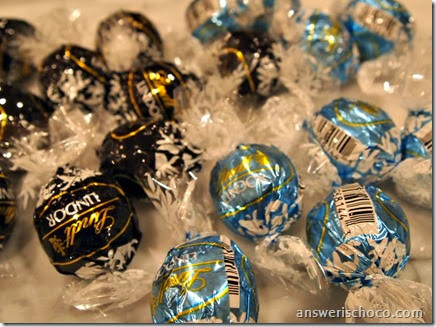
I found some Lindt Truffles at the store that matched the color scheme of the bags I had as well as the confetti candy melt:

Lindt Truffles

White chocolate and dark chocolate and the blue and black wrapping was perfect.

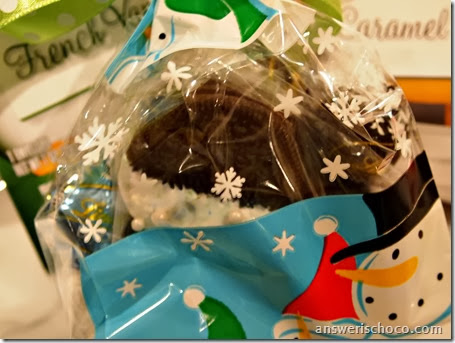
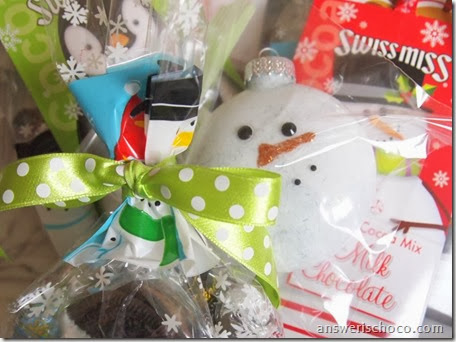
Triple Double Oreo Goodie Bags

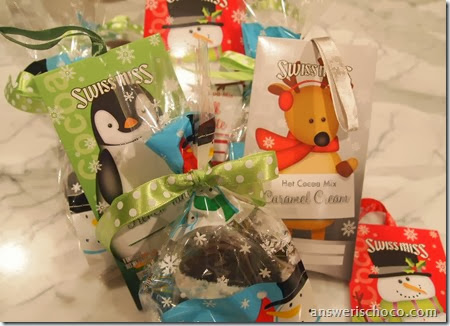
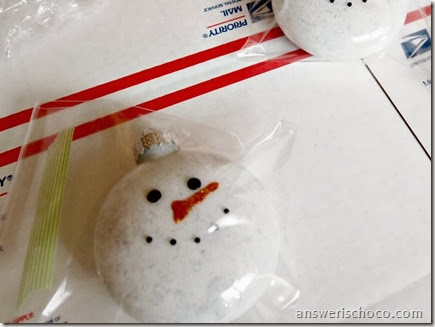
The dipped cookies and truffles went in cello snowman bags and then I picked up individual hot chocolate packages to go with each goodie bag. I finished everything off with a snowman ornament for each of the recipients.

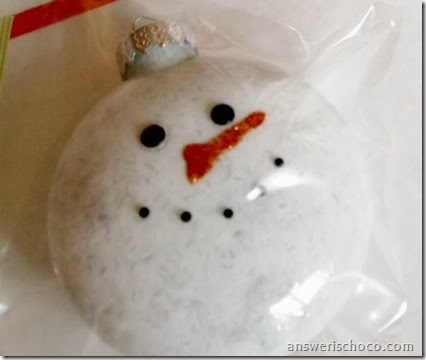
Frosty Ornaments

Snowman Treats

The ornaments were super super easy!

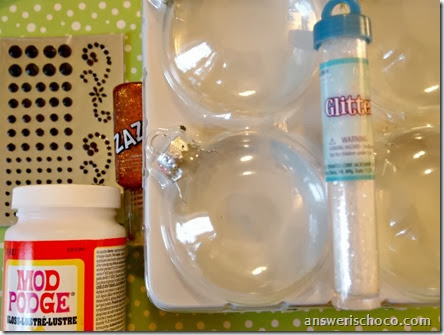
Supplies:
  • Clear Glass Ornaments ( I used the flat round ones you can find these at any craft store)
  • Mod Podge
  • Glitter
  • Self Adhesive Rhinestones
  • Glitter Glue ( I used ZAZZ Copper )

Snowman Ornament Supplies

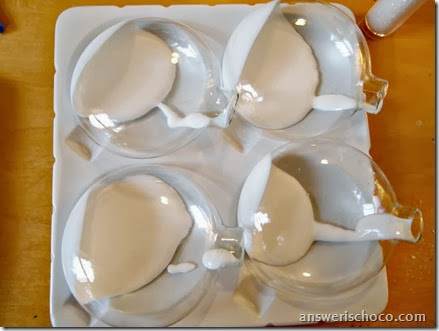
I swizzled the ornaments with a little alcohol and water to clean them and once dry poured in some Mod Podge:

Mod Podge Ornaments

Swirl your MP around inside the ornament until fully coated, pour in glitter, shake to coat. Turn your ornaments upside down in a cup to drain and dry.

I used self adhesive rhinestones for the eyes and mouth and just freehand drew the nose with the glitter glue tip. SO EASY!

Frosty Ornaments

Monday, December 16, 2013

Vintage Winter Wonderland Mantle

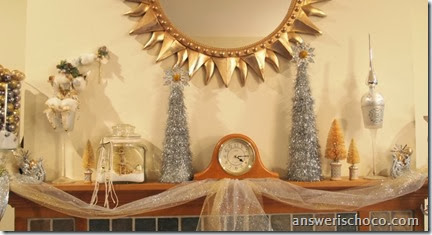
Vintage Christmas Mantle 2013

Are you a traditionalist who uses the same decorations each year no matter what, or are you someone who has to have a new look every year? Or, are you like me… a combination of both?

Thought I’d share this year’s mantle which is a combination of new additions and repurposed pieces from prior years.

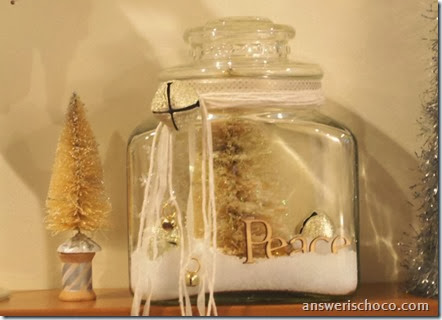
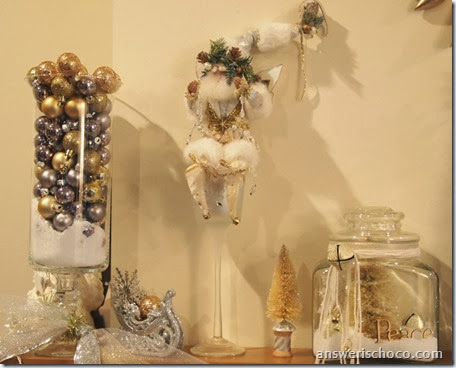
VIntage Repurposed Christmas Jar

New to the mantle this year are my Vintage Christmas Vignette in a Jar and Bleached Bottlebrush Trees.  I decided I wanted a “Winter Wonderland” theme this year so chose metallics and white as my color scheme.

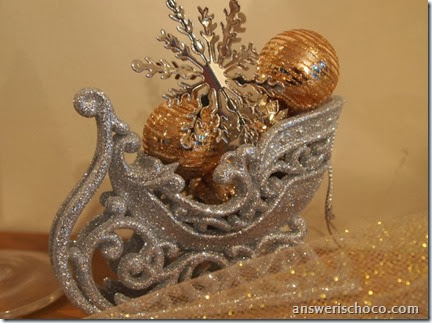
Ornament Display

Since I do like to change things up I try to keep it budget friendly so after Christmas shopping is a staple. I picked up these glittered sleigh ornaments last year for 50% off at Macy’s and then filled them with small gold ornaments ( also a post-Christmas find). Topped with a metal snowflake ornament.


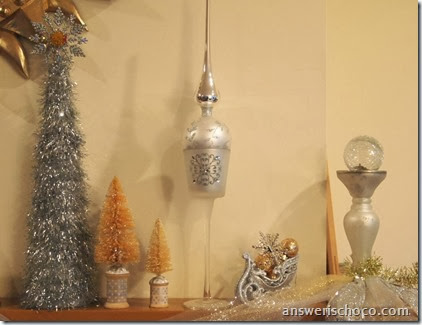
Vintage Christmas Mantle Silver

I made the silver tinsel trees a couple of years ago with supplies from Dollar Tree. To change them up I swapped out the previously red pom poms in the middle of the snowflake toppers with gold. A silver mercury glass tree topper rests in a stemmed votive holder…more after Christmas deals from prior years.

Vintage Mantle 2013

A DIY hurricane vase ( $1 candlestick glued to $1 vase…thank you Dollar Tree) is filled with silver and gold balls and some epsom salt snow.  I collect Marc Roberts faeries and this one matched my mantle so he sits atop another stemmed votive. To complete my mantle, I added metallic silver and gold glittered tulle.

Thursday, December 12, 2013

BFF Open House Link Party #135

The Answer Is Chocolate

Happy Friday eve all! Hope everyone is managing to stay dry and warm. YIKES...we're less than two weeks out from Christmas already and if last week's party is any indication, you all are on top of things. I am counting down the days until College Boy comes home. I want the time to go by fast and slow at the same time.  Here are just a few ideas that caught my eye. 


Gifts don't have to be huge or expensive to be thoughtful.  Stacey at Glued to My Crafts has an easy way to show your thanks or complete your stocking stuffers.


Fonda, over at Southern Scraps has I think my favorite upcycled sweater idea EVER. Combine an old but festive sweater with embroidery hoops for adorable ornaments to keep or give as gifts. 


How totally awesome is this washi tape reindeer? I can't count the ways. Visit the guys at Crafty Lumberjacks for the details. So many possibilities. 


This week's chocolate feature is almost too eat. Who wouldn't love a piece of this gorgeous Chocolate Mont Blanc cake? Katerina from Culinary Favors shares the steps for making this incredible creation. 

Now it's time to see what everyone's been up to. 


Tuesday, December 10, 2013

Dollar Store Decor: Chalkboard JOY Sign

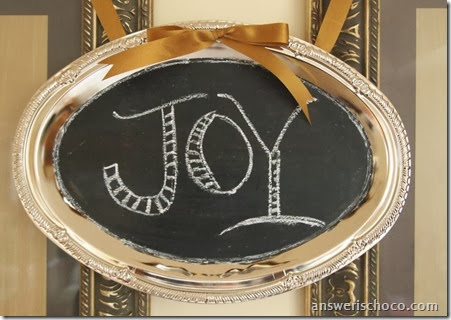
Chalkboard JOY Tray

Sometimes you have a project in mind and you go in search of the supplies. Other times, you pick up something for your stash knowing that you’ll use it someday. And yet other times, you stumble upon something that gives you the spark to use stuff you already had on hand (because you picked it up knowing you'd use it someday) .  I know I'm not alone.

For this project you will need:
  • “Silver” oval tray from Dollar Tree
  • Chalkboard paint (I used Martha Stewart)
  • Chalk
  • Ribbon
  • Hot glue
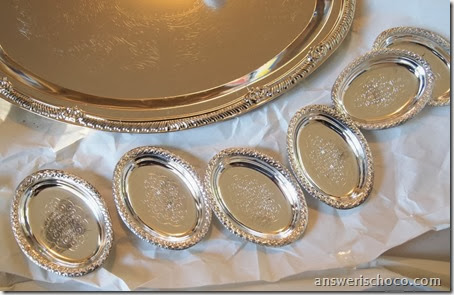
I have a few of these Dollar Tree silver trays in my stash. I mean they’re $1 so they're useful for something right? Maybe even to serve food.

Dollar Tree SIlver Tray

What I didn’t have (and still don’t know what they’re for) are the mini silver trays that coordinate. Tea bag holders? Dunno. I stumbled upon them at an antique store and for a few dollars, thought “there’s a project here somewhere and oh hey, tray stash at home” which turned out to be adding some additional decorations to my dining room for Christmas.

First the big tray:
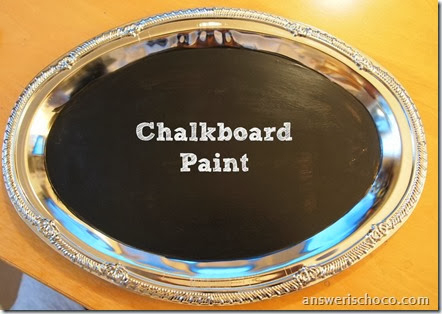
Chalkboard Painted Tray


Paint the inside of the tray with chalkboard paint. Let dry completely between coats. I did three coats. I also learned by the third coat that a foam brush works better than a bristle brush. The instructions said to let the paint cure for at least 24 hours. Patient crafting is not my thing but I did it.

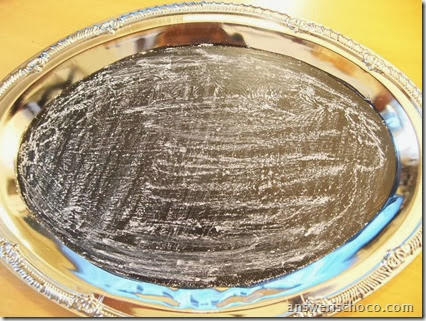
Chalkboard Conditioned Tray

To condition your chalkboard before you write anything on it, cover the surface with chalk. This is a good way to let your inner child out. Especially if you’re in a bad mood. Scribble that mood away! Wipe the surface with a clean cloth then do your thing.  I kept it simple and just wrote JOY. I’ll probably change it to 2014 for New Year’s. See…décor mileage!

Hot glued gold ribbon the the back and made a bow and glued it to the front and washi taped it to two pictures in our dining room. 


Holiday Lampshade


Holiday Decor Lamps

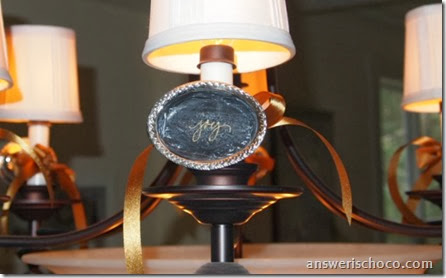
I decided that the mini trays would be a fun way to decorate our dining room light fixture. This is one of those idea that make Mr. Chocolate say “ What goes in in that head? " This is also when I know he likes a project.

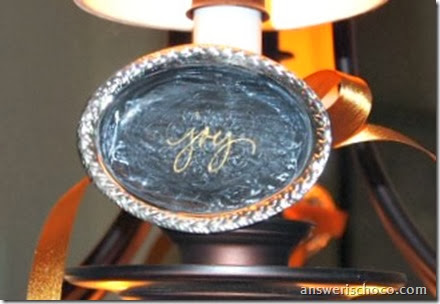
Process is the same only after I conditioned my chalkboard, I used a paint pen to write the words. Glued a satin ribbon the back of each and then tied to each of the six lamps on my fixture.

Mini Chalkboard Trays

I could also see these as place cards, or buffet food markers or used to embellish a glass jar candle….or yep that’s what goes on in this head. Of course I have no idea what they’re supposed to be used for and no intention of finding out!

Since I already had the paint and chalk on hand, cost was around $5.

Sharing At: 

Monday, December 9, 2013

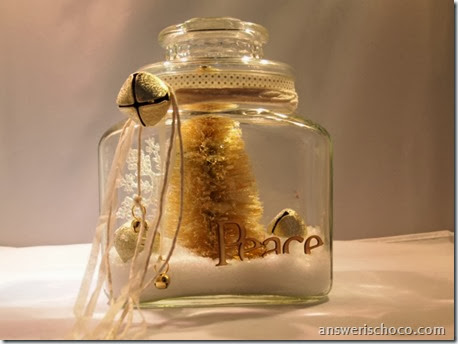
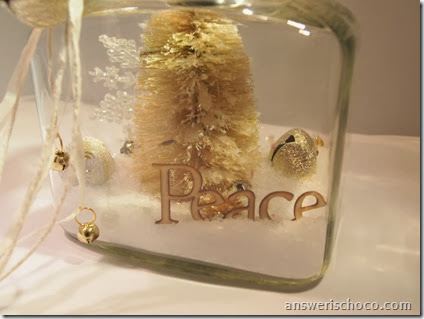
Winter Wonderland Repurposed Storage Jar

Christmas Jar 3

We visited our favorite little antique town this weekend and while there, I picked up a clear glass storage jar. Maybe it was seeing all of the vintage Christmas displays in the stores but I immediately had an idea mind for my jar which also provided another chance for me to bleach  more bottlebrush trees. You can check out this post for more on the trees.

Christmas Repurposed Jar

For this project you will need:
  • Large glass storage jar with removable lid
  • Bleached bottlebrush tree
  • Epsom Salt
  • Jingle Bells (large and small)
  • Snowflake pick
  • Wood Word or letters
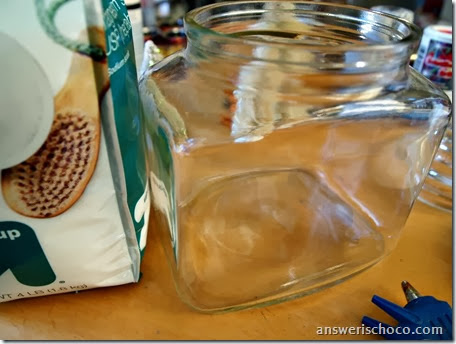
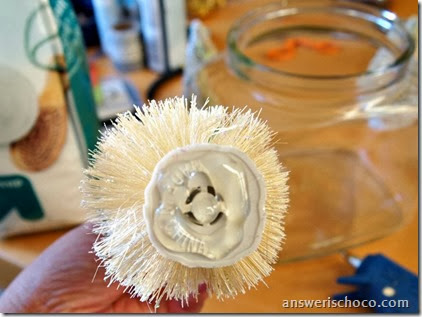
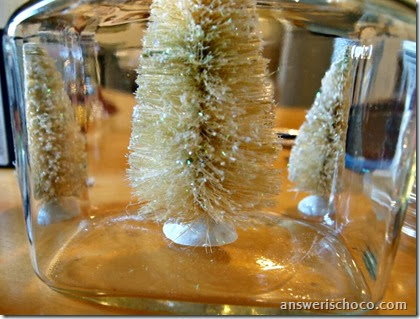
After cleaning up your jar, glue the bleached tree to the bottom.

Christmas Repurposed Jar 2

I put a big glob of hot glue on the bottom of the tree since I wanted it to stand firmly in the jar. Once the tree’s glued in, pour in some of the epsom salt and then drop in a few of the jingle bells, add more salt. When satisfied with the depth, place the snowflake pick and phrase inside the jar. I sprinkled some iridescent glitter on top.

Christmas Repurposed Jar 1


Christmast Repurposed Jar 4

Cover the rim of the jar with a coordinating washi tape, twine, and ribbon, and then tie a few jingle bells to the ends.

VIntage Repurposed Christmas Jar

It’s sitting on my Winter Wonderland vintage mantle with my other bleached trees.


Sharing At: 


Thursday, December 5, 2013

BFF Open House Link Party #134

The Answer Is Chocolate

It's hard to believe that Thanksgiving was already a week ago and Hanukkah has come and gone. December shows no signs of slowing down. We had a smaller party last week due to the holiday but here are some fab features. Can't wait to see what everyone's been up to this week !


Tis the season for baking so whip up these adorable and festive peppermint mocha cupcakes. They are too pretty to eat! Visit Life With the Crust Off for the details. 


Printables are such an easy and inexpensive way to update your decor. This one from 24 Cottonwood Lane is no exception. 


I think your table should be as amazing as the food you prepare. Digiscrapboutique  shared how to use scrapbooking supplies to dress up a holiday table. 


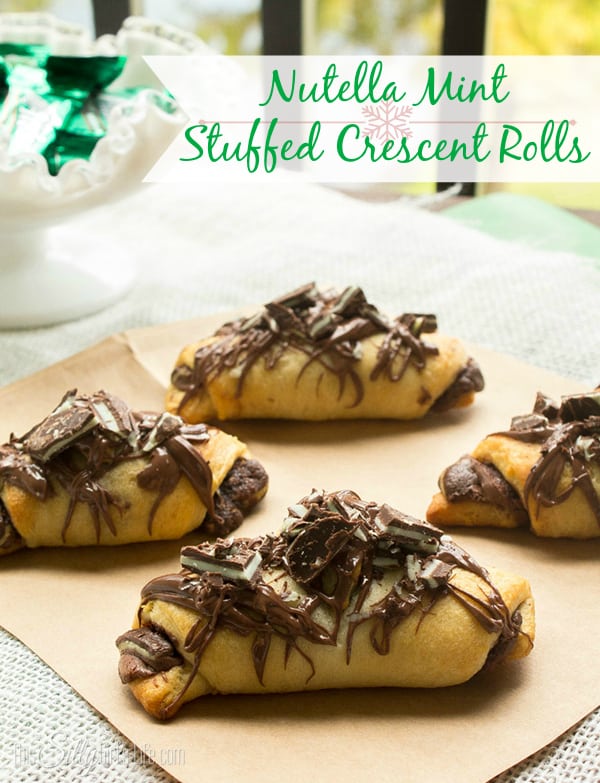
The holidays just scream chocolate and mint don't they? How about these Nutella Mint stuffed crescent rolls? Yes please. Stop by This Silly Girls Life for the how to.  

Now, onto this week's party!