I'm sure everyone is busy cooking baking, packing, or traveling ....maybe all of the above. I've been up since before the sun came up and the cranberry sauce is done, the pumpkin pie and chocolate pecan tart baked, the turkey brining, and the bread dough rising. But before I sit down to peel apples and the day gets any further away from me, I wanted to pause and say thanks.
I love this time of year which reminds us to stop and think about all the things for which we really have to be grateful. Included in the many many things for which I will give thanks tomorrow, I include you all. Truly, the talented, supportive, creative, funny, and smart people I've met through blogging are among my blessings. I read every comment left, recognizing that someone took time out of their day to share a thought with me. I appreciate that you all put up with ( and get!) my cheesy puns and sense of humor. I am so very thankful to have a creative community that constantly inspires me. My husband's grateful that I have people who get as excited as I do about how many things you can Mod Podge and glitter, and who understand why it's not redundant to need more than one die cutting machine.
I wish everyone a very Happy Thanksgiving, filled with great food shared with those you love. Thanks for enriching my life!
Showing posts with label Thanksgiving. Show all posts
Showing posts with label Thanksgiving. Show all posts
Wednesday, November 23, 2011
Sunday, November 20, 2011
Our Thanksgiving Table
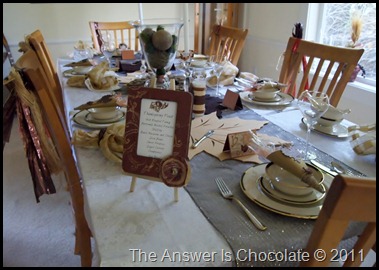
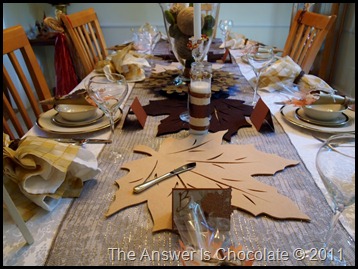
Cleaning out and cleaning the refrigerator don’t count as creative projects. Necessary, but not creative! But I did also set our Thanksgiving table so I did do get to do something a little creative.
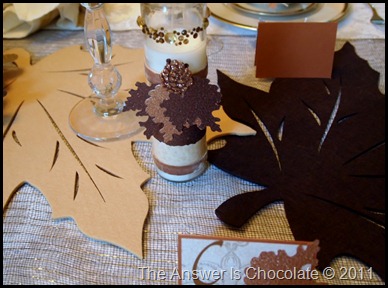
We’re not super formal on holidays but Thanksgiving and Christmas are the two times a year I at least get to break out the wedding china. This year I went for a mix of nature and glitz.
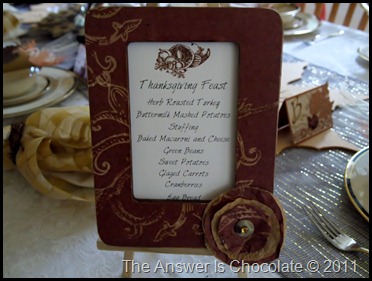
Our menu is pretty traditional. Herb roasted turkey, stuffing, mashed potatoes, sweet potatoes, green beans, glazed carrots, fresh homemade cranberry sauce, and an egg bread I’ve been baking since I was 16. I’m one of “those” people…I cook it all and I love it. For dessert there will be pumpkin and apple pies, vanilla whipped cream, and a chocolate pecan tart.
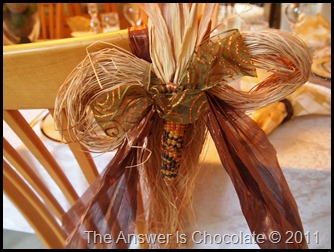
I’ve had these raffia bows forever and this year I used them as chair decorations, with metallic organza ribbon and mini Indian corn.
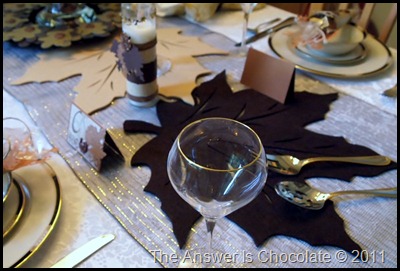
Here are the Thanksgiving candles and place cards I shared earlier.
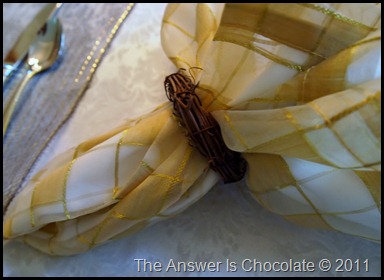
For napkin rings, I just used mini grapevine wreaths I found at Michaels for $.49 ea.
I don’t put out all the flatware that you’re “supposed to “ for a proper place setting because the unused stuff ends up getting scooped up between dinner and dessert and I end up starting all over anyway. SO it stays put and I get it out when its needed. Sorry Emily Post.
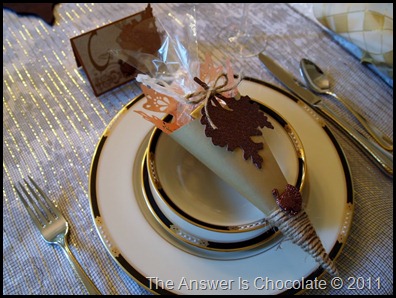
I filled my table favor cones with Hershey’s Toffee Crunch Nuggets wrapped in cone shaped cellophane bags that fit perfectly in the favors.
I’ll leave you with this recipe because every time I mention I make cranberry sauce from scratch, people look at me like I have three heads. It is SO SO EASY ( but you can definitely let people think it’s hard). Mr. Chocolate eats this stuff as a side dish so I start stocking up on fresh cranberries as soon as they hit the stores, freeze them right in the bags, and make this several times during the year.
![]()
We’re not super formal on holidays but Thanksgiving and Christmas are the two times a year I at least get to break out the wedding china. This year I went for a mix of nature and glitz.
I’ve had these raffia bows forever and this year I used them as chair decorations, with metallic organza ribbon and mini Indian corn.
For my table runner, I used a woven chocolate brown and gold giant ribbon roll I found at JoAnn’s for 70% off!!! $3 for my table runner ! I also found these felt maple leaf place mats at Bed Bath and Beyond for 2 for $3. I bought 2 in maize and 2 in dark brown and just angled them along the runner.
For napkin rings, I just used mini grapevine wreaths I found at Michaels for $.49 ea.
I don’t put out all the flatware that you’re “supposed to “ for a proper place setting because the unused stuff ends up getting scooped up between dinner and dessert and I end up starting all over anyway. SO it stays put and I get it out when its needed. Sorry Emily Post.
I filled my table favor cones with Hershey’s Toffee Crunch Nuggets wrapped in cone shaped cellophane bags that fit perfectly in the favors.
I’ll leave you with this recipe because every time I mention I make cranberry sauce from scratch, people look at me like I have three heads. It is SO SO EASY ( but you can definitely let people think it’s hard). Mr. Chocolate eats this stuff as a side dish so I start stocking up on fresh cranberries as soon as they hit the stores, freeze them right in the bags, and make this several times during the year.
Picture and Recipe, courtesy of Ocean Spray’s website
Ingredients:
1 cup sugar
1 cup water
1 12-ounce package Ocean Spray® Fresh or Frozen Cranberries
1 cup water
1 12-ounce package Ocean Spray® Fresh or Frozen Cranberries
Directions:
Combine sugar and water in a medium saucepan. Bring to boil; add cranberries, return to boil. Reduce heat and boil gently for 10 minutes, stirring occasionally. Cover and cool completely at room temperature. Refrigerate until serving time. Makes 2 1/4 cups.
Can it get any easier than that? I usually add some fresh orange zest or even just strips of peel to the sugar / water before I add the cranberries, or if I don’t have oranges on hand, reduce the water by 1/4C and replace with orange juice. You could also add a cinnamon stick or cloves if you want a little spice.
Sharing At:
Wednesday, November 16, 2011
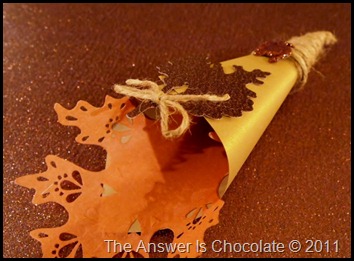
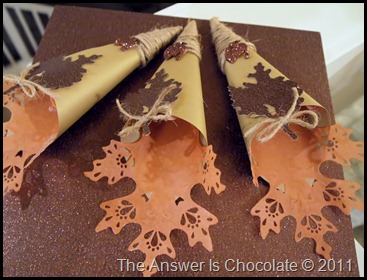
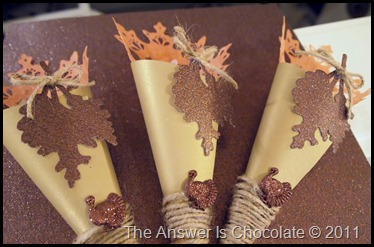
Thanksgiving Table Favors “Cone-u-copias”
I always like to have a little something on the table for guests. Like most of my projects, this idea just kind of came to me and I ran with it hoping it would pan out.
Since cornucopias are such an iconic symbol of Thanksgiving, I thought paper cones were in order.
Since cornucopias are such an iconic symbol of Thanksgiving, I thought paper cones were in order.
You’ll need:
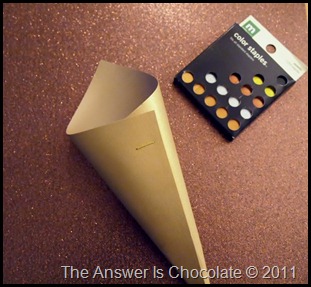
- Lightweight cardstock cut 6x6. I used a metallic gold by Recollections from Michaels
- Jute twine
- Embellishments
- Die Cuts
I formed my cone shape and taped and stapled together.
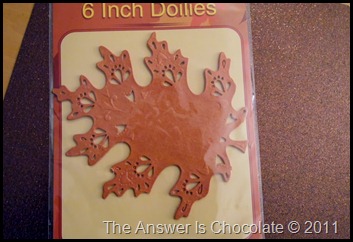
Pretty boring right? I had this package of leaf shaped doilies I found on one of my Dollar Tree trips and thought hmmm….maybe they would work here.
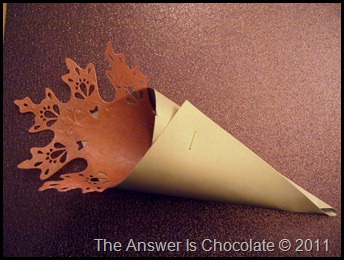
I just ran a line of tape down the center of my cone and stuck a doily about halfway in. Better. Still kinda boring. In lieu of a doily, you could use a big die cut.
What isn’t made better with jute? Ran a line of hot glue down the back of the cone starting about 1/3 of the way from the bottom and then wrapped my jute around ending at the bottom. Had some more glittered turkeys from other projects ( Recollections) and glued one on top of the twine.
Then die cut oak leaves using the Memory Box Leaf Trio die I used on my place cards and candles and scraps of Core’dinations glittered paper, made and glued on a jute bow at the stem, and glued to the cone. Done and done!
Tuesday, November 8, 2011
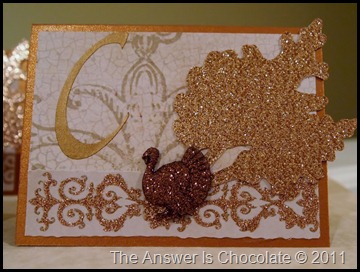
Thanksglitter Place Cards
I am in love with Core’dinations glitter cardstock. It’s what I used in my “All That Glitters” wreath, and as I mentioned in that post, I couldn’t resist buying several other colors. Psssst….it’s on sale this week at JoAnn’s…5 sheets for $.95. That’s a lot of bling for under a buck!
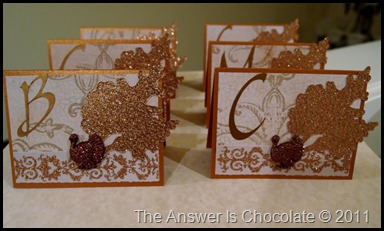
I decided it was time for new place cards this year and a color called Copper Shimmer went perfectly with the project I shared over at A Glimpse Inside today.
I cut my place cards from copper cardstock (4x6, so they’ll be 4x3 when folded), then panels from K and Company’s Fall Wheat Scroll paper, edged them with coordinating (and glittered) scrapbook borders from KandCo.
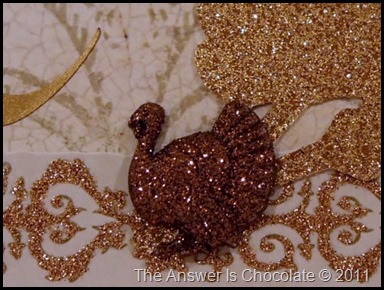
Ran Memory Box’s Fall Leaf Trio die through my die cut machine and cut the leaves from the Copper Shimmer paper. Cut everyone’s initials on my Expression (Jasmine cart) from the same great metallic vinyl I used on my Autumn Lantern, and finished with more of the glittered turkeys I used on my wreath. Is that enough glitter for you? lol .
Hello. My name is Carol, and I’m a glitterholic.
I decided it was time for new place cards this year and a color called Copper Shimmer went perfectly with the project I shared over at A Glimpse Inside today.
I cut my place cards from copper cardstock (4x6, so they’ll be 4x3 when folded), then panels from K and Company’s Fall Wheat Scroll paper, edged them with coordinating (and glittered) scrapbook borders from KandCo.
Ran Memory Box’s Fall Leaf Trio die through my die cut machine and cut the leaves from the Copper Shimmer paper. Cut everyone’s initials on my Expression (Jasmine cart) from the same great metallic vinyl I used on my Autumn Lantern, and finished with more of the glittered turkeys I used on my wreath. Is that enough glitter for you? lol .
Linking Up At:
Thursday, November 3, 2011
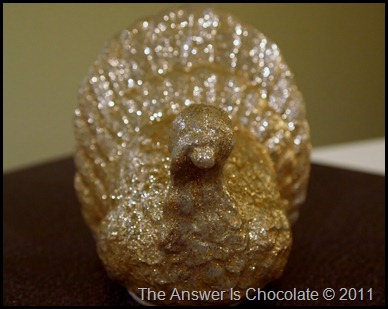
These Turkeys Were Screaming For a Makeover
I was wandering through JoAnn’s ( I swear, the car just goes there by itself) and even though I’m a crafter and thus a season ahead, it wasn’t even Halloween yet and the Fall and Thanksgiving stuff was already 70% off. Who am I to argue? Had to peek!
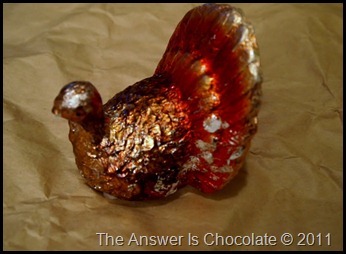
I stumbled upon a pair of these poor turkeys who’d been left behind when all the other Thanksgiving stuff went home with people. They were sitting there, kinda pitiful looking. Just staring at me.
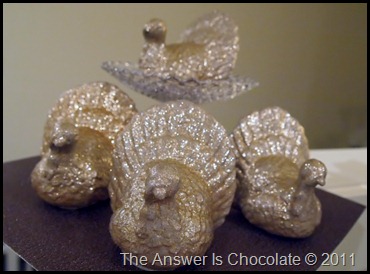
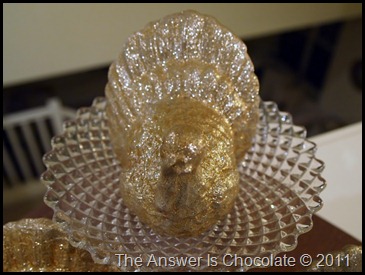
I’m thinking they’re much happier with their new look. And I’m happy with my $5 investment! They’re either going on my dining table or mantle. Haven’t decided yet.
I stumbled upon a pair of these poor turkeys who’d been left behind when all the other Thanksgiving stuff went home with people. They were sitting there, kinda pitiful looking. Just staring at me.
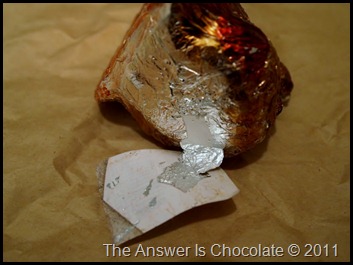
The were covered in some sort of foil but these poor birds were molting. I mean this stuff was coming off:
I picked them up. I put them down. They kept staring at me. I walked away. I came back. OMG, they brought friends! Now there were two pairs of them. I figured I better just get them for a whopping $1.19 each before they multiplied. Again.
Once I got them home I started picking off the foil but that got tedious fast. So I figured what the heck. I’ll just paint over them. I gave them a coat of a satin finish acrylic paint, let that dry, then went over with a similar color glitter paint. They were better after the first coat, but here they are after two coats of glitter paint. What do you think?
I’m thinking they’re much happier with their new look. And I’m happy with my $5 investment! They’re either going on my dining table or mantle. Haven’t decided yet.
Linking Up At:
Wednesday, November 24, 2010
From Our Home To Yours..
Wishing you all a very Happy Thanksgiving! I have so many blessings to be grateful for and included among them are the wonderful bloggers and friends I've met. Hope you each spend time with those you love. And yikes...Christmas is one month from Turkey Day exactly!
Tuesday, November 2, 2010
A "Banner" Crop of Gratitude with Tute
OK I've gone a little overboard on the banners. I think I'm done because I really need to be working on some more stuff for the craft show I'm doing later this month but I decided to do one more banner so here 'tis:
It's hard for me to get a good shot of the whole thing so here it is broken down into two parts:
Here's the tute:
Create letters of varying sizes ( you could use varying fonts too but I used the same one)
Print out on lightweight cardstock. I used cream. Cut out each letter and adhere to slightly larger black panel.
I used my Cricut (Accent Essentials cartridge) to cut out scalloped edge squares of patterned paper but you could use a large punch or decorative edge scissors to do to the same . Adhere to black cardstock:
Adhere your letters to your prepared panels using foam dots. I put every other letter at an angle because...I did ( you thought there was a plan?).
Grab some clothespins. I bought a ton when one of the Dollar Stores was going out of business. Use your patterned paper scraps to cover one side of your clothespins. Grab some embellishments. I used paper flowers, buttons, and adhesive rhinestones:
Once all of your clothespins are assembled, line them up and take a picture cause they're cute:
Tulle has become my new favorite banner hanging thing. The rolls of it they sell with the wedding stuff not the kind on bolts in the fabric store. It's inexpensive, sturdy and and plus it's tulle. What's not to like? Clip your letters to your tulle ( I roll it out as I go along so I know how much I need) and you're done! Here's a close up of one of the letters:
I don't know how to attach it but I did make a pdf of the letters so if you would like it, just email me.
It's hard for me to get a good shot of the whole thing so here it is broken down into two parts:
Here's the tute:
Create letters of varying sizes ( you could use varying fonts too but I used the same one)
Print out on lightweight cardstock. I used cream. Cut out each letter and adhere to slightly larger black panel.
I used my Cricut (Accent Essentials cartridge) to cut out scalloped edge squares of patterned paper but you could use a large punch or decorative edge scissors to do to the same . Adhere to black cardstock:
Adhere your letters to your prepared panels using foam dots. I put every other letter at an angle because...I did ( you thought there was a plan?).
Grab some clothespins. I bought a ton when one of the Dollar Stores was going out of business. Use your patterned paper scraps to cover one side of your clothespins. Grab some embellishments. I used paper flowers, buttons, and adhesive rhinestones:
 |
| Plain clothespin, paper to fit, paper flower, button, completed pin ( OK minus rhinestone but you get the gist) |
 |
| See, there are the rhinestones |
 |
| OK this is mostly because I am playing around w/ settings on my camera and figured out my color accent thingy |
Subscribe to:
Posts (Atom)

