

I saw these making the rounds last Christmas decorating season after I was done and definitely wanted to try making some this year. There are a gazillion tutorials on Pinterest and You Tube so I'm not going through a step by-step but rather sharing some tips I learned while making them.
Supplies:
- Brown Paper Lunch Bags (Can also use white or other colors but these are easily found)
- Hot Glue Gun and Glue Sticks
- Sharp Scissors
- Scrapbook Papers

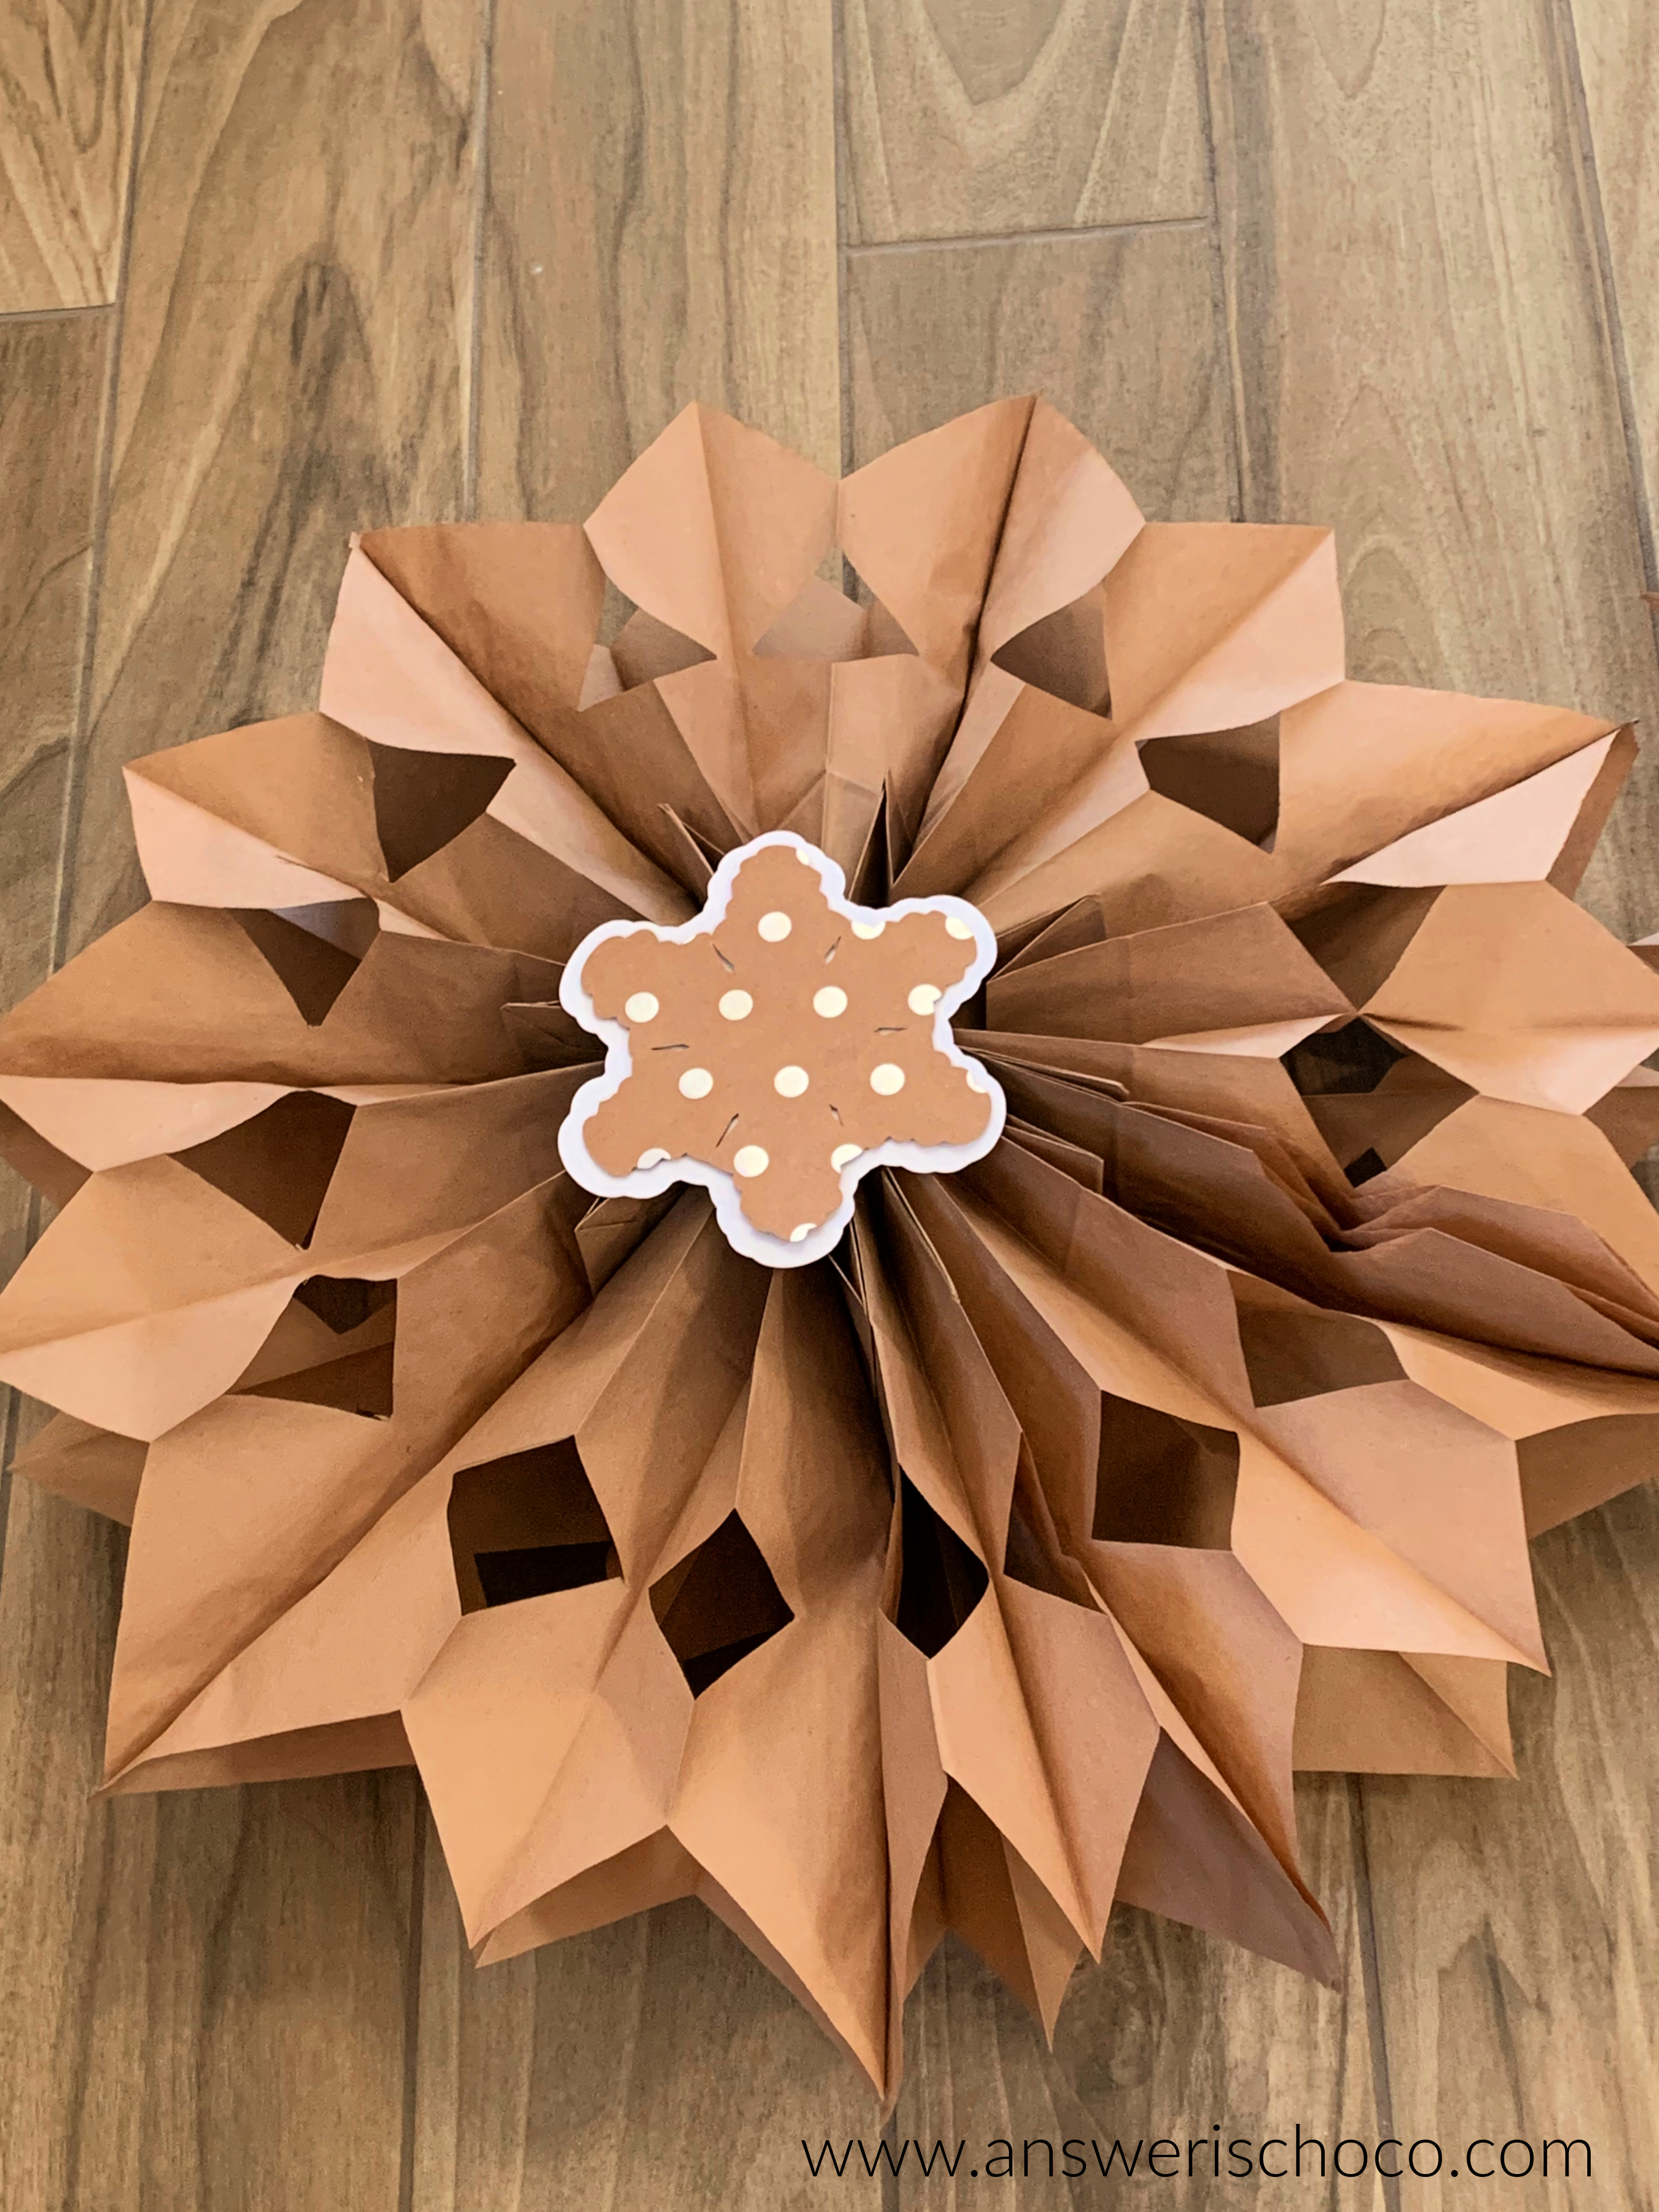
The best part of these is how inexpensive they are and the bang for the buck! I already had these on hand from Walmart. Dollar stores are a great place to find them as well. I used 9 bags which was the most consistent number of bags I ran across looking at tutorials.
I saw some tutorials that said it didn't matter whether your bags were "flappy side" up or down as long as you used the same side. I tried both ways but had success with "flappy side" down. If you are wondering what I'm talking about, the "flappy side" is where the bottom of the bag folds up to lay flat in the package.

Flip your first bag over and run a line of hot glue across the bottom and another up/down the middle to connect and make a T.

I also saw where some people glued all of the bags together before cutting and others that started with three bags, cut your design, layer the next three, use the first three as your guideline then cut, finish with the final three.
The design possibilities are ENDLESS but I kept it simple so I could get the technique down. Decorative edge scissors and hole punches would also add character.
I did a simple cut by trimming the edges of the bags to a point and adding triangle cuts on the sides. You can measure or do freehand.


Once all nine are glued together it looks like this from the side:

Once the nine bags are stacked, glued, and cut, open like a pinwheel and glue the two unglued sides together. I was working to get this done before the glue cooled so no pics.


I made these to hang on our fireplace wall. We don't have a mantel but I wanted something festive for this area. I just started decorating (I am an absolutely AFTER Thanksgiving decorator and usually not until December). I got some very cool wood bead garland I'm planning to add here but I needed to know I could do these first!

They're hanging on the panels that are on either side of the fireplace. Mr. Chocolate gave me one of his "This woman is nuts" looks since I woke up early this morning and did them and he knows they weren't there when he went to bed last night.


