Showing posts sorted by date for query egg. Sort by relevance Show all posts

Saturday, March 31, 2012

Easter Decor: HOP Printable

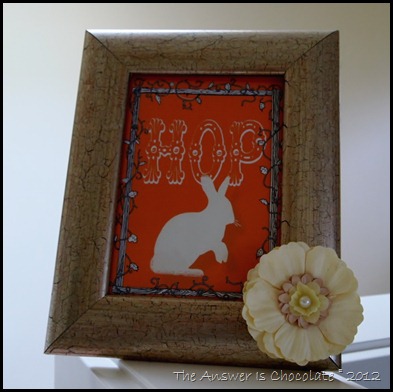
I have done absolutely nothing for Easter. True confession time. I still had my St. Patrick’s Day printable in the frame that I change out each month / holiday! What can I say? Life is what happens when you’re busy making other plans to decorate for Easter.

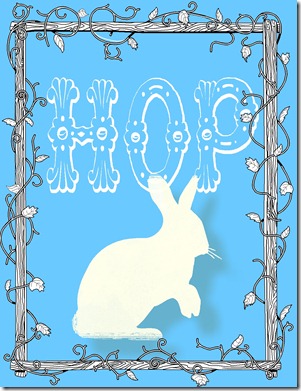
I couldn’t let it go another day  so I made a new Easter printable :

HOP Printable
The font I used is called Grolier Beveled which I downloaded free here.

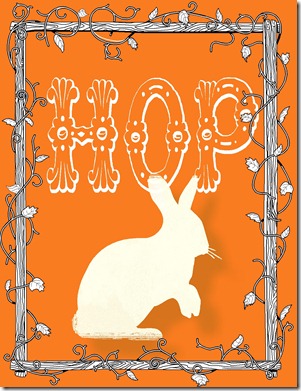
And what’s the fun of making a printable if you don’t share? I went with the orange version here because I usually go so neutral and Mr. Chocolate likes orange. Plus what's a bunny w/out a carrot so he has a carrot orange background! True to form, I made a neutral version just because ….

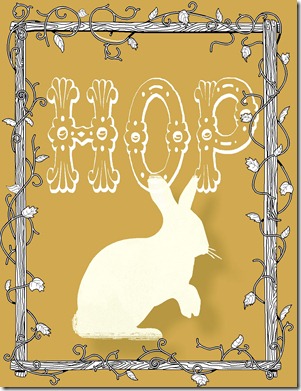
Natural:
HOP Tan
Orange:
HOP Orange
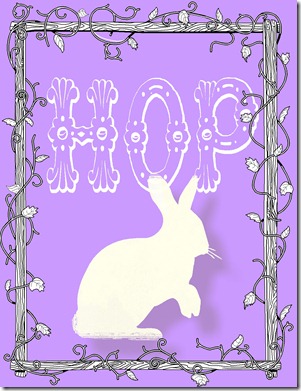
Lavender:
HOP Lavender
Robins Egg:
HOP Robins Egg

Click on your preferred color to bring to full size, then right click to Save As. I re-sized mine to 5x7 to fit my frame.

Sharing At: 
Polish The Stars

Sunday, November 20, 2011

Our Thanksgiving Table

Cleaning out and cleaning the refrigerator don’t count as creative projects. Necessary, but not creative! But I did also set our Thanksgiving table so I did do get to do something a little creative.
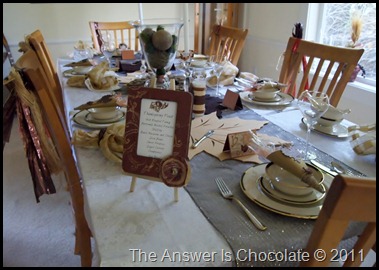
PB193580
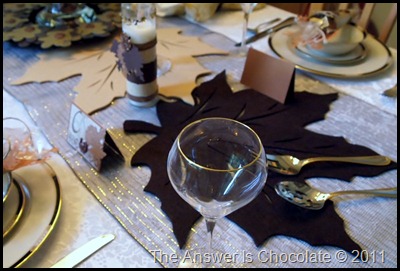
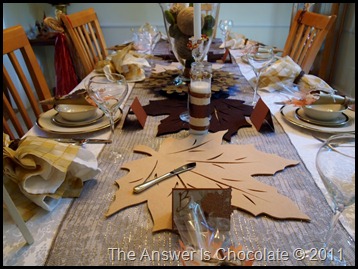
We’re not super formal on holidays but Thanksgiving and Christmas are the two times a year I at least get to break out the wedding china. This year I went for a mix of nature and glitz.
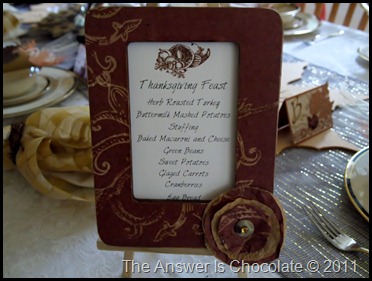
PB193581

Our menu is pretty traditional. Herb roasted turkey, stuffing, mashed potatoes, sweet potatoes, green beans, glazed carrots, fresh homemade cranberry sauce, and an egg bread I’ve been baking since I was 16.  I’m one of “those” people…I cook it all and I love it. For dessert there will be pumpkin and apple pies, vanilla whipped cream, and a chocolate pecan tart.
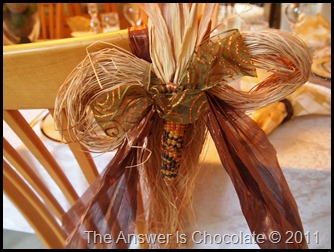
PB193589
I’ve had these raffia bows forever and this year I used them as chair decorations, with metallic organza ribbon and mini Indian corn.
PB193587
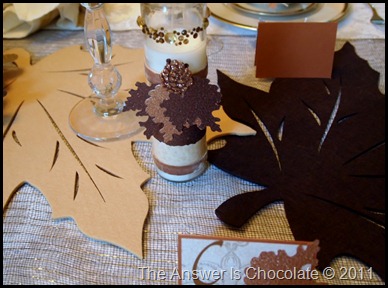
For my table runner, I used a woven chocolate brown and gold giant ribbon roll I found at JoAnn’s for 70% off!!! $3 for my table runner ! I also found these felt maple leaf place mats at Bed Bath and Beyond for 2 for $3. I bought 2 in maize and 2 in dark brown and just angled them along the runner.
PB193597
Here are the Thanksgiving candles and place cards I shared earlier.
PB193595
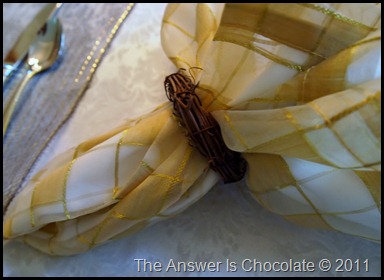
For napkin rings, I just used mini grapevine wreaths I found at Michaels for $.49 ea.
PB193599
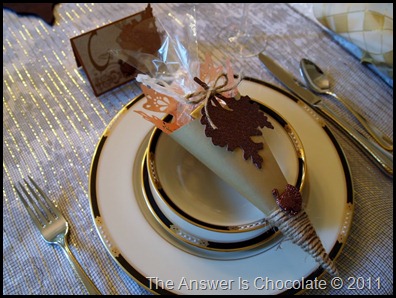
I don’t put out all the flatware that you’re “supposed to “ for a proper place setting because the unused stuff ends up getting scooped up between dinner and dessert and I end up starting all over anyway. SO it stays put and I get it out when its needed. Sorry Emily Post.
I filled my table favor cones with Hershey’s Toffee Crunch Nuggets wrapped in cone shaped cellophane bags that fit perfectly in the favors.
PB193594
I’ll leave you with this recipe because every time I mention I make cranberry sauce from scratch, people look at me like I have three heads. It is SO SO EASY ( but you can definitely let people think it’s hard). Mr. Chocolate eats this stuff as a side dish so I start stocking up on fresh cranberries as soon as they hit the stores, freeze them right in the bags, and make this several times during the year.
Fresh Cranberry Sauce
Picture and Recipe, courtesy of Ocean Spray’s website

Ingredients:

1 cup sugar
1 cup water
1 12-ounce package Ocean Spray® Fresh or Frozen Cranberries

Directions:

Combine sugar and water in a medium saucepan. Bring to boil; add cranberries, return to boil. Reduce heat and boil gently for 10 minutes, stirring occasionally. Cover and cool completely at room temperature. Refrigerate until serving time. Makes 2 1/4 cups.
Can it get any easier than that? I usually add some fresh orange zest or even just strips of peel to the sugar / water before I add the cranberries, or if I don’t have oranges on hand, reduce the water by 1/4C and replace with orange juice. You could also add a cinnamon stick or cloves if you want a little spice.

Sharing At:

Thursday, September 1, 2011

Disneyland’s Blue Ribbon Bakery Cinnamon Rolls

One of the things we indulged in our our recent Disneyland trip :
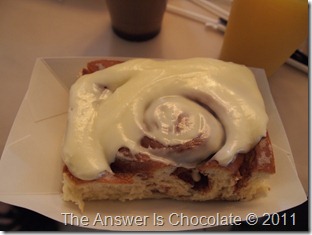
P8191690
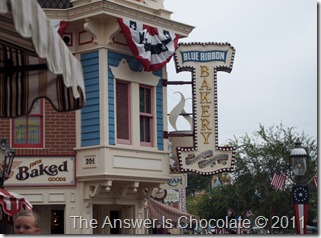
The BEST cinnamon rolls I’ve ever had. Better than Cinnabon in my opinion. Made fresh daily at the Blue Ribbon Bakery on Main Street:
P8191687
P8191688
Definitely not something you want to indulge in every day ! So upon returning home, I couldn’t wait to see if I could find the recipe online!!
I haven’t had a chance to try this recipe yet, but I’m going to try this one from keyingredient.com:

Disney Cinnamon Rolls (Main Street Bakery)
½ cup warm water
2 packages yeast
2 tablespoons sugar
1 (3½ ounce) package instant vanilla pudding
2 cups milk
½ cup unsalted butter, melted
2 large eggs, beaten
1 teaspoon salt
8 cups all-purpose flour
1 cup unsalted butter, melted
2 cups brown sugar
2 tablespoons cinnamon
Cream Cheese Frosting:
1 8-ounce package cream cheese, softened (room temperature)
½ cup unsalted butter, softened
1 teaspoon pure vanilla extract
3 cups powdered sugar
2 tablespoon milk
In small bowl, combine water, yeast, and sugar. Stir until dissolved. Set aside.
In large bowl, mix pudding according to package instructions with milk. To this add ½ cup melted butter, egg and salt. Mix well, then add yeast
mixture and blend well. Gradually add flour and knead until smooth. Place in a very large greased bowl. Cover and let rise in a warm place until double in size. Punch down and let rise again for second time.
Roll dough on a very large floured surface. Dough should roll out to a long rectangle, about 34 × 21 inches in size. Take the 1 cup of melted butter and spread over entire dough surface, using a pastry brush.
In small bowl, mix together the brown sugar and cinnamon. Sprinkle over top of buttered dough. Roll dough up like a jelly roll.
Measure dough every 2 inches and cut with a knife. Take each roll into the palm of your hand and gently pack the roll (this keeps it from coming apart during baking).
Place each roll in a buttered baking pan and allow to rise in a warm place for about 20 minutes. Bake in a preheated 350ยช oven until golden brown in color, about 15-20 minutes. Frost rolls while still warm.
Since we are going to cheat, let’s fo all the way with the frosting. I know
your children will love this production.
Cream Cheese Frosting
In mixing bowl, combine all ingredients and mix until smooth. Spread on the very warm rolls. Enjoy!
If they turn out half as good as the real thing, they’ll be wonderful!

Monday, August 22, 2011

Today's Guest Chocoholic: Jocelyn from Inside BruCrew Life

Hi, fellow chocolate fans!
Jocelyn from Inside BruCrew Life here with you today. I am so thrilled to be guest posting on The Answer is Chocolate.  Carol is an amazing blogger with so many fun things to keep you busy.  I always look forward to seeing what she has come up with. Thank you so much Carol for asking me to be a part of your blog today!   This summer has been crazy!  Can anyone else believe that is almost over???
joce8
I am a SAHM mom to 3 kids, and I have been married to my best friend for 13 years.  I enjoy spending lots of bonding time with my kitchen aide.  I have quite the sweet tooth and my blog has become an outlet  for me to share those crazy baking concoctions with others. My family is used to me making something yummy at least 2-3x's a week. In fact, I tease my husband that we like to eat brownies for dinner when he is working. (ok, not really) I also find time each week for card making, scrapbooking, and making flowers for my etsy shop, The Trendy Owl.

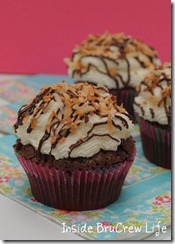
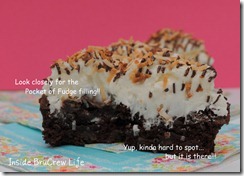
Now since I am posting on a blog named after chocolate, I felt it would only be right to give you a recipe full of chocolate.  How about a chocolate brownie cupcake filled with fudge and topped with coconut butter cream?  Yup, it doesn't get much better than that:-)  I hope you enjoy this crazy creation.  Please stop in my blog sometime.  Any friend of Carol's is a friend of mine:-)
May 11 cinnamon rolls, whoopie pies 050-1
Brownie Cupcakes with Coconut Butter Cream
1 brownie mix
1 c. chocolate chips
1/2 c. chocolate chips melted with 1 tsp. butter
hot fudge topping
toasted coconut

Preheat oven to 350*  Fill your cupcake pan with cute liners and set aside.  Mix up the brownie mix according to the 3 egg directions.  Stir in the 1 c. chocolate chips.  Fill liners 3/4 full and bake 20-22 minutes.  Cool on a wire rack.  Scoop out a small portion of the middle and fill with the hot fudge topping.  Frost with coconut butter cream.  Drizzle with melted chocolate and sprinkle with toasted coconut.

Coconut Butter Cream
1 c. butter
1/8 tsp. salt
1 1/2 tbsp. water
1 tsp. vanilla extract
1 tsp. coconut extract
4 c. powdered sugar
1 c. shredded coconut

Beat butter until creamy. Add the salt, water, and extract and cream again. Slowly add the powdered sugar until all is incorporated. Stir in the shredded coconut.  If you are going to use a piping bag to frost your cupcakes, use a very large tip, so the coconut doesn't get stuck in the tip:-)

May 11 cinnamon rolls, whoopie pies 065-1
Thank you for letting me share one of my chocolate creations with you today. I would love for you to visit me over at my blog...
just don't judge me when you see how much sugar I consume weekly:-)

Hugs, Jocelyn
Inside BruCrew Life

Saturday, April 9, 2011

Faux Oeuf en Chocolat aka Faux Chocolate Egg

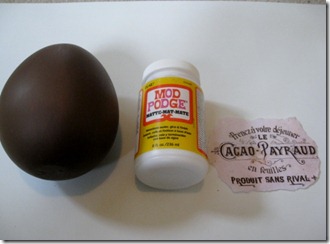
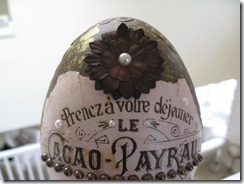
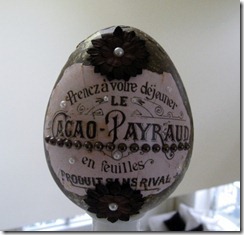
I thought I'd share a project I did earlier in the month for a guest post over at The Scrap Shoppe. It was inspired by a graphic that had been put up at The Graphics Fairy, a vintage chocolate label! Did that have my name written on it or what?


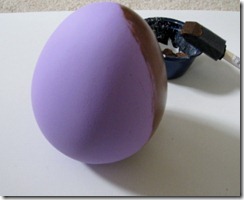
I started with a plastic egg from Michaels that I painted a couple coats of  a deep chocolate brown. I used Folk Art’s Coffee Bean.
IMG_4973
Once the egg was completely dipped in chocolate, I was ready to decorate!
IMG_4979
I printed out my image from The Graphics Fairy, sealed it with a Krylon matte finish spray sealer and then tore around the edges.

These eggs have a flat spot on the back so make sure you apply your pic to the rounded side! I used Mod Podge to apply. If only they’d make a chocolate scented Mod Podge!

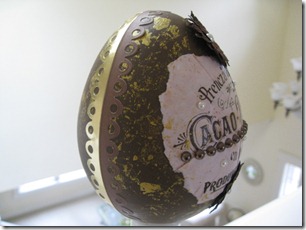
Once that was dry, I went over the whole thing lightly with some gold paint. I just scrunched up a plastic bag and dabbed the paint on all  over.

I had some brown and cream self adhesive pearls ( Michaels) and some dark brown paper flowers in my stash that I used to embellish the front of the egg.
IMG_4980
IMG_4985
IMG_4987
I put one whole strip of brown pearls in the middle of the label, and then used individual cream pearls as the centers for the flowers and randomly on the label.

Finally, I used self adhesive scrapbook borders by K&Co ( Sheer Simplicity , neutral collection) to go around the egg to finish it off. This collection contains neutral browns and beiges and metallic gold so I used the brown and gold of the same pattern, with the straight sides back to back.

IMG_4986

So there you have it, a chocolate egg with 0 calories!
Linking Up At: 

Tuesday, March 29, 2011

Tissue Paper and Twine Egg Tutorial

Thank You:


for featuring my egg! 

Tissue Twine SIde
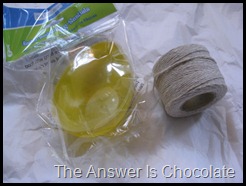
Last year “BB” ( before blogging) I made some Easter eggs covered with scrapbook paper and Mod Podge. True to my deal hunting ways, I picked up several more of the eggs I used after Easter when they were on sale for $.49. Michaels has them again this year and even at regular price they’re $.99:
IMG_5288
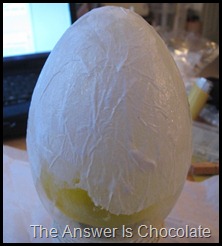
I had an idea in my head ( uh-oh) that I wasn’t sure would work but I figured the most I was out was $.49…not a big price to pay. I slapped some Mod Podge on the egg and then smooshed some torn tissue paper on. Continue the slap and smoosh. The tissue drinks up the Mod Podge and it’s really easy to blend the edges so you don’t have seams. Better if you tear your tissue. Just regular old tissue that some stores give you way too much of and you don’t throw it away tissue.
Tissue Paper Egg
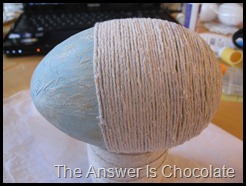
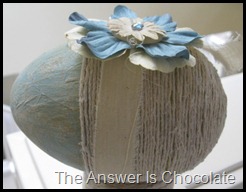
For this one I only covered the top half of the egg because the plan was to cover the bottom half with twine. Once this was dry, I painted it with acrylic craft paint in a robins egg blue and then dry brushed it with white and taupe. After that was dry I started in the middle with a dab of hot glue and started wrapping the rest of the egg in cotton twine. That took the longest but it’s pretty self explanatory.
Twine Wrapped Egg
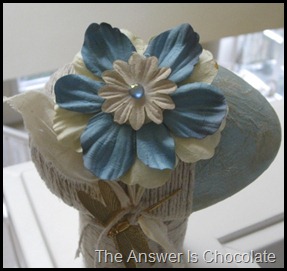
To finish, I tore a strip of muslin, wrapped around the middle and tied a dragonfly charm to the knot with more twine. I added Prima paper flowers, a button, and a self adhesive rhinestone.
Tissue Twine Flower
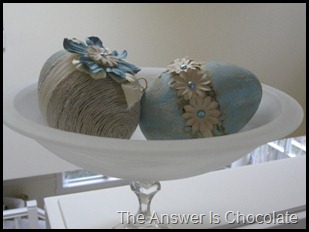
I made a second egg using the same process only this time I covered the whole egg with tissue. I went around the middle of this one with a K&Co scrapbook border ( Flora and Fauna) , a strip of muslin, another brass charm, and small paper flowers ( Kaiser Scrapbook) and coordinating rhinestones:
Tissue Flower Bowl
Here are both of them in an alabaster footed bowl ( cobbled together from Salvation Army finds) :
Tissue, Twine, Bowl (2)
I’m “egg-static” with the outcome!
Linking Up At: 


Blue Cricket Designs