Showing posts with label Dollar Tree. Show all posts

Monday, August 31, 2020

Halloween: Gothic Batty Wreath. Dollar Tree Finds


I popped into Dollar Tree recently since I've been seeing some fun finds on different blogs. Just my luck, I didn't find what I went for but can you ever leave Dollar Tree empty handed? Not me! The end result is this Gothic Batty Wreath using a wire frame and ornaments I picked up on my visit. 


Supplies

  • Wire Wreath Form (Dollar Tree)
  • Black Mini Ornaments (Dollar Tree)
  • Black Ultra Suede Fabric (Stash)
  • Cream Paper Flowers (Stash)
  • Self Adhesive Rhinestones (Stash)


I also picked up these cool straw brooms that I thought I was going to use in this project but ended up saving for something else. 


The fabric scrap I had was about 36 inches long and 9 inches wide so I cut it in half to make two 4.5 x 36 strips and wrapped the wreath form adhering with hot glue. 


I cut out 8 pairs of bats (16 total) on my Cricut Explore 2 using black cardstock.


I scored each bat down the middle and then layered using foam tape to give each pair some depth and dimension. Then, hot glued as shown towards the inside of the wreath. Never one to leave well enough alone, because I debated...I kind of liked the simplicity of it but...I had those cool black ornaments to use! 


I removed the ornament caps and then glued groups of three ornaments around the wreath. They come in matte, shiny, and glitter. I ended up using about 1.5 packages and still have the same amount left over which means I guess I'll have to make something else!  I also remembered I had these paper flowers in my stash. Last September we were at Disneyland which was all decorated for Halloween. My favorite was The Haunted Mansion which each normal year ( so not 2020!) they turn into "The Nightmare Before Christmas" and this was shaping up to remind me of that. Creepy yet pretty. 


I added the flowers to the ornament clusters and then because "it don't mean a thing, if it ain't got that bling" finished with some self adhesive rhinestones.


Yep. I got that stray glue string. 

Et voila! 


Tuesday, October 1, 2019

Black and White Wickedy Witch Wreath


Happy October! Yikes. But here we are. I actually had time to make something this weekend and had so much fun with it. Super easy and inexpensive and I'm really happy with it!
Supplies: 
  • Wire Wreath Form ( Dollar Tree)
  • Recycled Packaging ( See below for description)
  • Tulle (on hand)
  • Ribbon ( Michaels 40% off, 2 rolls)
  • Halloween Picks (Michaels 40-60% off)
  • Hot Glue / Glue Gun

Don't ask me how my brain works. My family has tried and failed. It just does what it does, which is how I came up with the idea to use this "packaging stuff" that's used to protect things in shipping to pad my wreath which my brain decided needed to be done. That's it. I had a wire wreath form on hand from Dollar Tree and thought just wrapping it in ribbon the frame might show through so wanted to pad it before wrapping it in ribbon. 


I cut it in strips and then wrapped and glued it to the frame w/ hot glue. WARNING: I used to have a fancy glue gun then it broke and I've been using a really cheap little "one temp" one. You might want to use "low temp" if you use this material because it can melt. I recovered and kept at it but you've been warned!


Wrap and glue, wrap and glue, wrap and glue watch "SVU". 


I ended up not wrapping the whole thing because a couple of burned fingertips makes you lazy and I also figured that where I was going to put "stuff" didn't need to be padded.  You can see the difference it made though and I do like the padded part which is the exposed part of the wreath. Wrap with ribbon et voila. 


Once my wreath was ribbon wrapped ( say that three times fast) I made a six-loop bow from black tulle, tied the ends around the wreath, and secured with a couple of dots of hot glue. Using the second roll of ribbon, I made an eight-loop bow and glued down to the wreath. 

Then, assuming your puppy hasn't run off with your witch leg pick, remove the stems from the hat and legs and glue down and you're done. 


Sharing At:


Wednesday, October 31, 2018

Til Death Do Us Part Couples Shower Candles


 Happy Halloween all! Hope those of you with Trick or Treaters are prepared for tonight. We are winging it. We have no idea if we'll get any at all but I was a Girl Scout so I'm prepared with candy ( my favorites just in case no one shows!).

My BFF just threw an amazing couples shower for "our" daughter and future son-in-law. The inside joke is that I'm her "real" mom because we tend to like a lot of the same things, and those things are very different from what my BFF tends to like. We all converge around Harry Potter!  Since we were pregnant together, there's always been a connection there.

The wedding isn't until January but "our" daughter LOVES Halloween and all things skully and gothic so October was the perfect time for the shower.

Supplies:

  • Plain Prayer Candles (Dollar Tree)
  • Black Vinyl ( I used Cricut Glossy Black)
  • Skull Image ( downloaded from Silhouette online store)
  • Decorative Paper ( I had this in my stash)
  • Washi Tape (also stash)


Tip: if you need Dollar Tree items in a specific quantity and don't want to risk your store not having enough, you can order online and have sent to your store for you to pickup. I had a little hiccup with mine but it's the first time it's happened and luckily the store still had the 20 candles I needed.


I wrapped the bottom of 10 with the silver paper and 10 with the black and silver paper.


I used a strong double sided tape to adhere. I had some coordinating washi tape in my stash so I used it with the silver paper. 

My images were busy  cutting on my Cameo while I was wrapping the candles. Once they were cut, the fun began: weeding. Not my favorite part of vinyl, but oh so necessary! 


Weeding As Art ! These are all my little scraps removed from the images. 


Once the weeding was complete and the transfer tape applied, applying the images to the candles was easy peasy.  My BFF was so happy with them and they went perfectly with how she'd decorated for the shower. 


Sunday, November 9, 2014

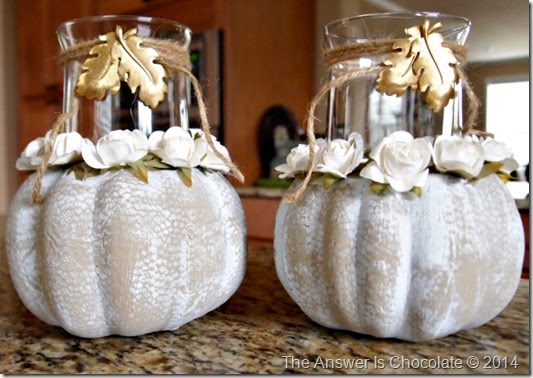
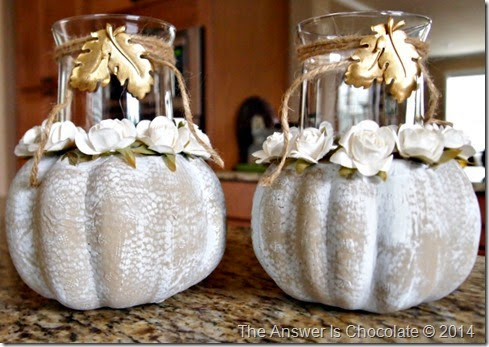
Dollar Tree Altered Pumpkin Candleholders

Dollar Tree Thanksgiving Candle Holders

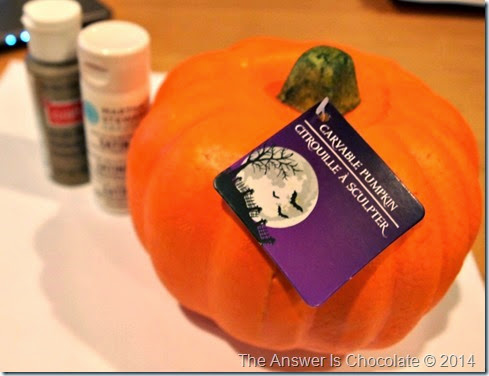
I picked up a couple of extra foam pumpkins at the Dollar Tree during Halloween shopping. Like most projects I do, I knew I’d do something with them but not exactly what. Since the tag said they were carvable, I thought maybe I could use them as the base to hold glass candleholders , also from Dollar Tree. No clue why this thought came to me...just did.

For this project you will need:
  • Dollar Tree ( or other carvable foam pumpkins)
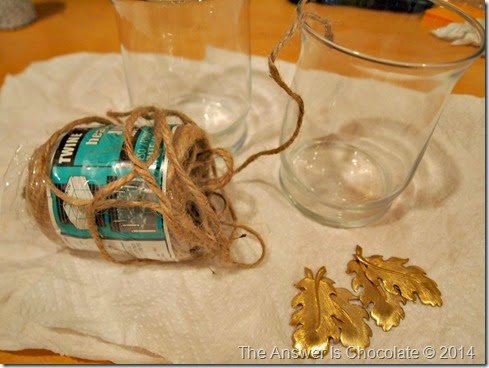
  • Glass candleholders (Dollar Tree)
  • Craft paint
  • XActo knife
  • Twine
  • Charms
  • Hot glue gun
  • Paper Roses
Dollar Tree Pumpkin

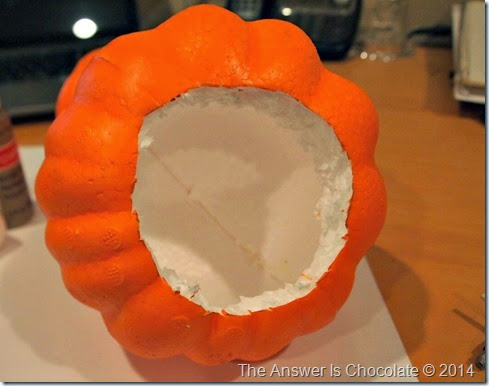
Using the bottom of the glass candleholder as a guide, I traced a circle around the top of the pumpkin and cut out the top with an Xacto knife:

Carved Dollar Tree Pumpkin

Yay…no pumpkin guts to deal with. Inside the rim looked a little rough so I covered it with some Mod Podge and tissue paper. It doesn’t really show in the finished project but I wanted to be safe  just in case.

Painted Dollar Tree Pumpkins

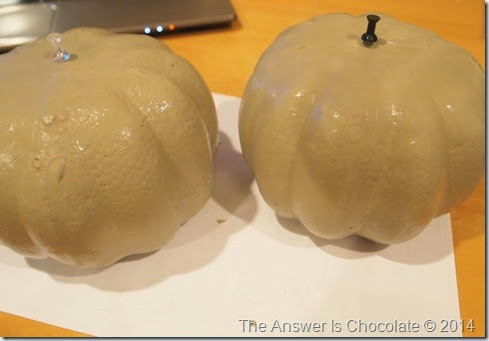
Paint pumpkins with a couple coats of craft paint (I used taupe).

Tip:  use push pins to make it easy to pick them up and hold while painting.

When the base color is dry, dry brush with white. The bumpy texture of the pumpkin really shows through with the dry brushing.

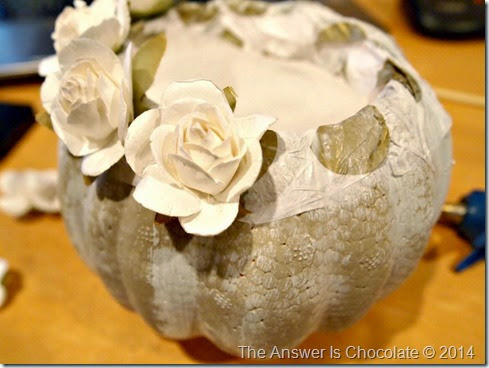
Dollar Tree Pumpkin Makeover

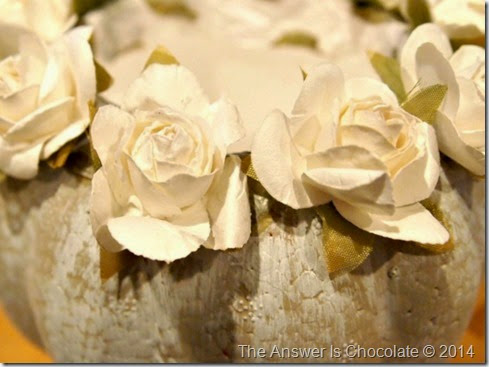
Glue paper roses around the top of the pumpkin (you can see the tissue paper I used to rim the inside of the pumpkin) .

Dollar Tree Makeover 1

Now on to the candleholders.

Dollar Tree Vase Makeover

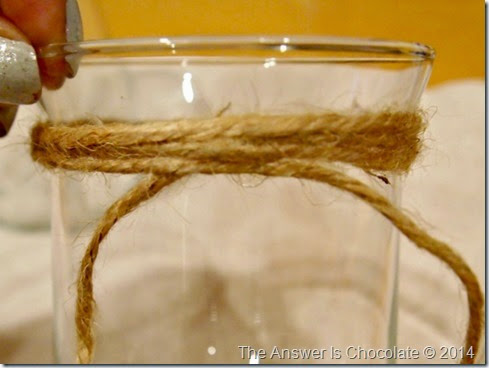
Wrap the twine around the top of the candleholder and tack in place using hot glue.
Twine Wrapped Vase

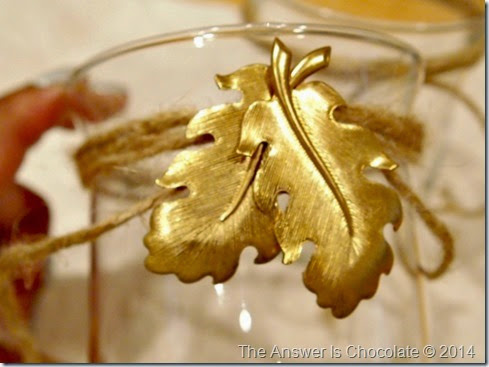
Hot glue charms to center:

Oak Leaf Charm Vase

Place candleholders inside pumpkin base.

Dollar Tree Thanksgiving Candle Holders

Sharing At:
The Girl Creative


Sunday, November 2, 2014

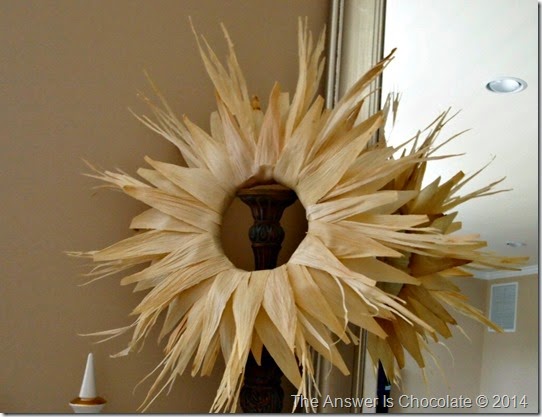
Thanksgiving: Cornhusk Wreath

Cornhusk Wreath Stand

I hope everyone had a Happy Halloween!

Full speed on to Thanksgiving which often gets overlooked in the preparation for Christmas. Well not in this house! College Boy picked up on Thanksgiving being overlooked pretty early on so ever since then I have made sure to decorate for it at least as much as I do for Halloween. This year is extra special because CB will be home for Thanksgiving for the first time in 2 years!!! Yes I am triple exclamation point excited.

I remember seeing cornhusk wreaths in magazines and on Pinterest last year and knew I wanted to try one this year.

For this project you will need:
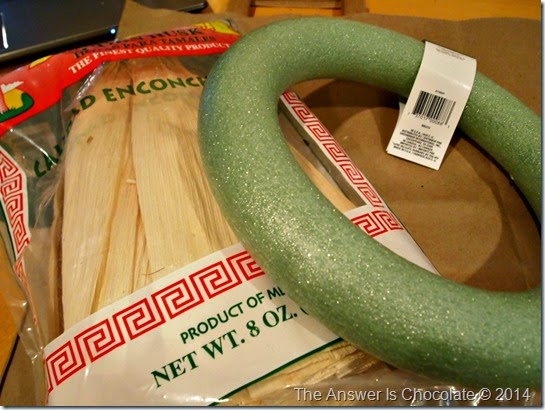
  • Cornhusks ( I am not Martha enough to have saved and dried my own from Summer corn on the cob…got mine at the grocery store by the Mexican spices. $3.99)
  • Wreath form ( Dollar Tree)
  • Glue Gun
  • Glue Sticks
  • Kraft paper or brown bag

Cornhusk Wreath Supplies

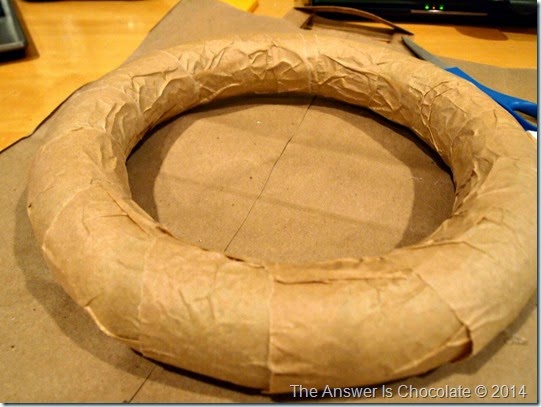
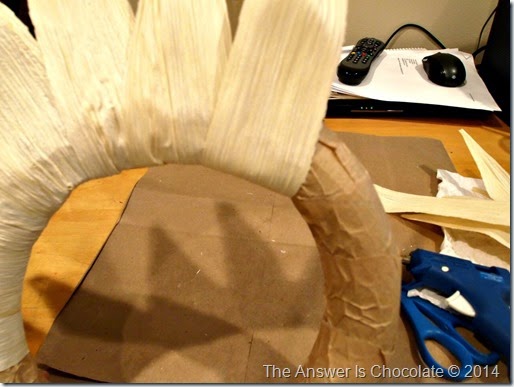
I decided just in case I wasn’t even about placing my corn husks ( and didn’t want any of the green from the wreath form showing through) I’d cover the wreath form with some paper. I used painter’s masking paper but you could use kraft paper, brown bags etc.

Paper Wrapped Wreath

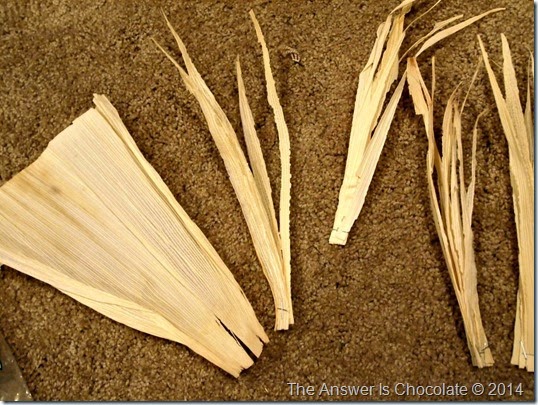
Some tutorials advise moistening the cornhusks to make them easier to work with but I just used them dry. Some split a bit but I didn't mind. They were pretty wide so I tore each husk into halves or thirds depending on the original size. I ended up with a bunch of scraps. More on that later.

Cornhusk Wreath Begin

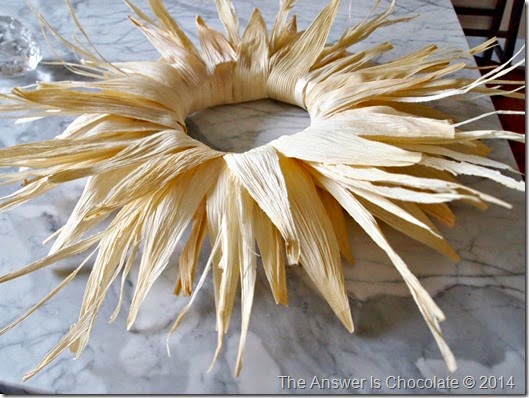
I wrapped the wide side of my husks under the wreath and glued them around the form with the pointy ends sticking out. Once one layer was complete I added another couple of layers slightly offset each time so the husks aren’t laying directly on top of each other.

Cornhusk Bundles

Remember the scraps? These were the odd bits that I pulled off to make each of my sections about the same size. I gathered a handful of these together , stapling at the bottom and made enough of these little bundles to tuck around the wreath. I found it easiest to tear from the wide side just FYI.

Cornhusk Wreath Side

I was actually happy with the wreath before I added these but once I did, I was really happy because it gave the wreath a more natural wild look.

Cornhusk Wreath Mantle

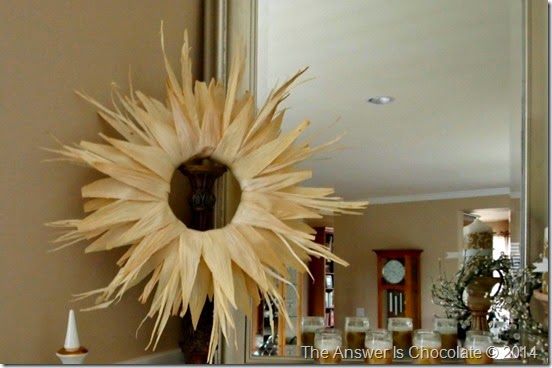
I’m sure this would be fine outdoors ( corn grows outside right?) but I have mine resting on an over sized candlestick that sits on my mantle. I  only used about half the bag of husks so have some other ideas in my head that you may see later!

Sharing At: