Showing posts with label Card Making. Show all posts

Monday, February 4, 2019

Black White and Antique Gold Birthday Card


Sharing an easy birthday card that requires no cutting machines or equipment besides a paper cutter and a punch. 

Supplies: 
  • DCWV "Decor Noir" Stack ( I've had this one for a while so not sure if it's still around but I know I've seen similar stacks at JoAnn)
  • Black Cardstock ( I used Recollections 110 lb, Michaels)
  • Antique Gold foiled transparency ( Michaels)
  • Cream and Antique Gold glitter scraps
  • Recollections ( Michaels) Washi Tape
  • Self adhesive 3D sticker embellishment strips ( stash)
  • Star Punch
  • Foam Tape
  • Double sided tape ( I used my trusted tape gun)

The Deco Noir stack includes a couple sheets of different sentiments / sayings like the one I used for the focal. Cut from sheet, trim, add two strips of washi tape, add 3D embellishment strip,  mount to cream glitter scrap. Punch Antique Gold star from glitter scrap and mount with foam tape as shown.


Cut the black cardstock to 5x7 and trim a sheet of the "alphabet" paper from the stack to the same size. Adhere to front of card.  Cut  the transparency to 4.5 x 6.5, and layer the front panel to it, then adhere to card and voila. Done and done!


Monday, January 28, 2019

Baby Boy Cards


I made a couple of cards this weekend to congratulate new parents and grandparents on the arrival of a new bundle of joy. I decided to keep things fairly monochromatic in hues of blue . 

Supplies Used: 
  • White Cardstock (Recollections, Michaels 110 lb)
  • Pale Blue 12x12 Glitter Paper ( Recollections, Michaels,  Holiday Glitz and Glitter Stack)
  • Light and Medium Blue 12x12 Cardstock (Craft Smith, Michaels Blues Stack) 
  • Baby Boy cut file (Silhouette Online Store Design ID #17765)
  • Onesie cut file (Silhouette Online Store Design ID # 59708


Misc: 
  • Gold paper scrap
  • Heart punch
  • Washi Tape
  • Adhesive ( I live for my tape gun)
  • Paper Cutter
  • Silhouette Cameo 3
  • Foam tape
Instructions: 
  • Using paper cutter, cut and score white cardstock to 5x7  card
  • Cut blue glitter paper panel to 4.75 x 6.75
  • Cut pale blue cardstock to 4.25 x 6.25
  • Layer glitter and pale blue panels as shown. 
  • Add washi tape to opposite corners as shown
  • Download, size, cut "Baby Boy" and "Onesie" images. 
  • I cut sets of images from the glitter paper and from the medium blue paper. I like giving images a little bit of a shadow by layering them. I find this gives them some depth. 
  • Mount cut  images to card panels using foam tape
  • Punch heart from gold scrap and mount to center of onesie


I made matching panels for the inside of the card but forgot to take a pic when they were blank. You can see a little peeking out from the card that's laying down. 


Monday, January 21, 2019

Valentine's Day : Blasts From The Past


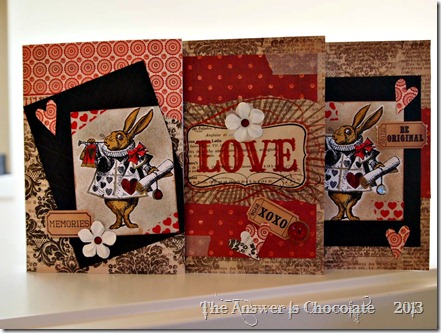
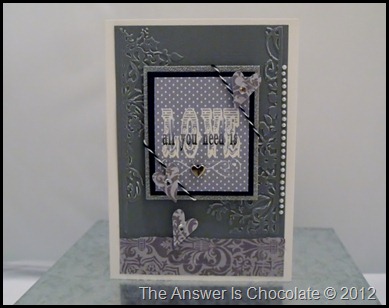
Yay! I have my laptop back and didn't lose anything and I'm so happy! Have some photo editing to do for some things I've worked on recently and have to re-install some stuff,  but in the meantime, thought I would take a trip down memory lane and re-up a few Valentine's Day home decor and card projects from past years.  Projects are linked in the titles. 

Home Decor


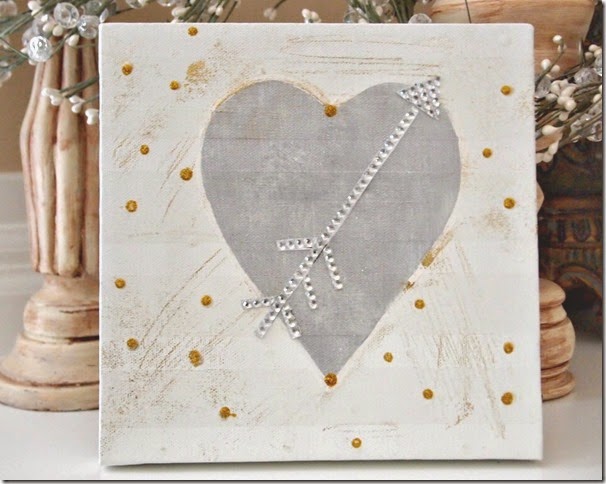
This is a really quick way to add some Valentine's decor that can actually stay up all year long and not look out of place. Neutral colors make it versatile. 

Valentine Canvas Bling Arrow


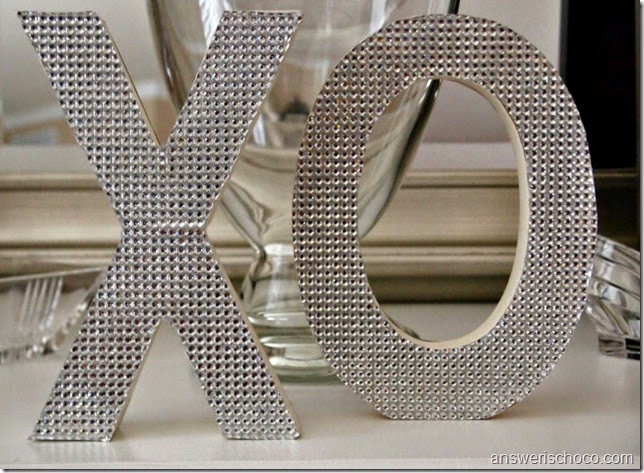
This is another thing that you can leave up all year long. 

DCWV Bling XO Letters


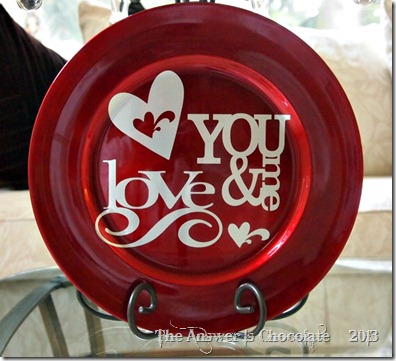
I actually did this in "traditional" Valentine's colors ( primarily since it was a stash bust from an extra charger I had from Christmas)

Love You and Me


Cards 

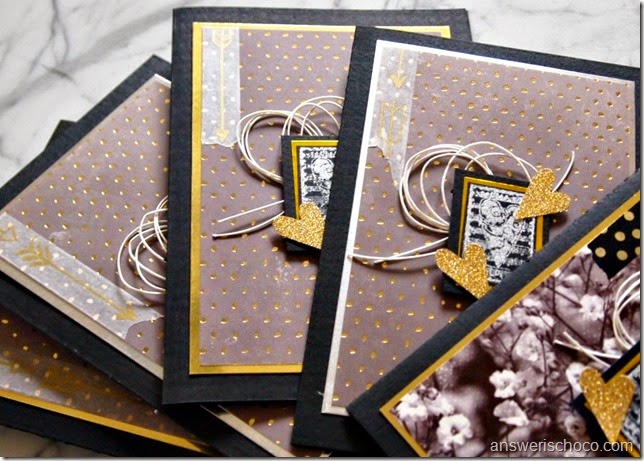
Mizuhiki Cord Valentine's Cards:

Handmade cards using Mizuhiki Cord (found w/ Origami supplies)

DCWV Decor Noir Valentines


Metallic and Bright Valentine's Day Cards:


Valentine's Cards 2013


Grey and White Valentine


Hope you've found some inspiration!


Monday, December 10, 2018

2018 Christmas Cards


I haven't been posting a lot, but I have been busy making things including my 2018 Christmas cards. I'm old school and while I know there are all kinds of cool things you can order online I still like making my cards. 

I was a little frustrated this year ( and have seen other card makers and paper crafters express similar frustration) that both Michaels and JoAnn had very paltry supplies to choose from. Usually there are several paper stacks and coordinating embellishments but both stores disappointed this year. I was able to find two stacks by Recollections that I liked and who am I kidding? Like all crafters, I had "stash" from prior years. Not the point Mr. Chocolate so don't even start. 

This year, I incorporated adhesive foils in my card making. I like to spread the love so I used my Cameo 3 to cut my Cricut adhesive foils :) 


For this one, I went with a monochromatic approach using SEI white on white papers, silver glitter paper, silver metallic foil and iridescent sequins. Sized and cut the "dot tree" (Silhouette Online Store) and then layered onto a metallic white panel, then glitter panel and SEI panel as shown. Finish with iridescent sequins. 


Since I can never settle on one card to make, I usually make a few different ones. This year, I made three different versions. For the second one, I used black cardstock as the base card, and then cut my focal using metallic gold foil (Cricut) , layered onto black cardstock, trimmed closely and then layered using foam tape onto red velvet paper panel, matted with black and onto coordinating papers. Finished with iridescent sequins and red self adhesive rhinestones. 


For the third card, I cut a snowglobe image ( Silhouette Online Store) from the gold foil and like the ornament card, layered onto cardstock, trimmed, layered onto white and silver panel as shown and then used panels cut from the Recollections pack I did find this year. Again finished with iridescent sequins. 


While I might have been cranky that my favorite stores didn't have the selection I wanted and I am happy with the papers I did find, c'mon, we're creatives...less is not more. More is more!! 


Monday, September 11, 2017

Peacock Feather Anniversary Card and Envelope Art


Hard to believe that my oldest (as in number of years we've been friends...since 7th grade) is celebrating her 30th Anniversary! They got engaged before I left for a study abroad program in college and got married shortly after I came back the following year so I missed a lot of the wedding planning. I don't have pics but let me tell you, she was DIY before DIY was what it is now. 

She made her wedding dress, our bridesmaids dresses, the groom's tux, her mom's dress... basically EVERYTHING. Each of us bridesmaids wore a different jewel tone color and they used peacock feathers in the bouquets. 

I wanted to capture elements of day in their Anniversary card. 


I found a peacock feather design in the Silhouette online store that I downloaded and cut from gold adhesive foil. 


I dreaded weeding these because I hate weeding. Love vinyl. Hate weeding. Did I mention how I hate weeding? Fortunately these weren't as bad as I feared. 

I layered these on different colors of cardstock and trimmed. 


Layered onto coordinating papers as shown using foam dots, and then finished with self adhesive rhinestones. 

I also wanted the envelope to be special. One of the reasons I started playing with hand lettering is because I wanted to make the envelopes as special as I hope the cards are . 


I did a simple laurel wreath and mixed faux calligraphy and printed lettering styles. Fortunately the Post Office didn't get snippy with me and it arrived just fine! 
Equally exciting is that this time next year, my friends will be recovering from their daughter who's getting married 2 days prior to their 31st Anniversary. Cannot wait to see what she does for her daughter's wedding!


Sunday, February 26, 2017

Hand Lettered Cards


When I became intrigued by hand lettering, one of the things I hoped I'd be able to do was to incorporate it into my card making. So when I had a couple of cards to make this weekend, that's just what I did. 

I started by doodling the wreath for each card, then added the initial. It just so happened that both recipients have the same initial. 


I chose some coordinating papers , trimmed the focal piece, matted then stamped the sentiments for each with Staz On ink onto white cardstock scraps. Matted those w/ coordinating paper scraps. As I continue to practics and get better at lettering, I'll do the sentiments too but for now, stamps lol. 


To add some dimension, I dotted the berries on the doodled branches with clear dimensional drops ( Nuvo clear). 


Supplies Used: 
  • Decorative Scrapbook Papers: Crate Paper pack ( Michaels)
  • Lettering Paper: Strathmore Watercolor 
  • Staz On Black Ink
  • Sentiment Stamps : Michaels (Impulse buy a while ago)
  • Drawing Pen: Faber Castell (my personal fave)
  • Coloring Pens: Tombow Dual Tip (my personal fave)


Tuesday, February 14, 2017

Card Making: Valentine's Day


Happy Valentine's Day!

One upside to our snow day last week was it gave me a chance to finish this year's Valentine's Day cards. Fortunately I'd already cut out my focal images using my Silhouette Cameo since the power was out. The rest didn't require any electricity!

My colors this year were black, cream and fuschia. 

Here are the papers and supplies I used: 
  • Black metallic Stardream cardstock 
  • Cream Cardstock
  • My  Minds Eye "From the Heart" gold foil heart paper
  • Craft Smith gold foiled paper 
  • Recollections gold mirror and fuschia glitter paper
  • Watercolor paper 
  • Watercolor paints 

I chose an image from the Silhouette Design Store and cut it from gold mirror cardstock. Waste not want not, this image resulted in a positive and negative so I had the hearts that were leftover from the middle of the framed image if that makes any sense, and used those as well. 

For the "framed hearts" as I'll call them, I mounted on cream cardstock, then the fuschia glitter paper. I cut a panel from the gold foiled heart paper ( 4x6) and mounted to the Stardream black card (5x7) and then mounted the focal as shown.


For the cards I made using the center hearts, I played around with some watercolors I picked up recently on a BOGO ( buy one get one free) at Aaron Brothers. Cone to think of it , the watercolor pad was from a previous Aaron Brothers BOGO. Spotting a trend? 


I just played around and made some background paper ( oh I added some gold mica inks): 


I trimmed this , mounted on black then gold paper and attached the gold mirror heart with a foam dot. 


I finished each style of card with gold sequins!

Hand Lettering Practice ... Happy Valentine's Day  


Tuesday, December 20, 2016

Hanukkah Card and Tags


Ack. I've been without a computer for almost a week which is a lifetime in blogging years. Backup your stuff people because we always think it can't happen to us and then boom, new hard drive. 

In the meantime, made Hanukkah cards and tags for a couple of friends. I'm tickled that the tags I started making a few years ago for one friend get asked about by her relatives "Is she making any this year". 


I've always loved shiny and glittery things so I had a lot of fun working with gold foiled and glitter papers found at Michaels. The foiled papers are a combination of Recollections, Craft Smith, and DCWV stacks. Add to that my weakness when Michaels has their specialty papers 10 for $10 and I'm in paper hoarder heaven. 

For the card, I cut a menorah on my Cameo ( image found in the Silhouette Online Store) and then just hand cut the candles and flames freehand. I double cut the menorah and gave it depth using foam dots by layering one piece atop another. Blue and gold glitter papers were layered on top of a foiled piece. Simple but I am really happy with the outcome. 

For the tags, I just like to play around with bits and pieces with no particular plan. I just want the colors to work with each other so when I package them, they look like a set. 

My signature paper style is tearing things. I just can't not have some ragged edges! 

With freaking out over my computer crash, would  you believe I forgot to take pics of this year's Christmas cards? I did manage to take pics of a set of Christmas tags I made as a gift! Whew. 


Papers used here are from the Traditional Christmas paper pack from Oriental Trading Company along with some of my glitter and foil stash. 

Tuesday, June 7, 2016

Quick Card Project: Gardener's Birthday Card


I am hopelessly addicted to the 2 for $3 bins at Michaels. When I saw a packet of metal garden shapes, in the basket they went. I love the rustic nature of the metal plus my Father In Law's birthday was coming up so it was a no brainer since he's an avid gardener. 

Supplies: 
Coordinating papers: I used DCWVs Lemon Flower Stack and a scrap of white textured paper
Metal focal point
Ribbon ( previous 2 for $3 find at Michaels)
Flower brads

The card is 5x7. Cut papers in 4.75x5.75 , 4x6 and 3x5 and layer as shown. Wrap scrap piece of cardstock with ribbon ; adhere metal focal with strong tape or glue; adhere to ribboned scrap. Mat onto gold scrap and layer onto front of card. Easy peasy! 


I  debated about adding a scrap of paper to the watering can but decided I liked the scratched up rustic look of the metal. I also debated about replacing the twine that came on it with ribbon but went with the twine.