Tuesday, December 14, 2010

Ding Dong My Cards Are Done!

Not that my cards are wicked. For all my pretend grumbling, I can't imagine Christmas without making cards. I'm usually done earlier but something's been distracting me this year....hmmmm....maybe blogging :) ? But they're all (57) addressed, stamped (including extra postage for heavier ones Post Office people!) and on their way. Here are a few I remembered to take pics of before sending:

Forgot to change my camera setting for detail ... Me&My Big Ideas glittered polka dot paper, glittered winter scene rub-o, K&Co glittery self adhesive scrapbook borders
Me&My Big Ideas music paper, K&CO glittery scrapbook border scrap, misc snowflake and postage rub-ons, focal sticker from Michael's $1 section Christmas collection
Studio G Rhinestone strip, another diecut sticker from Michael's $1 pack, Me&My Big Ideas paper
In years past I was obsessive about every card being exactly the same. Then a few years ago I couldn't find enough of something , got over it and made different cards, and since then have made more and more variety .

Linking Up At:

Monday, December 13, 2010

Pop Go The Cake Pops

I've been focused on trying to wrap up my Christmas cards ( and what genius makes almost 60 handmade Christmas cards which means you also have to make an inside, then write something in each oh and write a family Christmas letter?) I know... "we" do.

I did take some time away to do some baking for a treat exchange I attended on Friday. You could bring cookies, candies, or appetizers....everyone brought 5 plates of whatever they brought and you left with 5. Great idea. I tried my hand at cake pops since they're "popping" up all over. I saw them in this month's "Food Network" magazine and there are shops in NY and Dallas and CA selling these for around $30 a dozen?! I won't be buying them.

If you've not tried these, they're not too hard. The basic is one 13x9 cake ( you can make from scratch but I cheated and used a mix....cards cards cards) and 3/4 can of frosting ( or whatever that works out to if you make your frosting from scratch!) . You can use any combination you want. Of course I did, chocolate cake and chocolate frosting! You were expecting maybe lemon? No. Bake your cake, let it cool, crumble it ( this is good for getting out frustration at your decision to make almost 60 cards...crumble crumble grumble grumble) , mix in your frosting and refrigerate for several hours while you work on cards. Then roll your filling into balls and dip in candy melts. I used Wilton white chocolate melts. You can stop there or sprinkle with stuff. Yep I sprinkled. I wanted a "Winter Wonderland" feel so I used white sparkly sanding sugar.

Lesson Learned: Miss Smarty Pants read that you should insert your lollipop sticks AFTER you coat your cake pops and they set but no, I decided I was going to put the sticks in and then dip. Worked OK except I got impatient after a few of these and didn't let the candy melt set up before putting on waxed paper to and the tops got a little flat on some. So if you dip, dry and then stick, your flat tops can be your pop bottoms.

I presented them in upcycled tomato sauce cans, decorated w/ scrapbook paper and embellishments. I stuck styrofoam balls inside to hold the pops:
I decorated some with gold Wilton gel....Jo Ann's
Tonight we return to addressing cards. Again...whose idea was that?

Linking Up At: 

Saturday, December 11, 2010

Embossed Metal Ornaments

My Friend Michele over at The Scrap Shoppe is still hosting her fun and inspiring Homemade Holidays, and I was excited to do another guest post. This time I did:  Embossed Metal Ornaments similar to those I have on one of my Christmas trees.

First you'll need some metal soft enough to emboss. Walnut Hollow and Ten Second Studios sell it as does AMACO which is what I'm using here:
I got mine at Michaels but you can find it at many art supply stores. It comes in copper, brass, aluminum, and pewter as well as colors. It also comes in different weights. I like the medium.

Then decide what you want your ornament to be and find an image you can trace (or you can draw freehand). I chose a dove ( downloaded from the internet) and printed out on regular copy paper. Cut off a piece of your metal and lay your image on top:
Sorry for the pic quality...didn't realize the reflection of the light
The AMACO metal comes with a wood stylus or you can use a ball point pen , pencil, or dry embossing tool. I have a rubber mat I use but you can use magazines or a stack of newspaper to give yourself some cushion so when you trace, you get some indentation. You don't have to press super hard, but firmly.

Once you 've traced your image, you can flip it over and go around the inside or outside edge to give it more definition. Then you can start designing. I did freehand designs or you can trace a design just like you did your image:
I just made a scallop pattern around the edge and some squiggly lines in the tail.
When you're happy with your design, then cut out around the image. You can use regular craft scissors. You don't need special ones.
I added some spirals to the middle
While there are all kinds of specialty tools you can buy:

You don't have to. Sewing tools like pattern wheels work great:

I just used a perforation wheel to make random lines on this one which you'll see below. Once you've cut out your images, add a small eyelet in the center and then whatever you want to use to hang it. I added these to another of my trees :
This is the one I used the pattern wheel on just making random lines and then added "dots" using a dry embossing stylus

Hope that made sense. It can get very addicting and the metal goes a long way. I've used it on cards, as accents on altered art, etc. Here's another piece I did a couple of years ago that I aged with a little black paint:

And don't forget to go check out some of the great projects over at :


Linking Up At:


Photobucket 
 UndertheTableandDreaming

Fun With Digital Scrapbooking...Thanks Down This Road

Digital Designs and The Crafting Chicks! I was super excited to learn that I'd won a fantastic giveaway from Down This Road Digital Designs,  hosted by The Crafting Chicks! It was a whole Christmas themed digital kit called "Deck The Halls" filled with all kinds of wonderful goodies from digital papers to an alphabet to accents...

Digital scrapbooking is something I've wanted to learn and just haven't made the time to do so I'm really looking forward to playing with this using my Christmas photos. I couldn't wait to try to do SOMETHING so I made a button for my December Open House Link Party coming up on Friday December 17. I'm also not the best button maker but practice makes better right?!


Photobucket

Friday, December 10, 2010

This Week's BFF: michele made me

Happy Friday all! If it's Friday, that means it's time for another BFF: Blog Feature Friday! This week's BFF is: michele made me.

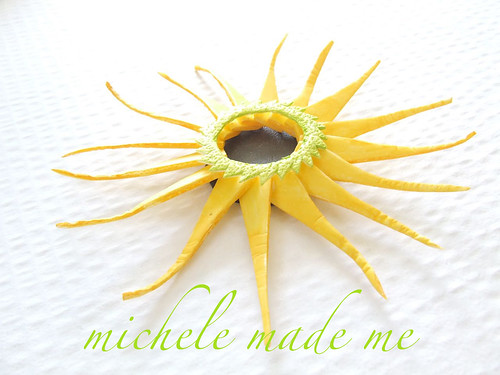
Michele hails from Ontario Canada and is the mom of two grown children and a 6 year old and describes herself as a "creator of stuff". And what stuff it is ! I love seeing what lovely things she has come up with and since we're in high Christmas mode, I thought I'd feature some of her recent Christmas lovelies. We've all made paper snowflakes but Michele manages to take them up several notches and I think these are so elegant:
Would you guess the secret ingredient is "Christmas flavored junk mail". Me either! Then there are these which just have such an ethereal glow:
Winter Wonderlantern

Then there's this transformation of a frozen juice container! Yep...A. Frozen. Juice. Container. Tell me you would have ever guessed that's what this was:
I promise you, you will enjoy a visit to Michele's blog. Not only talented, but generous in sharing how she makes these gorgeous pieces! So go have a look at this week's BFF: michele made me

Wednesday, December 8, 2010

The "Community" of Misfit Toys

We interrupt our irregularly scheduled craft, chocolate, and Christmas tree obession to tell you not to miss tomorrow's episode of the NBC comedy "Community". Some of us bloggers got a sneak peek at it because of our affiliation with "One2One Network" . I won't give away any secrets but it was definitely a cute and fun Christmas episode. It was done in "claymation" which reminded me of all the Rankin/Bass specials I loved growing up ( OK still)  like "Rudolph The Red Nosed Reindeer", "Santa Claus Is Coming To Town" etc. although the humor of "Community"  is definitely more adult. But at its core, this episode fits right in with the things we all try to remember at Christmas while staying true to the show's quirky nature and characters. You can get a sneak peek at the sneak peek ( not the whole epi) here:


If you're not familiar with NBC's "Community," it's a  comedy series about a band of misfits (hence the title) who attend fictional Greendale Community College. 

At the center of the group is Jeff Winger (Joel McHale, "The Soup"), a fast-talking lawyer whose degree has been revoked. With some help from his fellow classmates, Winger forms a study group that eventually learns more about themselves than their course work.  It also features Pierce (Chevy Chase), a man whose life experience has brought him infinite wisdom but isn't always the most tactful or contemporary in his views; Gillian Jacobs ("The Book of Daniel") as Britta, the 20-something dropout with something to prove; Yvette Nicole Brown ("Rules of Engagement") as Shirley, a sassy middle-aged divorcée; Danny Pudi ("Greek") as Abed, a pop culture junkie; Alison Brie ("Mad Men") as Annie, a high-strung perfectionist; Donald Glover ("30 Rock") as Troy, a former high school football star trying to find his way, and Ken Jeong ("The Hangover") as Señor Chang.

Generally I'm more of a drama girl but Thus nights we watch the NBC comedy lineup that includes Community, 30 Rock and The Office. 
This episode combines "Community's" irreverant snark ( right up my alley) with ageless stories of friendship. In "Abed's Uncontrollable Christmas", watch as my favorite character (Abed) searches for the meaning of Christmas with a little help from his friends.

Monday, December 6, 2010

I May Need a Tree-tervention

Every time we get decorations out, Mr. Chocolate says: "Feel free to get rid of anything". Now why do you suppose he would say that? I don't know either. But I was really diligent with the Christmas decorations ( and guess who snuck stuff out of the Goodwill pile hmmm...his initials are Mr. Chocolate) deciding that it was time to part with some things that I hope someone else will enjoy. This almost went with the lot but it was debatable whether it was Goodwill or trash since it was truly sad looking. So of course I kept it and managed to unbend its poor twisted little branches, and so what if it tilts a little if you don't position it just the right way? It was a lonely little tree and it needed some love and the past few years it's just been shoved back in a bin.
It has a hideous metal base so I wrapped it in burlap and twine which was an immediate transformation The branches are fragile so I thought what could they hold? Only a few lights and book page ornaments which don't weigh much. I didn't do a tutorial on these but there are plenty easily found .
The layered flower ornaments I cut freehand, and the loopy ones have flattened bottlecap centers filled with dimensional glue and glitter
The centers of the pinwheels are coiled silver tinsel pipe cleaners, held together with a dab of hot glue and a rhinestone center
Another bottlecap with a combination of glitter glue and Diamond Glaze
It's sitting on my dresser with  another one of my bear victims stuck in a bowl:
This bowl stays out all year but I added white lights and white tulle to give it wintery feel 
Linking Up At:

Photobucket