Thursday, October 19, 2023

BFF Open House TWO WEEK Edition


Happy Friday Eve all! Before we get started, a note: I'm leaving this party up to cover next week as well because I'll be running around Disneyland and California Adventure like the mature adult I'm not. We're going to celebrate my birthday (last month) and wanted to wait until it was a little cooler to go. So there will be features this week, the party will stay open to link up next week and I'll do double features the following week. 

Mr. Chocolate might have opinions on how early holiday supplies hit the craft stores, but that didn't stop him from wanting a Christmas mug yesterday when we were at JoAnn and it was already 40% off! 

But before we start with December holidays, let's take a look at some Halloween ideas there's still time to make. This week I shared two projects: Easy Halloween Candles and a Dia de los Muertos Canvas


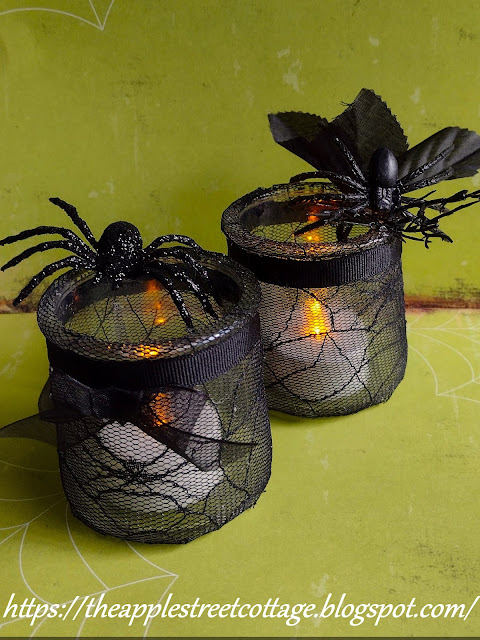
The Apple Street Cottage shared a great Easy Halloween Candle project. I love the combination of elegant and creepy! 


Anyone else loathe cleaning out pumpkin guts to carve pumpkins? Creatively Beth has us covered with these Printable No-Carve Pumpkin Faces


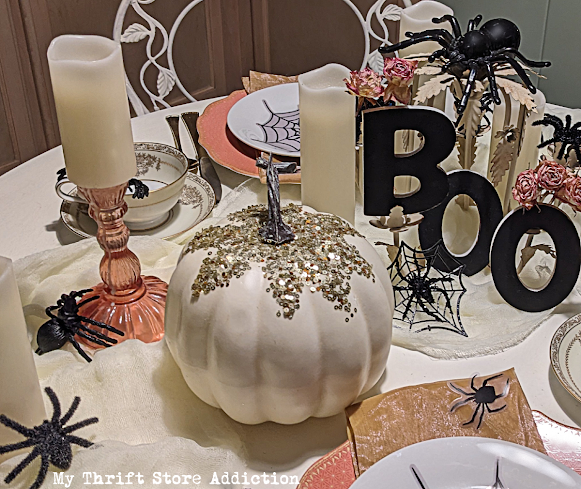
If you're looking to dress things up, My Thrift Store Addiction shared this Elegantly Eerie Arachnophile Tea Party


Finally, these Skeleton Cookies from Two Chicks and a Mom are just perfect for the season! 

Thanks to all who linked up and remember,, this party will be up for Two Weeks! Now, let's see what everyone's been up to! 


You are invited to the Inlinkz link party!

Click here to enter

Tuesday, October 17, 2023

Layered Dia de los Muertos Canvas


Living in the Southwest, I am surrounded by beautiful Sugar Skull imagery and art. Our Friday tradition for years now has been Mexican food and one of the things that was a factor in where we chose to live when we moved last year, was a nearby place to continue this tradition. We definitely found that and they know me by voice when I call in our order each week. I included them in seasonal cards last year and this year I wanted to do something more so my brain came up with this Sugar Skull Canvas. 

Supplies:
  • 5x5 Canvas
  • Multi-surface paint, black (I used Craft Smart from Michaels)
  • Scrapbook papers / lightweight cardstock
  • Self Adhesive Rhinestones
  • Layered Sugar Skull cut file (I used one from Cricut Design Space)
  • Digital Cutting Machine (I used my Cricut Explore Air2)

I chose pink, yellow, and turquoise papers to cut my skull. I knew I was going to do a black background and rhinestones and thought these colors would really pop. I sized the file accordingly and then cut the layers using my Cricut.

I used foam squares to attach the layers as shown.


Once the layers were constructed, I set aside and painted the canvas. I really love this multi-surface paint because fewer coats are needed. This just took one!


It was still wet here but it dried perfectly! Once it was dry, I attached the skull to the canvas with a few dabs of superglue. 

To finish, I used different-sized self-adhesive rhinestones to decorate!


And now, I'm hungry and it's not yet Friday! 


Sharing At:


Monday, October 16, 2023

Halloween: Easy Skull Candles


Can you ever have enough candles? Especially ones easy to "make" and that go with your Halloween decor? Clearly, my answer is: "Of course not!"


These are super easy to make and can be done in any style you like.


Supplies:

  • Plain Glass Candles (Dollar Tree)
  • Decorative Napkins (Walmart)
  • Mod Podge (Stash)
  • Cording and Beads (Stash)
I keep plain glass jar prayer candles from Dollar Tree in my stash, and picked up a $.98 package of napkins at Walmart. 


If you want a more opaque look, you can skip this part but I was going for a more translucent effect so I separated the patterned layer from the white backing. 


This also lets the Mod Podge seep through better. After I separated the layers, I tore the edges of the napkins both for appearance and because they were too tall for the candles. 


If you have any edges hanging over, no worries. Use lightweight sandpaper, a sanding block or an emery board to sand off once the candles are dry. 


Spread Mod Podge down the length of the candle and adhere one edge of the napkin. Normally, I coat the object and the paper I'm adhering but since the napkins were so absorbent, I just tacked one edge, and then applied the Mod Podge atop the napkin as I wrapped it around the candle. 


For this project, all of the crinkles and wrinkles just added to the look! I let these dry overnight. 


You can see here where I had some edges that were hanging over. I used a sanding block on them and they came right off. 


To finish, I grabbed some waxed cotton cording and crystal beads to wrap around the tops. 


When lit, you can see the glow come through the skulls! 


So now we have some spooky candles to accent our table! 

Thursday, October 12, 2023

BFF Open House


Happy Friday Eve, and mid-October, all! Full speed ahead to the end of the year and so many holidays. I continue to be heartbroken by the news and what's happening in Israel and the ongoing news out of Ukraine, and being able to escape into creating things is therapeutic. I finished my Halloween Cards for friends and family, which I shared here. There's so much hate and destruction in the world that without trivializing any of it, seeing the beauty you all create each week helps soothe my soul.


Pumpkins are everywhere. I am partial to the ones some people find ugly. The differently shaped or knotty ones in non-traditional colors. Let's take a look at some ideas. 


Steph Creates really knocked it out of the park with this DIY Pumpkin Display made from supplies Dollar Tree. 


Fresh Vintage by Lisa S shared these fabulous Baking Pan Pumpkins. Hit the thrift stores (or your cupboards) and grab some spray paint! 
With holiday entertaining season upon us, these Fall Themed Stamped Tumbled Tile Coasters from An Artful Mom make a lovely hostess gift or if you're hosting, can you ever have enough coasters?


Finally, these Classic Pumpkin Scones (served with Maple Thyme Butter!) are perfect for this time of year. From The Copper Table.


As always, thanks to all who link up each week and WELCOME to first timers! Let's see what you've been up to this week. Take care of yourselves! 


You are invited to the Inlinkz link party!

Click here to enter

Monday, October 9, 2023

Papercrafting: 2023 Halloween Cards


I'm easing back not only into making things but also getting them posted, after my unintentional Summer Break. It doesn't take long to forget the work that goes into taking pictures, uploading and photo-editing them, planning out a post, etc. 

Of course, I never take a break from being on the lookout for supplies and ideas and in early September, I didn't skip or delay picking up a fun Halloween Paper stack at Michaels. I needed an escape from the news over the weekend so I got busy making cards for family and friends. I love that a few people keep these and pull them out each year as part of their decor. 


Supplies: 

  • Witch's Lair 12x12 Paper Stack (Recollections, Michaels)
  • Black 110 lb Cardstock (Recollections, Michaels)
  • Gold Foil 65lb Cardstock (Recollections, Michaels)
  • Gold Star Transparency (Stash)
  • Tape Runner or Double Sided Tape
  • Self Adhesive Rhinestones


This is the stack I used which comes with a mix of plain, foiled, and panel sheets. As much as I love my digital cutting machines, I love these kinds of paper stacks because the panel sheets are perfect focals for cards. 


I generally make my cards 5x7 which I did for these. Cut the black cardstock 7x10 then score in the middle. For the background panels, I chose a few different papers in the stack. 


The panel pages always come in different sizes. If you're not into card making you can simply cut and frame some of them!


Cut and trim the panels you want to use, and then mat with coordinating paper. I used the gold foil or black cardstock. 


I picked up the coordinating washi tape in the Witch's Lair collection which I attached to some of the panels before adhering them to the background panel.


To finish, I used self adhesive rhinestones to add a little glam! 


Sharing At: