Thursday, April 27, 2023

BFF Open House


Happy almost May Day, Friday Eve! I stopped dead in my tracks on Tuesday when I realized it was the 25th and only 8 months until Christmas. When you put it like that, even to yourself, it's a "Yikes" moment. 

Didn't do anything really worth posting this week. I'm going to get started on Mother's Day. Let's jump right into some of the fun ideas shared at last week's party! 


I love how this Farmhouse Basket Makeover from The House on Silverado. It's clean and crisp and allows access to things while looking fresh! 


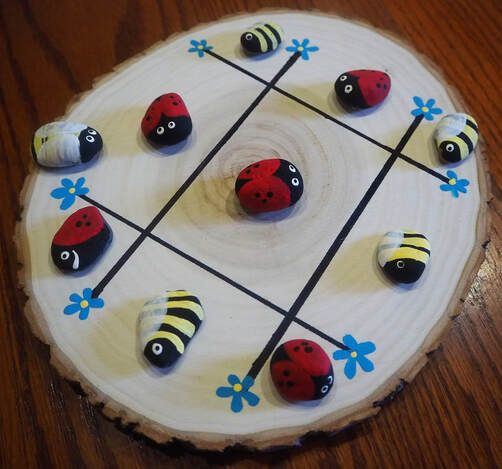
How cute is this fresh take on a Tic Tac Toe game from 3 Winks Design?! Perfect for playing outdoors or in. 


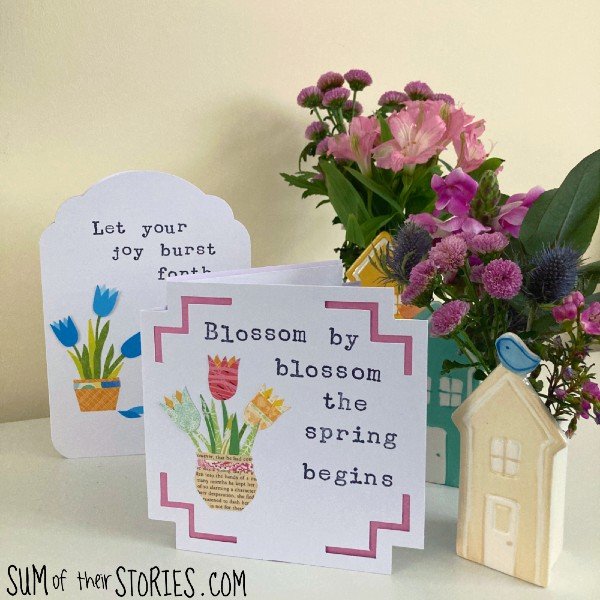
These Tulip Collage Cards from Sum of Their Stories are a creative and earth-friendly way to share your love and use up scraps and found paper items. So perfect for Spring! 


Finally, how creative are these Alice in Wonderland-inspired Strawberry Mushroom Cookies from Me and My Inklings? Fun for a themed party or just because.

Thank you to everyone who linked up. Your creativity inspires more people than you realize. 

Time to see what everyone's been up to this week! 


You are invited to the Inlinkz link party!

Click here to enter

Thursday, April 20, 2023

BFF Open House


Happy Friday Eve already again! No idea where the week went. And what a difference a week makes. We live surrounded by pecan groves we didn't even know existed until we were househunting last year and last week I swear there were no leaves on the trees and this week? BAM!

A friend of mine and her husband just joined the Grandparent's club so I had fun making them this card to celebrate. She's the friend who actually got me into cardmaking which she left behind almost as soon as she got me hooked. See my Baby Bear Card here.


Lots of wonderful ideas shared at last week's party so let's take a look at a few. 

The Apple Street Cottage shared what to do with something that isn't cut quite perfectly but can still be used with this Imperfect Cutting Board Makeover


Want to add a bit of a French Country vibe to your gardening? Check out this Burlap Container Gardening idea shared by Masterpieces of My Life


Whether for Mother's Day or any occasion, these Oversized Flower Gift Tags from Whitehouse Crafts will make any gift special.


And if you need a gift to go with those awesome gift tags, these Faux Turquoise Earrings from Creatively Beth are just the thing. 

Thanks to everyone who linked up and can't wait to see what you've all been up to this week! 


You are invited to the Inlinkz link party!

Click here to enter

Tuesday, April 18, 2023

Papercrafting: New Baby Layered Bear Card


My contemporaries are entering the Grandparent' years and I made this card for a friend who just welcomed a new Granddaughter!  I'm completely addicted to layered cut files and so many Creatives generously share ones they create plus there are tons of them on places like Designbundles and Creative Fabrica you can purchase. I have a subscription to CF so found and downloaded the cut file for this one from there. 

Supplies:
  • 110 lb Cardstock (Recollections)
  • Assorted Scrapbook papers
  • Digital Image (Layered Teddy Bear, Creative Fabrica)
  • Digital Cutting Machine (Cricut Explore Air 2)
  • ATG 700 Tape Runner
  • Foam Squares


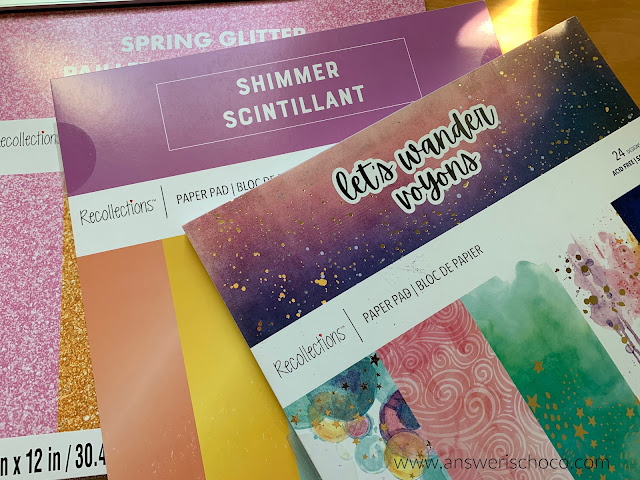
I grabbed some coordinating paper stacks from my supplies using a piece from the "Let's Wander" stack for the card base panel and a variety of other papers for the layers of the bear. 


I went with this multi-colored and foiled piece for the card panel and cut the card base from ink 110lb cardstock (Recollections). Card 5x7 ; panel 4.75x6.75.


I didn't even cut all the layers that come in this file! I think there were 8 and I went with 6. 


These are the first three layers.


I attached these layers using foam squares. You can see bits of the orange and green peeking through.


These are the top three layers. I used foam squares to attach the 4th layer then spray adhesive to attach layers 5 and 6. 


And here's the bear completely assembled. All that was left was to attach this to the card which I did using my tape runner.


Usually, I don't feel like I'm done until I add some rhinestones, but the details of all the layers are enough. This time! 

Sharing At:


Thursday, April 13, 2023

BFF Open House


Happy Friday Eve once again Creative Peeps! Speaking of Peeps, I hope everyone who celebrated Easter this week had a wonderful one. Orthodox Easter is this coming Sunday so Easter wishes to those celebrating. 

Like other places, the weather continues to be "interesting". We hit our first days of 90+ degrees and wearing shorts and now are "cooling" back down to 80s so back to leggings 😂Brrr!

Some wonderful Spring ideas shared at last week's party so let's take a look at a few.


I just love seeing vintage pieces re-combined into something new, especially when it's pretty and practical. Such is the case with this Vintage Thread Holder project from Birdz of a Feather. Isn't it great?!


If you're thinking of starting an herb garden, you can't go wrong with this Self-Watering Herb Garden from Condo Blues


This DIY Hanging Sign from Steph Creates just screams Spring! 


Finally, the only thing better than a scrumptious chocolate cake is a One Bowl Chocolate Cake like this one from Rose Bakes! Fewer dishes. More time for eating. 

Thank you to everyone who linked up! Can't wait to see what you've been up to this week.


You are invited to the Inlinkz link party!

Click here to enter

Thursday, April 6, 2023

BFF Open House


Happy Friday Eve, Easter Weekend, Passover! Our weather in the desert continues to be WILD. Red flag wind advisory on Monday, freeze warning and 29 degrees when I woke up yesterday, 90s by the weekend. I know it's been crazy in other parts of the country too. 

I shared my Easter and Passover cards here: Layered Easter and Passover Cards. I had a lot of fun with them and can't wait to start working on Mother's Day cards. 

Lots of creativity as always at last week's party so let's take a look at some ideas!


If you're looking for a last-minute but easy Easter decor project, look no further than this Bunny Carrot Basket from Artsy Va Va


If you're doing some Spring thrifting or freecycling, or just have a piece you've been wanting to make over, check out the transformation of this Spoon Carved Desk from Junk Is My Life.


If you're looking for a fun party idea, check out this Escape Room Party from Simple Joys.


Finally, if you're thinking ahead to a Mother's Day celebration or also perfect for showers whether baby or wedding, this Spring Mocha Fudge Cake from Claire Justine is perfect!

Thanks to everyone who linked up and whatever you're doing this weekend, enjoy! 


You are invited to the Inlinkz link party!

Click here to enter

Monday, April 3, 2023

Papercrafting: Layered Easter and Passover Cards


I was finally able to make some things and wanted to share the Easter and Passover cards I made for friends and family. I will forever be a snail mail girl! 

Supplies:
  • Scrapbook Papers (I used coordinating pastel-colored stacks)
  • 110 Pink Cardstock (Recollections)
  • Digital Images (Creative Fabrica and Cricut Design Space)
  • Digital Cutting Machine (Cricut Explore Air 2)
  • Tape Gun
  • Foam Squares
  • Self-Adhesive Rhinestones

Whenever Michaels has deals on their paper stacks, I stock up so I can coordinate things when I'm making a project. I had these "Spring Inks" and "Spring Pastels Glitter" stacks in my stash and since they're both by Recollections, they coordinated perfectly. I also used Recollections 110lb cardstock for the base which went with these colors. 

I cut the pink cardstock to size for 5x7 cards (10x7), scoring down the middle. Then I selected some foiled sheets from the Spring Inks stack and cut 6x4 panels. I used some mirrored cardstock cut 6.75x4.75 (also Recollections) to mat these panels. 


I found a layered image from Creative Fabrica (I am a subscriber) and downloaded, imported into Cricut Design Space, sized, and then cut each layer. The base layer was done using the solid sheets from the Spring Inks stack. The second (top) layer, I cut from the glitter paper. 


I used a spray adhesive to attach the glitter layer to the solid, and then used foam squares to attach the bunnies to the panels. 


I could have stopped here, but what fun is that? I decided I wanted to add another layer to the carrot and then figured since I was cutting carrots, I cut extras!


This image also came in two layers so I cut one from green mirror cardstock and the other from coppery orange glitter. The tops were close enough to the top of the bunny's top layer, so I layered as shown using foam squares.


To finish, I went around the inside of the bunny's ears with tiny self-adhesive rhinestones. 


Passover begins this week as well. I used the same papers to make these cards. I found another layered image at Creative Fabrica and followed the same process. This image came in more layers, a total of 7 of which I used 5. You can see the first three (silver, metallic blue, and lavender) which I adhered together using spray adhesive and then attached to the turquoise glitter panel with foam squares, doing the same to attach to the gold panel. 


I used the same basic process to make the base cards.


I love how all of the layers of this cut file allow peeks here and there through the different layers! 

Whatever you're celebrating, I wish you peace! And of course...CHOCOLATE!

Sharing At: