Happy Monday friends! Hope you all had a wonderful weekend. I extended mine one day and took Friday off and celebrated a belated "Galentine's Day" with two girlfriends and we had the BEST time at a local place I discovered and am so thrilled to tell you about. If you are near or visiting the Scottsdale area and need to get your creative fix on, let me tell you....
Stencil A DIY Craft Studio is the place for you!
Part of the fun of moving to a new state is finding new resources. I was Googling one day and this place came up and immediately went on my list of places I knew I needed to check out.
What is it ?
Let me let Nicole, the creator and owner of Stencil describe it:
Stencil is a DIY craft studio with over 100 projects for all ages and skill levels. If you’ve been collecting ideas on Pinterest but haven’t taken the crafting plunge, then Stencil is the place for you. Or maybe you’re a regular crafter and you want to advance your skill level but you don’t have some of the equipment needed to craft your creations, then Stencil is the place for you.
It's located in a multi business office park just off of Scottsdale Road.
When you first enter, you are treated to examples of all of the fun and beautiful things you can create at Stencil. Each project has its own price which includes materials, studio time and help and guidance from Nicole who is wonderful and patient. What's even more wonderful is, whether you've never crafted in your life or you're an experienced maker, you'll feel right at home.
Of the two friends I was with, one is a regular DIYer and the other does not consider herself crafty or creative ( she is, she just doesn't think she is). The hardest thing you have to do is decide what you want to make. I mean look at the options:
Gorgeous paper flowers?
Seasonal or Holiday ?
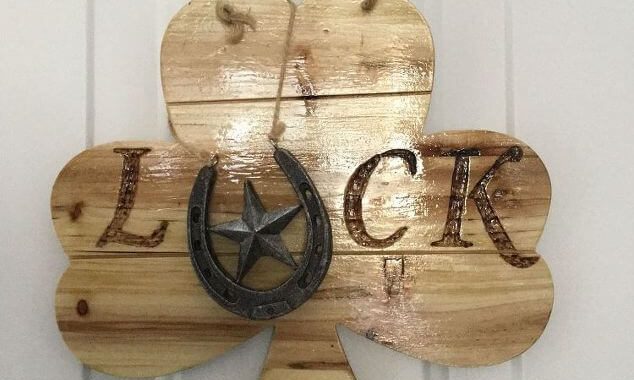
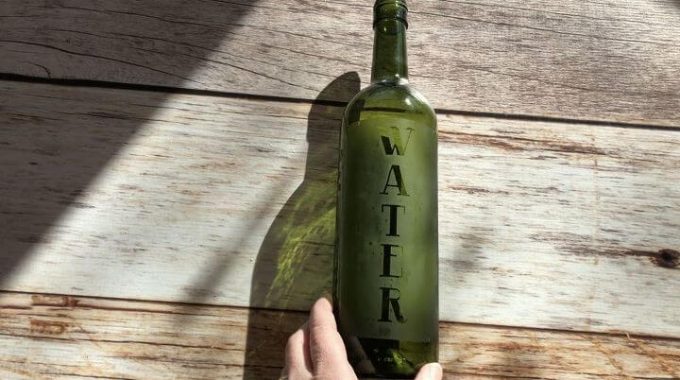
Coffee or tea lover? Wine lover? Home decor for yourself or as a gift? Check, check , check
Everything pictured is something you can make at Stencil. Nicole has things so well planned and laid out.
Once you decide what you will make (one friend and I chose a
String Art Project and my friend who doesn't consider herself craft, went big and chose a
Utensil Caddy), she gives you a packet with instructions and templates, and then pulls the basic materials you need which are pre-cut for you. You then grab an apron, safety goggles if appropriate, and follow the instructions that take you along the supply wall to grab what you'll need for your project:
Stencil Studio Color Station
If your project involves paint, then you'll choose it from the Color Station.
Stencil Studio Hardware Station
The Hardware Station contains things like nails, screws, eye hooks in different sizes and you select what's needed per the project instructions. Nicole even has these colorful little Hardware Containers to put everything in. Shown to the left are color choices of yarn.
Stencil Studio Tool Board
As you can see, the Tool Board is complete and well organized. Hammers, screwdrivers, wire cutters, scissors, rulers etc. On the shelf below are drills.
Not shown is the area where Nicole has all of the pre-cut wood for projects (well organized like everything else shown) and bigger tools like a pneumatic drill, nail gun etc. Don't worry if you're intimidated by these. She will help you or do it for you.
OK so what did I make?
My friend S. and I each decided to make a String Art project and we both made a Prickly Pear Cactus. One of the best things about Stencil is while Nicole has examples up for you, you can change the colors, color combinations etc. to suit your own style.
As mentioned, Nicole pulls some of the supplies needed for your project. For mine, that was four pre-cut boards with brace boards for the back to hold them together. We followed the instructions to sand each board, front back and sides.
Once all the boards were stained we laid them face down and put the brace boards on the back. Stencil Studio is perfect if you want to do more DIY projects without having to invest in power tools like saws, drills etc. or supplies like stains that you may or may not use again.
Safety first! Protective eyewear.
I was having so much fun and got so focused working on my project, I didn't take step by step pictures but once the base for my project was done, the next steps were :
- Remove Prickly Pear template from the well organized instruction packet Nicole provided
- Nail through the pattern so you have the outline of your image
- Select string color
- Watch video Nicole has ready for you on tablets in the work space
- Have fun with your string
I chose an ebony stain, white nails, and sage green string for my cactus. Nicole also has pre-cut flowers for your project.
My friend S. chose a grey stain, white nails and teal string for her cactus:
And our friend who doesn't think she's crafty, put together this gorgeous Utensil Caddy from scratch. She built, glued, stained and stenciled it! Oh did I mention? Nicole will custom cut your stencil for you.
I blurred out the name for privacy.
Cost for my project was $35 which included all materials, guidance, and 2.5 hrs studio time and cleanup. If you make a reservation in advance like we did, you get $5 off your project. In addition to open studio time, there are classes and special events.
Again, if you are local or come to the desert and need to get your craft on, I highly recommend a visit!
We left so happy with our projects, and Mr. Chocolate now has another place to look if he can't find me besides Michaels and JoAnn's !
Stencil is located 1 mile south of Scottsdale Quarter/Kierland Commons at:
14435 N. 73rd St.
Scottsdale, AZ 85260
https://stencilstudios.com/
Disclaimer: I asked Nicole if I could blog about her shop. All opinions are mine and I was not compensated for this post.


